Nissan Rogue (T33) 2021-Present Ownerâs Manual & User Guide: Rear-facing child restraint installation using the seat belts
WARNING
The three-point seat belt with Automatic Locking Retractor (ALR) must be used when installing a child restraint. If the ALR mode is not used, the restraint may not be properly secured and could tip or become loose, causing injury to a child in a sudden stop or collision.
For additional information, refer to all Warnings and Cautions in the âChild safetyâ and âChild restraintsâ sections before installing a child restraint.
Do not use the lower anchors if the combined weight of the child and the child restraint exceeds 65 lbs (29.5 kg). If the combined weight is greater than 65 lbs (29.5 kg), use the vehicle seat belt (not the lower anchors) to install the child restraint. Always follow the child restraint manufacturerâs instructions.
Follow these steps to install a rear-facing child restraint using the seat belts in the rear seats of your Nissan Rogue:
Rear-facing - step 1
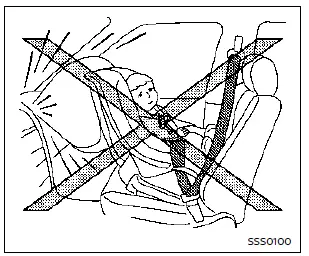
1. Child restraints for infants must be used in the rear-facing direction and must never be installed in the front seat. Position the child restraint on the rear seat. Always follow the restraint manufacturerâs instructions.
Rear-facing - step 2
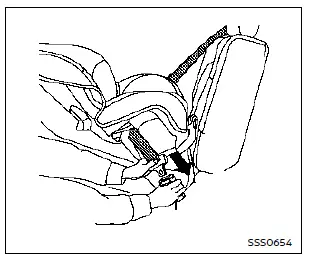
2. Route the seat belt tongue through the child restraint and insert it into the buckle until you hear and feel it latch. Be sure to follow the child restraint manufacturerâs belt routing instructions.
Rear-facing - step 3
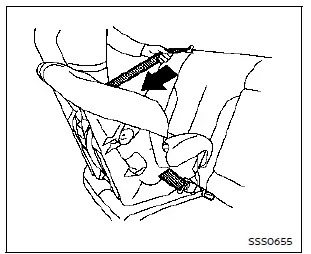
3. Pull the shoulder belt until it is fully extended. At this point, the seat belt retractor switches to Automatic Locking Retractor (ALR) mode (child restraint mode). When the belt is fully retracted again, it returns to Emergency Locking Retractor (ELR) mode.

Rear-facing - step 4
4. Allow the seat belt to retract. Pull up on the shoulder belt to remove any remaining slack from the Nissan Rogue seat belt system.
Rear-facing - step 5
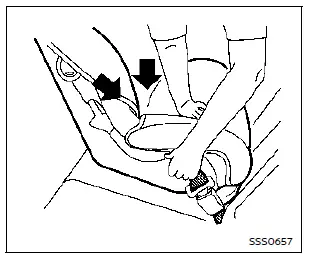
5. Remove additional slack from the seat belt by pressing downward and rearward firmly in the center of the child restraint. This compresses the vehicle seat cushion and seatback of your Nissan Rogue while you pull up on the shoulder belt.

Rear-facing - step 6
6. After securing the child restraint, test the installation before placing the child in it. Hold the restraint near the seat belt path and push it from side to side.
The child restraint should not move more than 1 inch (25 mm) side to side. Tug it forward to ensure the Nissan Rogue seat belt holds it firmly. If the restraint is not secure, tighten the belt further or move the restraint to another seating position and test again. Some child restraints may not fit all vehicle types.
7. Check that the child restraint is properly secured before each use. If the seat belt is not locked, repeat steps 1 through 6.
Once the child restraint is removed and the Nissan Rogue seat belt is fully retracted, the ALR mode (child restraint mode) is deactivated.
Other materials:
Brake system
Braking precautions
Basic information
The brake system uses two independent
hydraulic circuits. If one circuit fails,
braking at two wheels will still be available.
Vacuum assisted brakes
The brake booster enhances braking force
using engine vacuum. If the engine stops,
you can still brake by press ...
PrÃĐsentation gÃĐnÃĐrale
ProPILOT Assist est un systÃĻme avancÃĐ d'assistance à la conduite conçu pour offrir un confort accru au volant du Nissan Rogue lors des dÃĐplacements sur les voies rapides à accÃĻs limitÃĐ. Il nâest pas destinÃĐ Ã une utilisation en milieu urbain ou sur des routes secondaires. Ce systÃĻme a p ...
Removal and Installation. 12v Sub Battery (lithium Ion Battery)
Exploded View
1.
Sub battery bracket A
2.
Sub battery tube
3.
Sub battery bracket B
4.
12V sub battery (lithium ion battery)
5.
Sub battery bracket C
6.
12V sub battery (lithium ion battery) positive cable
7.
12V sub battery (lithium ion battery) negative ...