Nissan Rogue (T33) 2021-Present Service Manual: Transfer: Ty92a :: Removal and Installation
Transfer Oil Temperature Sensor
Kr15ddt
Exploded View
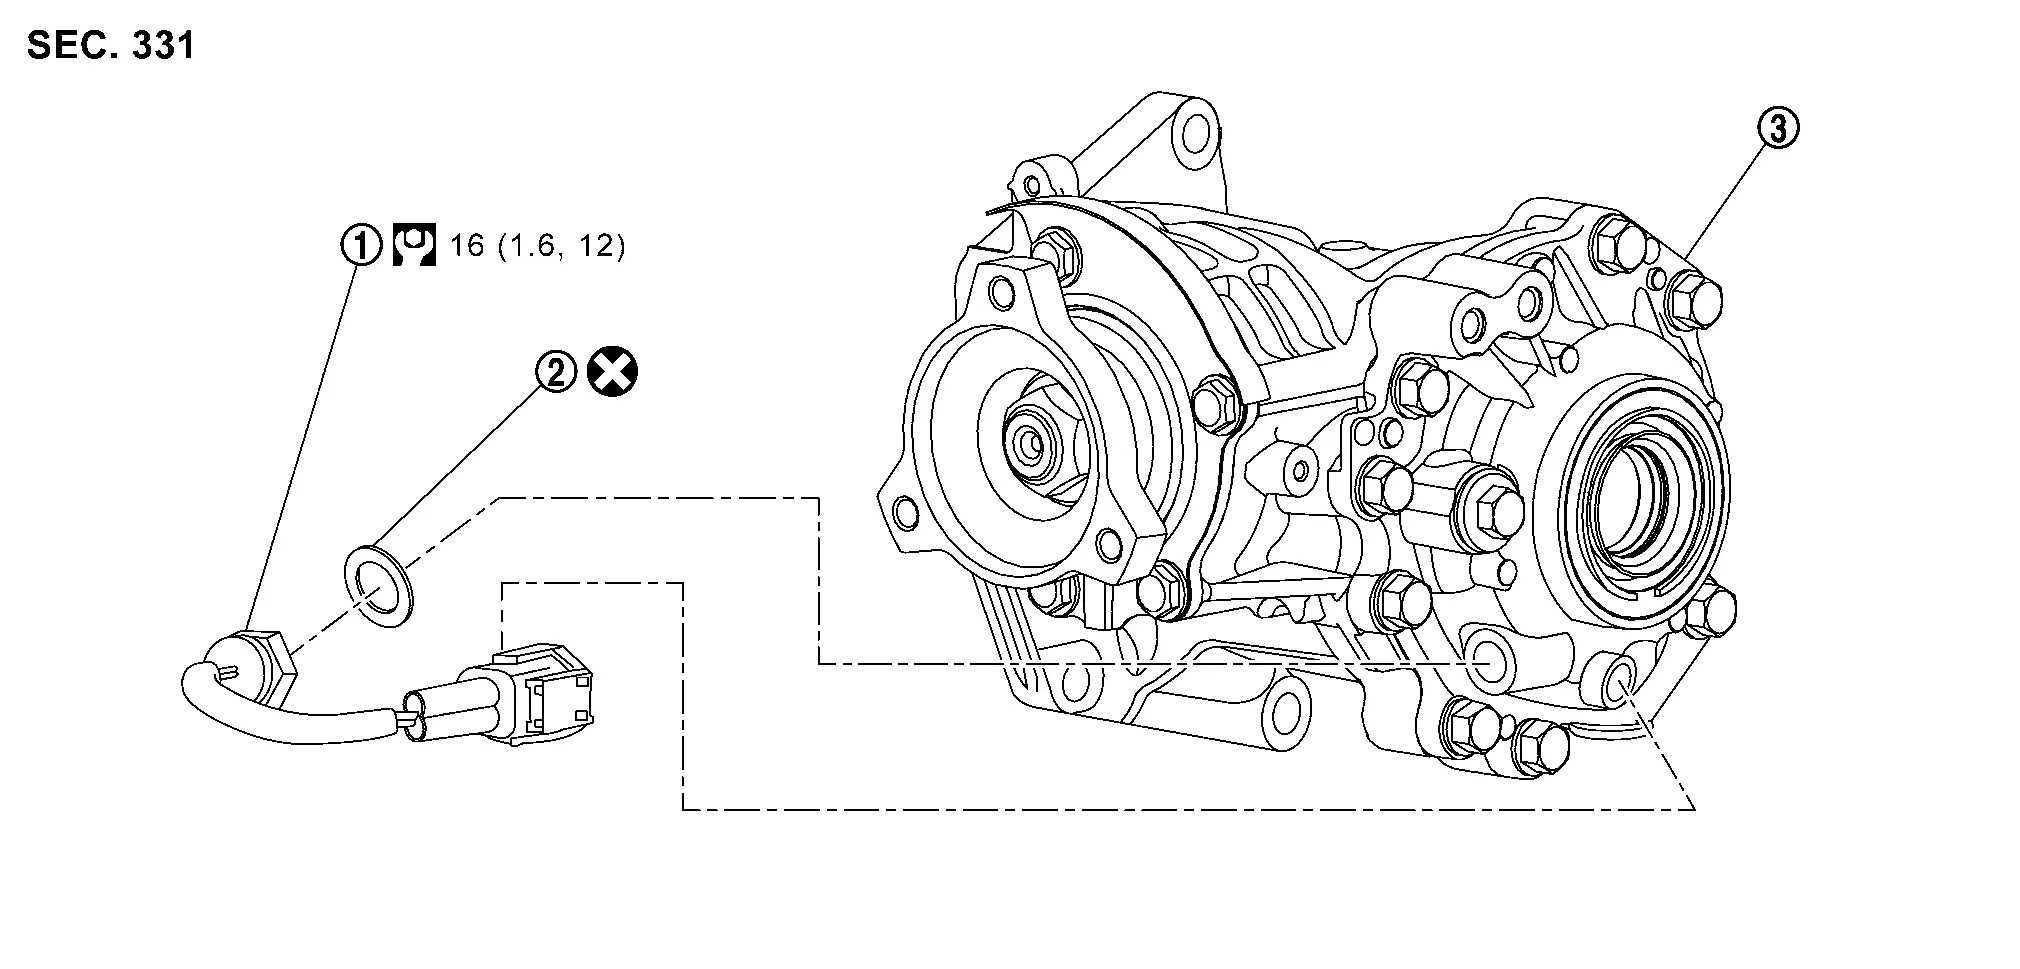
 |
Transfer oil temperature sensor |  |
Gasket |  |
Transfer assembly |
 : N·m (kg-m, ft-lb) : N·m (kg-m, ft-lb) |
|||||
 : Always replace after every disassembly. : Always replace after every disassembly. |
|||||
Removal and Installation
REMOVAL
Remove engine under cover. Refer to Exploded View.
Drain the transfer oil. Refer to Draining.
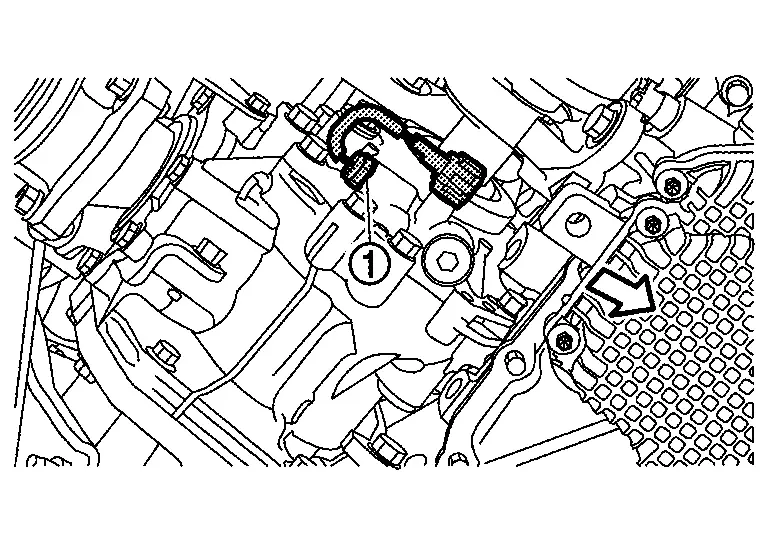
Disconnect transfer oil temperature sensor harness connector.
Remove transfer oil temperature sensor .
| : Nissan Ariya Vehicle front |
CAUTION:
-
Never twists and damage the harness of transfer oil temperature sensor.
-
If transfer oil temperature sensor is subjected to impact by dropping or hitting it, replace with new one.
INSTALLATION
Note the following, and install in the reverse order of removal.
-
For non-reusable parts, refer to Exploded View.
-
For each tightening torque, refer to Exploded View.
CAUTION:
Be sure to dry the sensor thread before installation.
-
Check the oil level and the oil leakage after installation. Refer to Inspection.
Transfer Cover Oil Seal
Exploded View
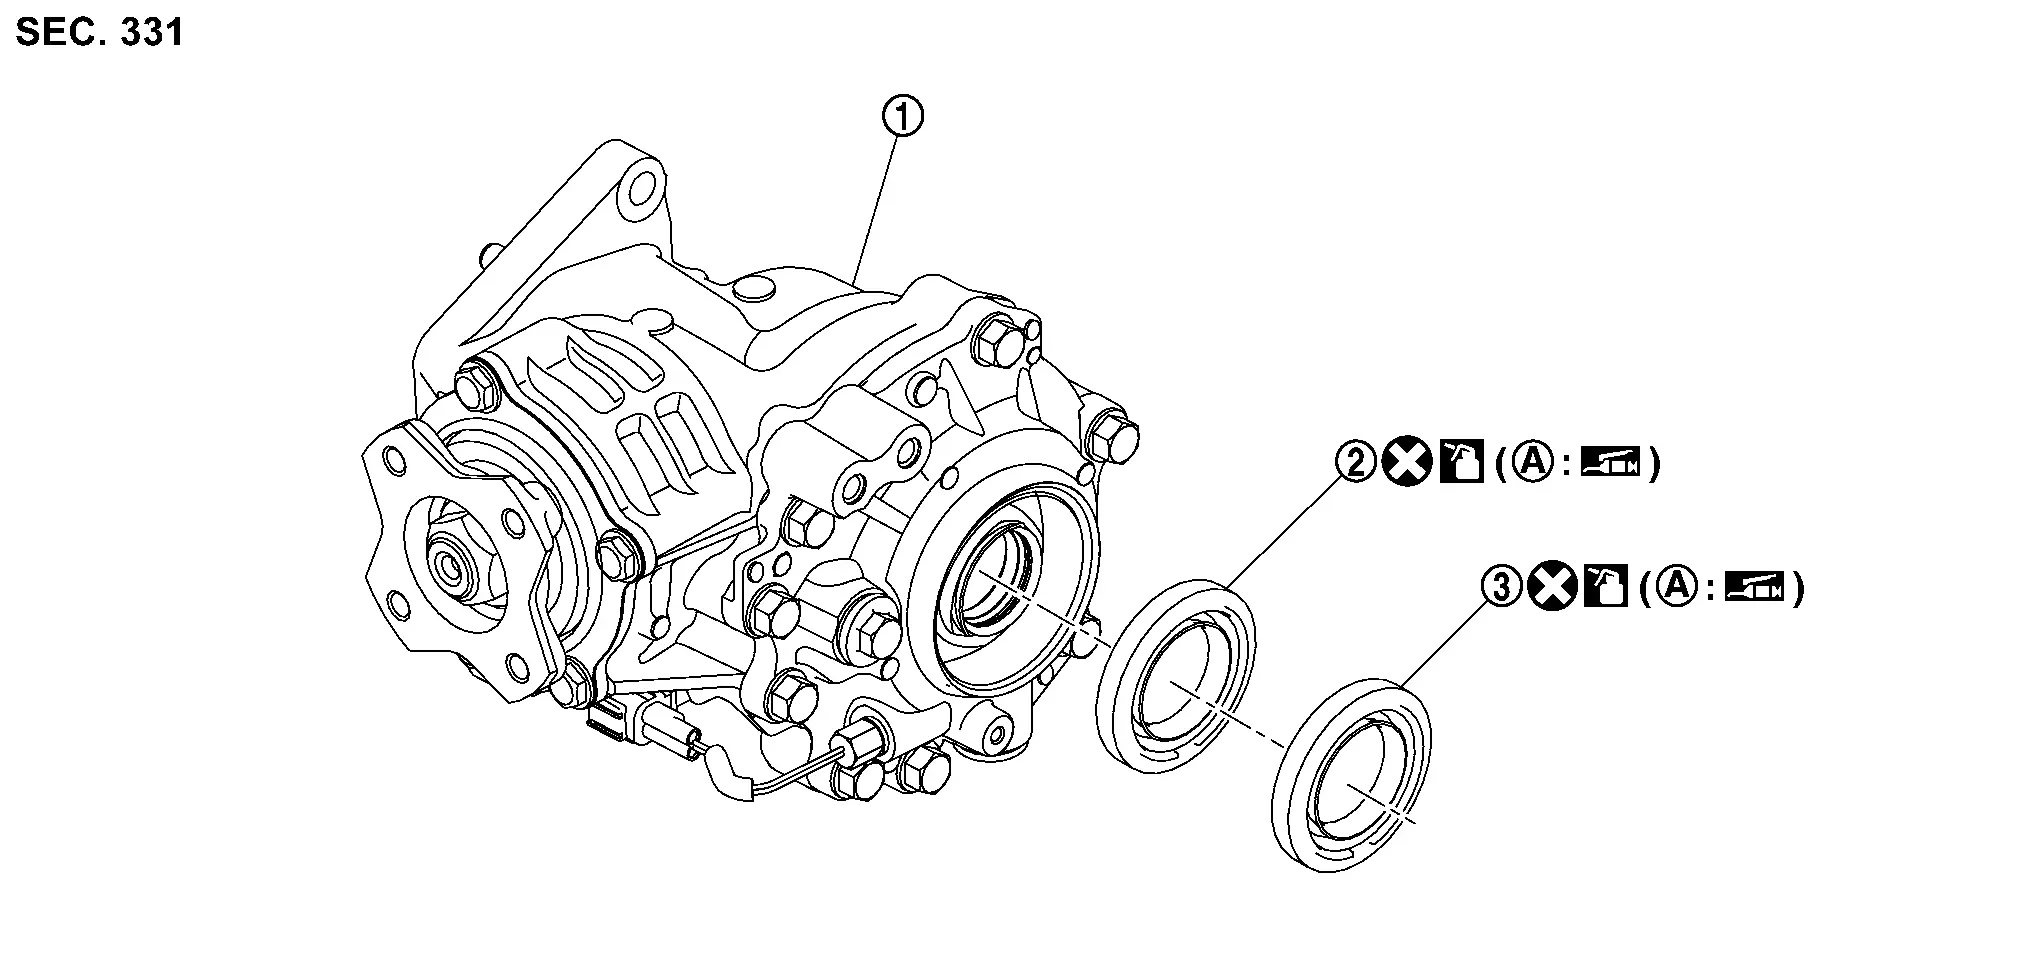
|
Transfer assembly | |
Transfer cover oil seal | |
Transfer cover dust seal |
 |
Oil seal lip | ||||
| : Always replace after every disassembly. |
|||||
 : Apply transfer oil. : Apply transfer oil. |
|||||
 : Apply multi-purpose grease. : Apply multi-purpose grease. |
|||||
Removal and Installation
REMOVAL
Drain the transfer oil. Refer to Draining.
Remove front drive shaft (right side) and support bearing bracket. Refer to Removal and Installation.
CAUTION:
Oil may leak from the opening. Use cap and/or plug to prevent leakage.
Remove transfer cover dust seal and transfer cover oil seal, using oil seal remover (commercial service tool).
CAUTION:
Never damage transfer cover.
INSTALLATION
Using drift (commercial service tool), install transfer cover oil seal to the specification below.
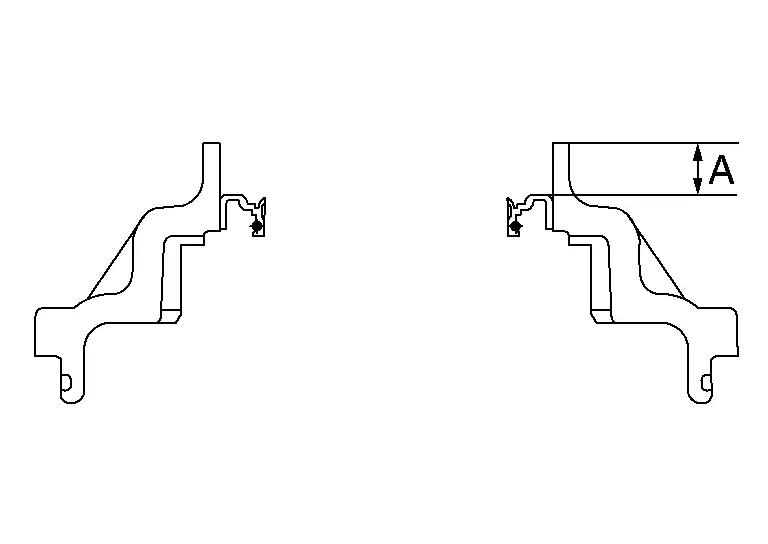
| A | : Installation dimension for transfer cover oil seal |
| Dimension | |
| A | : 10.3 +0.6/-0 mm (0.406 +0.024/-0 in) |
Using Tool, install transfer cover dust seal to the specification below.
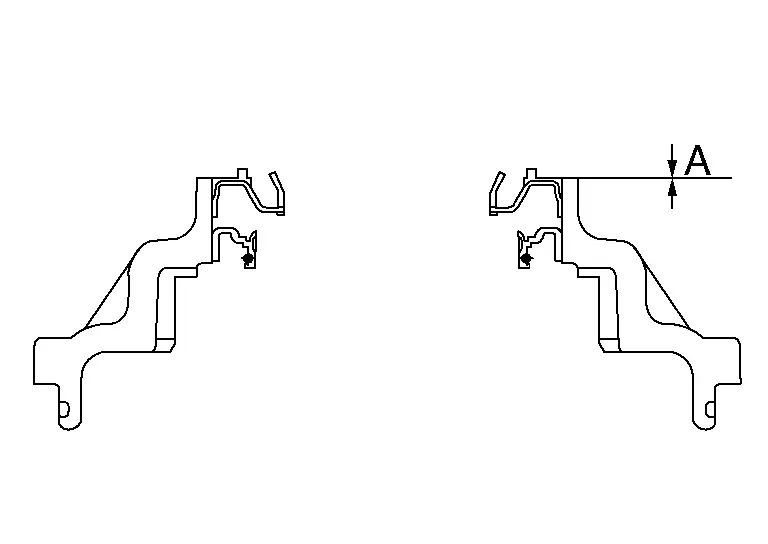
| Tool number | : — (NI-53127) |
| A | : Installation dimension for transfer cover dust seal |
| Dimension | |
| A | : 0 +0.6/-0 mm (0 +0.024/-0 in) |
 NOTE:
NOTE:
The positive value is deeper than the transfer cover end face.
CAUTION:
-
Never reuse oil seal.
-
When installing, never incline oil seal.
-
Apply multi-purpose grease onto oil seal lips, and transfer oil onto the circumference of oil seal.
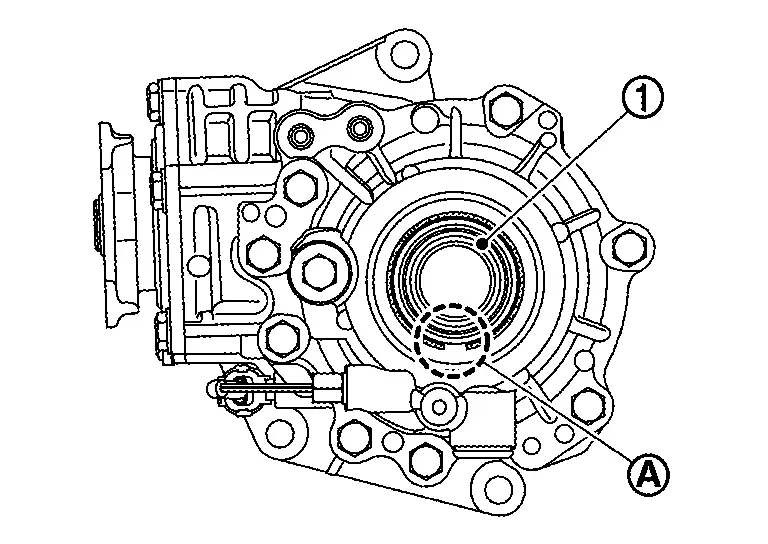
-
When installing the outer oil seal (1), the notch (A) is located on the lower side.
Install front drive shaft (right side) and support bearing bracket. Refer to Removal and Installation.
Refill the transfer oil to transfer assembly. Refer to Refilling.
Check the oil level and the oil leakage after installation. Refer to Inspection.
Other materials:
Component Parts
Engine Control System
Component Parts Location
ENGINE ROOM COMPARTMENT
Right front of Nissan Ariya vehicle
Left front of vehicle
Nissan Ariya Vehicle front
IPDM E/R
ECM
Admission valve
Turbocharger boost senso ...
Wireless Charger. System Description
Component Parts
Wireless Charger
Component Parts Location
A.
Console finisher assembly
No.Component
1.
Wireless charger unit
2.
Wireless charger indicator
Wireless charger unit
Wireless charger unit
The wireless unit is located at the front of the center console.
Wirel ...
U1321-55 Configuration Unfinished
DTC Description
DTC DETECTION LOGIC DTC No.
CONSULT screen terms
(Trouble diagnosis content) DTC detection condition
U1321–55
Config unfinished
(Configuration unfinished)
Diagnosis condition
When ignition switch is ON
Signal (terminal)
—
Threshold
Configuration ...