Nissan Rogue (T33) 2021-Present Service Manual: Removal and Installation :: Washer Tank
Exploded View
Except for Canada
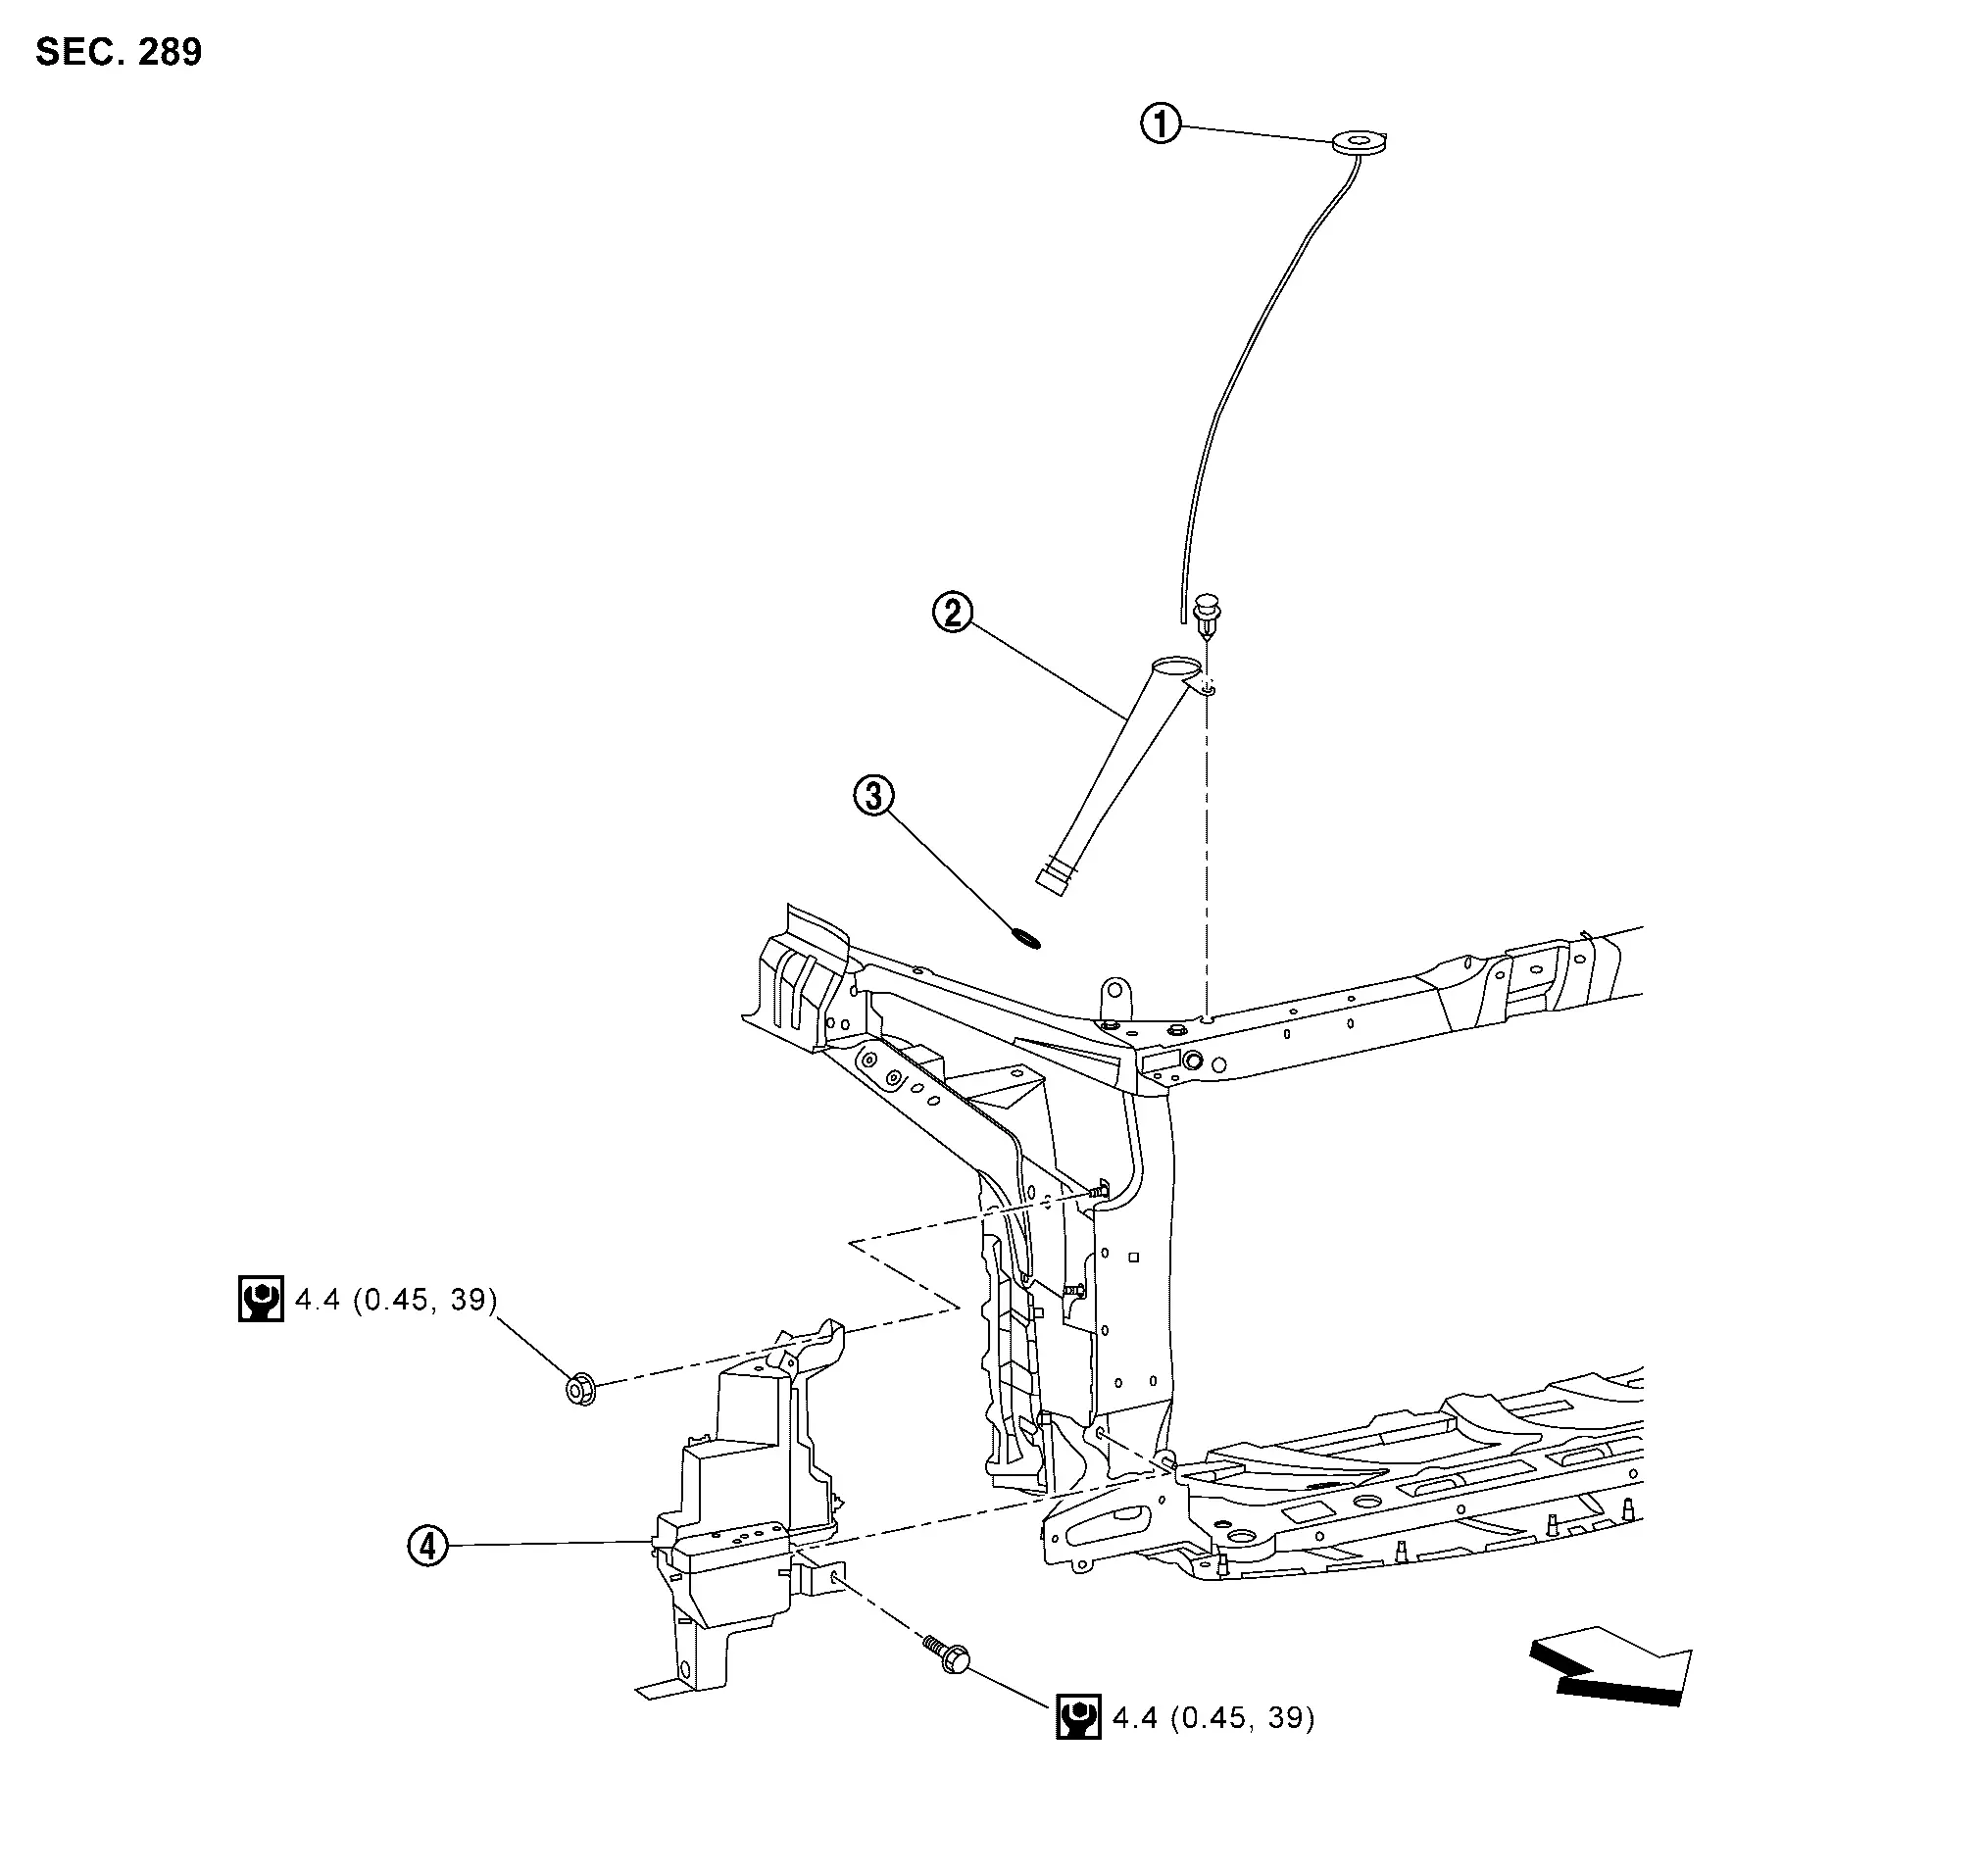
| 1. | Washer tank cap | 2. | Washer tank inlet | 3. | O-ring |
| 4. | Washer tank | тАФ | тАФ | тАФ | тАФ |
| : Nissan Ariya Vehicle front | |||||
 |
: N┬╖m (kg-m, in-lb) | ||||
For Canada
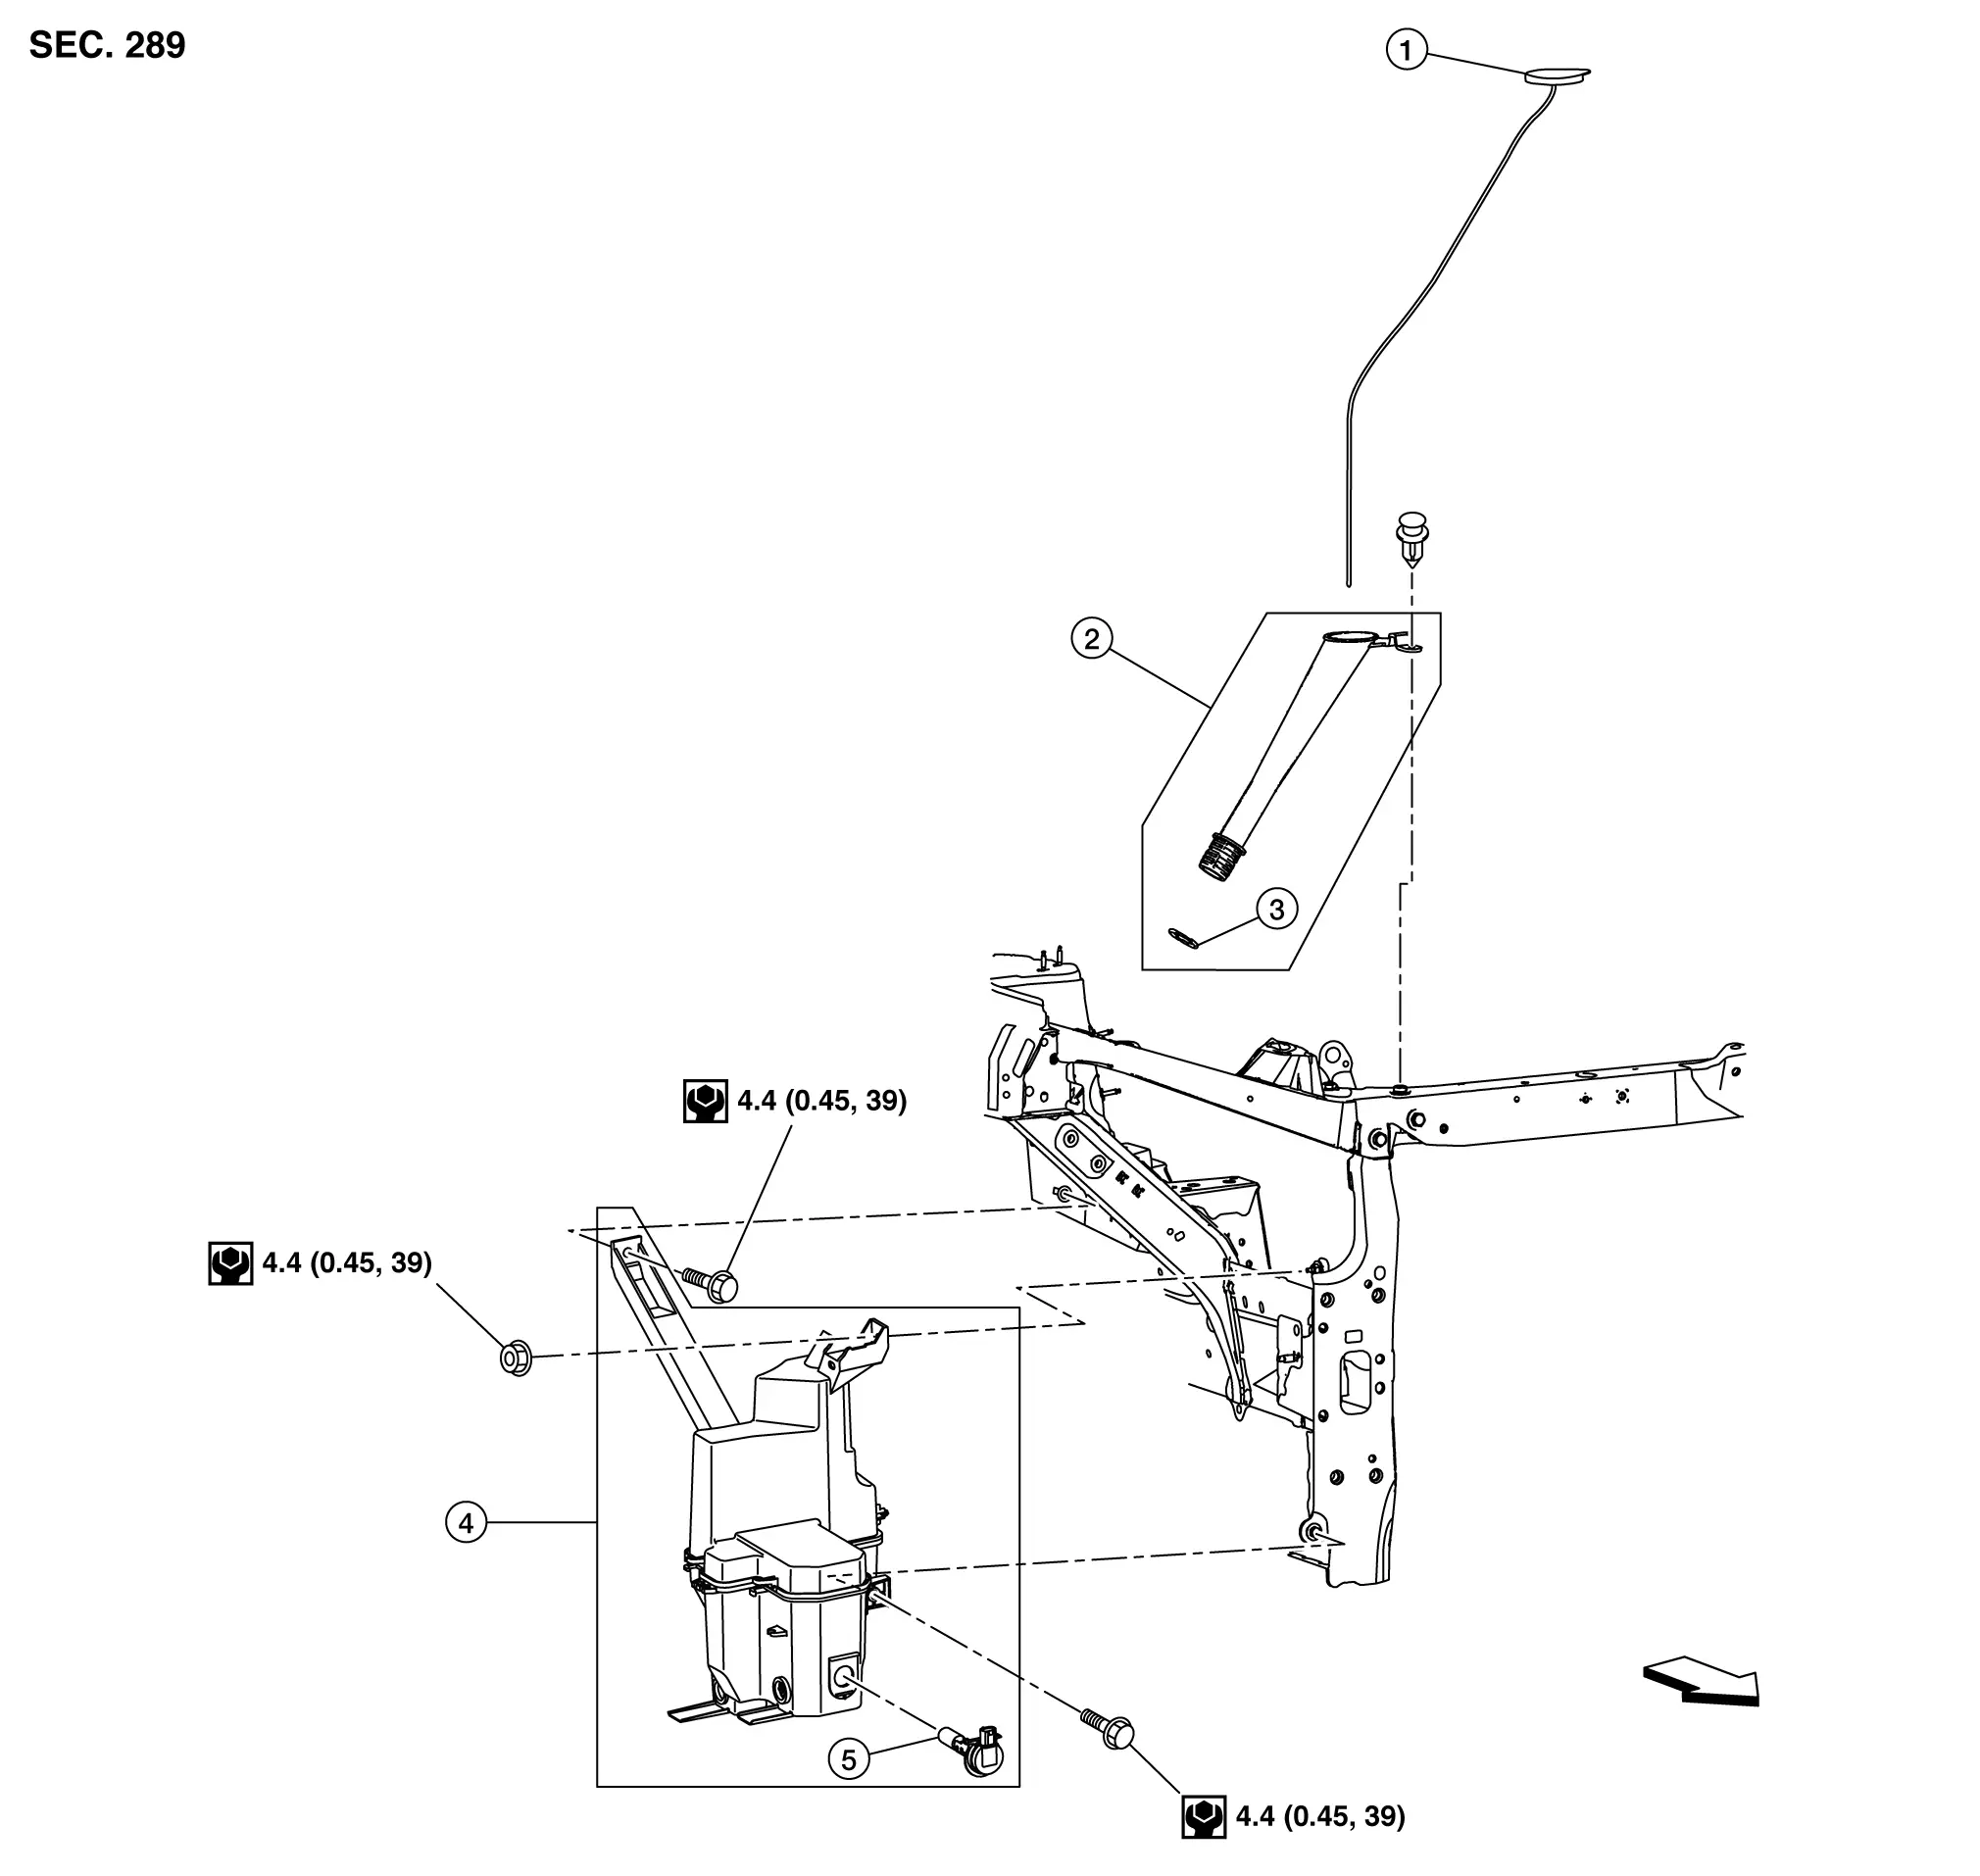
| 1. | Washer tank cap | 2. | Washer tank inlet | 3. | O-ring |
| 4. | Washer tank | 5. | Washer fluid level switch | тАФ | тАФ |
| : Nissan Ariya Vehicle front | |||||
|
: N┬╖m (kg-m, in-lb) | ||||
Removal and Installation
CAUTION:
When washer tank is removed, washer fluid may come out so prepare a container to receive the fluid and never allow fluid to be sprinkled.
REMOVAL
Fully open hood assembly.
Remove front grille cover. Refer to Removal and Installation.
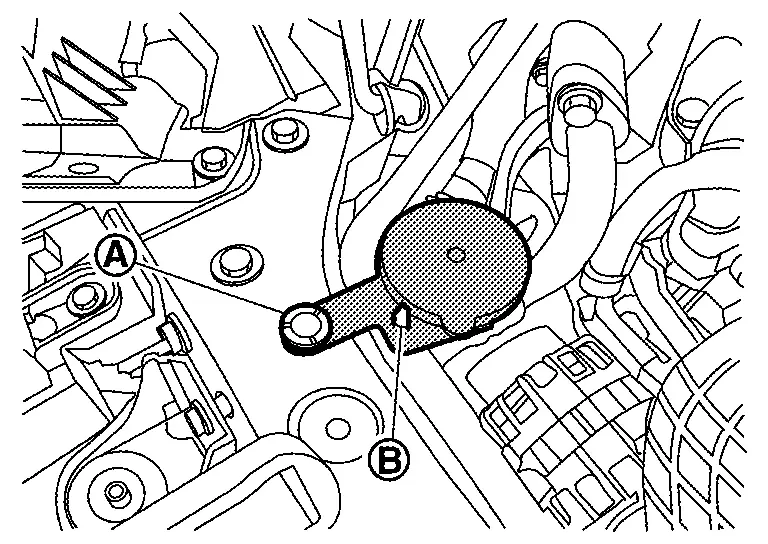
Remove washer tank inlet fixing clip (A) and harness clip (B), and then pull out to remove washer tank inlet from washer tank.
Remove front combination lamp. Refer to Removal and Installation.
Remove front and rear washer pump. Refer to Removal and Installation.
For Canada models only, disconnect the harness connector from washer fluid level switch.
Remove washer tank mounting bolt(s) and nut.
Remove harness clips from washer tank, and then remove washer tank.
INSTALLATION
Note the following item, and then install in the reverse order of removal.
CAUTION:
After installation, refill washer tank with washer fluid, and then check that there is no leakage.
Other materials:
System
I-Fcw
System Description
SYSTEM DIAGRAM Component Description
ABS actuator and electric unit (control unit)
ABS Actuator and Electric Unit (Control Unit)
Combination meter (FULL TFT METER)
Combination Meter
Combination meter (7 INCH INFORMATION DISPLAY)
Combination Meter
...
C1220-54 Incomplete Air Bleeding
DTC Description
DTC DETECTION LOGIC DTC
CONSULT screen terms
(Trouble diagnosis content) DTC detecting condition
C1220-54
INCOMP AIR BLEEDING
(Incomplete air bleeding)
Diagnosis condition
Ignition switch: ON
Signal
тАФ
Threshold
Air bleeding of electro-hydraulic co ...
P014c A/f Sensor 1
DTC Description
DTC DETECTION LOGICTo judge malfunctions, this
diagnosis measures response time of the A/F signal computed by ECM from
the A/F sensor 1 signal. The time is compensated by engine operating
(speed and load), fuel feedback control constant, and the A/F sensor 1
temperature inde ...