Nissan Rogue (T33) 2021-Present Service Manual: Removal and Installation :: Rear Wiper
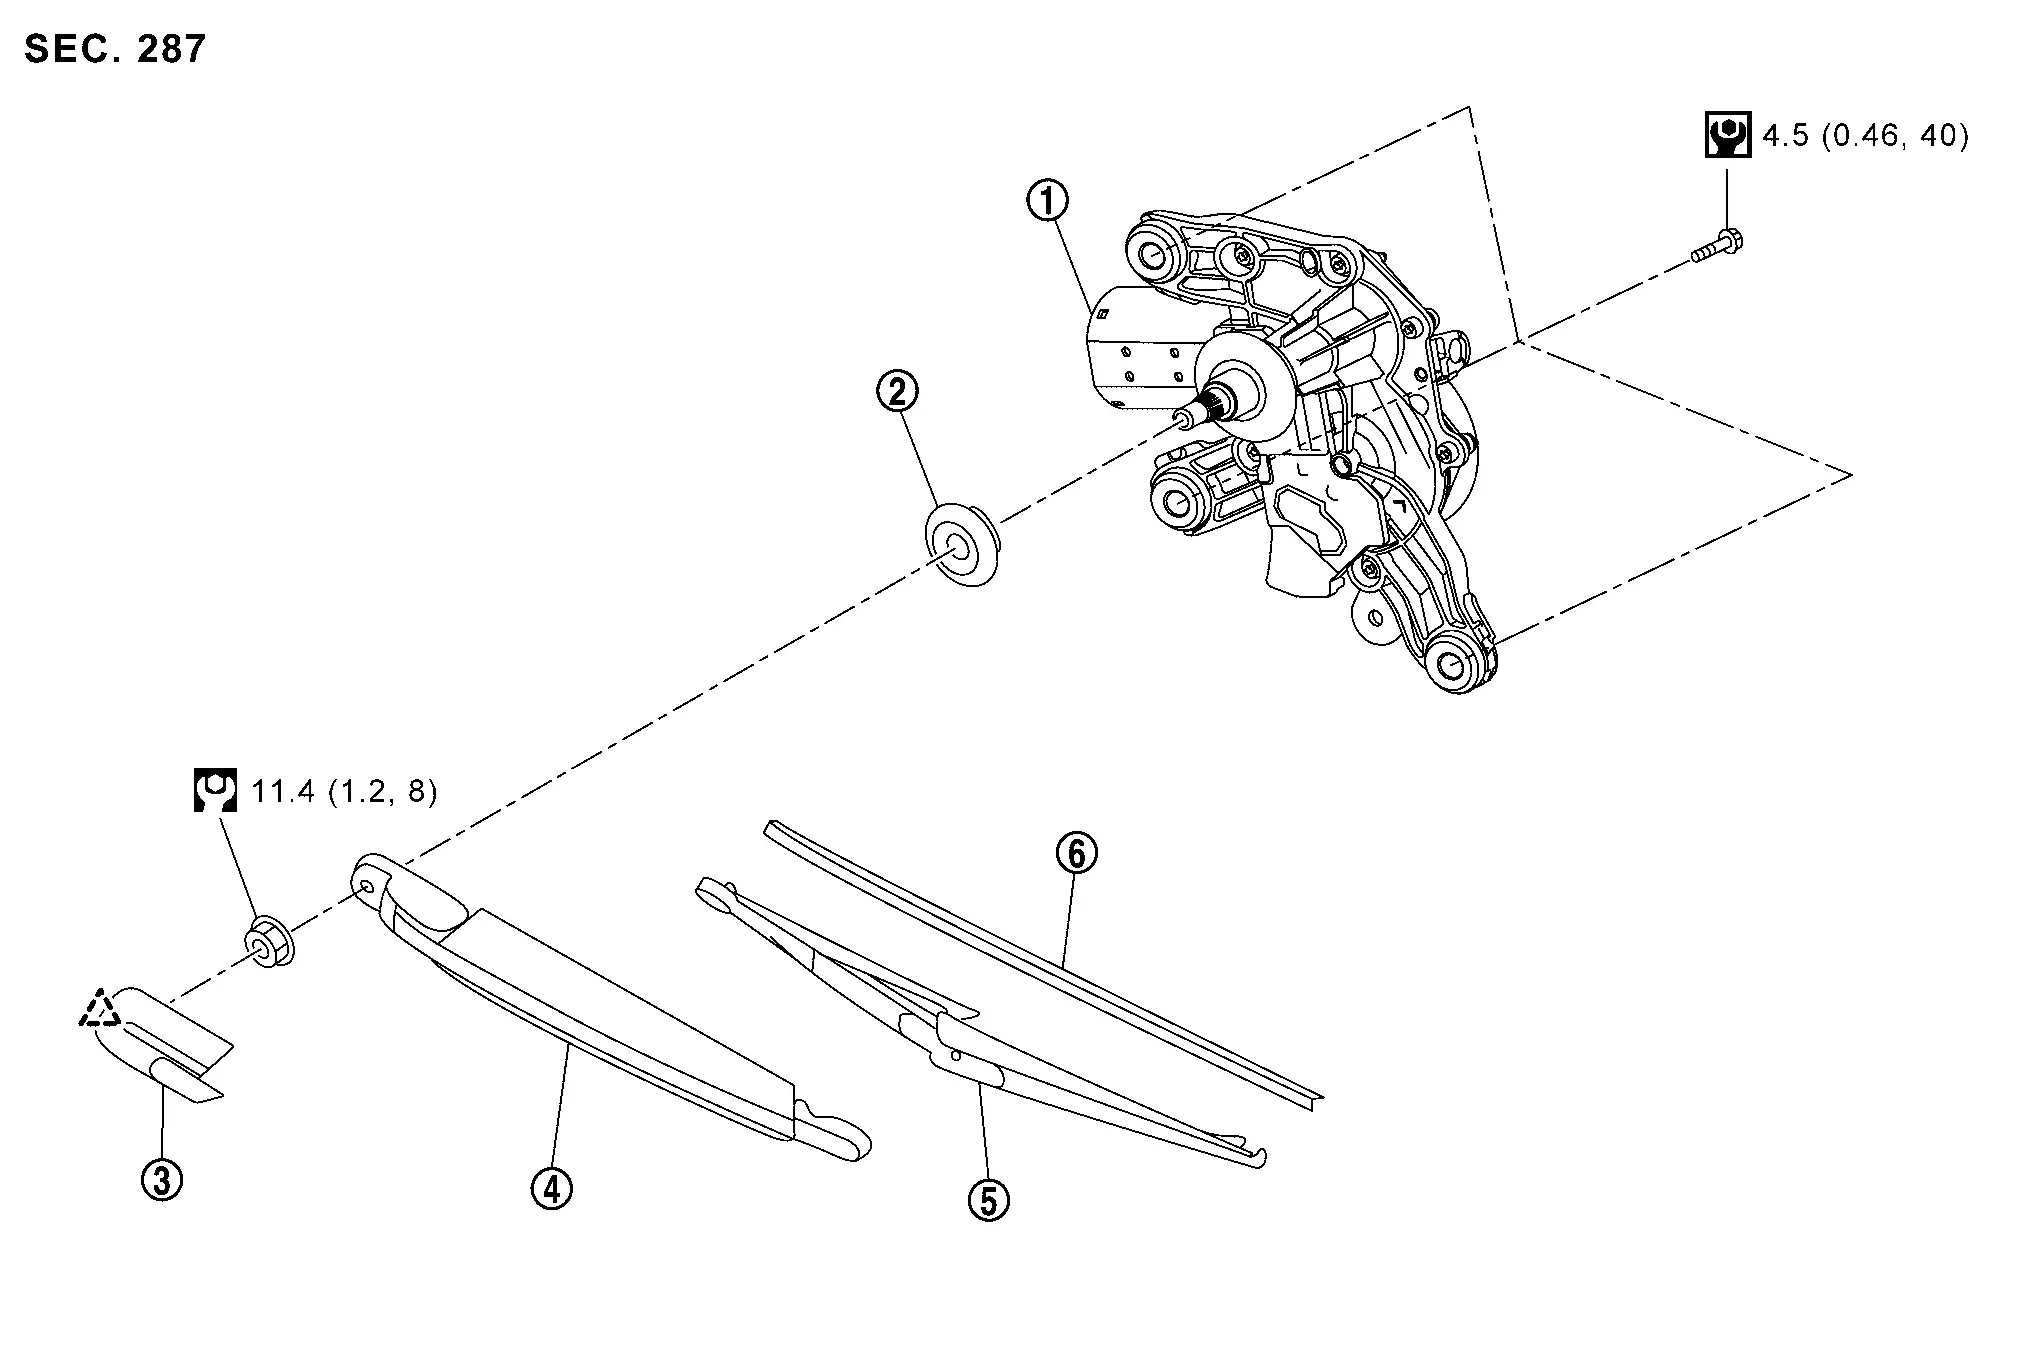
Exploded View
 |
Rear wiper motor assembly |  |
Pivot seal |  |
Rear wiper arm cover |
 |
Rear wiper arm |  |
Rear wiper blade |  |
Rear wiper refill |
 |
: Pawl | ||||
 |
: N·m (kg-m, in-lb) | ||||
 |
: N·m (kg-m, ft-lb) | ||||
Wiper Arm
Removal and Installation
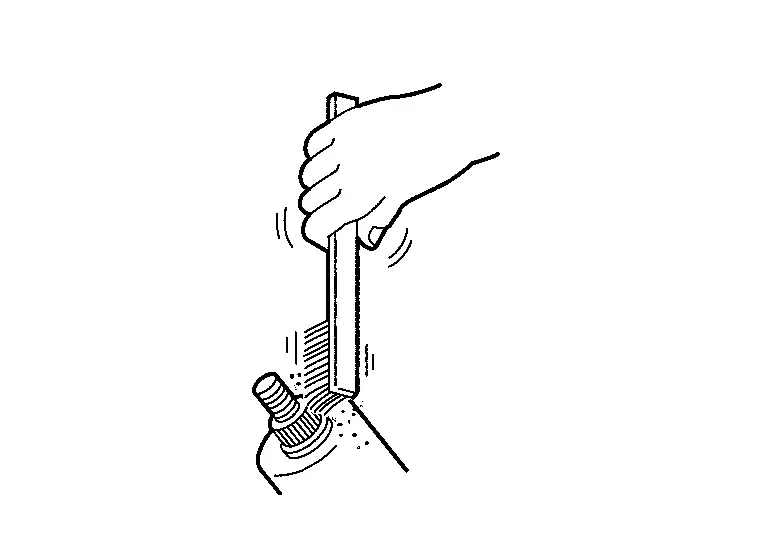
CAUTION:
Clean back door window glass and rear wiper refill so that back door window glass may not be damaged by dust, etc.
REMOVAL
Operate rear wiper to auto stop position. Refer to System Description.
Open rear wiper arm cover, and then remove rear wiper arm mounting nut  .
.
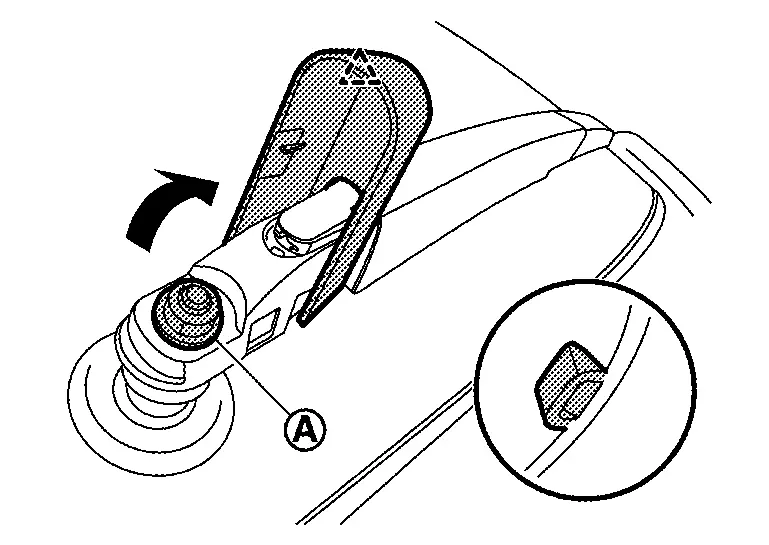
|
: Pawl |
Pull up rear wiper arm, and then remove rear wiper arm from Nissan Ariya vehicle.
INSTALLATION
Note the following items, and then install in the reverse order of removal.
CAUTION:
-
Clean rear wiper arm installation location as shown in the figure, and then fully insert rear wiper arm to prevent nut from being loosened by shakiness.
-
Before installation, operate rear wiper to the auto stop position.
-
When installation, install so that it is within the specified position. And after installation, operate rear wiper, and then check that rear wiper blades stop at the specified position. Refer to Adjustment.
Adjustment
REAR WIPER ARM POSITION ADJUSTMENT
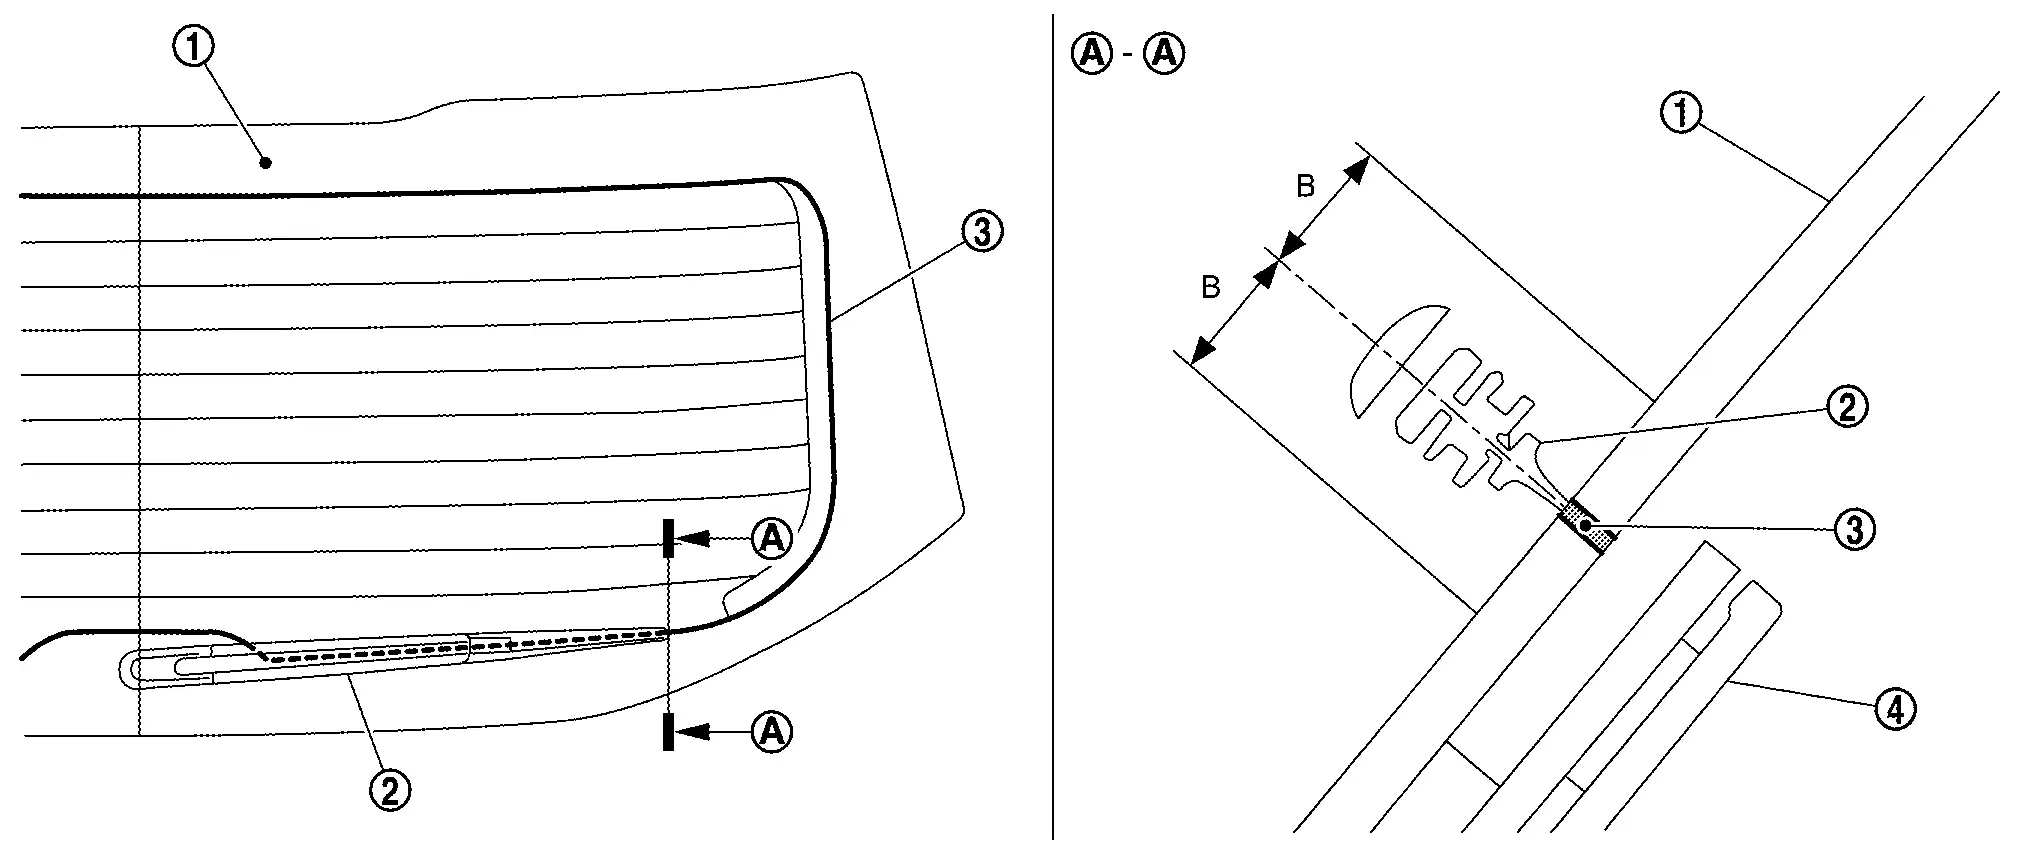
Adjust top of rear wiper blade center as shown in the figure.
|
Back door window glass | |
Rear wiper blade | |
Rear window defogger |
|
Back door panel |
| B | : 7.5 mm (0.30 in) |
 NOTE:
NOTE:
Perform measurement of clearance to the vertical direction of wiper blade.
Wiper Blade
Removal and Installation
REMOVAL
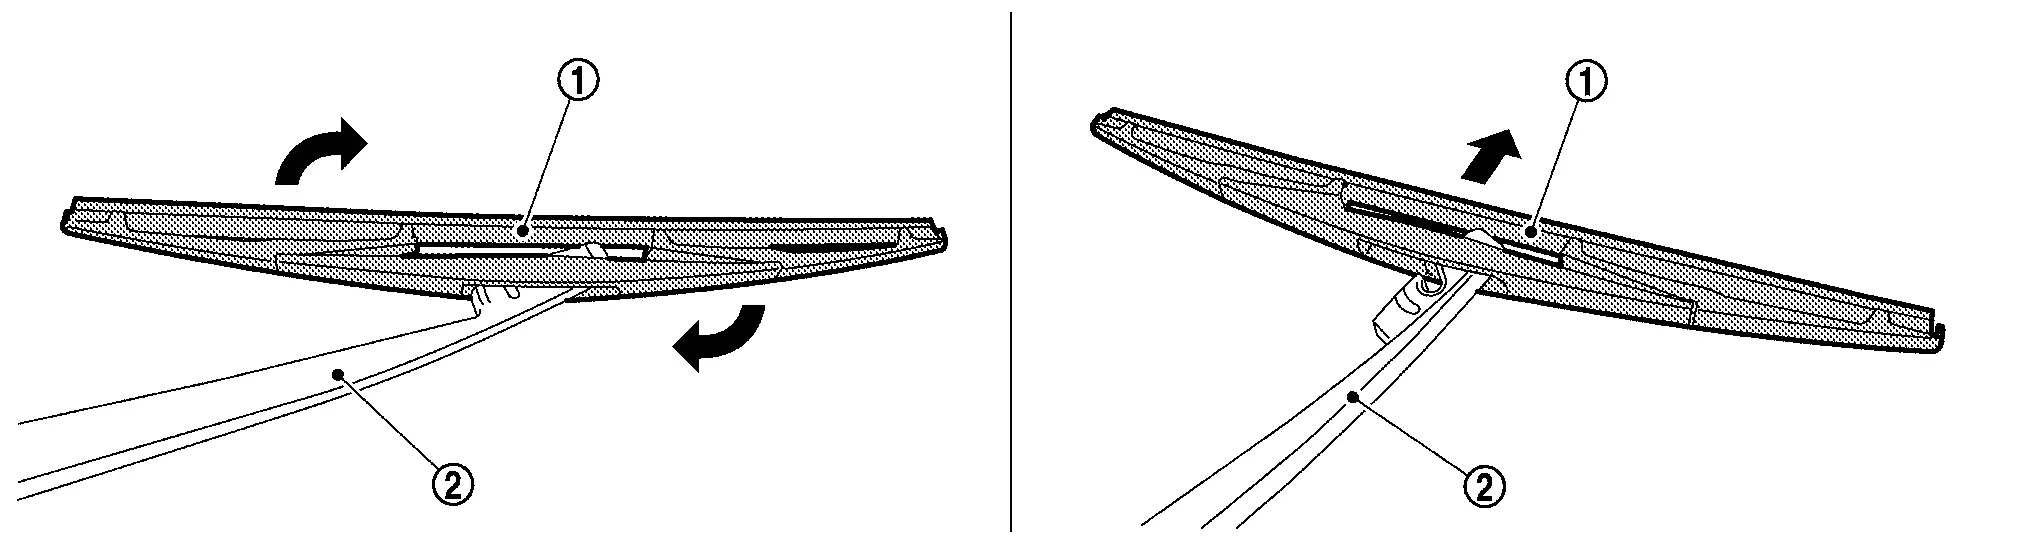
Lift up wiper arm, and then lock back wiper arm.
Remove rear wiper blade from rear wiper arm while rotating rear wiper blade in the direction indicated by the arrow as shown in the figure.
CAUTION:
After rear wiper blade is removed, wrap rear wiper arm tip with a shop cloth and fold it down so that rear wiper arm does not fall against and damage back door window glass.
INSTALLATION
Install in the reverse order of removal.
Wiper Motor
Removal and Installation
REMOVAL
Remove rear wiper arm. Refer to Removal and Installation.
Remove back door trim. Refer to Removal and Installation.
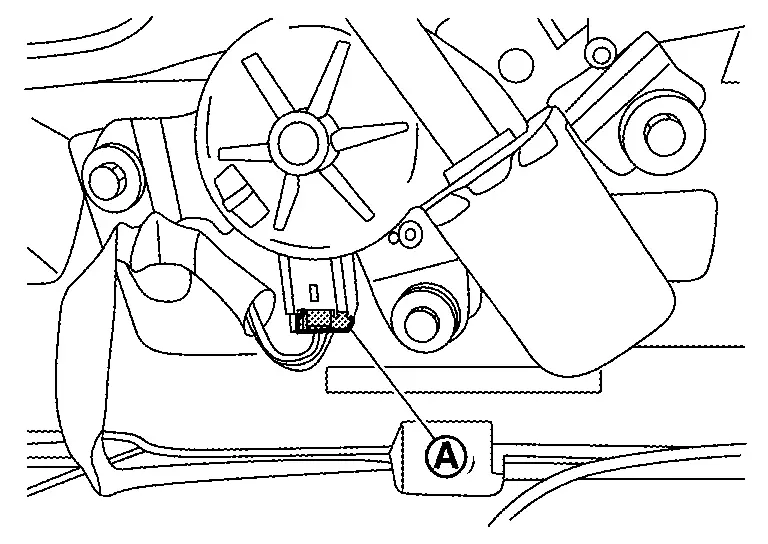
Disconnect rear wiper motor assembly harness connector .
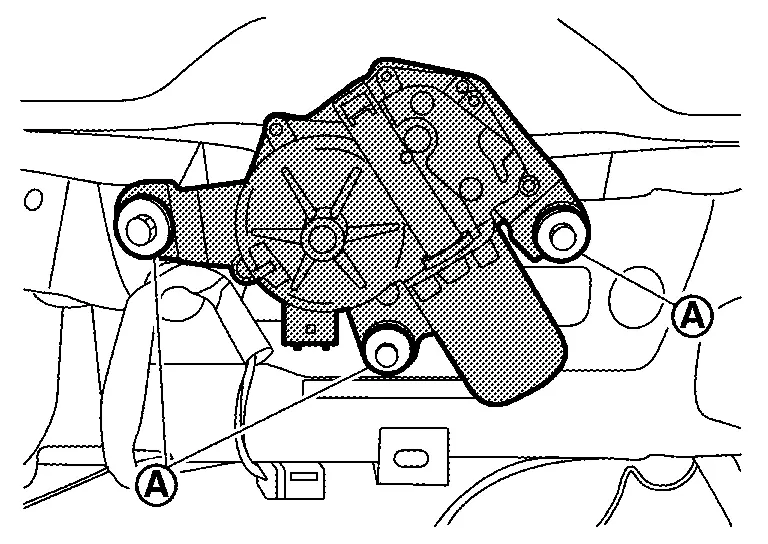
Remove rear wiper motor mounting bolts , and then remove rear wiper motor assembly from back door panel.
CAUTION:
Never drop rear wiper motor or cause it to come into contact with other parts.
Remove pivot seal from back door window glass.
INSTALLATION
Install in the reverse order of removal.
Other materials:
Awd. Periodic Maintenance
Rear Wheel Hub and Housing
Inspection
COMPONENT PARTMake sure that the mounting conditions
(looseness, backlash) of each component and component conditions (wear,
damage) are normal.WHEEL HUB ASSEMBLY (BEARING-INTEGRATED TYPE)Check the following items, and replace the part if necessary.
Mov ...
Service Data and Specifications (sds)
Road Wheel
ALUMINUM WHEEL Item Limit
Runout
Axial runout
Less than 0.3 mm (0.012 in)
Radial runout
Allowable unbalance
Dynamic (At flange)
Less than 5 g (0.17 oz) (one side)
Static (At flange)
Less than 10 g (0.35 oz)
STEEL WHEEL (EMERGENCY) Item Limit
Runo ...
Type a. Preparation. Preparation
Preparation
Commercial Service Tools
Tool name Description
Variable resistor
Check fuel gauge indication position
Power tool
Loosening screws
...