Nissan Rogue (T33) 2021-Present Service Manual: Removal and Installation :: Side Window Glass
Exploded View
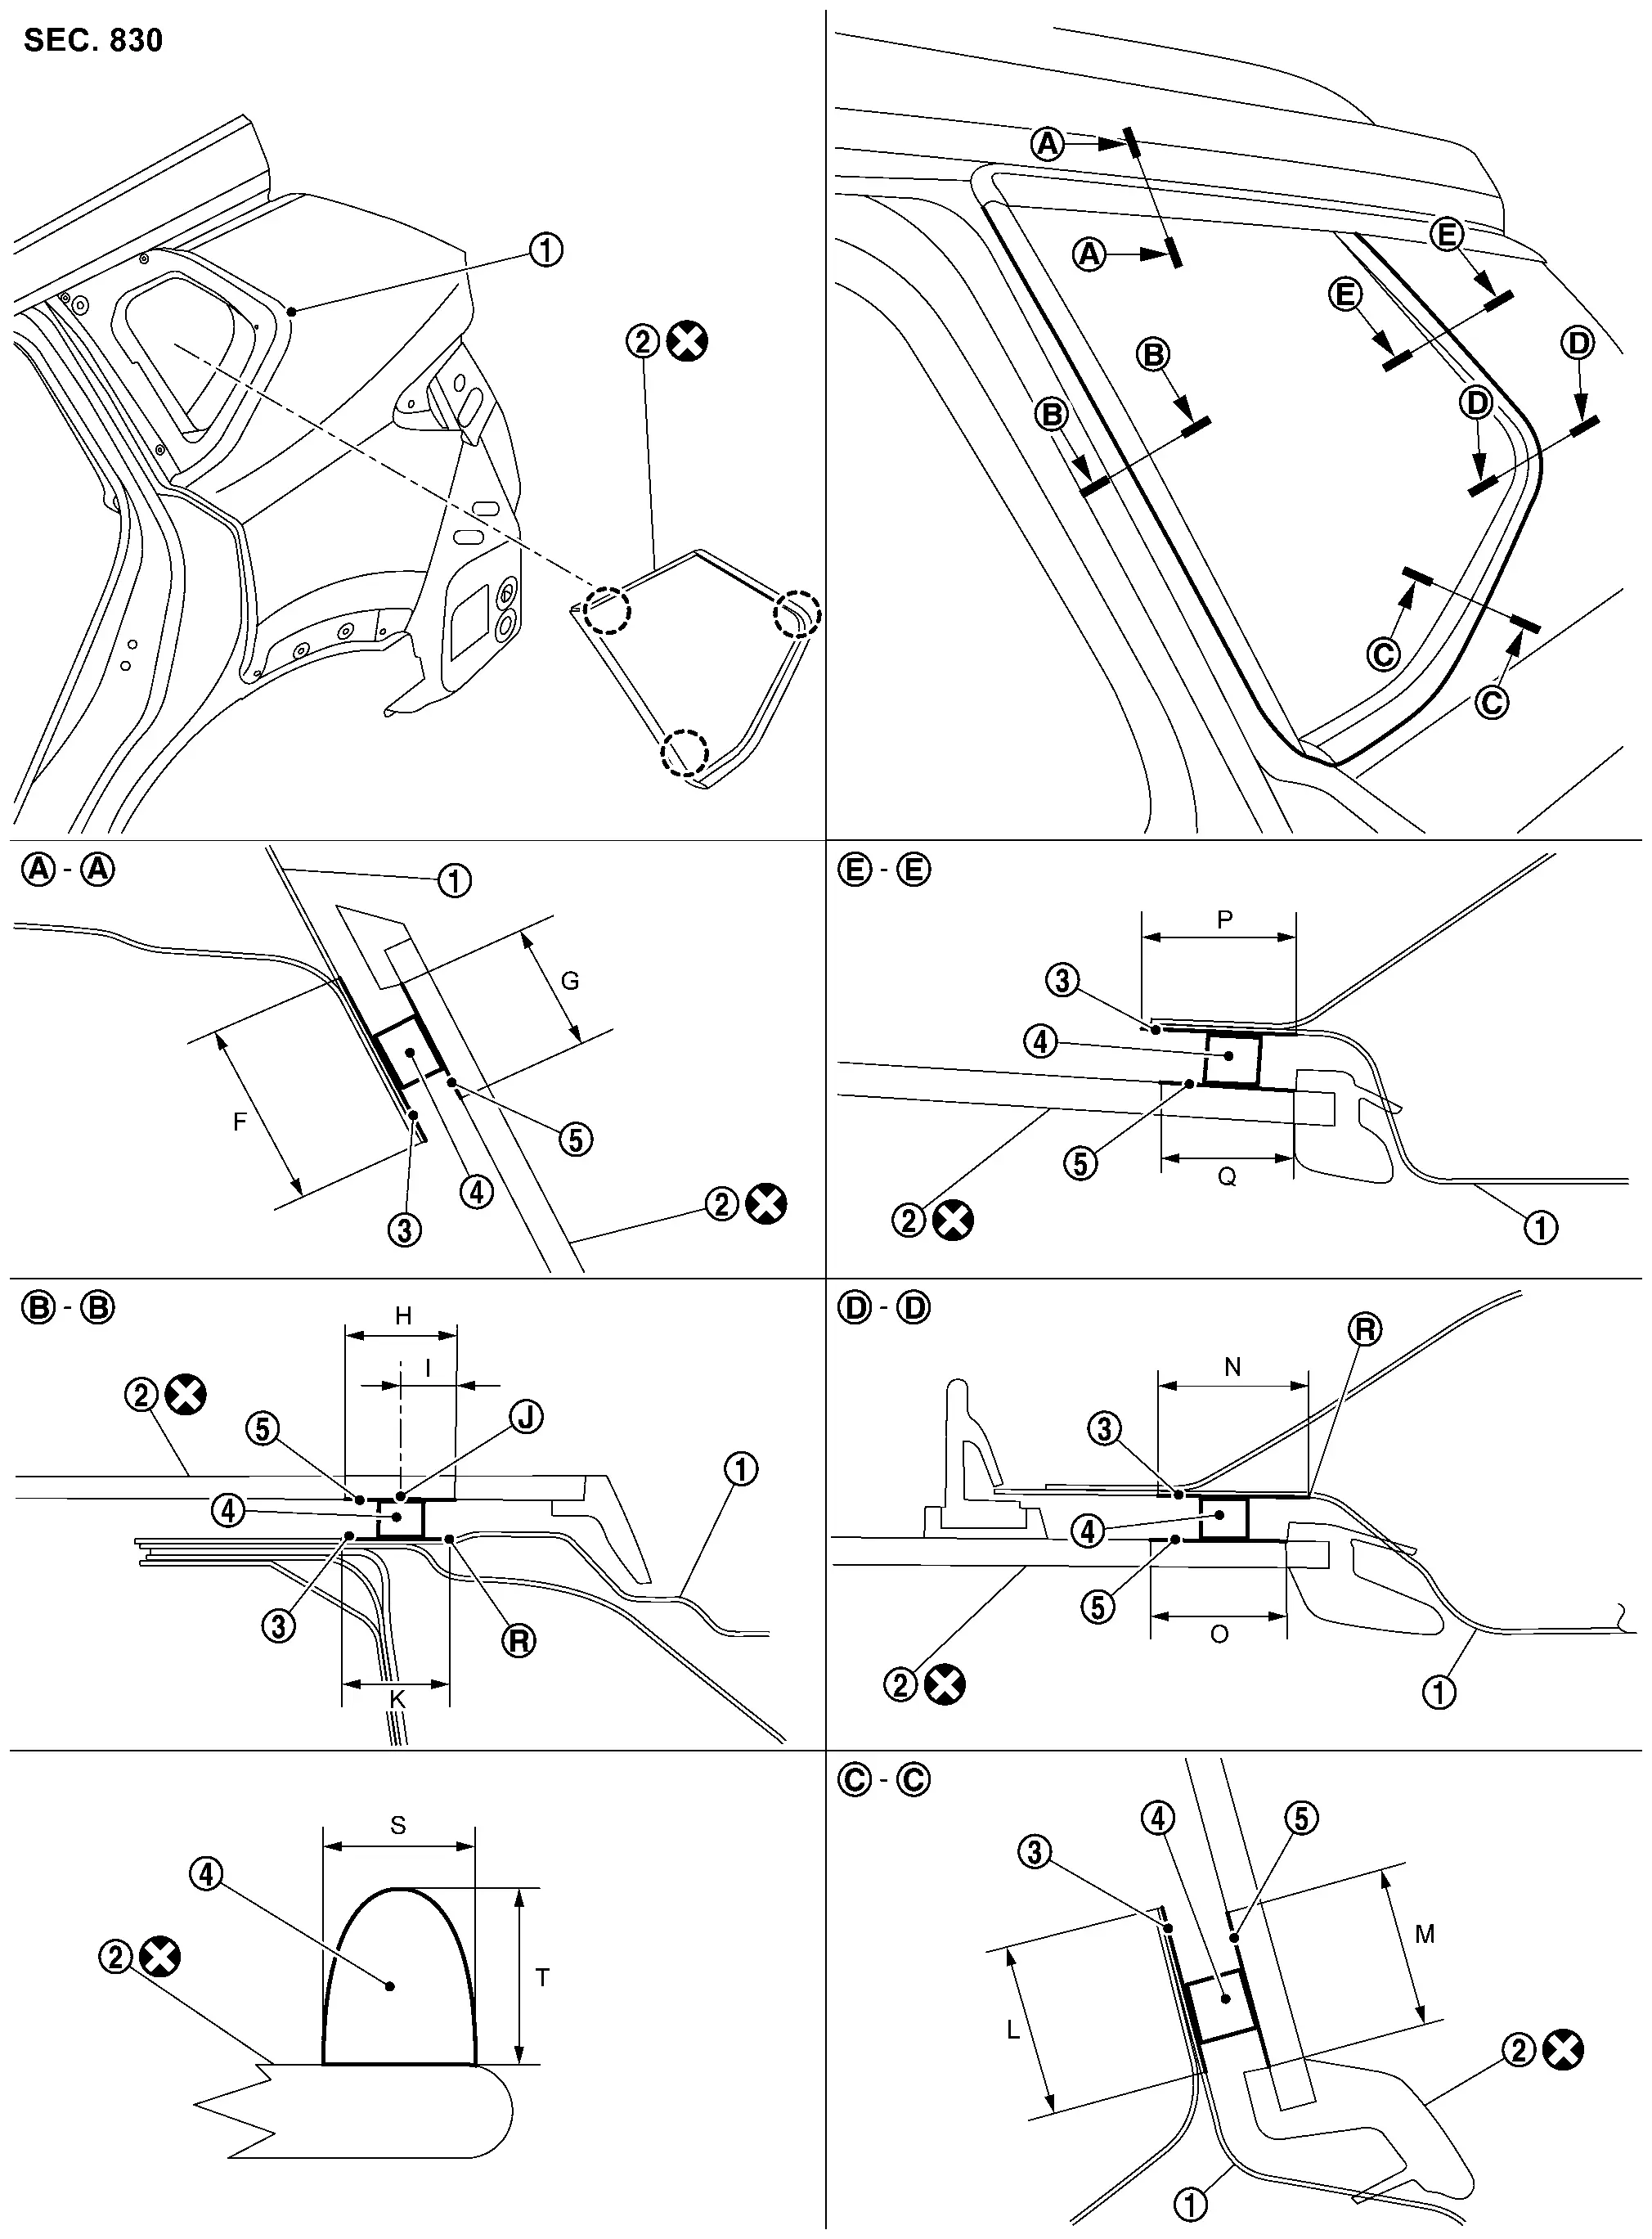
 |
Body side outer panel |  |
Side window glass |  |
Painted surface primer |
 |
Adhesive |  |
Glass primer | ||
 |
: Side window glass matching mark | ||||
 |
: R end | ||||
 |
: Clip | ||||
 |
: Always replace after every disassembly. | ||||
Unit: mm (in)
| Portion | Primer range | Adhesive range | |||
|---|---|---|---|---|---|
| S | T | ||||
| Side window glass – Body side outer panel |  – – |
F |
22.0 (0.870) |
7.0 (0.28) |
12.0 (0.47) |
| G |
17.0 (0.670) |
||||
 – – |
H |
17.0 (0.670) |
|||
| I |
8.5 (0.335) |
||||
| K |
17.0 (0.670) |
||||
 – – |
L |
19.1 (0.752) |
|||
| M |
17.0 (0.670) |
||||
 – – |
N |
18.5 (0.728) |
|||
| O |
17.0 (0.670) |
||||
 – – |
P |
19.9 (0.783) |
|||
| Q |
17.0 (0.670) |
||||
Removal and Installation
REMOVAL
CAUTION:
Never damage body side outer panel.
Remove luggage side upper finisher. Refer to Removal and Installation.
Remove rear fender sash molding. Refer to Removal and Installation.
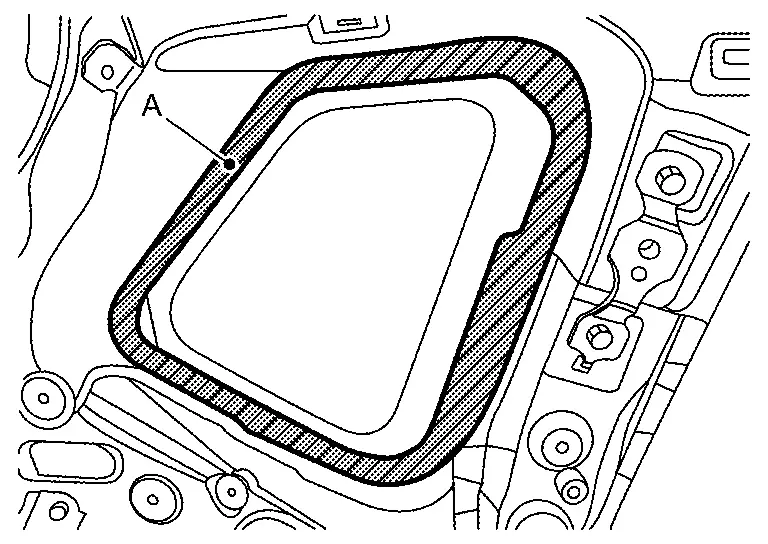
Apply protective tape (A) on body side inner panel around side window glass to protect painted surface from damage.
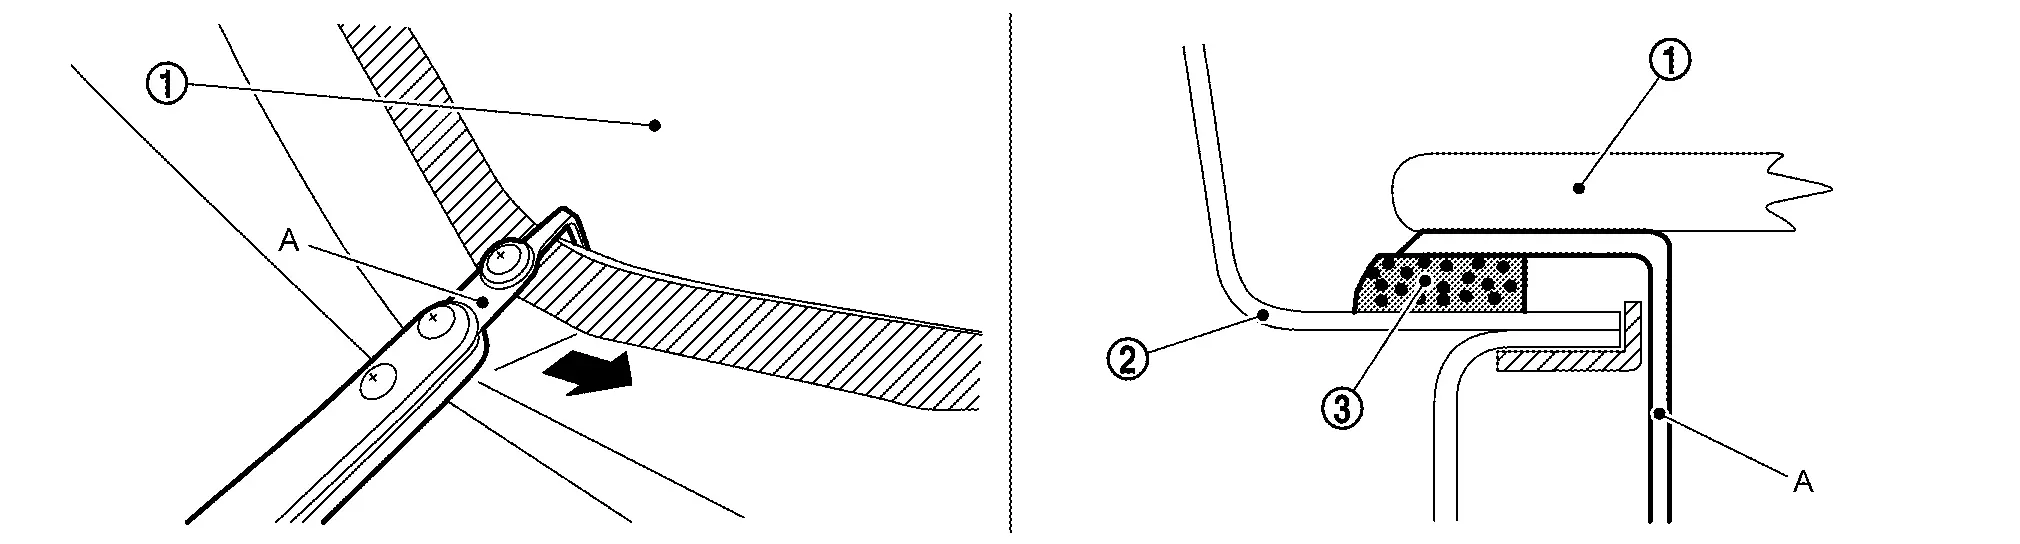
Insert a windshield cutter (A) between side window glass and body side outer panel . Cut the adhesive by pulling the windshield cutter, keeping the tip parallel to the edge of side window glass.
CAUTION:
Use piano wire to cut sealant if its difficult to use windshield cutter.
Cut the adhesive using a piano wire.Apply protective tape (A) on body side outer panel around side window glass to protect painted surface from damage.
CAUTION:
Never damage surrounding parts.
Tie both ends of the piano wire (B) to wire grip (A), etc..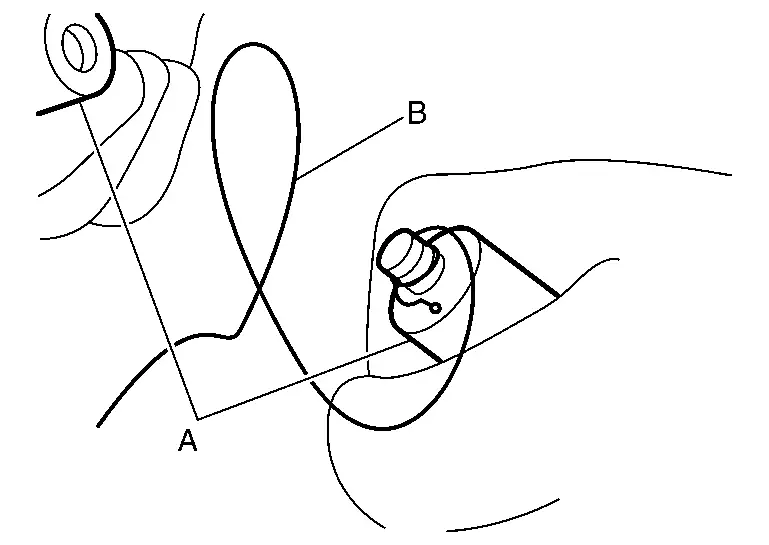
CAUTION:
To cut adhesive, 2 workers are required by all means.
Remove side window glass.
INSTALLATION
CAUTION:
-
Replace side window glass with a new part after removal. Never reuse side window glass.
-
Never damage body side outer panel.
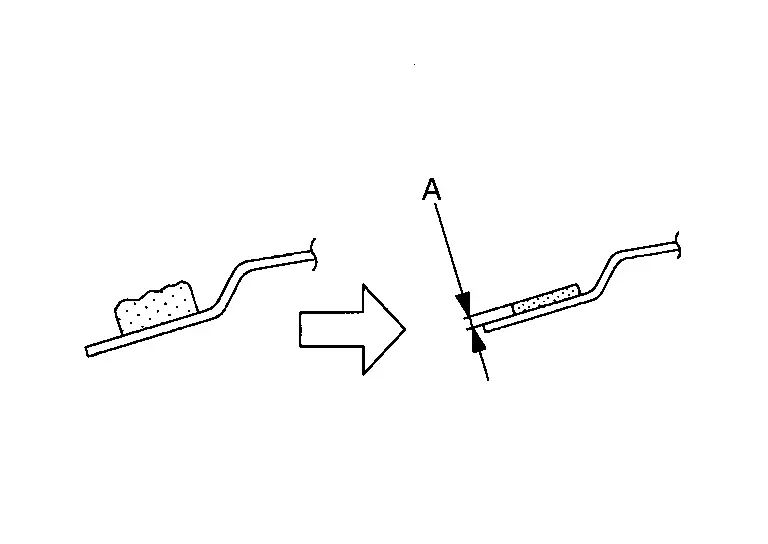
Use a cutter knife or scraper, and leave the of adhesive on the body side approximately 2 mm (0.079 in) (A) to make adhesive surface smooth.
CAUTION:
If the bonded area on the body is scratched, repair it using a 2 liquid types urethane paint. Never use lacquer type paint.
Clean the bonded area on side window glass and body side outer panel using a white gasoline or degreasing agent.
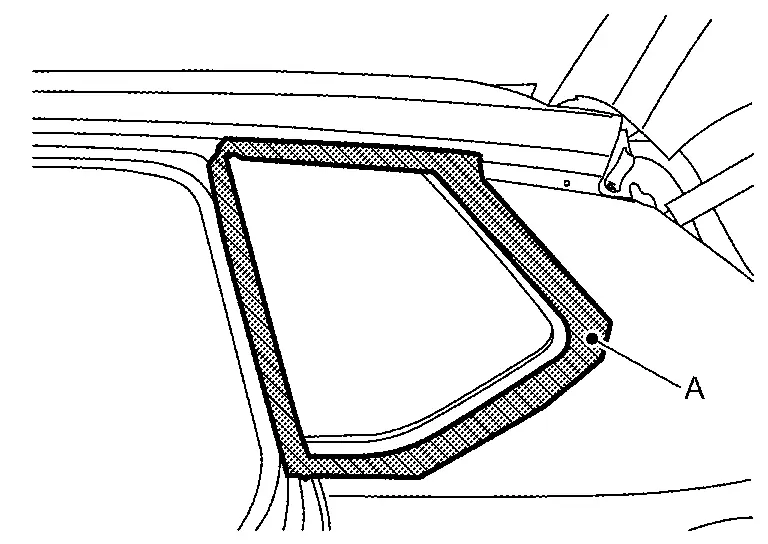
Apply glass primer along the entire circumference of side window glass. The range of glass primer, refer to Exploded View.
Apply painted surface primer to the body side bonding surface. The range of painted surface primer, refer to Exploded View.
Apply adhesive to side window glass by using a sealant gun. The volume of adhesive, refer to Exploded View.
CAUTION:
-
The start position
to applying adhesive is behind from matching mark as shown in figure.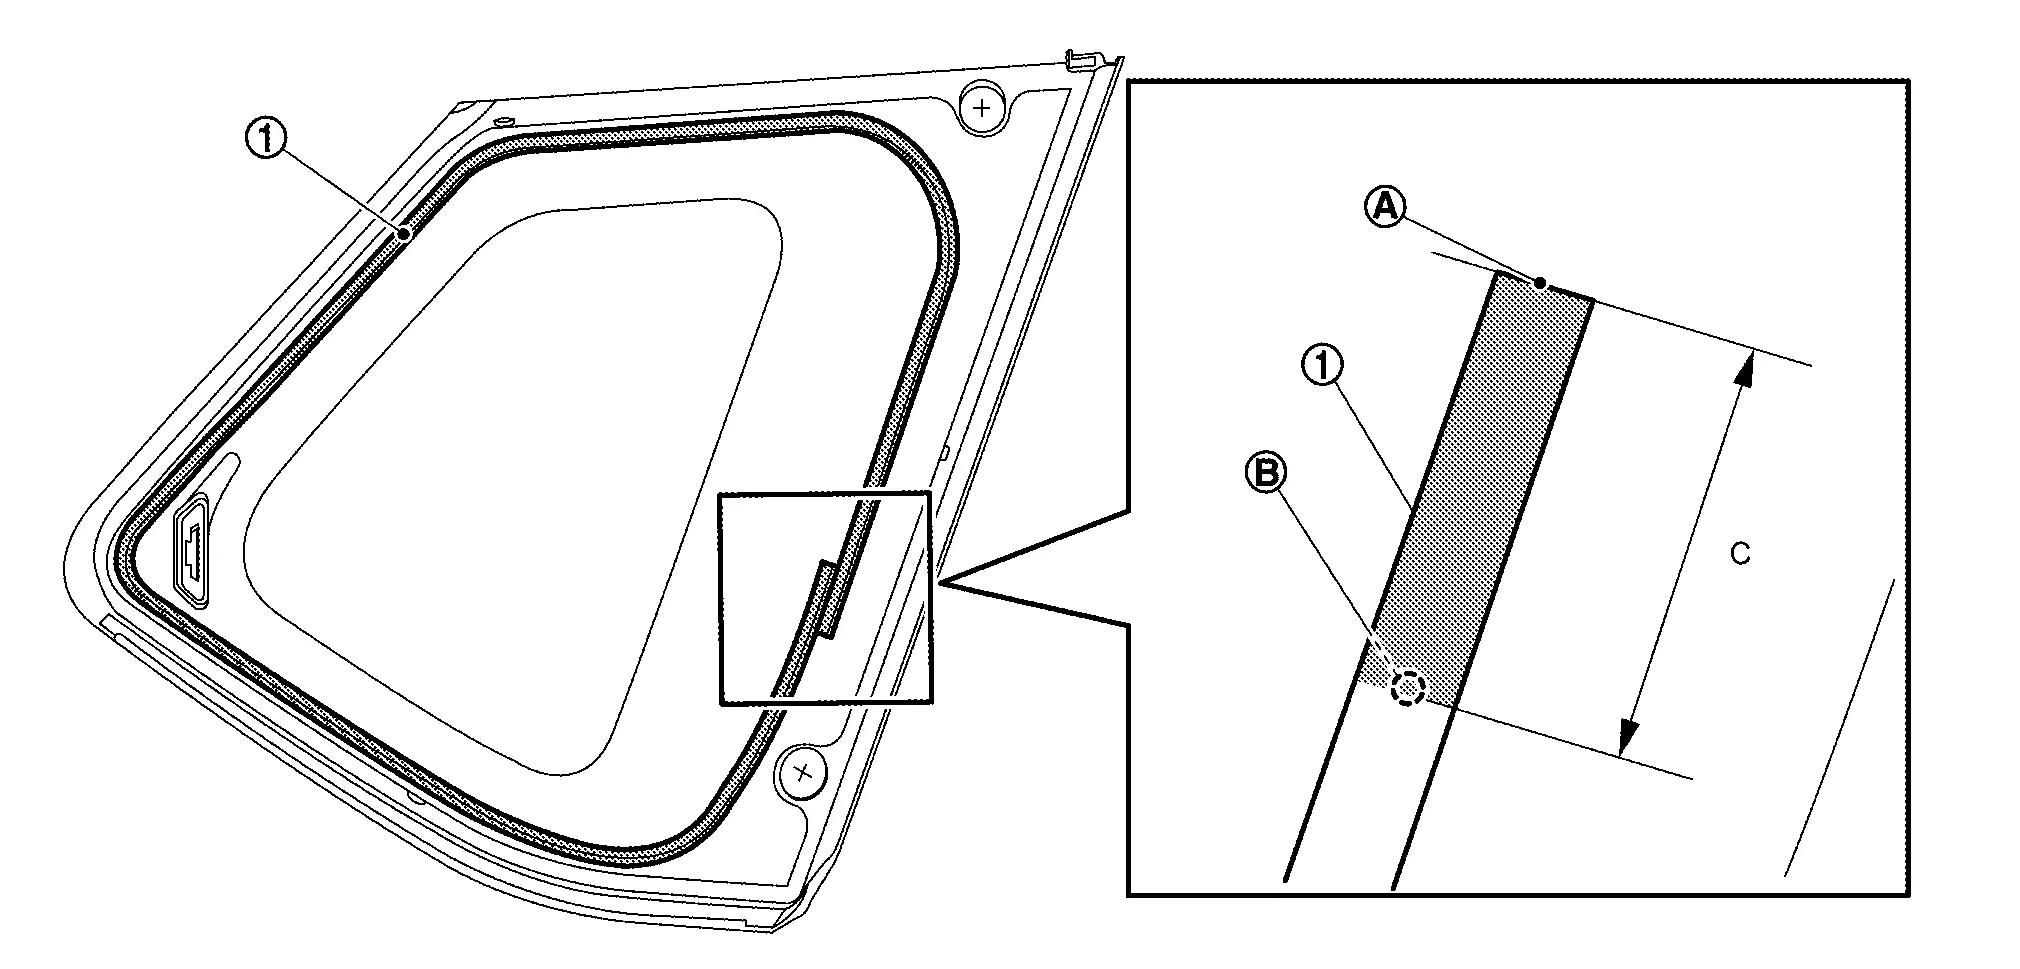
C : 30 mm (1.18 in) -
There are 2 patterns position to applying adhesive following bellow.
-
The front side
is apply adhesive center on the connected line of matching marks as shown in figure.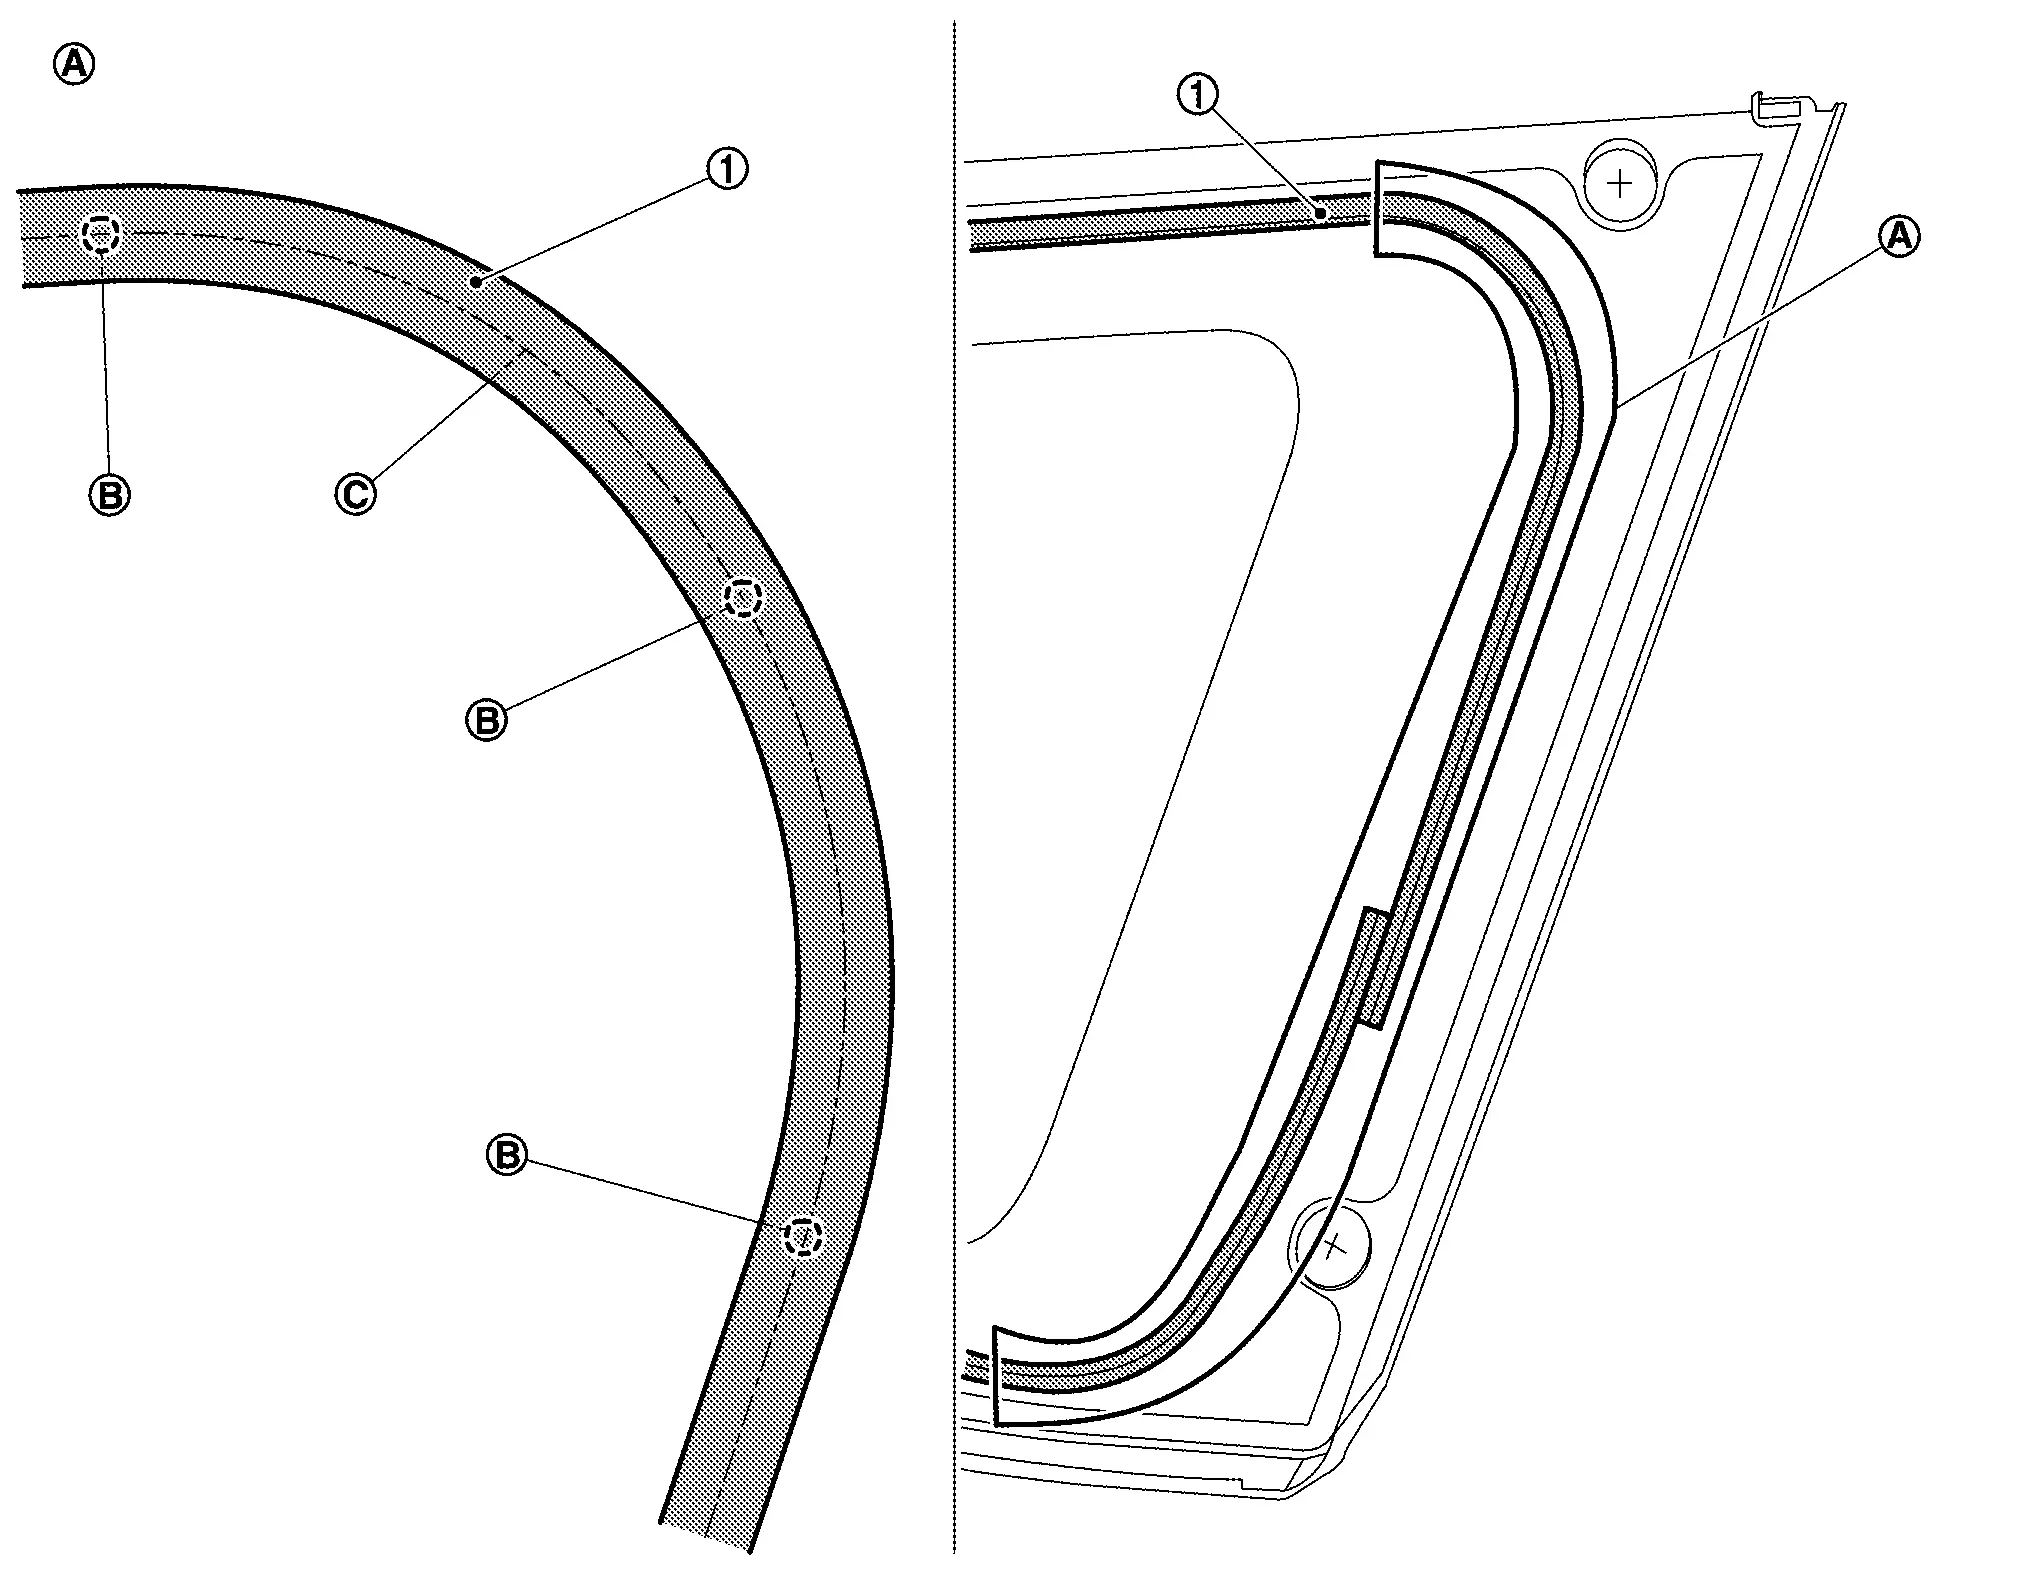
-
Except the front side is apply adhesive
along side window molding edge as shown in figure.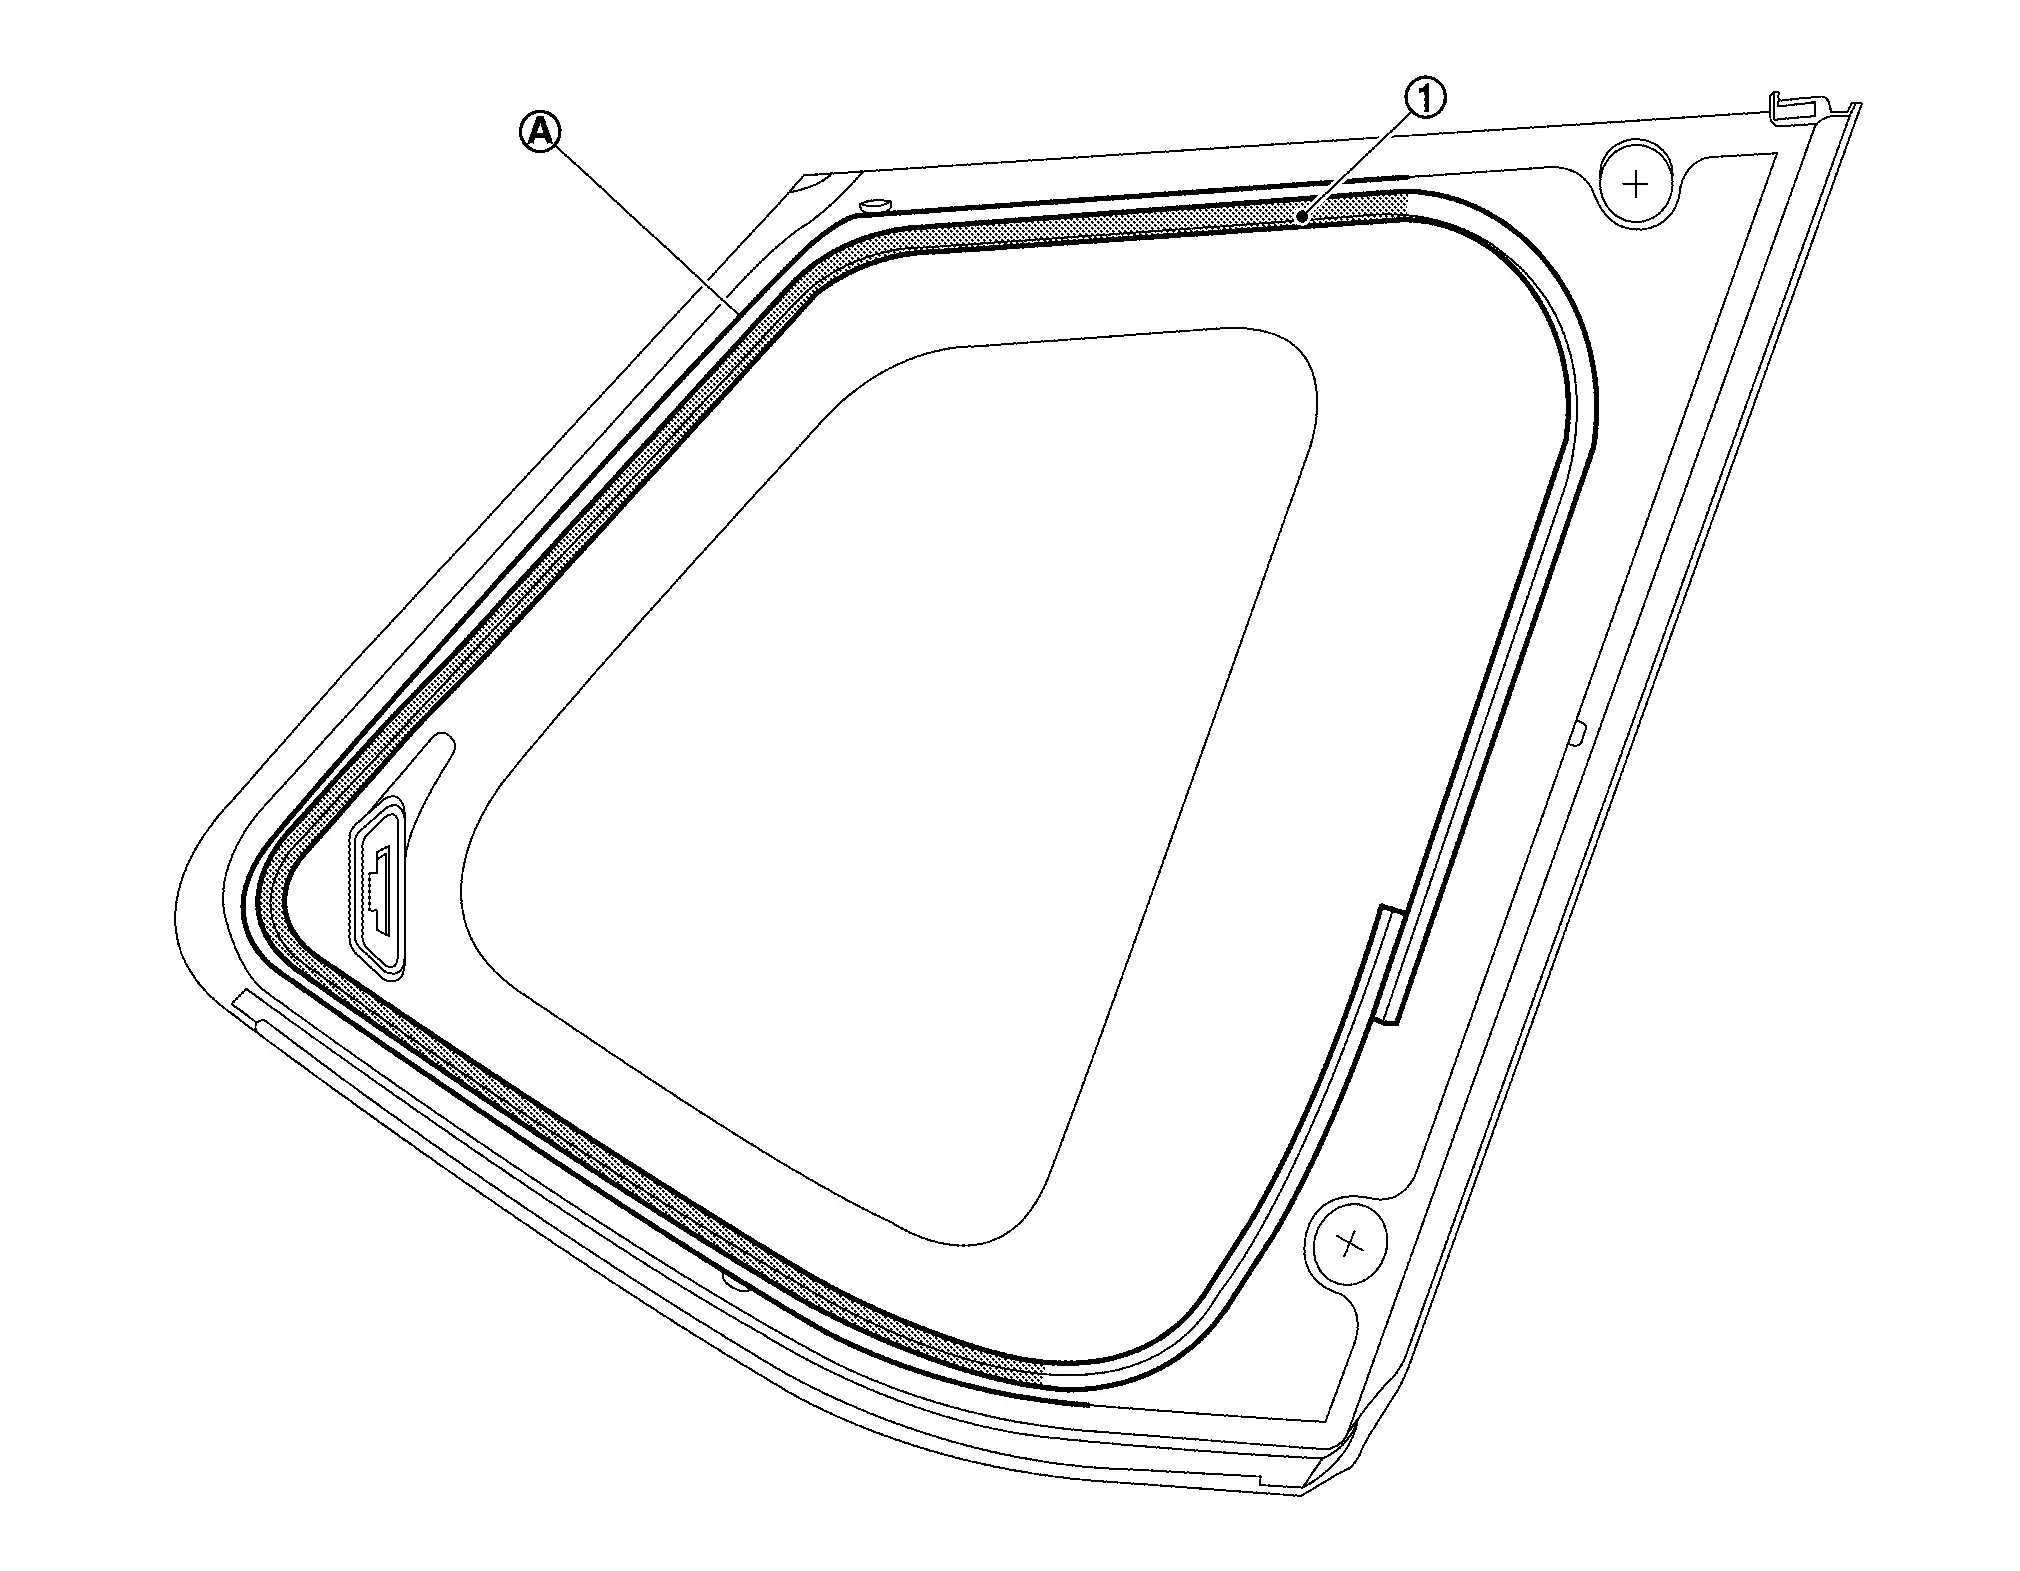
-
When finish to applying adhesive
, overlap from the start position to stop position as shown in figure.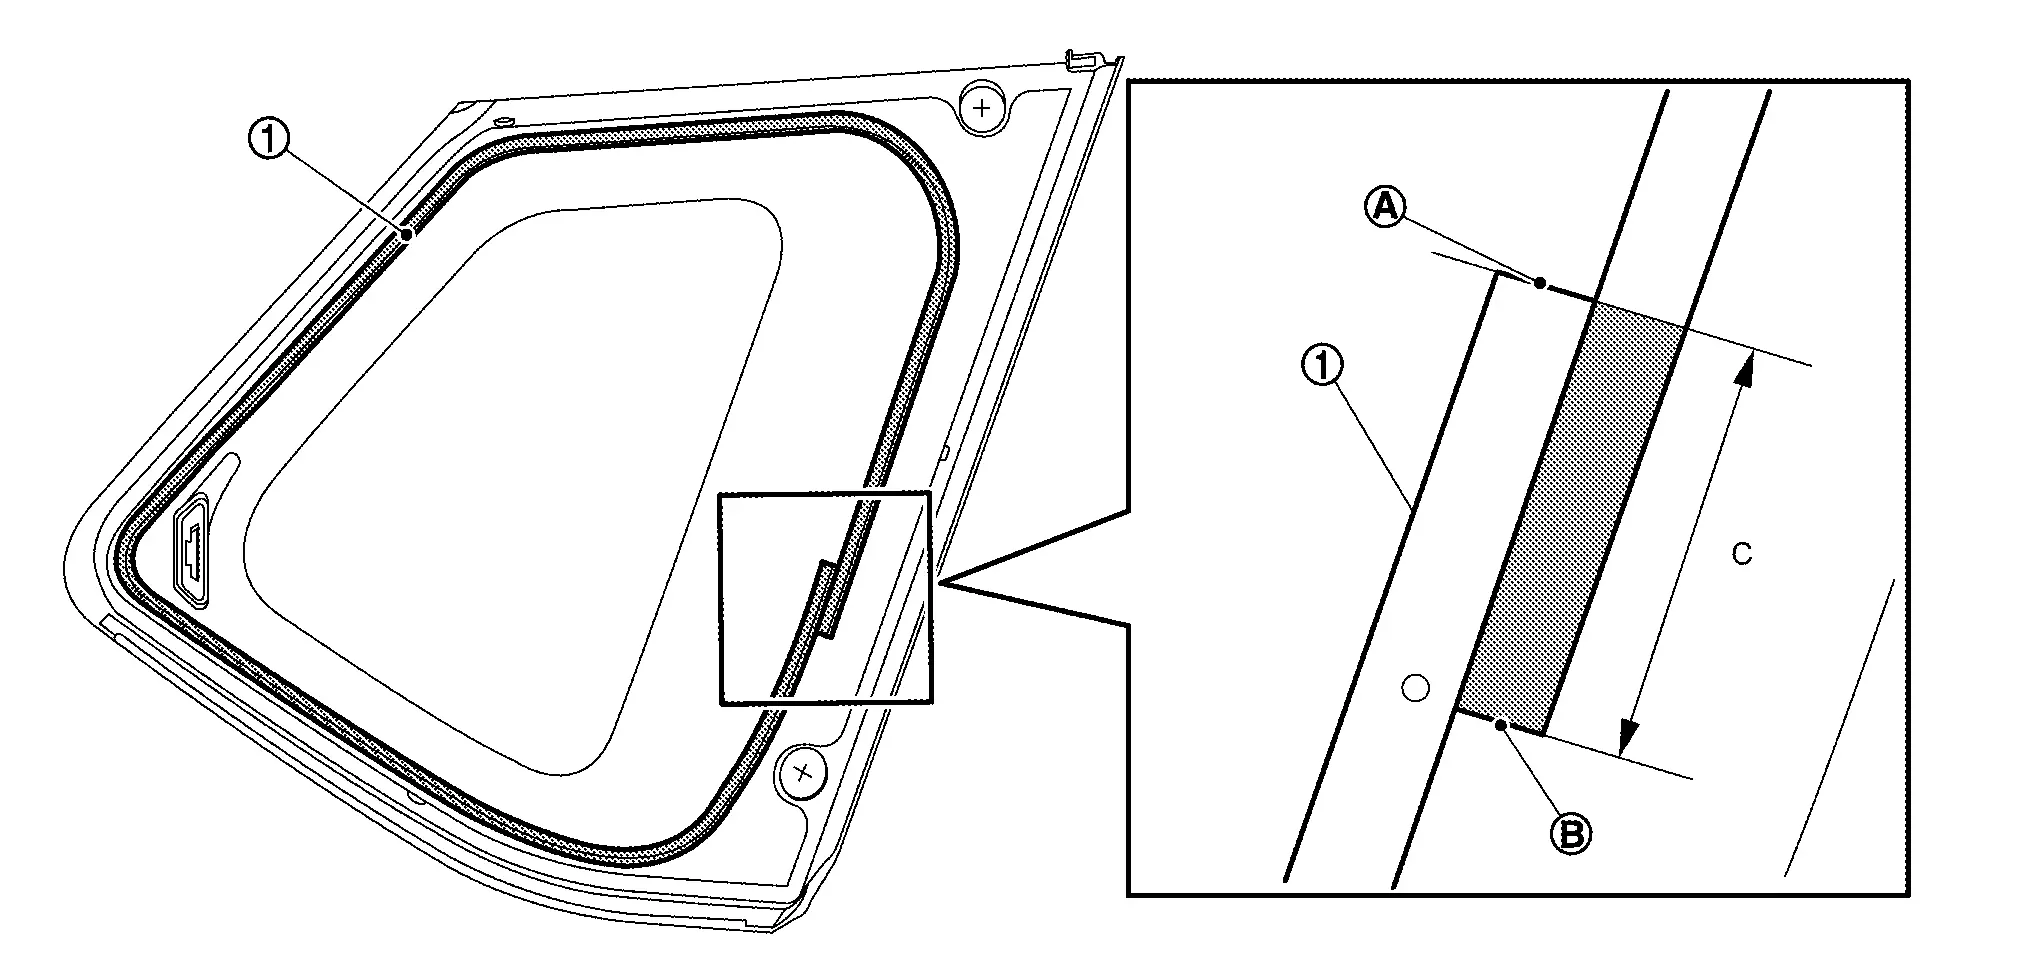
C : 30 mm (1.18 in)
Install side window glass to body side outer panel.
CAUTION:
-
When installing, press the side window glass according to numerical order 1→3 until the fixing clips
and are clicking as shown in figure.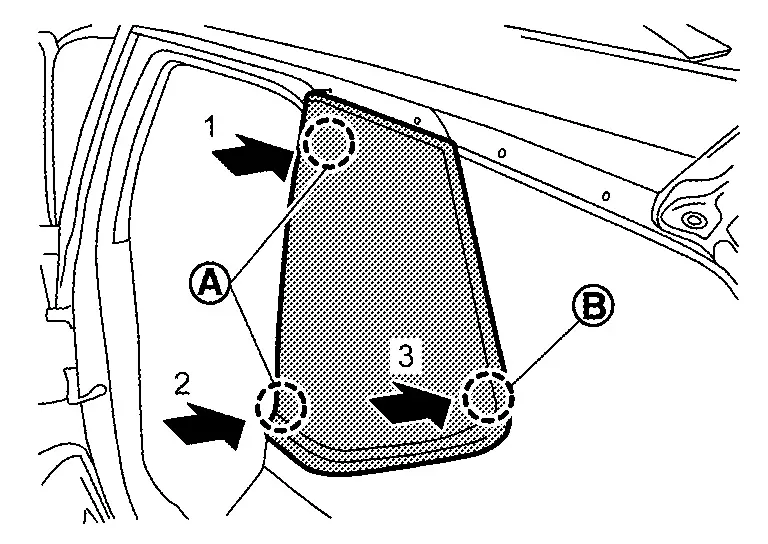
-
After installing, check the fixing clip
is hand on body side outer panel as shown in figure.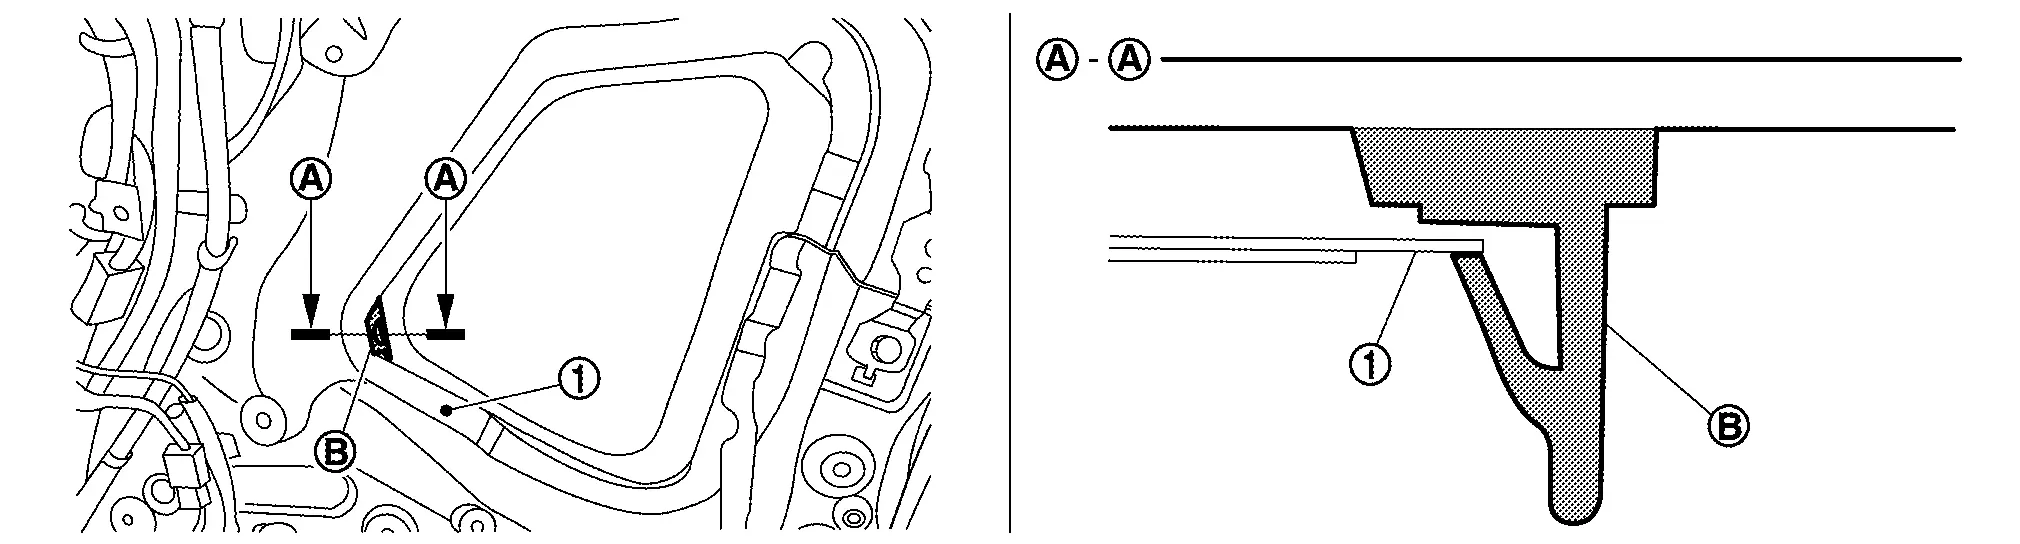
Correct any adhesive overflow or shortage using a spatula to make the surface smooth.
CAUTION:
-
After installing side window glass, keep the all door glass open until the adhesive is completely cured.
-
Never drive the Nissan Ariya vehicle before the adhesive is completely cured.
Remove protective tape.
Install removed parts.
CAUTION:
Check the mating area with surrounding parts. Adjust if necessary.
Inspection
WATER LEAKAGE INSPECTION
CAUTION:
-
Dry adhesive according to the specification of adhesive kit, do the leaking check when adhesive is stiffen.
-
If leakage was found, start over from the beginning as side window glass removal, install and leaking check.
Other materials:
P0261 Fuel Injector (cylinder 1)
DTC Description
DTC DETECTION LOGIC DTC
CONSULT screen terms
(Trouble diagnosis content)
DTC detection condition
P0261
00
CYL1 INJECTOR
(Cylinder 1 Injector A Circuit Low)
Diagnosis condition
—
Signal (terminal)
—
Threshold
Direct injector driver unit ...
U0402 Can Communication
DTC Description
DTC DETECTION LOGIC DTC
CONSULT screen terms
(Trouble diagnosis content)
DTC detection condition
U0402
00
Invalid data (TCM)
(Invalid Data Received From TCM)
Diagnosis condition
Ignition switch ON
Signal (terminal)
—
Threshold
When ECM is ...
Mac Key Writing
Description
When replacing around view monitor control unit, it is necessary to
write MAC key to around view monitor control unit. Write MAC key to
around view monitor control unit according to "MAC Key writing"
procedure of "CONSULT Operation Manual". Refer to Work Procedure.CAUTION:
During ...