Nissan Rogue (T33) 2021-Present Service Manual: Simplified Confirmation by Birds-Eye View Screen
Work Procedure
If the front grille upper is removed or replaced, perform the simplified confirmation by birds-eye view screen.
CAUTION:
-
This procedure should only be performed if the front grille upper has been removed or replaced.
-
Perform camera calibration when removing or replacing each camera, removing the camera mounting parts (front bumper mall center, door mirror, etc.), or replacing the around view monitor control unit. Refer to Work Procedure (WITHOUT ProPILOT ASSIST 2.1) or Work Procedure (WITH ProPILOT ASSIST 2.1).
TAKE A SCREENSHOT OF THE BIRDS-EYE VIEW SCREEN 1
-
Draw white lines with a width of 10 cm (3.9 in) or more as shown in the figure and place the Nissan Ariya vehicle.
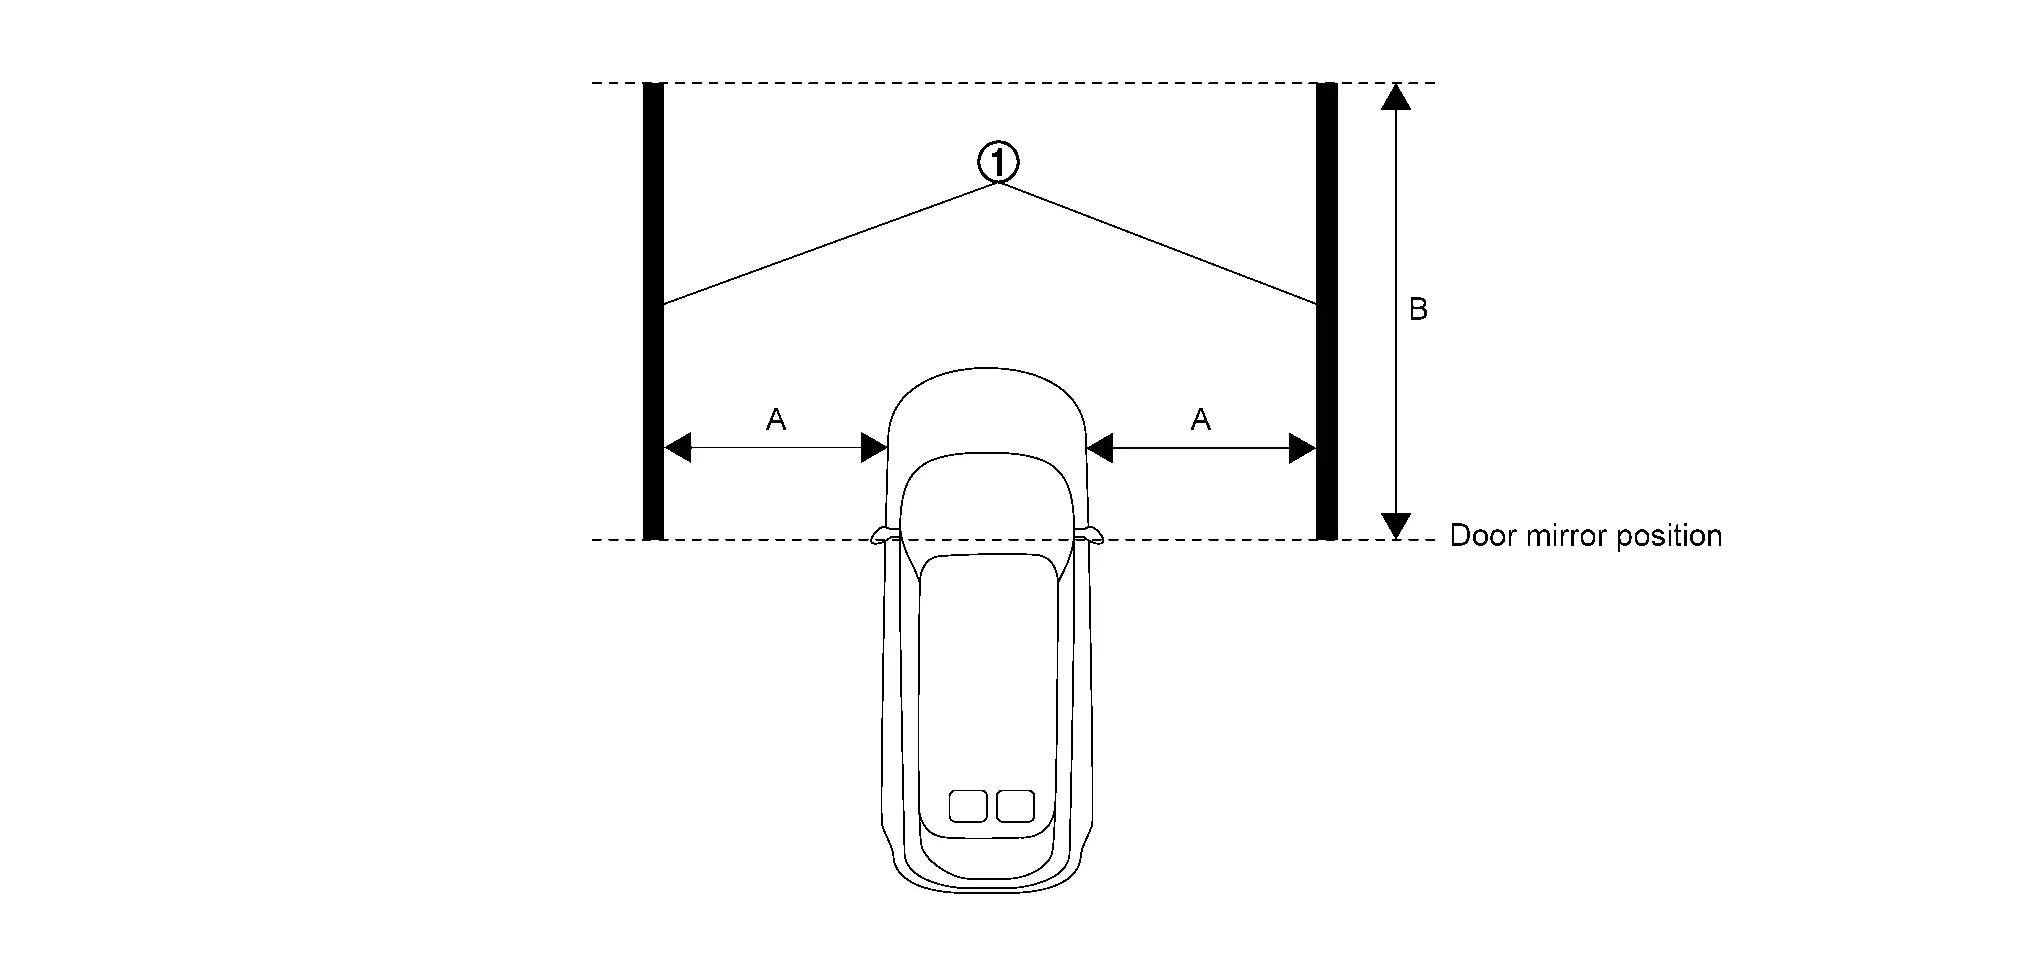

White lines
[10 cm (3.9 in) or more in width]A : 2 m (78.7 in) B : 3 m (118.1 in) -
Activate the around view monitor and display the birds-eye view screen.
-
Take a screenshot of the birds-eye view screen in the state shown in the figure.
 NOTE:
NOTE:
A screenshot of the birds-eye view screen can be taken by following the steps below.
-
Insert the USB memory into the USB port.
NOTE:
Using a USB memory with an access lamp makes it easier to determine the communication status of the USB memory.
-
While pressing the camera switch, quickly turn the volume dial 3 clicks in the order of rightÔćĺleftÔćĺright (switches to system diagnostic mode).
-
Select ÔÇťDisplay DiagnosisÔÇŁ.
-
Select ÔÇťScreenshot to USBÔÇŁ and turn ON the screenshot.
-
Display the birds-eye view screen.
-
Press the camera switch.
-
Wait at least 10 seconds until the data is written to the USB memory.
-
>>
GO TO 2.
REMOVAL OR REPLACEMENT OF FRONT GRILL UPPER
Remove or replace the front grill upper. Refer to Removal and Installation.
>>
GO TO 3.
TAKE A SCREENSHOT OF THE BIRDS-EYE VIEW SCREEN 2
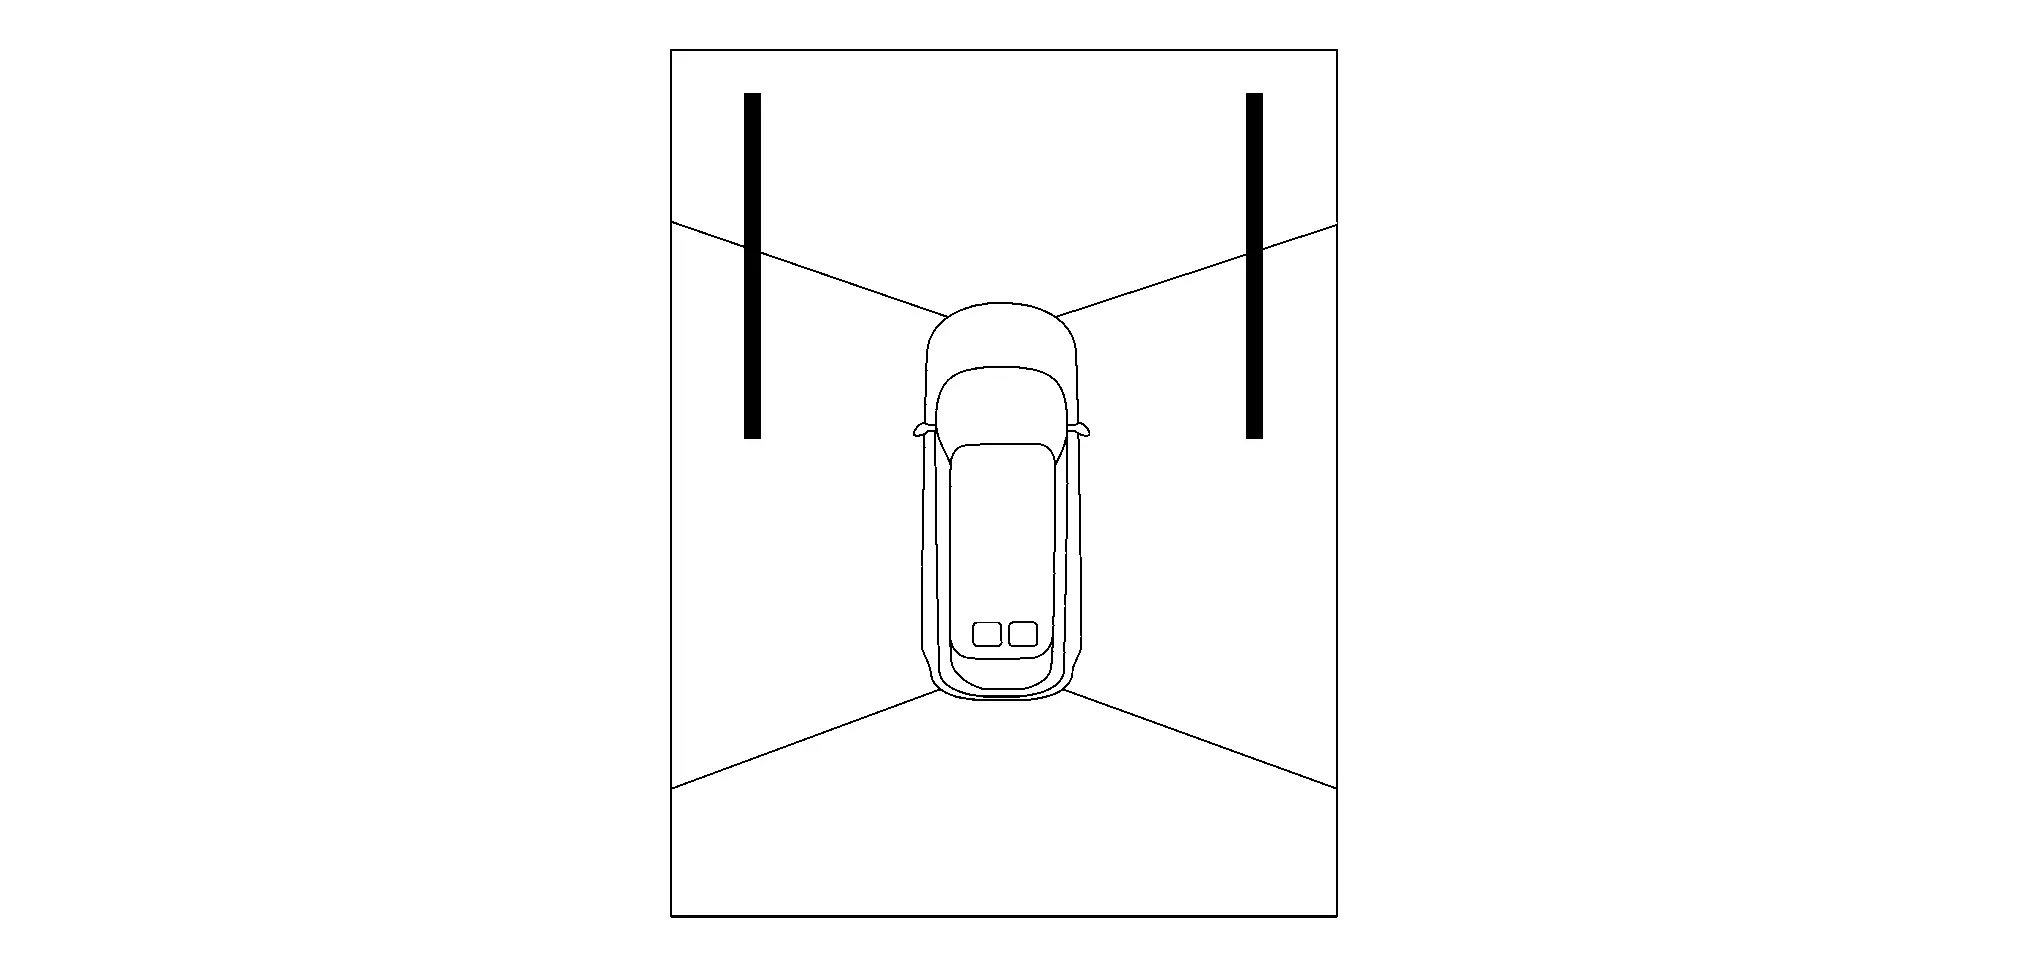
Take a screenshot of the birds-eye view screen again in the state of the figure.
>>
GO TO 4.
SCREENSHOT COMPARISON OF BIRDS-EYE VIEW SCREEN
Compare the screenshots of the birds-eye view screen before and after
removing or replacing the front grill upper, and check if the white
lines in the figure is misaligned.
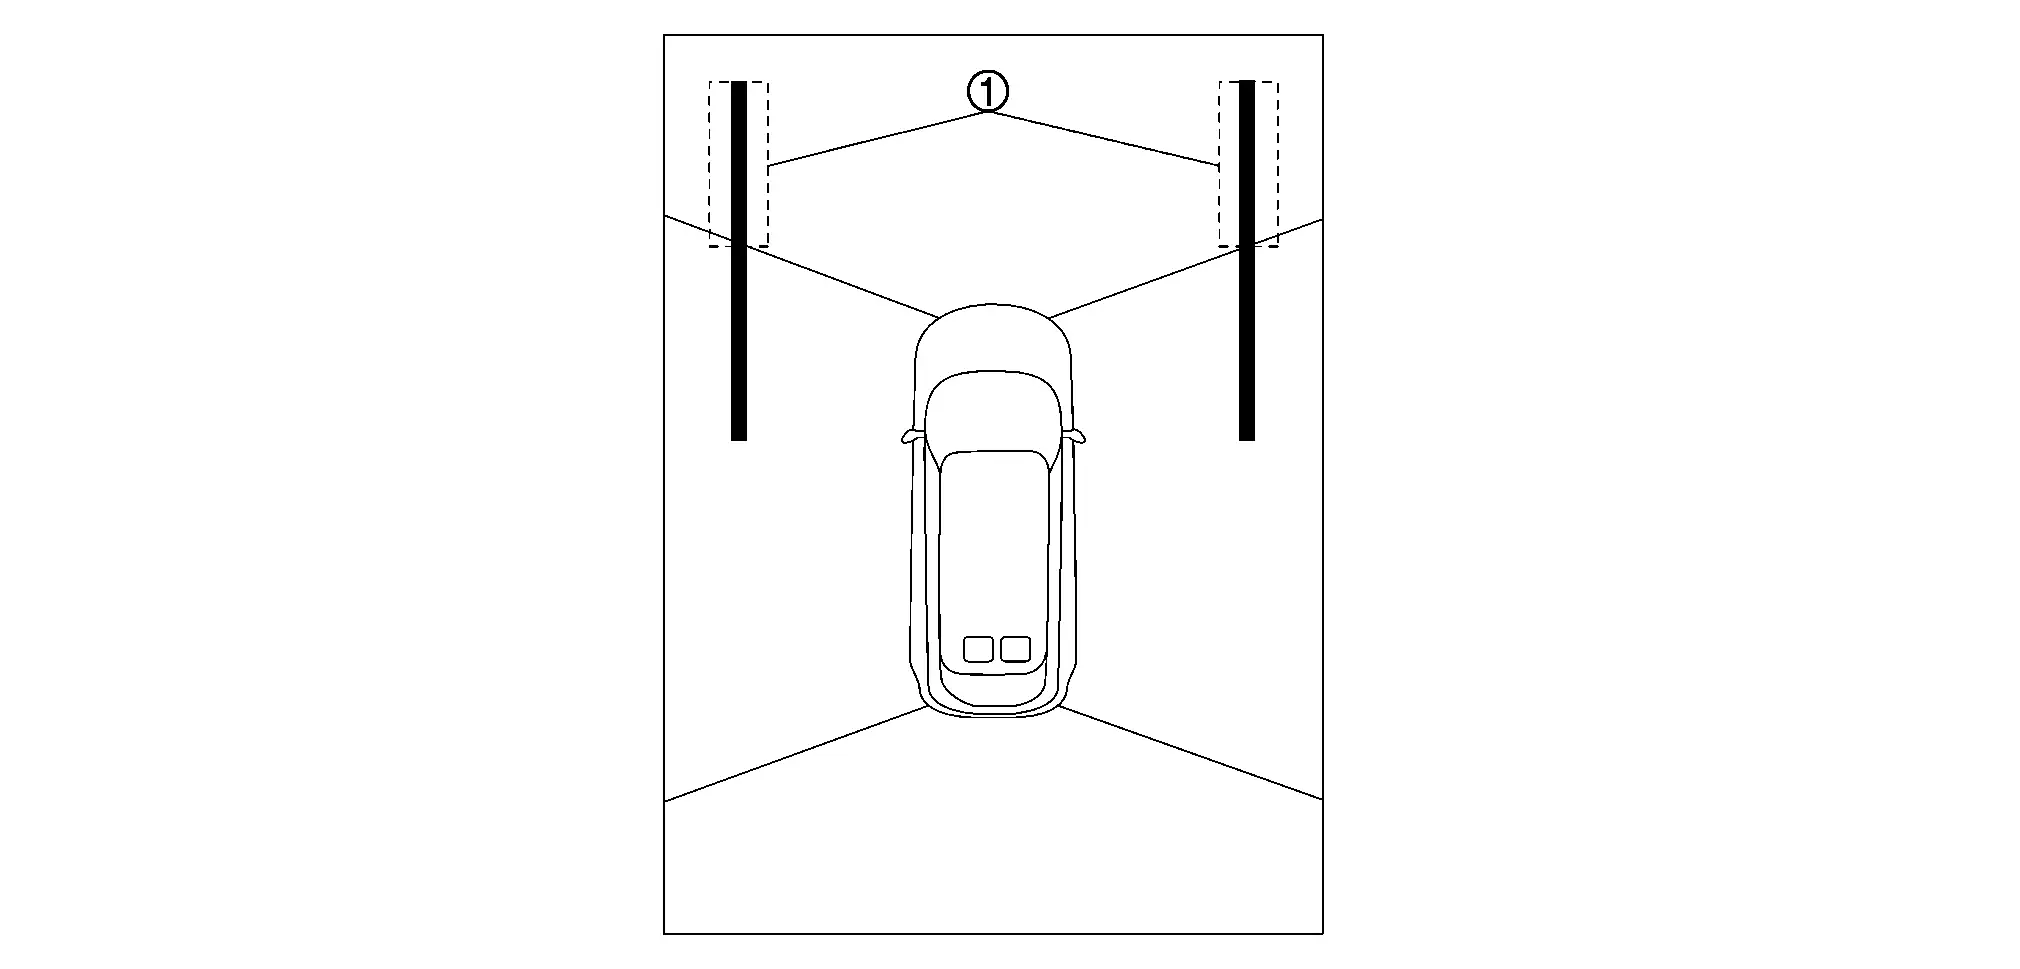
Is there a gap in the white lines?
YES>>Perform camera calibration. Refer to Work Procedure (WITHOUT ProPILOT ASSIST 2.1) or Work Procedure (WITH ProPILOT ASSIST 2.1).
NO>>Work End.
Other materials:
Maintenance requirement
Basic information
Some day-to-day and scheduled maintenance
is essential to keep your vehicle,
including the Nissan Rogue, in good mechanical condition and
maintain proper emissions and engine performance.
It is the owner's responsibility to make
sure that scheduled maintenance and
general mainten ...
Rear-facing child restraint installation using LATCH
For additional information, refer to all Warnings and Cautions in the ÔÇťChild safetyÔÇŁ and ÔÇťChild restraintsÔÇŁ sections before installing a child restraint.
Do not use the lower anchors if the combined weight of the child and the child restraint exceeds 65 lbs (29.5 kg). If the combined wei ...
Parking/parking on hills
WARNING
Do not park the vehicle over flammable
materials such as dry grass, paper
or rags.
Such materials may ignite and cause a fire.
Never leave the engine running while
the Nissan Rogue is unattended.
Do not leave children unattended in
the vehicle. They may accidentally
operate cont ...