Nissan Rogue (T33) 2021-Present Service Manual: Removal and Installation :: Rear Suspension Member
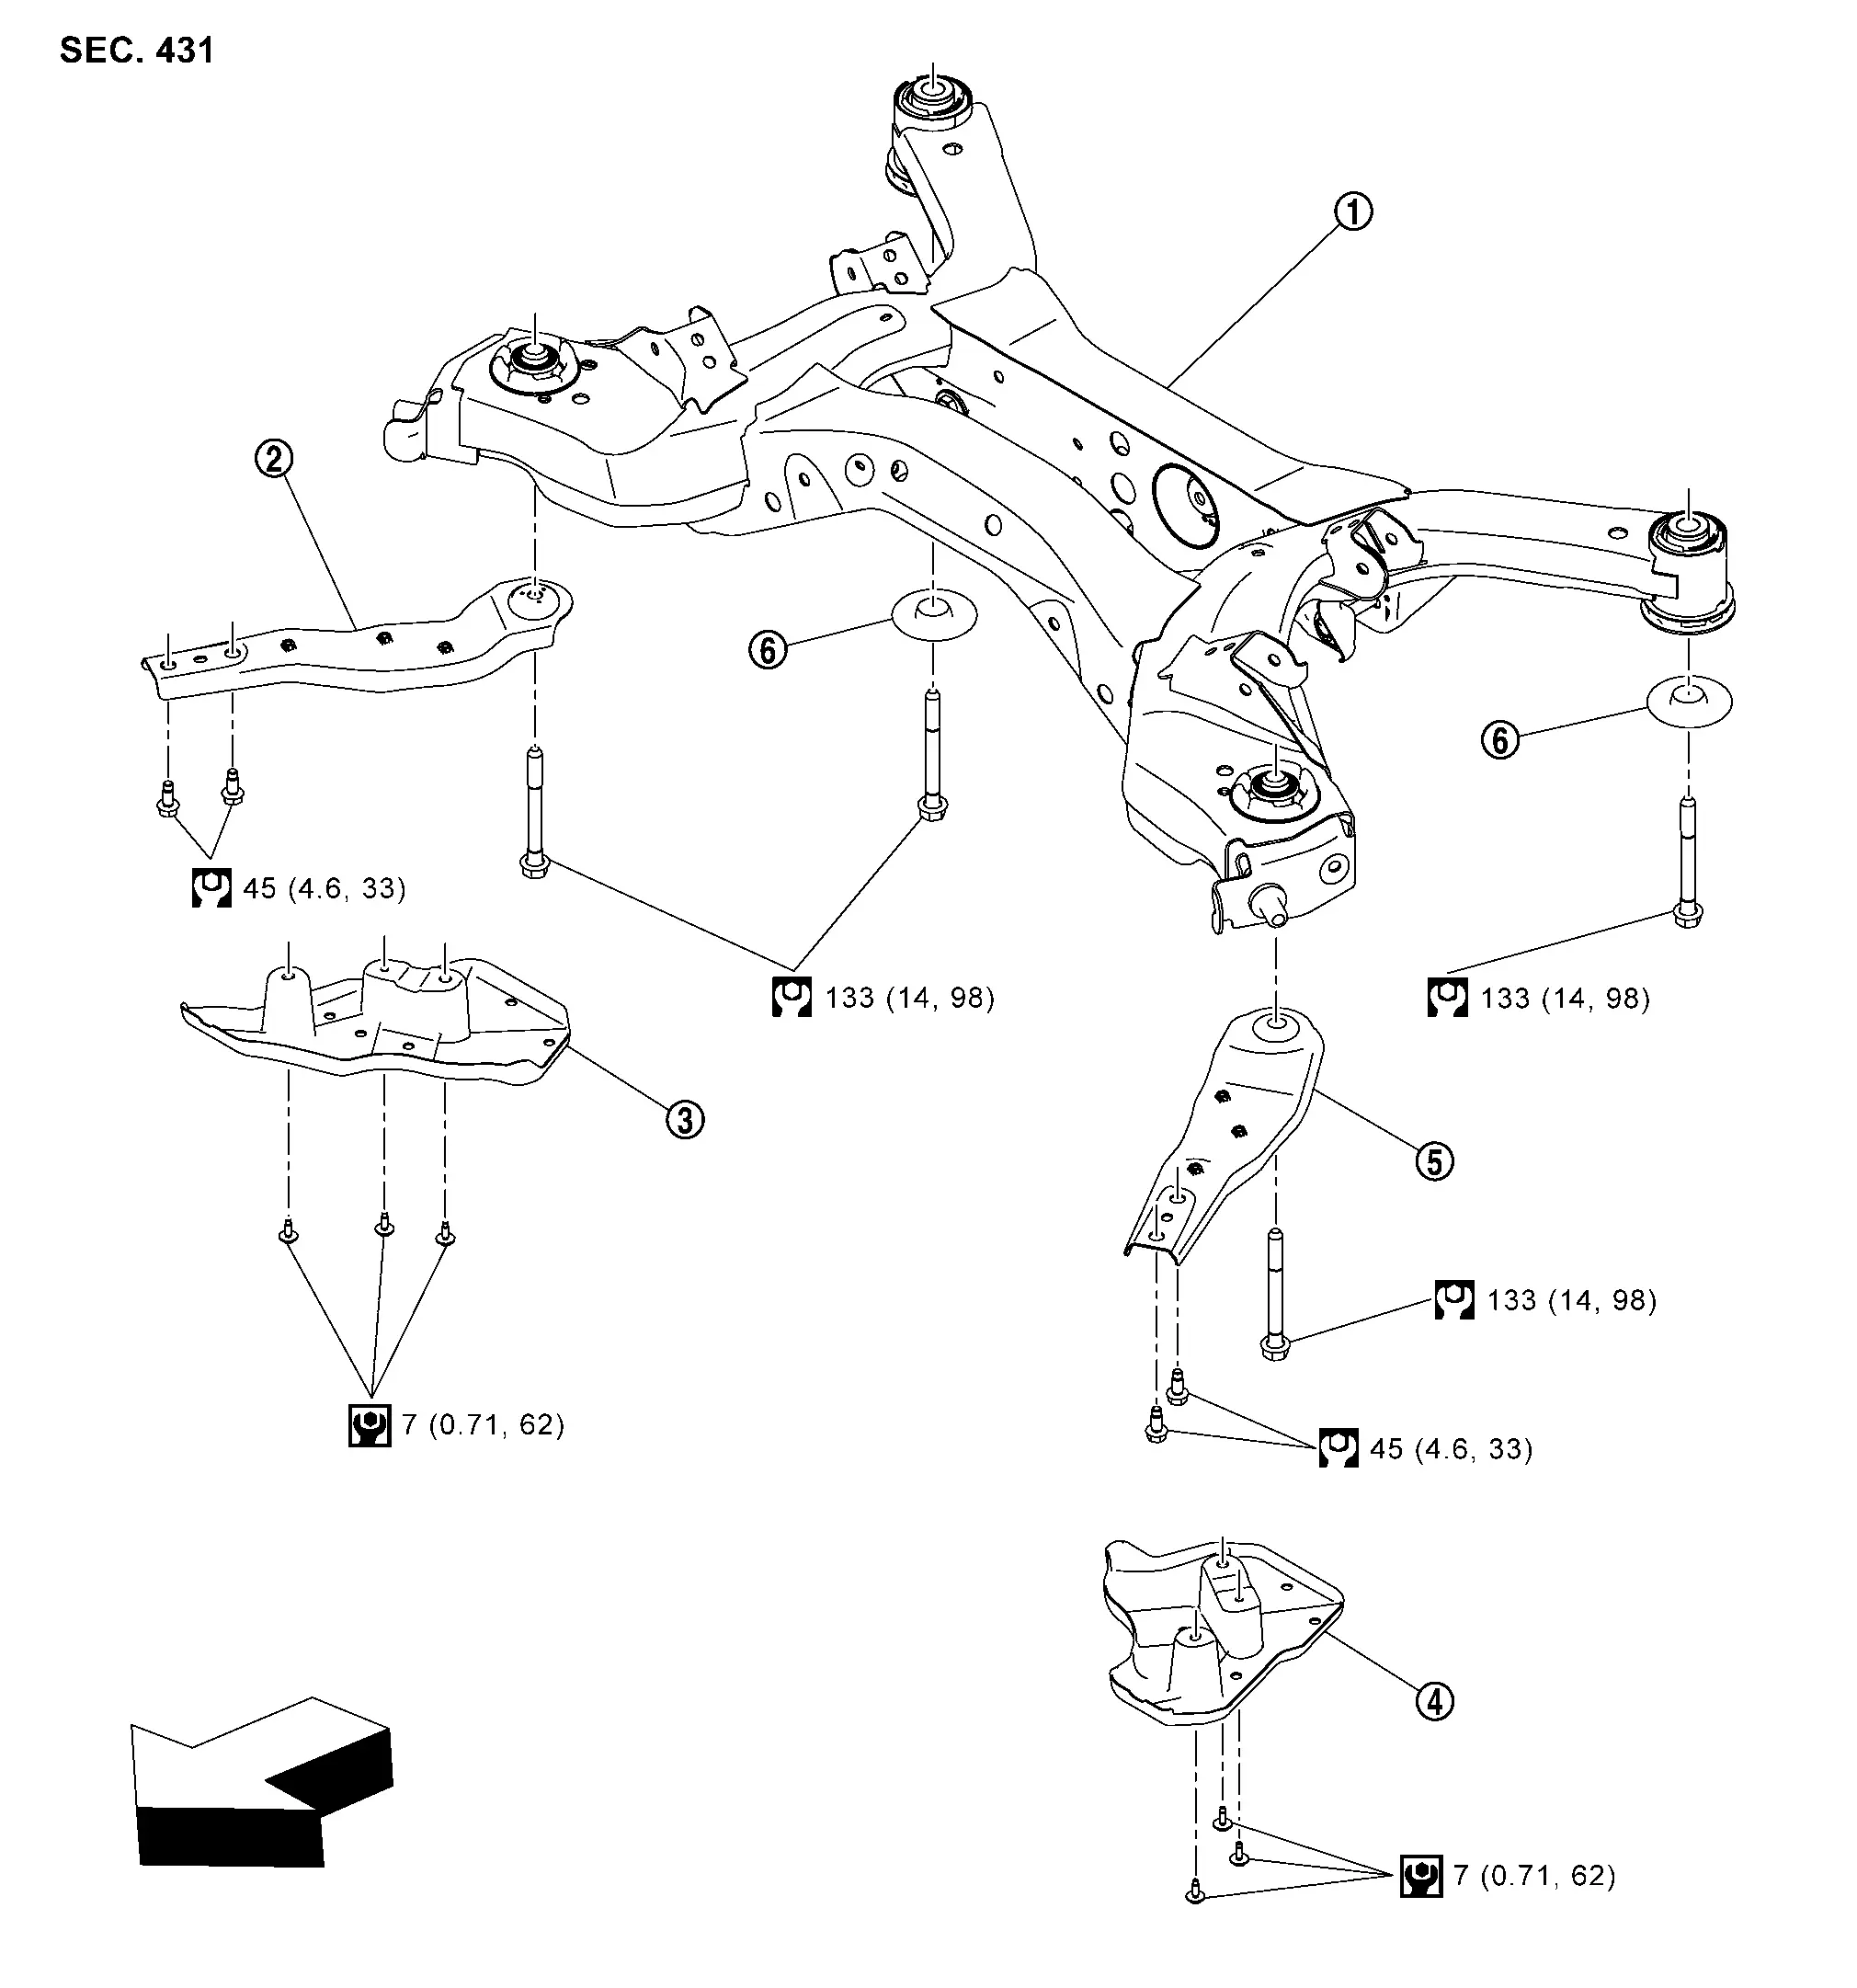
Exploded View
JAPAN PRODUCTION MODELS

 |
Rear suspension member |  |
Rear suspension member stay (right side) |  |
Rear suspension member stay protector (right side) |
 |
Rear suspension member stay protector (left side) |  |
Rear suspension member stay (left side) |  |
Rebound stopper |
| : Nissan Ariya Vehicle front | |||||
 |
: N·m (kg-m, ft-lb) | ||||
 |
: N·m (kg-m, in-lb) | ||||
NORTH AMERICA PRODUCTION MODELS
|
Rear suspension member | |
Rear suspension member stay (right side) | |
Rear suspension member stay protector (right side) |
|
Rear suspension member stay protector (left side) | |
Rear suspension member stay (left side) | |
Rebound stopper |
| : Nissan Ariya Vehicle front | |||||
|
: N·m (kg-m, ft-lb) | ||||
|
: N·m (kg-m, in-lb) | ||||
Removal and Installation
REMOVAL
Remove main muffler. Refer toRemoval and Installation.
Remove rear stabilizer. Refer to Removal and Installation.
Remove drive shaft (AWD). Refer to Removal and Installation.
Remove rear axle housing. Refer to Removal and Installation.
Remove rear final drive (AWD). Refer to Removal and Installation.
Remove harness clip.
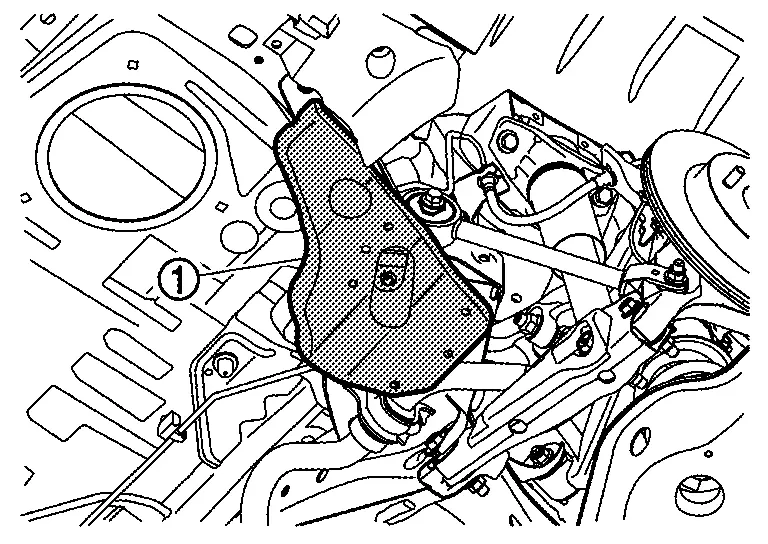
Remove suspension member stay protector .
Set jack rear suspension member.
CAUTION:
-
Check the stable condition when using a jack.
-
Never damage rear suspension member with a jack.
Remove suspension member stay.
Remove rear suspension member mounting bolt.
Slowly lower jack, remove rear suspension member with lower link and upper link.
CAUTION:
Operate while checking that jack supporting status is stable.
Perform inspection after removal. Refer to Inspection.
INSTALLATION
Note the following, and install in the reverse order of the removal.
-
Perform the final tightening of each of parts under unladen conditions, which were removed when removing rear suspension assembly.
-
Perform inspection after installation. Refer to Inspection.
Inspection
INSPECTION AFTER REMOVAL
Check rear suspension arm and bushing for deformation, cracks, or any other damage. Replace it if necessary.
INSPECTION AFTER INSTALLATION
Check wheel alignment. Refer to Inspection.
Other materials:
P0441 Evap Control System
DTC Description
DTC DETECTION LOGICIn this evaporative emission (EVAP)
control system, purge flow occurs during non-closed throttle conditions.
Purge volume is related to air intake volume. Under normal purge
conditions (non-closed throttle), the EVAP canister purge volume control
solenoid ...
Component Parts
Engine Control System
Component Parts Location
ENGINE ROOM COMPARTMENT
Right front of Nissan Ariya vehicle
Left front of vehicle
Nissan Ariya Vehicle front
IPDM E/R
ECM
Admission valve
Turbocharger boost senso ...
Dtc/circuit Diagnosis. B203d-14 Inside Antenna
DTC Description
DTC DETECTION LOGIC DTC No.
CONSULT screen items
(Trouble diagnosis content) DTC detecting condition
B203D-14
Inside antenna
(Inside antenna)
Diagnosis condition
Work supports “Inside/outside antenna diagnosis”: activated
Signal (terminal)
Inside key an ...