Nissan Rogue (T33) 2021-Present Service Manual: Removal and Installation :: Rear Door Glass
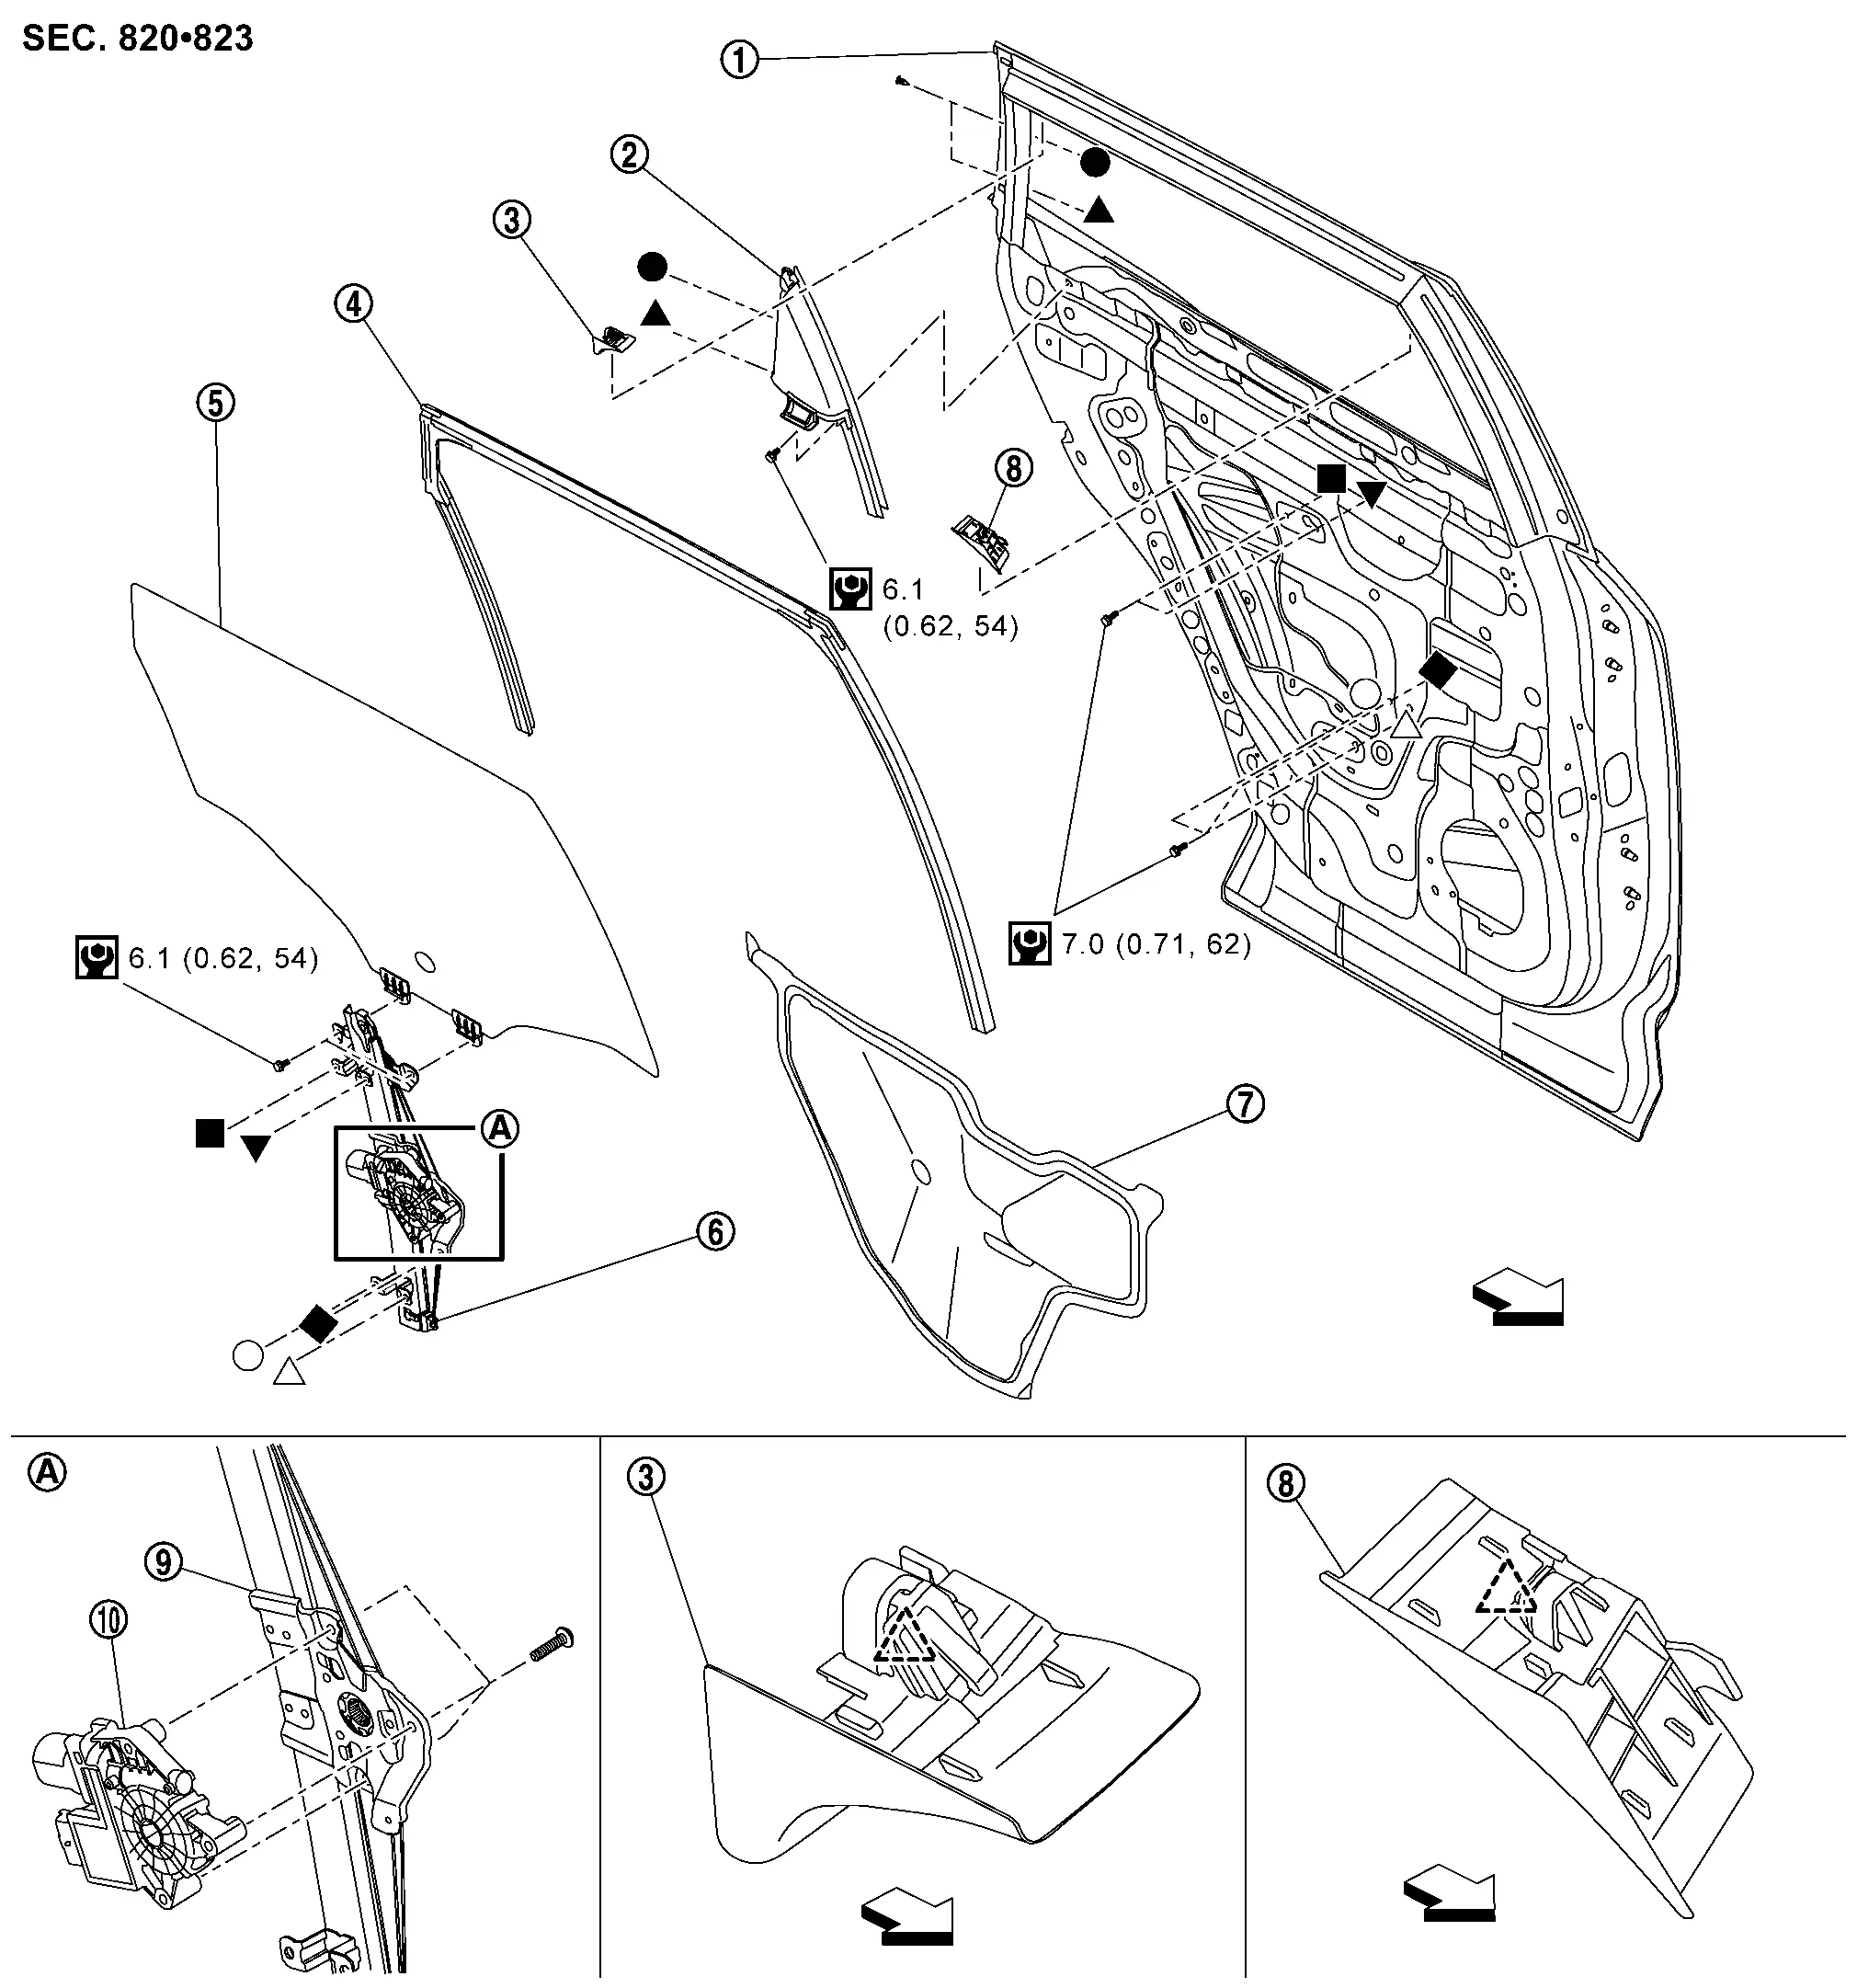
Exploded View
 |
Rear door panel |  |
Rear door corner piece |  |
Rear door corner cover rear |
 |
Rear door glass run |  |
Rear door glass |  |
Rear door regulator assembly |
 |
Rear door sealing screen |  |
Rear door corner cover front |  |
Rear door regulator |
 |
Rear door power window motor | ||||
 |
: Pawl | ||||
| : Nissan Ariya Vehicle front | |||||
 |
: N┬Ęm (kg-m, in-lb) | ||||
 , ,  , ,  , ,  , ,  , ,  , ,  : Indicates that the part is connected at points with same symbol in actual Nissan Ariya vehicle. : Indicates that the part is connected at points with same symbol in actual Nissan Ariya vehicle. |
|||||
Rear Door Glass
Removal and Installation
REMOVAL
CAUTION:
Never damage rear door glass and rear door panel.
Remove rear door finisher. Refer to Removal and Installation.
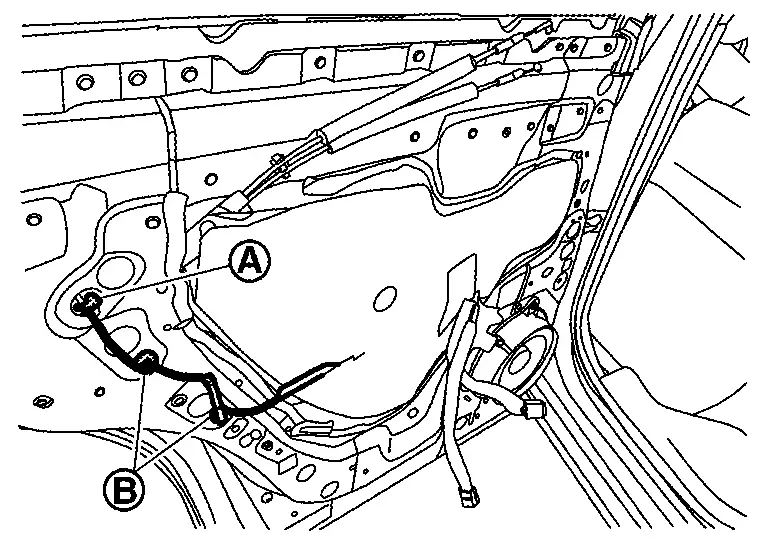
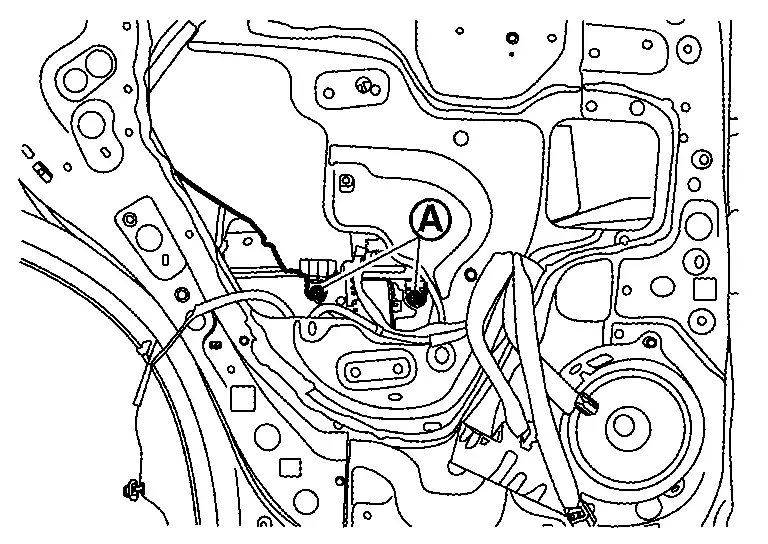
Remove rear door sealing screen.Disconnect door harness connector  , and then disengage harness fixing clips
  .
.
.
CAUTION:
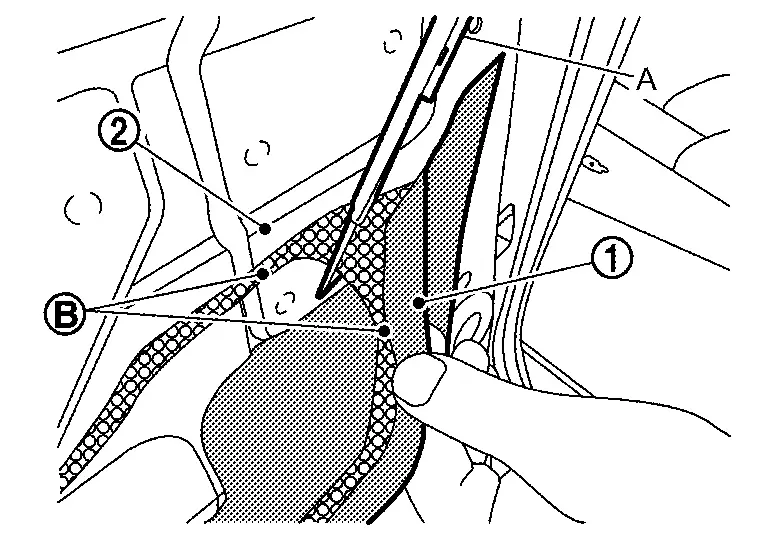
If reuse rear door sealing screen, cut the butyl-tape by using a cutter knife (A) that to remain both rear door panel  and sealing screen .
Remove rear door glass run. Refer to Removal and Installation.
Remove rear door corner piece. Refer to Removal and Installation.
Reconnect power window switch connector.
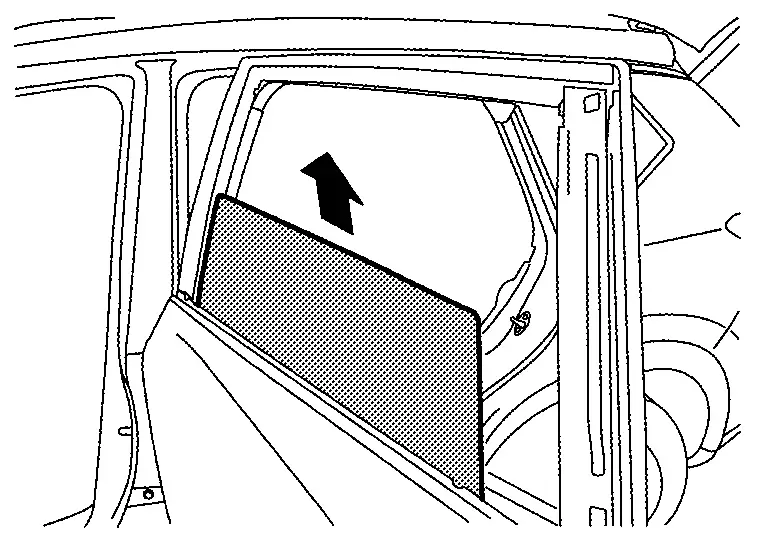
Operate power window switch to raise or lower rear door glass until rear door glass mounting bolts can be seen, and then remove rear door glass mounting bolts.
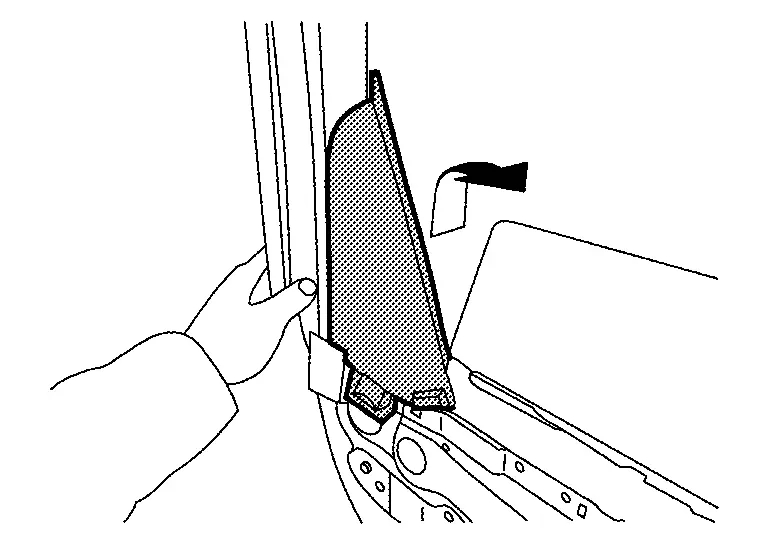
Hold securely rear door glass and pull it out of rear door panel to remove rear door glass.
CAUTION:
Never damage rear door glass and rear door panel.
INSTALLATION
Note the following item, and then install in the reverse order of removal.
CAUTION:
-
Tighten rear door glass mounting bolts to the specified torque. Refer to Exploded View.
-
After installing rear door glass, perform inspection and adjustment. Refer to Inspection and Adjustment.
Rear Door Corner Piece
Removal and Installation
REMOVAL
CAUTION:
Never damage rear door glass and rear door panel.
Fully open rear door glass.
Remove rear door inside seal. Refer to Removal and Installation.
Remove rear door glass run. Refer to Removal and Installation.
Remove rear door sash cover rear. Refer to Removal and Installation.
Remove rear door corner piece mounting bolt .
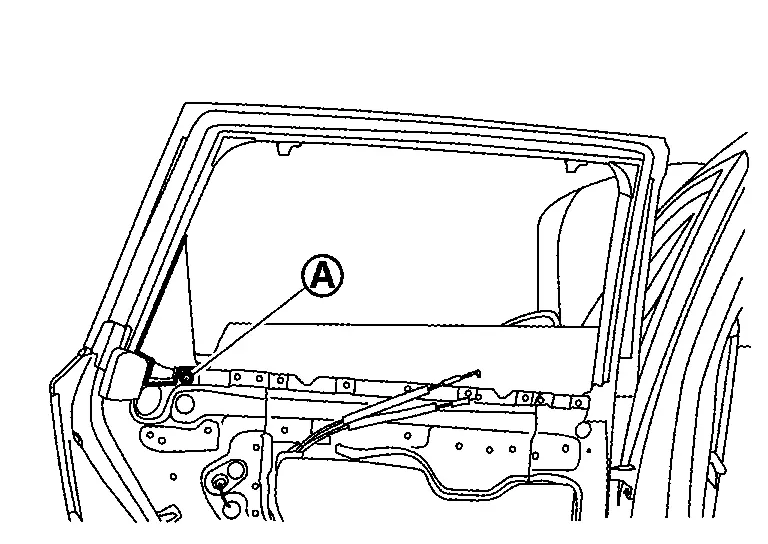
Turn over rear door weather-strip, and then remove rear door corner piece fixing screws .
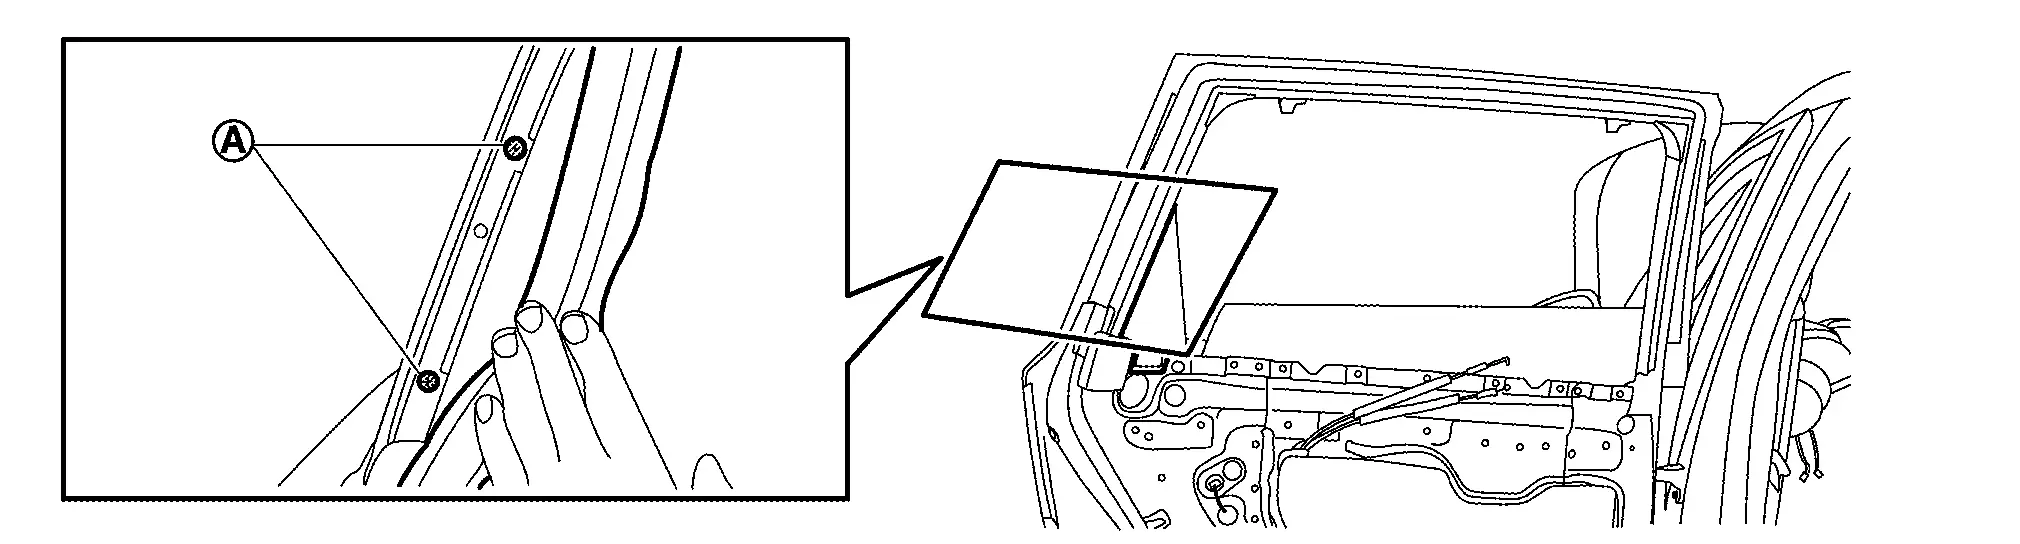
Remove rear door corner piece.
INSTALLATION
Note the following item, and then install in the reverse order of removal.
CAUTION:
Tighten rear door corner piece fixing bolt the specified torque. Refer to Exploded View.
Rear Door Glass Run
Removal and Installation
REMOVAL
CAUTION:
Never excessively pull rear door glass run.
Fully open rear door glass.
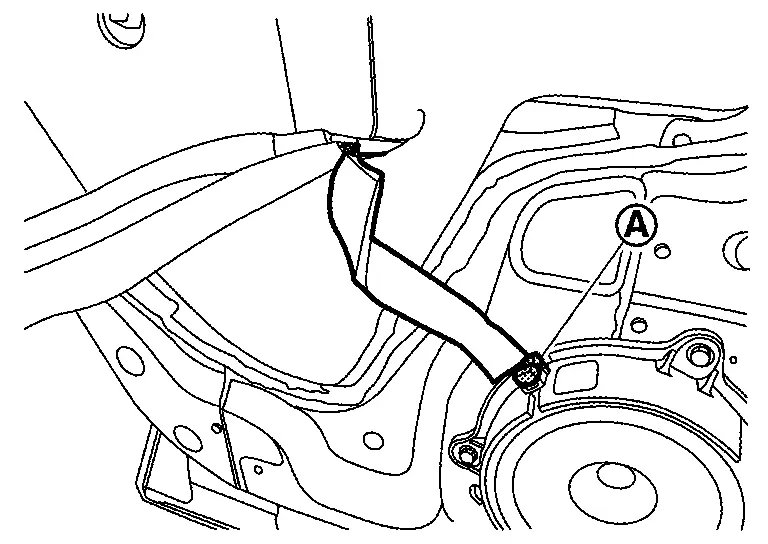
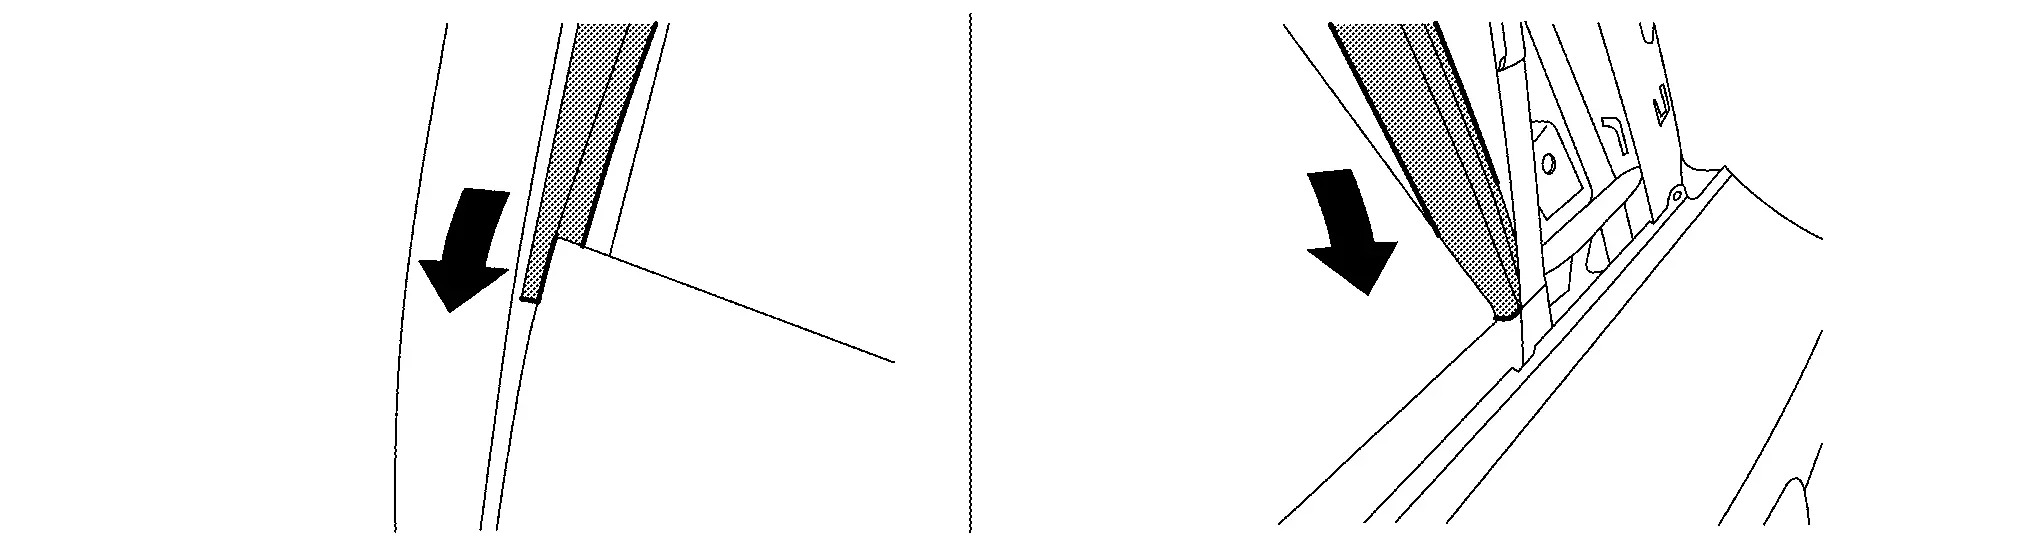
Disengage rear door glass run from rear door panel according to numerical order 1ŌåÆ3 indicated by arrows as shown in figure, and then remove rear door glass run.
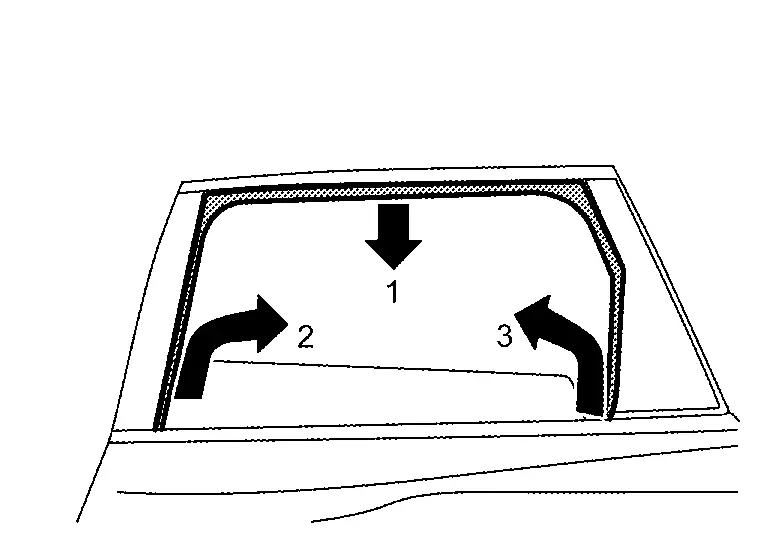
CAUTION:
Rear door glass run should be pulled out slowly.
INSTALLATION
Note the following item, and then install in the reverse order of removal.
CAUTION:
When installing rear door glass run between rear door panel/rear door corner piece and rear door glass, make sure engage glass run sash of rear door panel.
Inspection and Adjustment
FITTING INSPECTION
-
Check that the glass is fit securely into the sash groove.
-
Lower the glass slightly [approximately 10 to 20 mm (0.394 to 0.787 in)], and check that the clearance to the sash is parallel. Loosen the regulator mounting bolts, guide rail mounting bolts, and glass and guide rail mounting bolts to correct the glass position if the clearance between the glass and sash is not parallel.
Other materials:
Symptom Diagnosis. Engine Can Not Start
Description
Engine does not start when push-button ignition switch is pressed.SYMPTOM TABLE (BOTH INTELLIGENT KEYS HAVE THE SAME SYMPTOMS) Door lock operation (remote keyless entry)
Door lock operation (request switch of front/rear/back door) or
trunk/back door open operation (opener switch of ...
Multi Remote Ent
CONSULT Function (BCM - MULTI REMOTE ENT)
DATA MONITORNOTE:
The following table includes information (items)
inapplicable to this Nissan Ariya vehicle. For information (items)
applicable to this vehicle, refer to CONSULT display items.
Monitor Item Condition
Stop/start switch
[On/Off] ...
Commande de feux de d├®tresse
Appuyez sur cette commande pour signaler aux autres usagers que vous devez vous arr├¬ter ou stationner en urgence. Tous les clignotants du Nissan Rogue fonctionnent alors simultan├®ment.
AVERTISSEMENT
En cas dŌĆÖarr├¬t dŌĆÖurgence, garez le v├®hicule le plus loin possible de la circulatio ...