Nissan Rogue (T33) 2021-Present Service Manual: Removal and Installation :: Rear Door Regulator
Exploded View
Rear door regulator exploded view, refer to Exploded View.
Removal and Installation
REMOVAL
CAUTION:
Never damage rear door glass and rear door panel.
Remove rear door glass. Refer to Removal and Installation.
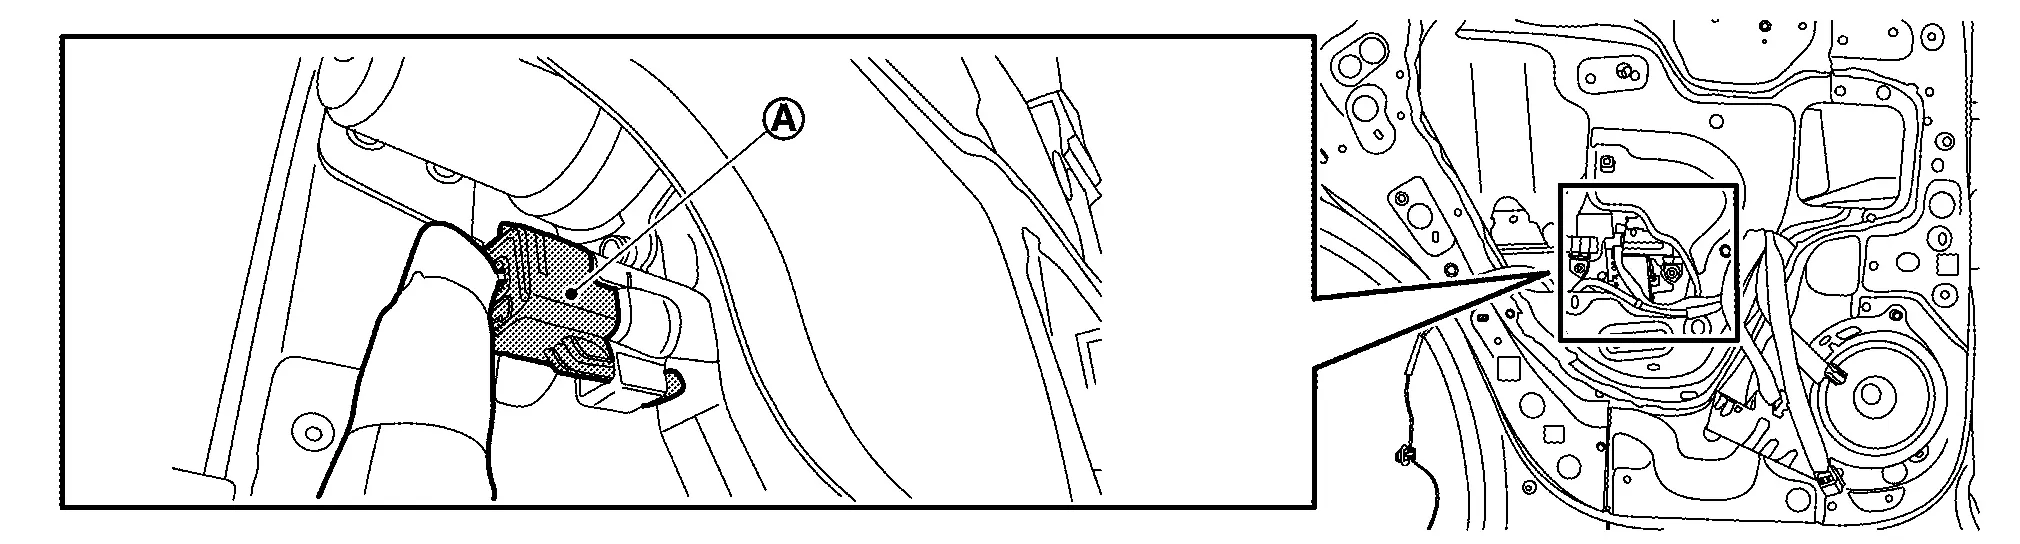
Disconnect rear door power window motor harness connector  .
.
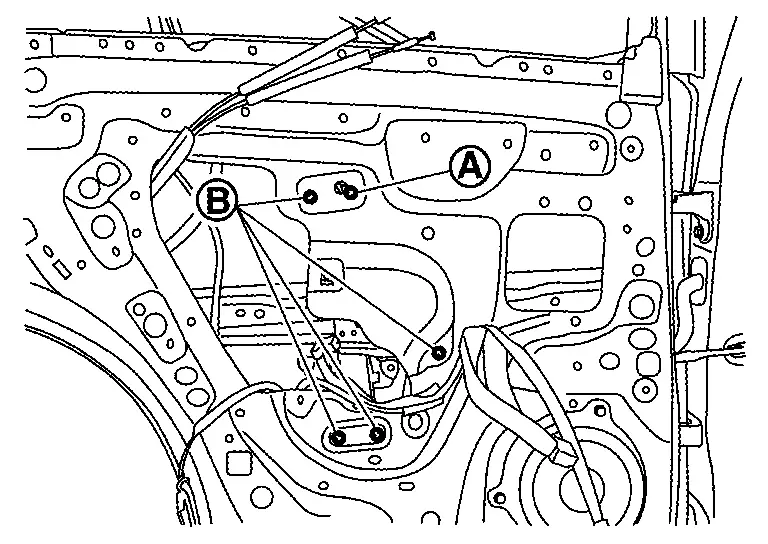
Loosen rear door regulator assembly mounting bolt , and then remove rear door regulator assembly mounting bolts  .
.
Remove rear door regulator assembly from open part of rear door panel.
INSTALLATION
Note the following items, and then install in the reverse order of removal.
CAUTION:
-
Check rear door regulator parts for lubrication. If necessary, apply body grease.
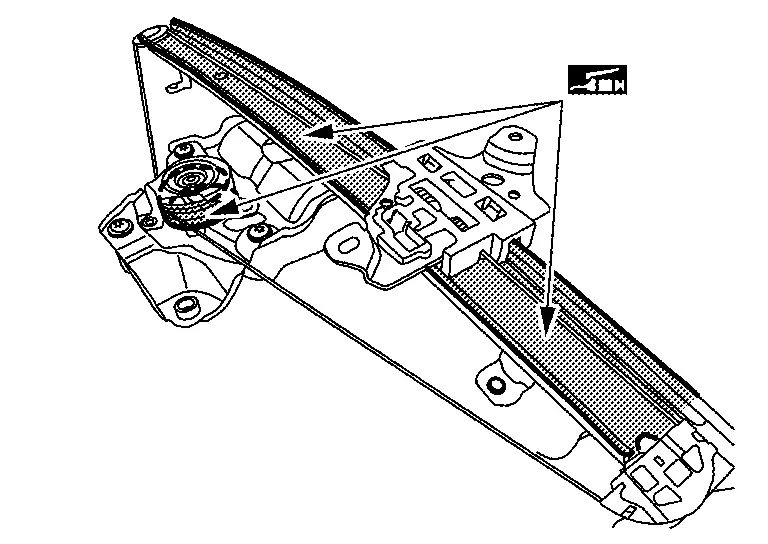

: Body grease -
Tighten rear door regulator mounting bolts to the specified torque. Refer to Exploded View.
-
After installing rear door regulator, perform inspection and adjustment. Refer to Inspection and Adjustment.
Disassembly and Assembly
DISASSEMBLY
Remove rear door regulator assembly. Refer to Removal and Installation.
Remove rear door power window motor mounting bolts, and then remove rear door power window motor.
ASSEMBLY
Assemble in the reverse order of disassembly.
Inspection and Adjustment
FITTING INSPECTION
-
Check that the glass is fit securely into the sash groove.
-
Lower the glass slightly [approximately 10 to 20 mm (0.394 to 0.787 in)], and check that the clearance to the sash is parallel. Loosen the regulator mounting bolts, guide rail mounting bolts, and glass and guide rail mounting bolts to correct the glass position if the clearance between the glass and sash is not parallel.
Other materials:
Adas Control Unit. Ecu Diagnosis Information. Adas Control Unit 2
Adas Control Unit 2
Without Propilot Assist 2.1
Reference Value
VALUES ON THE DIAGNOSIS TOOLNOTE:
The following table includes information (items)
inapplicable to this Nissan Ariya vehicle. For information (items)
applicable to this vehicle, refer to CONSULT display items.
Monitor item ...
Fuel Injector and Fuel Tube
Exploded View
Fuel rail pressure sensor
High pressure fuel rail insulator
High pressure fuel rail
O-ring (black)
Support disc
Fuel injector
Decoupling element
Valve seat
Retaining ring spring
Holding down appliance
Stud bolt
...
Type B. Precaution. Precautions
Precautions
Precaution for Supplemental Restraint System (SRS) "AIR BAG" and "SEAT BELT PRE-TENSIONER"
The Supplemental Restraint System such as “AIR BAG� and “SEAT BELT
PRE-TENSIONER�, used along with a front seat belt, helps to reduce the
risk or severity of injury to the driver and ...