Nissan Rogue (T33) 2021-Present Service Manual: Removal and Installation :: Front Door Regulator
Exploded View
For exploded view of front door glass regulator, refer to Exploded View.
Removal and Installation
REMOVAL
CAUTION:
Never damage front door glass and front door panel.
Remove front door glass. Refer to Removal and Installation.
Disengage fixing portion using a remover tool (A) according to numerical order 1→2 as shown in figure, and then disconnect power window motor harness connector.
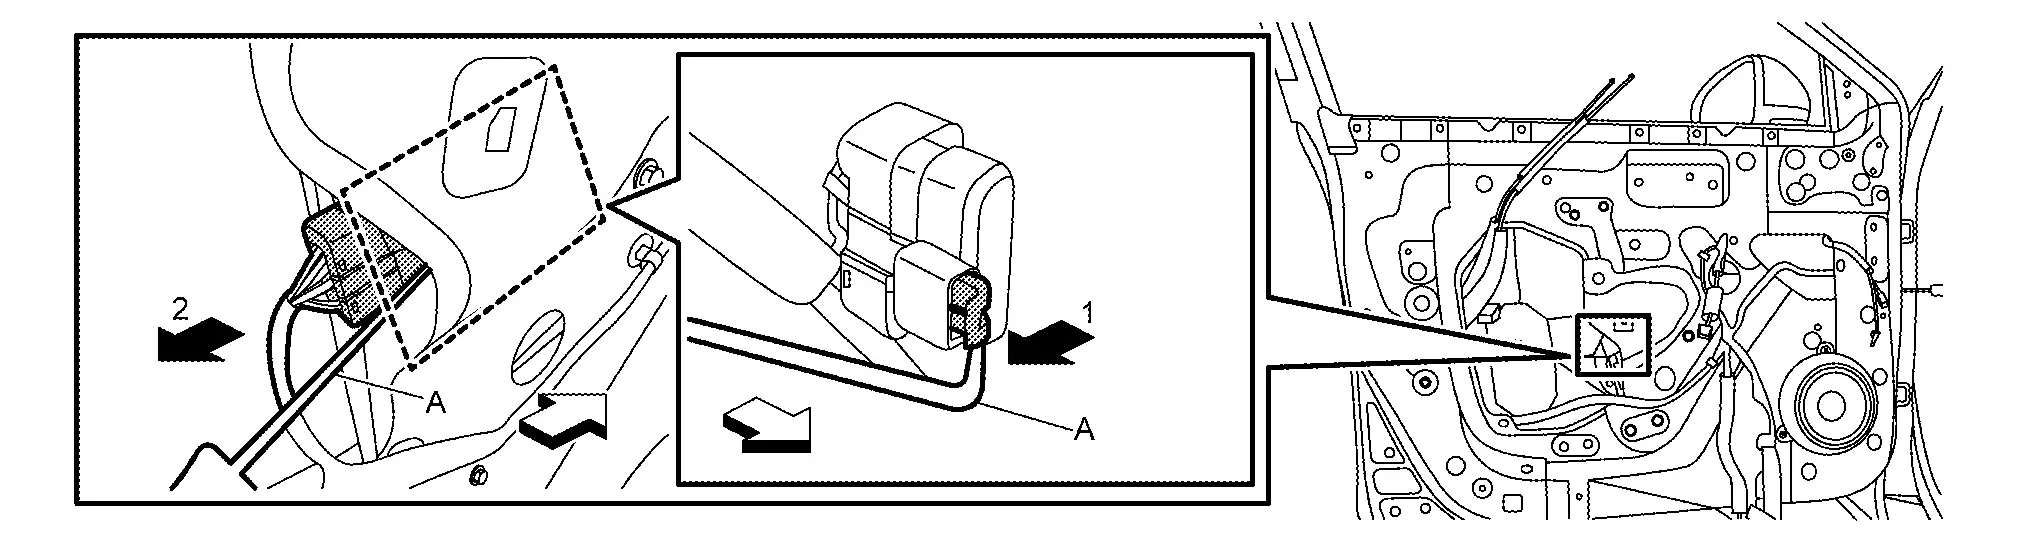
| : Nissan Ariya Vehicle front |
Loosen front door regulator assembly mounting bolt  , and then remove front door regulator assembly mounting bolts
  .
.
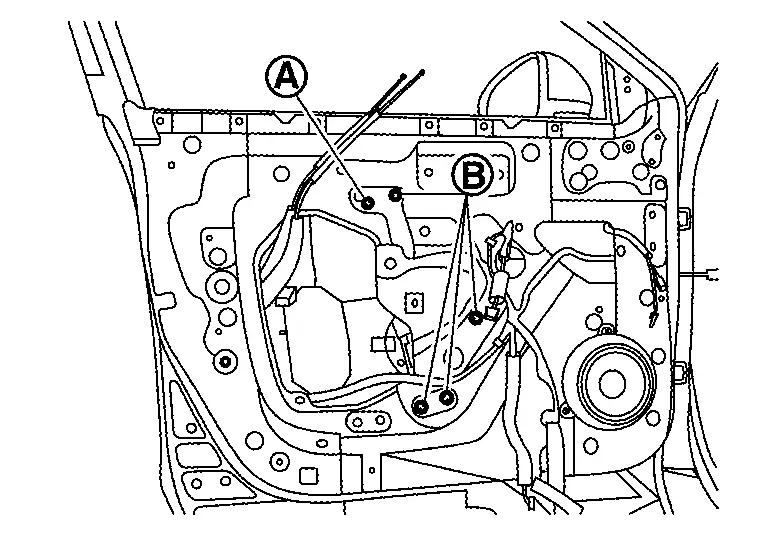
Remove front door regulator assembly from open part of front door panel.
INSTALLATION
Note the following items, and then install in the reverse order of removal.
CAUTION:
-
Check front door regulator parts for lubrication. If necessary, apply body grease.
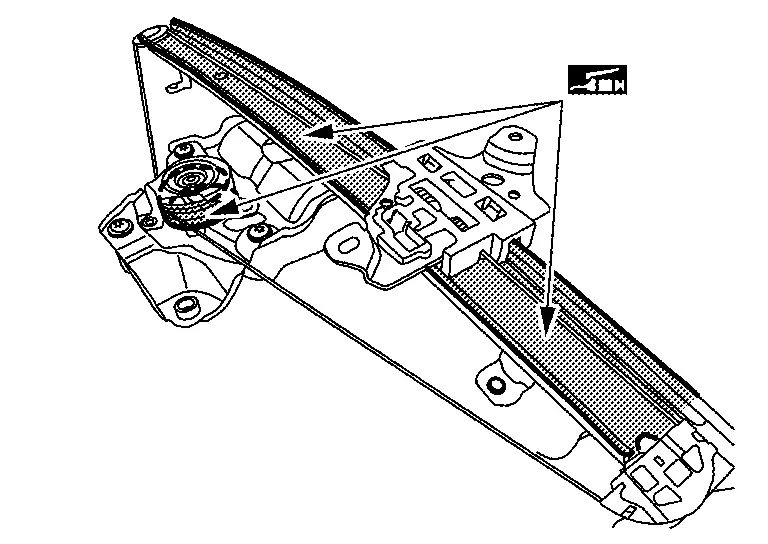

: Body grease -
Tighten front door regulator mounting bolts to the specified torque. Refer to Exploded View.
-
After installing front door glass, perform the inspection and adjustment. Refer to Inspection and Adjustment.
Disassembly and Assembly
DISASSEMBLY
Remove front door regulator assembly. Refer to Removal and Installation.
Remove front door power window motor mounting bolts, and then remove front door power window motor.
ASSEMBLY
Assemble in the reverse order of disassembly.
Inspection and Adjustment
SYSTEM INITIALIZATION (DRIVER SEAT)
-
Description. Refer to Description.
-
Work procedure. Refer to Work Procedure.
CHECK ANTI-PINCH FUNCTION (DRIVER SEAT)
-
Description. Refer to Description.
-
Work procedure. Refer to Work Procedure.
FITTING INSPECTION
-
Check that the glass is fit securely into the sash groove.
-
Lower the glass slightly [approximately 10 to 20 mm (0.394 to 0.787 in)], and check that the clearance to the sash is parallel. Loosen the regulator mounting bolts, guide rail mounting bolts, and glass and guide rail mounting bolts to correct the glass position if the clearance between the glass and sash is not parallel.
Other materials:
Symptom Diagnosis. Squeak and Rattle Trouble Diagnoses
Work Flow
CUSTOMER INTERVIEWInterview
the customer if possible, to determine the conditions that exist when
the noise occurs. Use the Diagnostic Worksheet during the interview to
document the facts and conditions when the noise occurs and any of
customer's comments. Refer to Diagnostic Work ...
B120e-55 Ipdm E/r
DTC Description
DTC DETECTION LOGIC DTC No.
CONSULT screen items
(Trouble diagnosis content) DTC detection condition
B120E-55
IPDM E/R
(Intelligent power distribution module engine room)
[NOT CONFIGURED]
Diagnosis condition
When ignition switch is ON
Signal (terminal)
â ...
System Description. Component Parts
Body Control System
Component Parts Location
A.
Underneath instrument panel LH (view with lower instrument panel finisher removed)
No. Component Function
1.
BCM
Refer to System Description.
Power Consumption Control System
Component Parts Location
No. Component Functio ...