Nissan Rogue (T33) 2021-Present Service Manual: Removal and Installation :: Front Door Glass
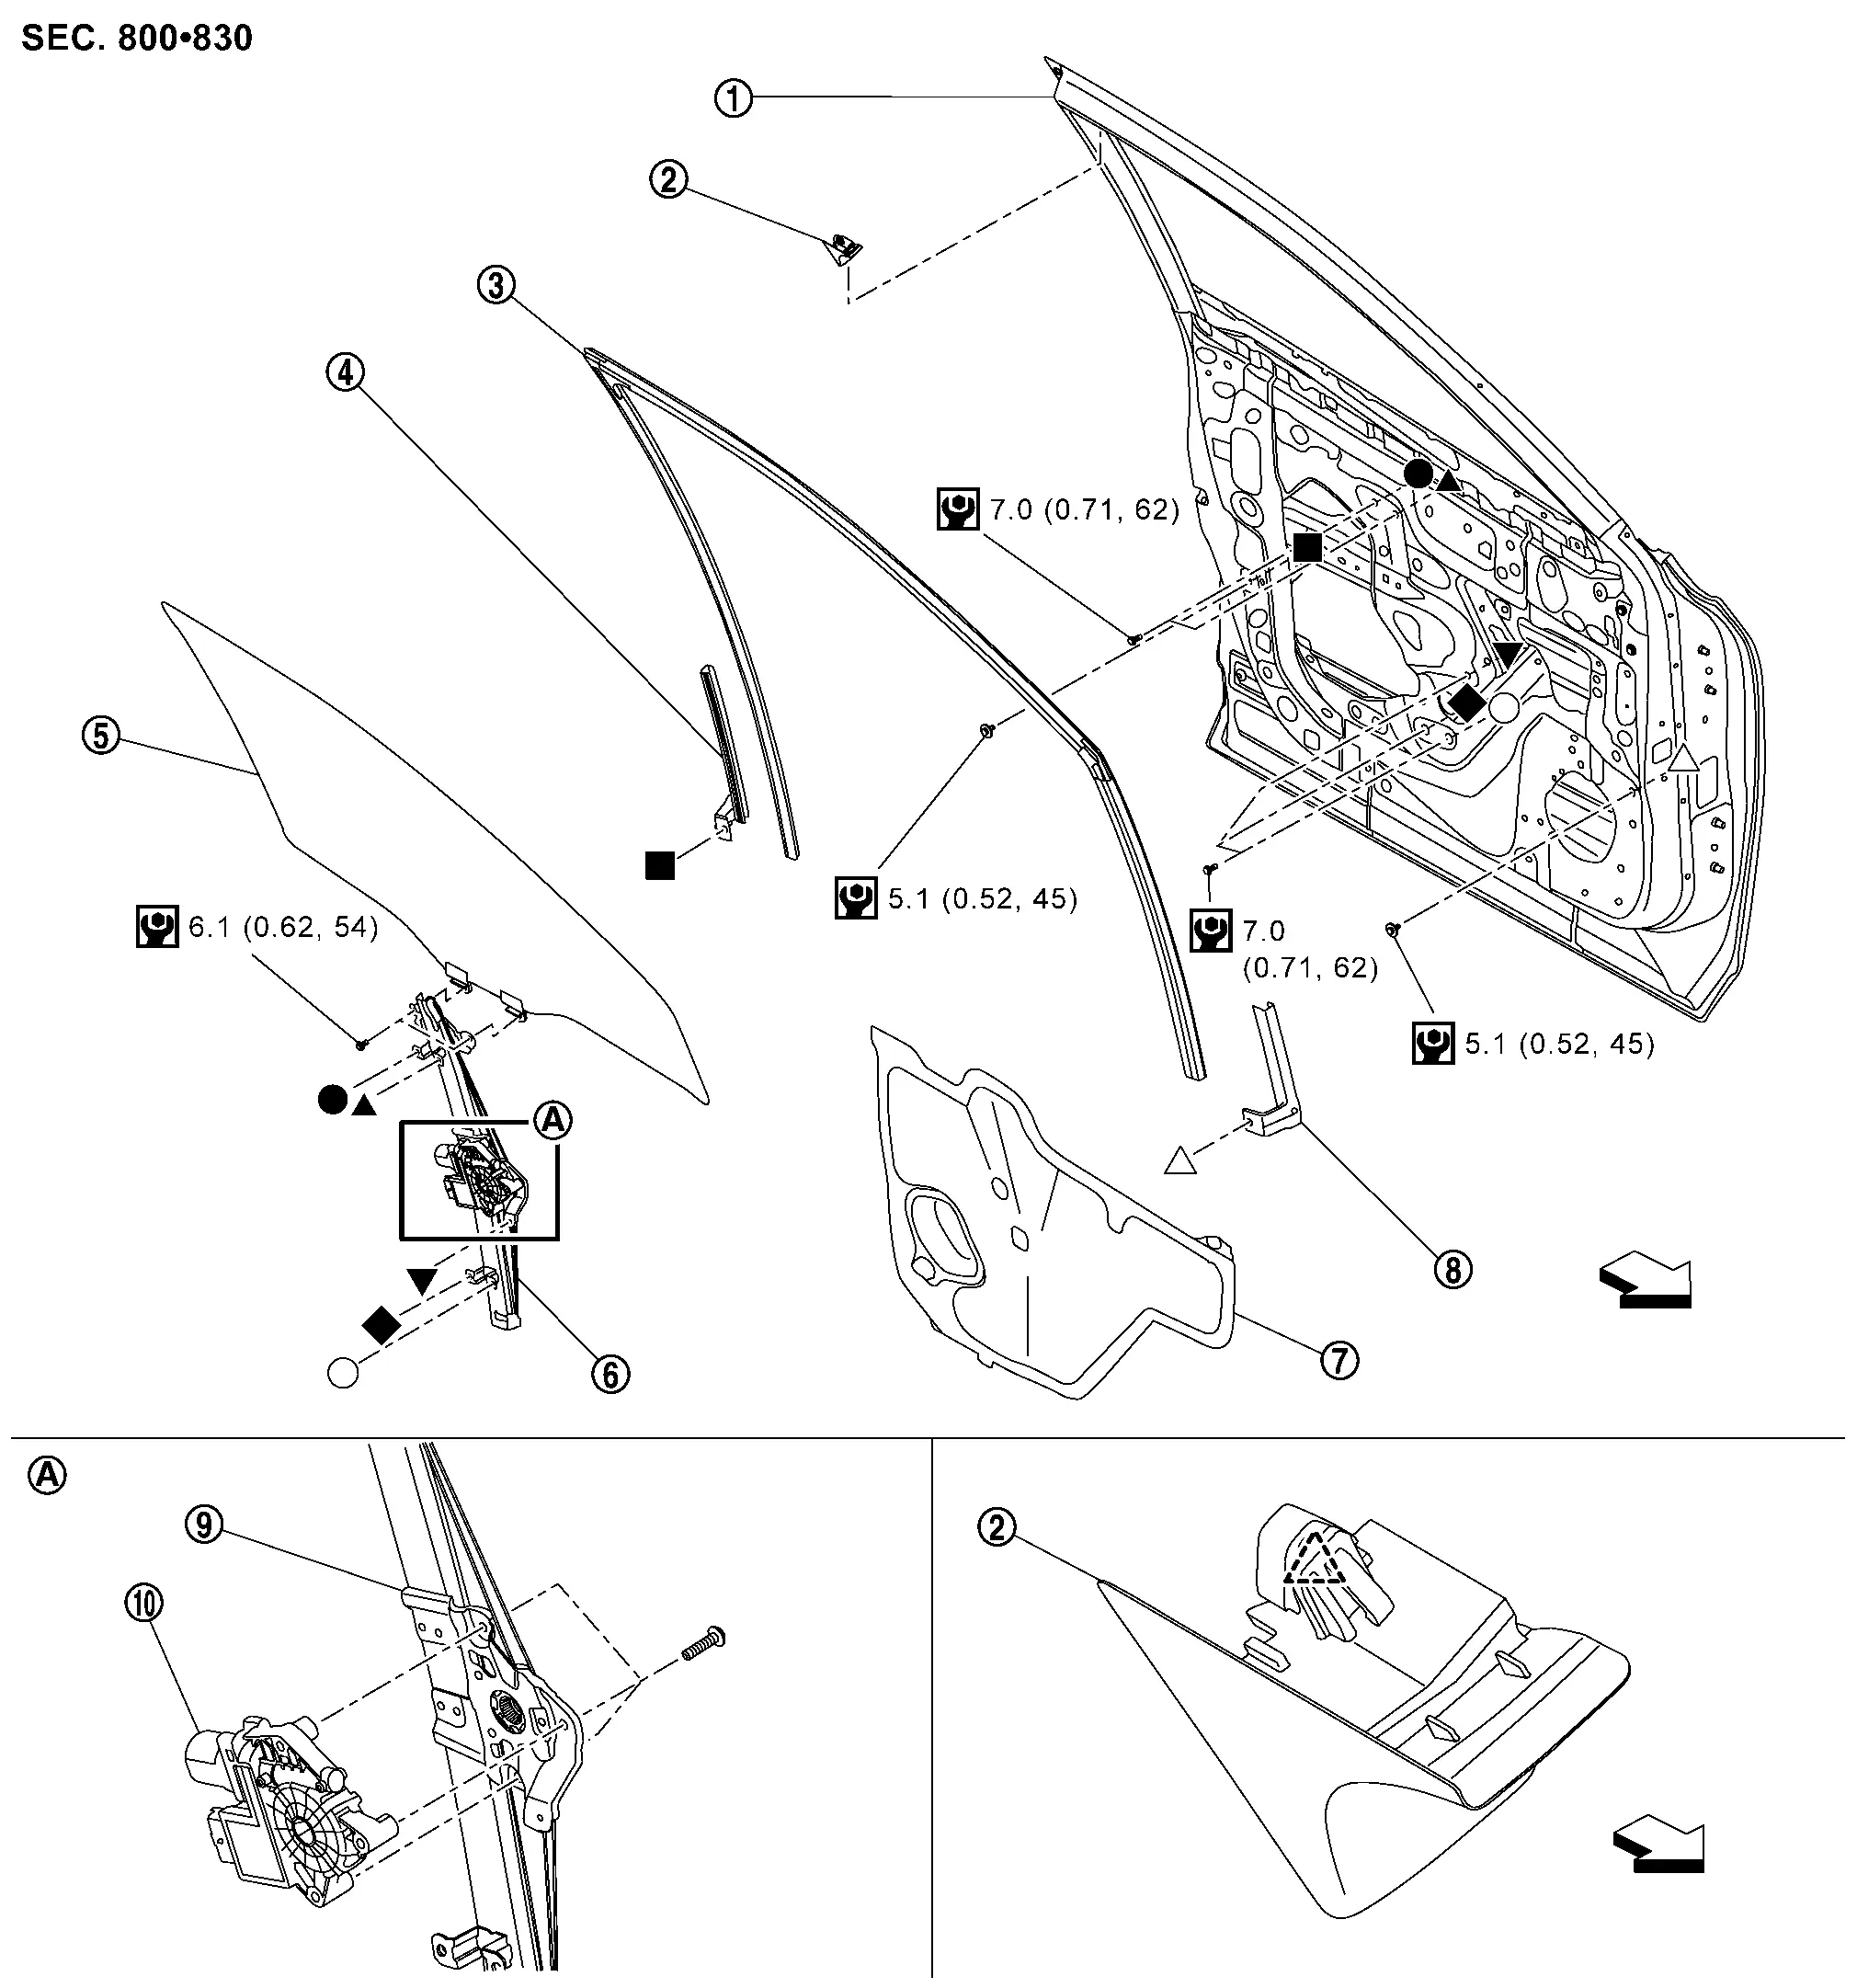
Exploded View
 |
Front door panel |  |
Front door corner cover |  |
Front door glass run |
 |
Front door glass run lower sash |  |
Front door glass |  |
Front door regulator assembly |
 |
Front door sealing screen |  |
Front door lower sash |  |
Front door regulator |
 |
Front door power window motor | ||||
 |
: Pawl | ||||
| : Nissan Ariya Vehicle front | |||||
 |
: N·m (kg-m, in-lb) | ||||
 , ,  , ,  , ,  , ,  , ,  , ,  ,: Indicates that the part is connected at points with same symbol in actual Nissan Ariya vehicle. ,: Indicates that the part is connected at points with same symbol in actual Nissan Ariya vehicle. |
|||||
Front Door Glass
Removal and Installation
REMOVAL
CAUTION:
Never damage front door glass and front door panel.
Remove front door finisher. Refer to Removal and Installation.
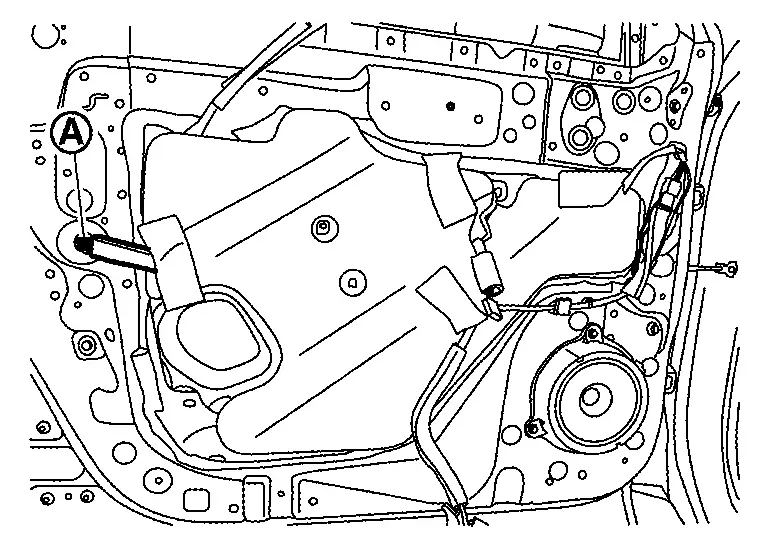
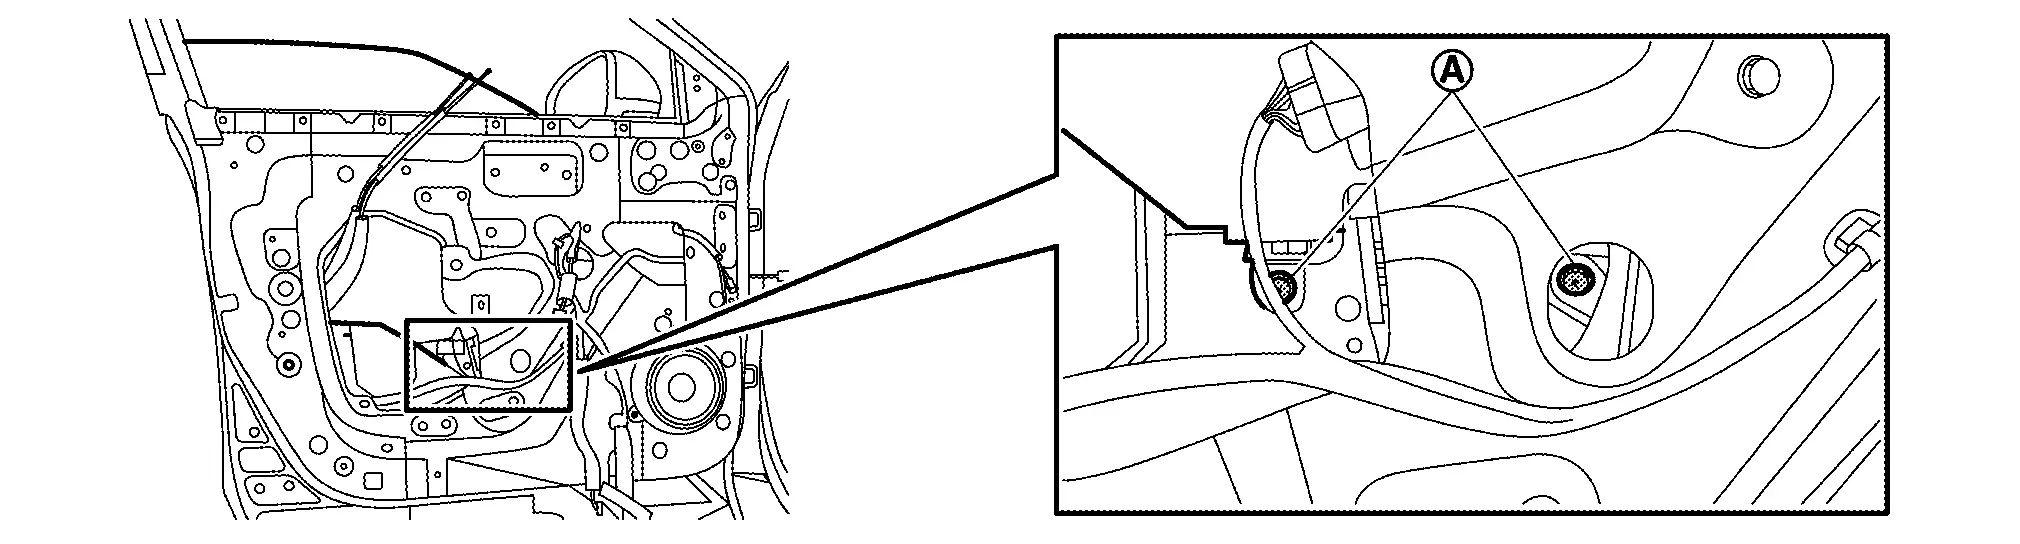
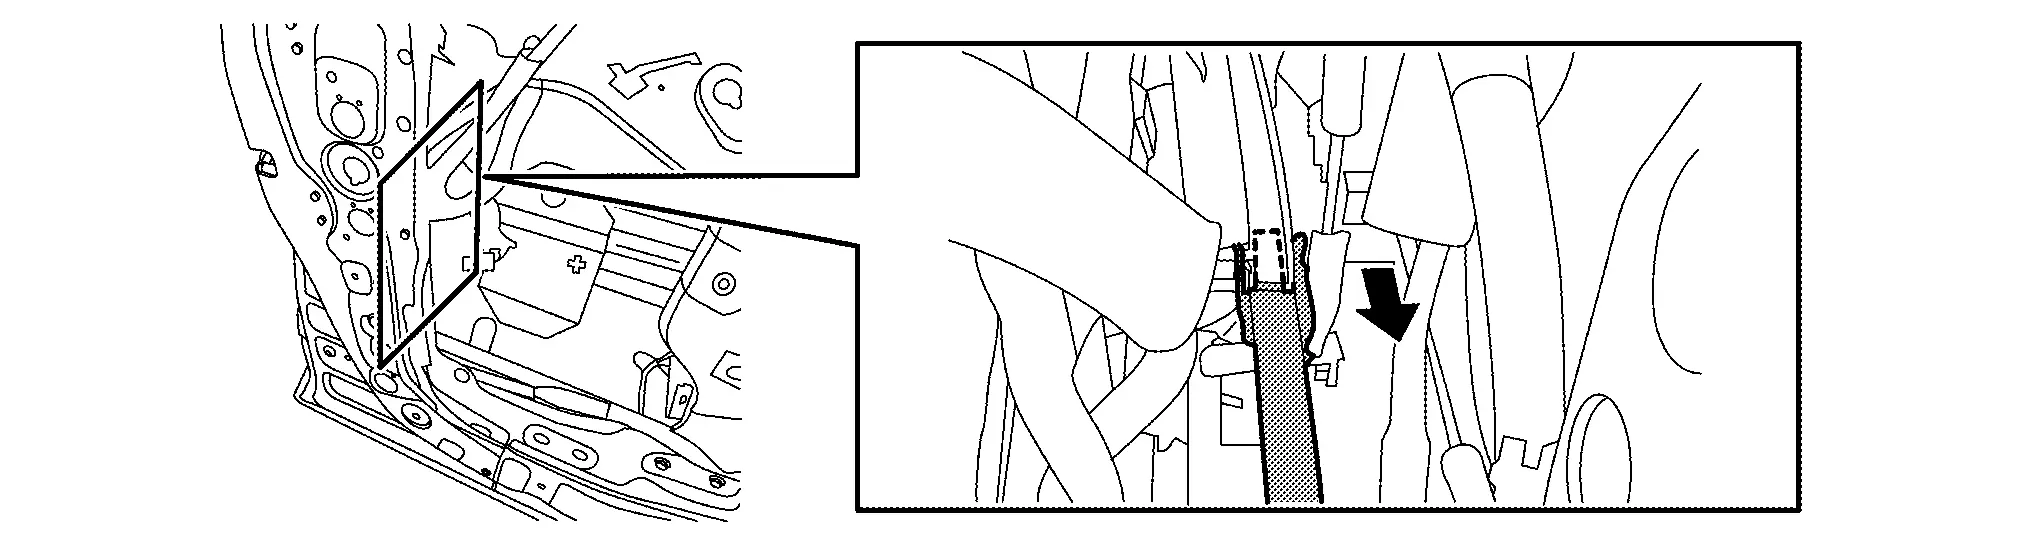
Remove rear side of sealing screen.Disconnect door harness connector  .
.
CAUTION:
For reuse front door sealing screen, cut the butyl-tape  by using a cutter knife (A) that to remain both front door panel and sealing screen .
Reconnect power window main switch connector.
Remove door corner cover and inside seal. Refer to Removal and Installation.
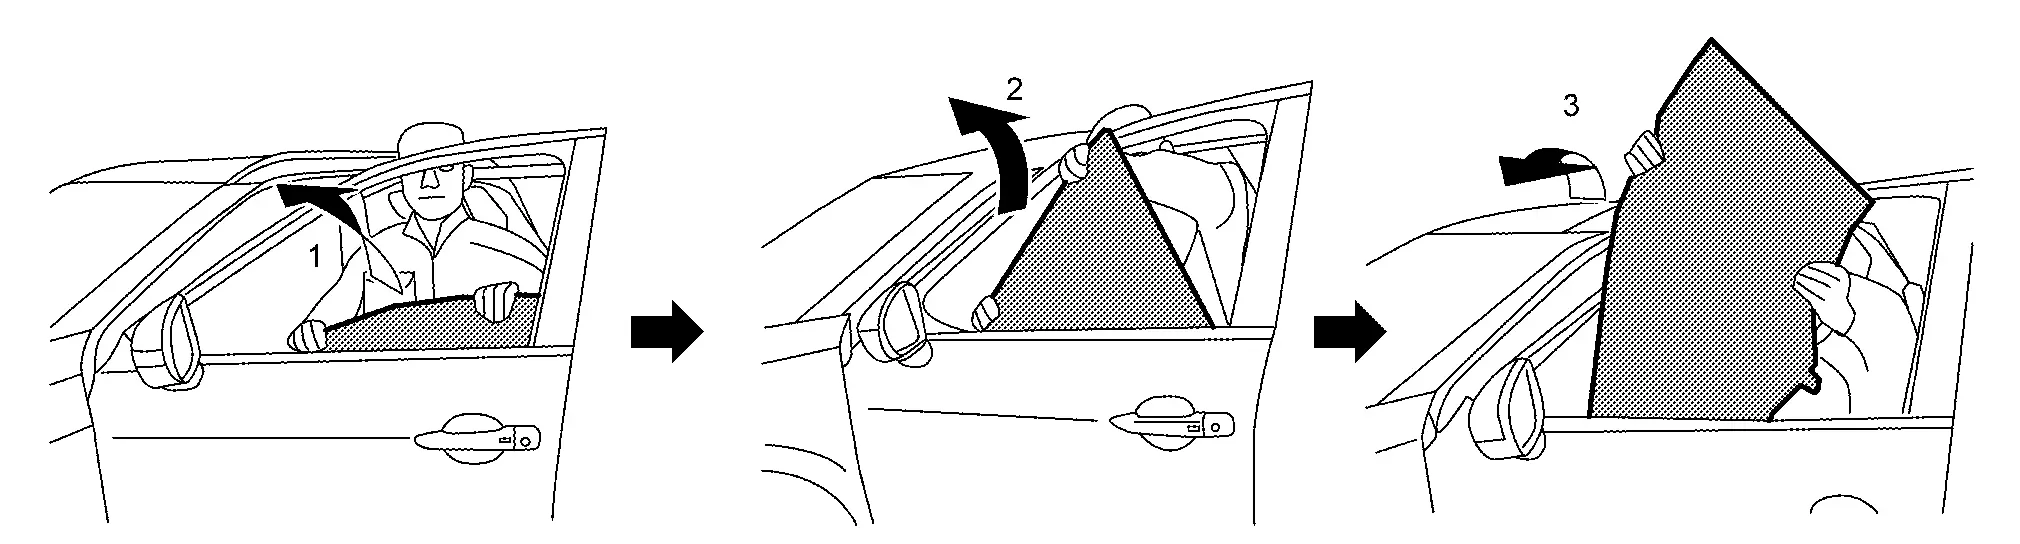
Operate power window main switch to raise or lower front door glass until front door glass mounting bolts can bee seen, and then remove front door glass mounting bolts.
Hold securely front door glass, and then remove it according to numerical order 1→3 indicated by arrows as shown in figure.
CAUTION:
Never damage front door glass, front door glass run and front door panel.
INSTALLATION
Note the following item, and then install in the reverse order of removal.
CAUTION:
-
Tighten front door glass mounting bolts to the specified torque. Refer to Exploded View.
-
After installing front door glass, perform the inspection and adjustment. Refer to Inspection and Adjustment.
Front Door Lower Sash
Removal and Installation
REMOVAL
CAUTION:
Never damage front door glass and front door panel.
Fully close front door glass.
Remove front door lower sash mounting bolt .
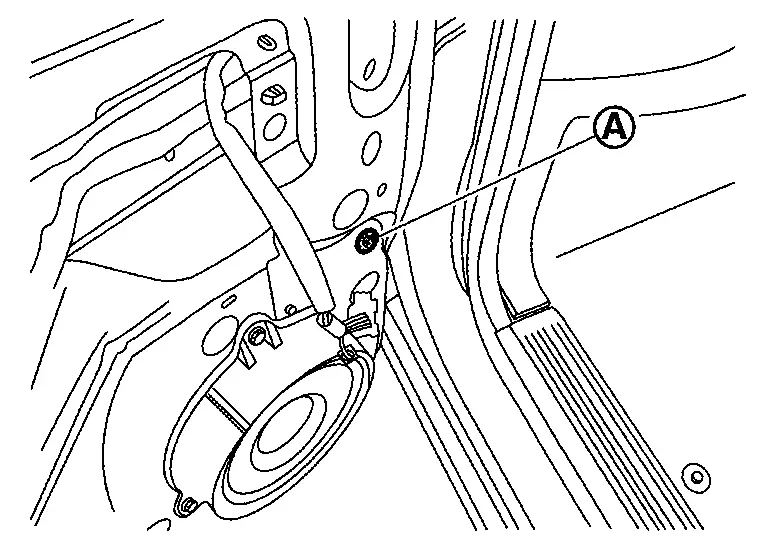
Remove front door speaker.
-
Without BOSE :Refer to Removal and Installation.
-
With BOSE : Refer to Removal and Installation.
Remove front door glass run from front door lower sash.
Remove front door sash from the hole of front door speaker install position.
CAUTION:
When removing front door lower sash, disengage fixing portion by arrow direction as shown in figure.

INSTALLATION
Note the following items, and then install in the reverse order of removal.
CAUTION:
-
Before installing, check the front door glass mounting bolt has been fixed by specified torque.
-
The front door glass mounting specified torque, refer to
Exploded View. -
The procedure of checking, refer to Removal and Installation.
-
-
When installing, insert portion
of front door lower sash to hole of front door sash (frond door panel ) as shown in figure.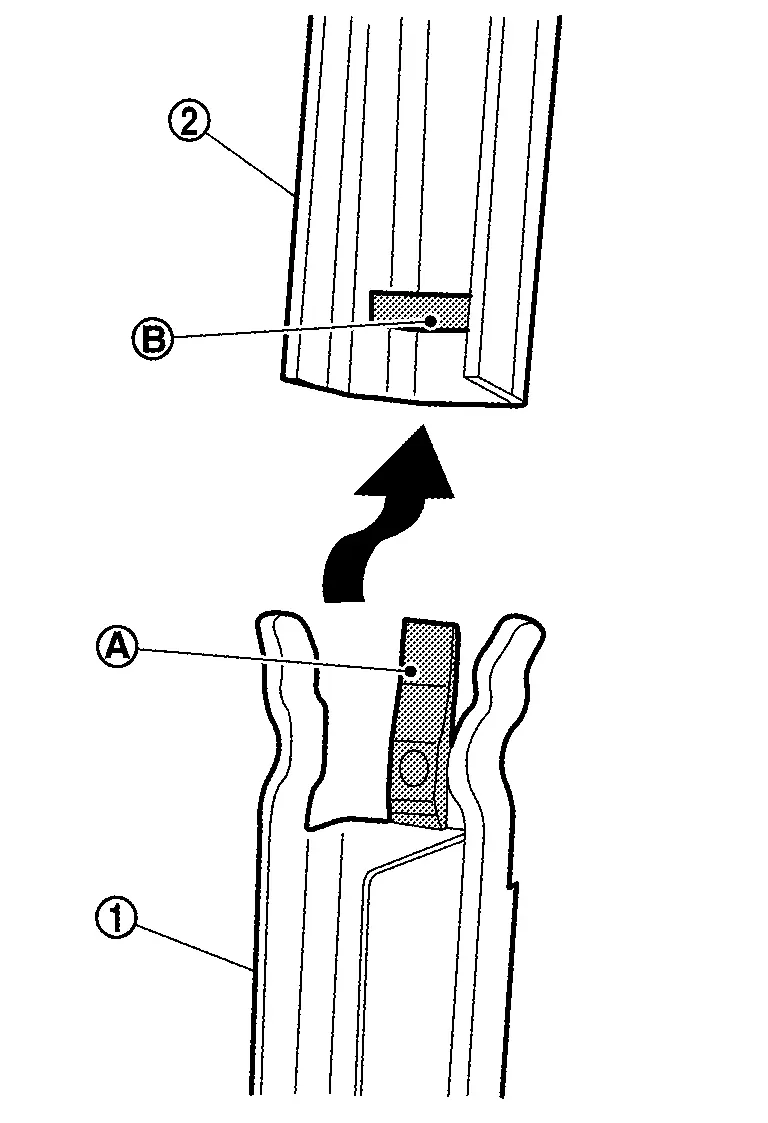
-
After installing, check the front door glass can be move smoothly. If it could not move smoothly, check the front door glass run has installed to front door lower sash correctly.
Front Door Glass Run Lower Sash
Removal and Installation
REMOVAL
CAUTION:
Never damage front door glass and front door panel.
Fully close front door glass.
Remove rear side of front door sealing screen. Refer to Removal and Installation.
Remove front door glass run from front door glass run lower sash.
Remove front door glass run lower sash mounting bolt .
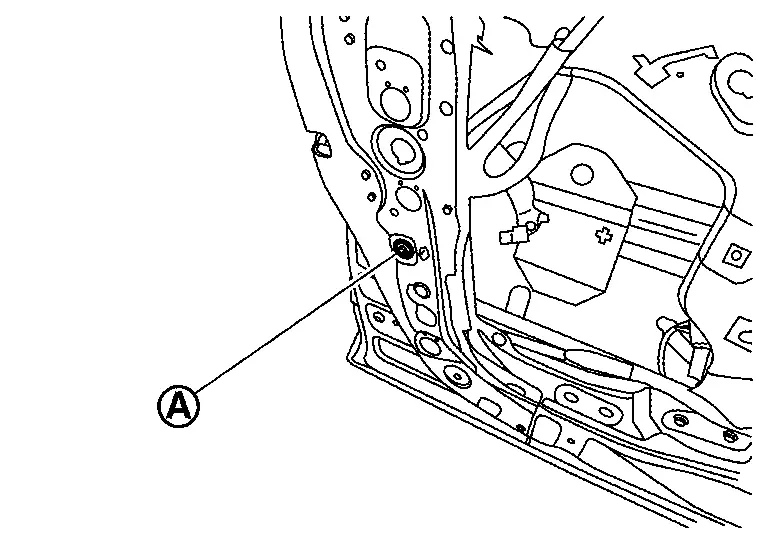
Disengage front door glass run lower sash fixing portion by arrow direction as shown in figure.
Remove front door glass run lower sash from open part of front door panel.
INSTALLATION
Note the following items, and then install in the reverse order of removal.
CAUTION:
-
Before installing, check the front door glass mounting bolt has been fixed by specified torque.
-
The front door glass mounting specified torque, refer to
Exploded View. -
The procedure of checking, refer to Removal and Installation.
-
-
When installing, install portion
of front door glass run lower sash to hole of front door sash (front door panel  ) as shown in figure.
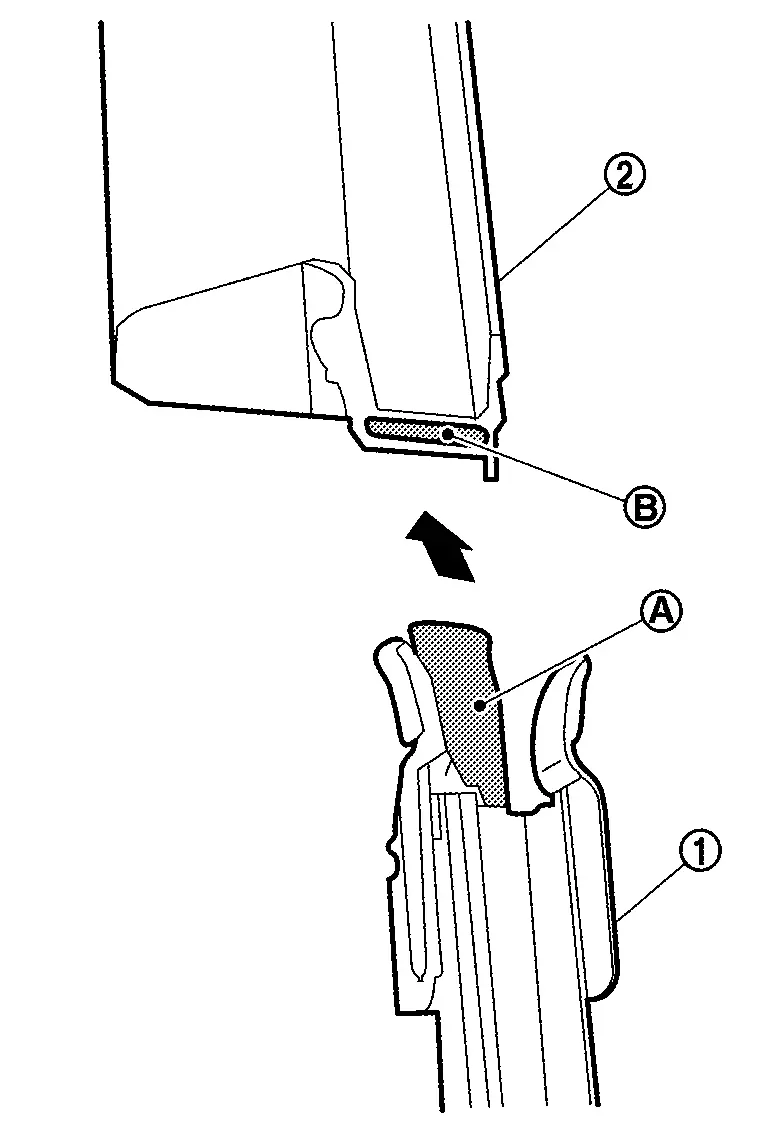
-
After installing, check the front door glass can be move smoothly. If it could not move smoothly, check the front door glass run has installed to front door glass run lower sash correctly.
Front Door Glass Run
Removal and Installation
REMOVAL
CAUTION:
Never excessively pull front door glass run.
Fully open front door glass.
Remove door corner cover and front door inside seal. Refer to Removal and Installation.
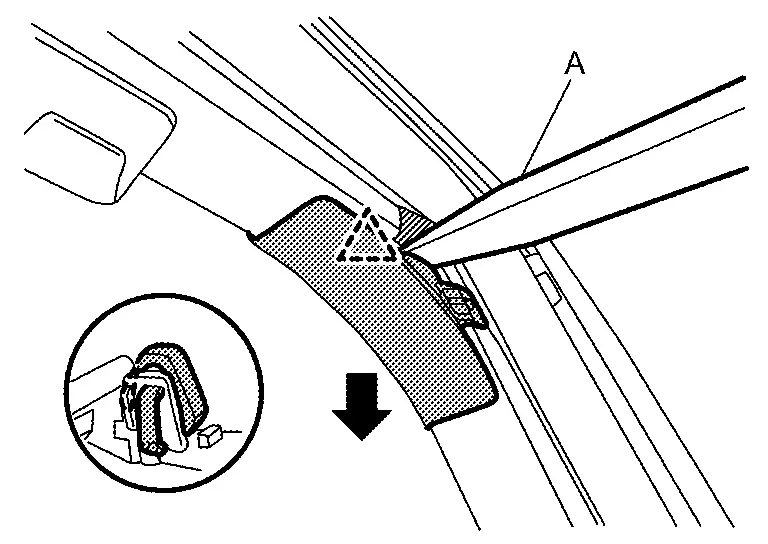
Remove front door glass run from front door panel.
CAUTION:
Front door glass run should be pulled out slowly.
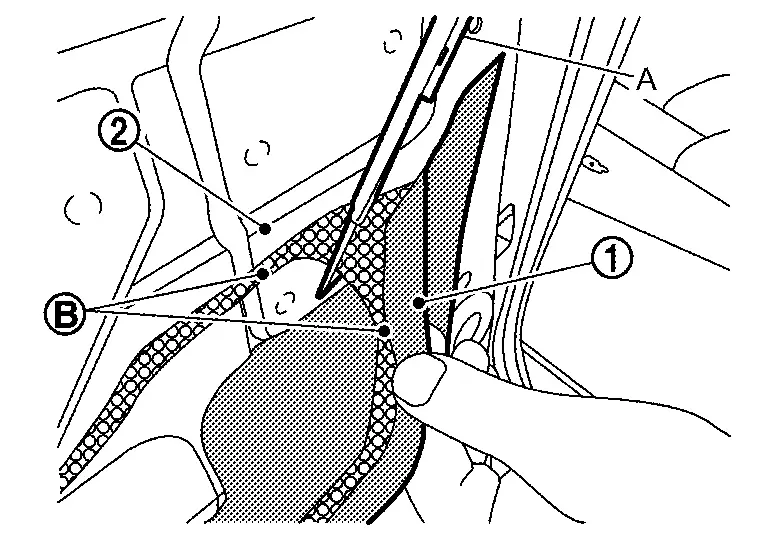
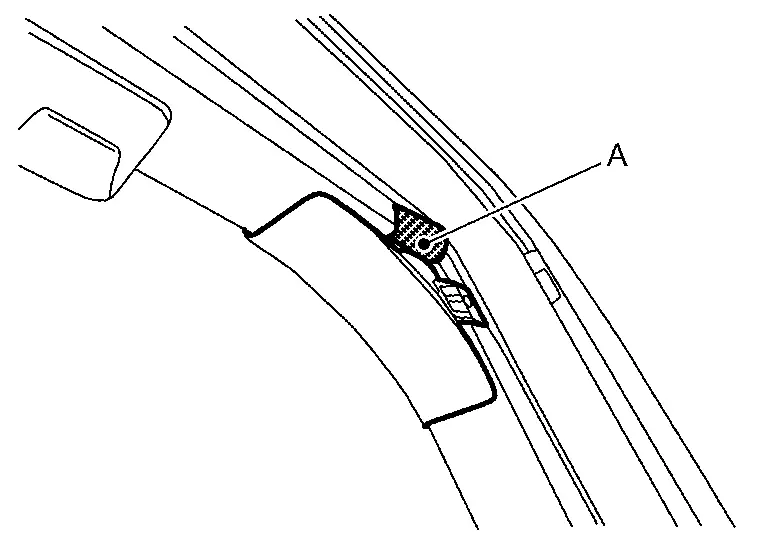
Remove front door corner cover.Apply protect tape (A) to prevent damage.
|
: Pawl |
INSTALLATION
Note the following items, and then install in the reverse order of removal.
CAUTION:
-
Make sure that front door glass run are engaged to front door lower sash and front door sash (door panel side).
-
To prevent trouble, make sure front door glass run needs to engaged to front door lower sash and front door sash (door panel side).
Inspection and Adjustment
SYSTEM INITIALIZATION
-
Description. Refer to Description.
-
Work procedure. Refer to Work Procedure.
CHECK ANTI-PINCH FUNCTION
-
Description. Refer to Description.
-
Work procedure. Refer to Work Procedure.
FITTING INSPECTION
-
Check that front door glass is fit securely into the sash groove.
-
Lower front door glass slightly [approximately 10 to 20 mm (0.394 to 0.787 in)], and check that the clearance to the sash is parallel. Loosen the regulator mounting bolts, guide rail mounting bolts, and glass and guide rail mounting bolts to correct the glass position if the clearance between the glass and sash is not parallel.
Other materials:
B2600-42 Configuration Error
DTC Description
DTC DETECTION LOGIC DTC No. CONSULT screen terms DTC detected condition
B2600-42
Configuration error
Diagnosis condition
After the ignition switch OFF, wait for 1 minutes or more
When ignition switch is ON.
Signal (terminal)
—
Threshold
...
Electric Intake Valve Timing Control Module
Values On The Diagnosis Tool
VALUES ON THE DIAGNOSIS TOOLNOTE:
The following table includes information (items) inapplicable to this
Nissan Ariya vehicle. For information (items) applicable to this
vehicle, refer to CONSULT display items.
Numerical values in the following table are re ...
Accelerator Pedal Position Sensor
Component Inspection
CHECK ACCELERATOR PEDAL POSITION SENSOR
Turn ignition switch OFF.
Reconnect all harness connectors disconnected.
Turn ignition switch ON.
Check the voltage between ECM harness connector terminals as per the following condition.
ECM Condition
Voltage
(A ...