Nissan Rogue (T33) 2021-Present Service Manual: Removal and Installation :: Parting Seal
Exploded view
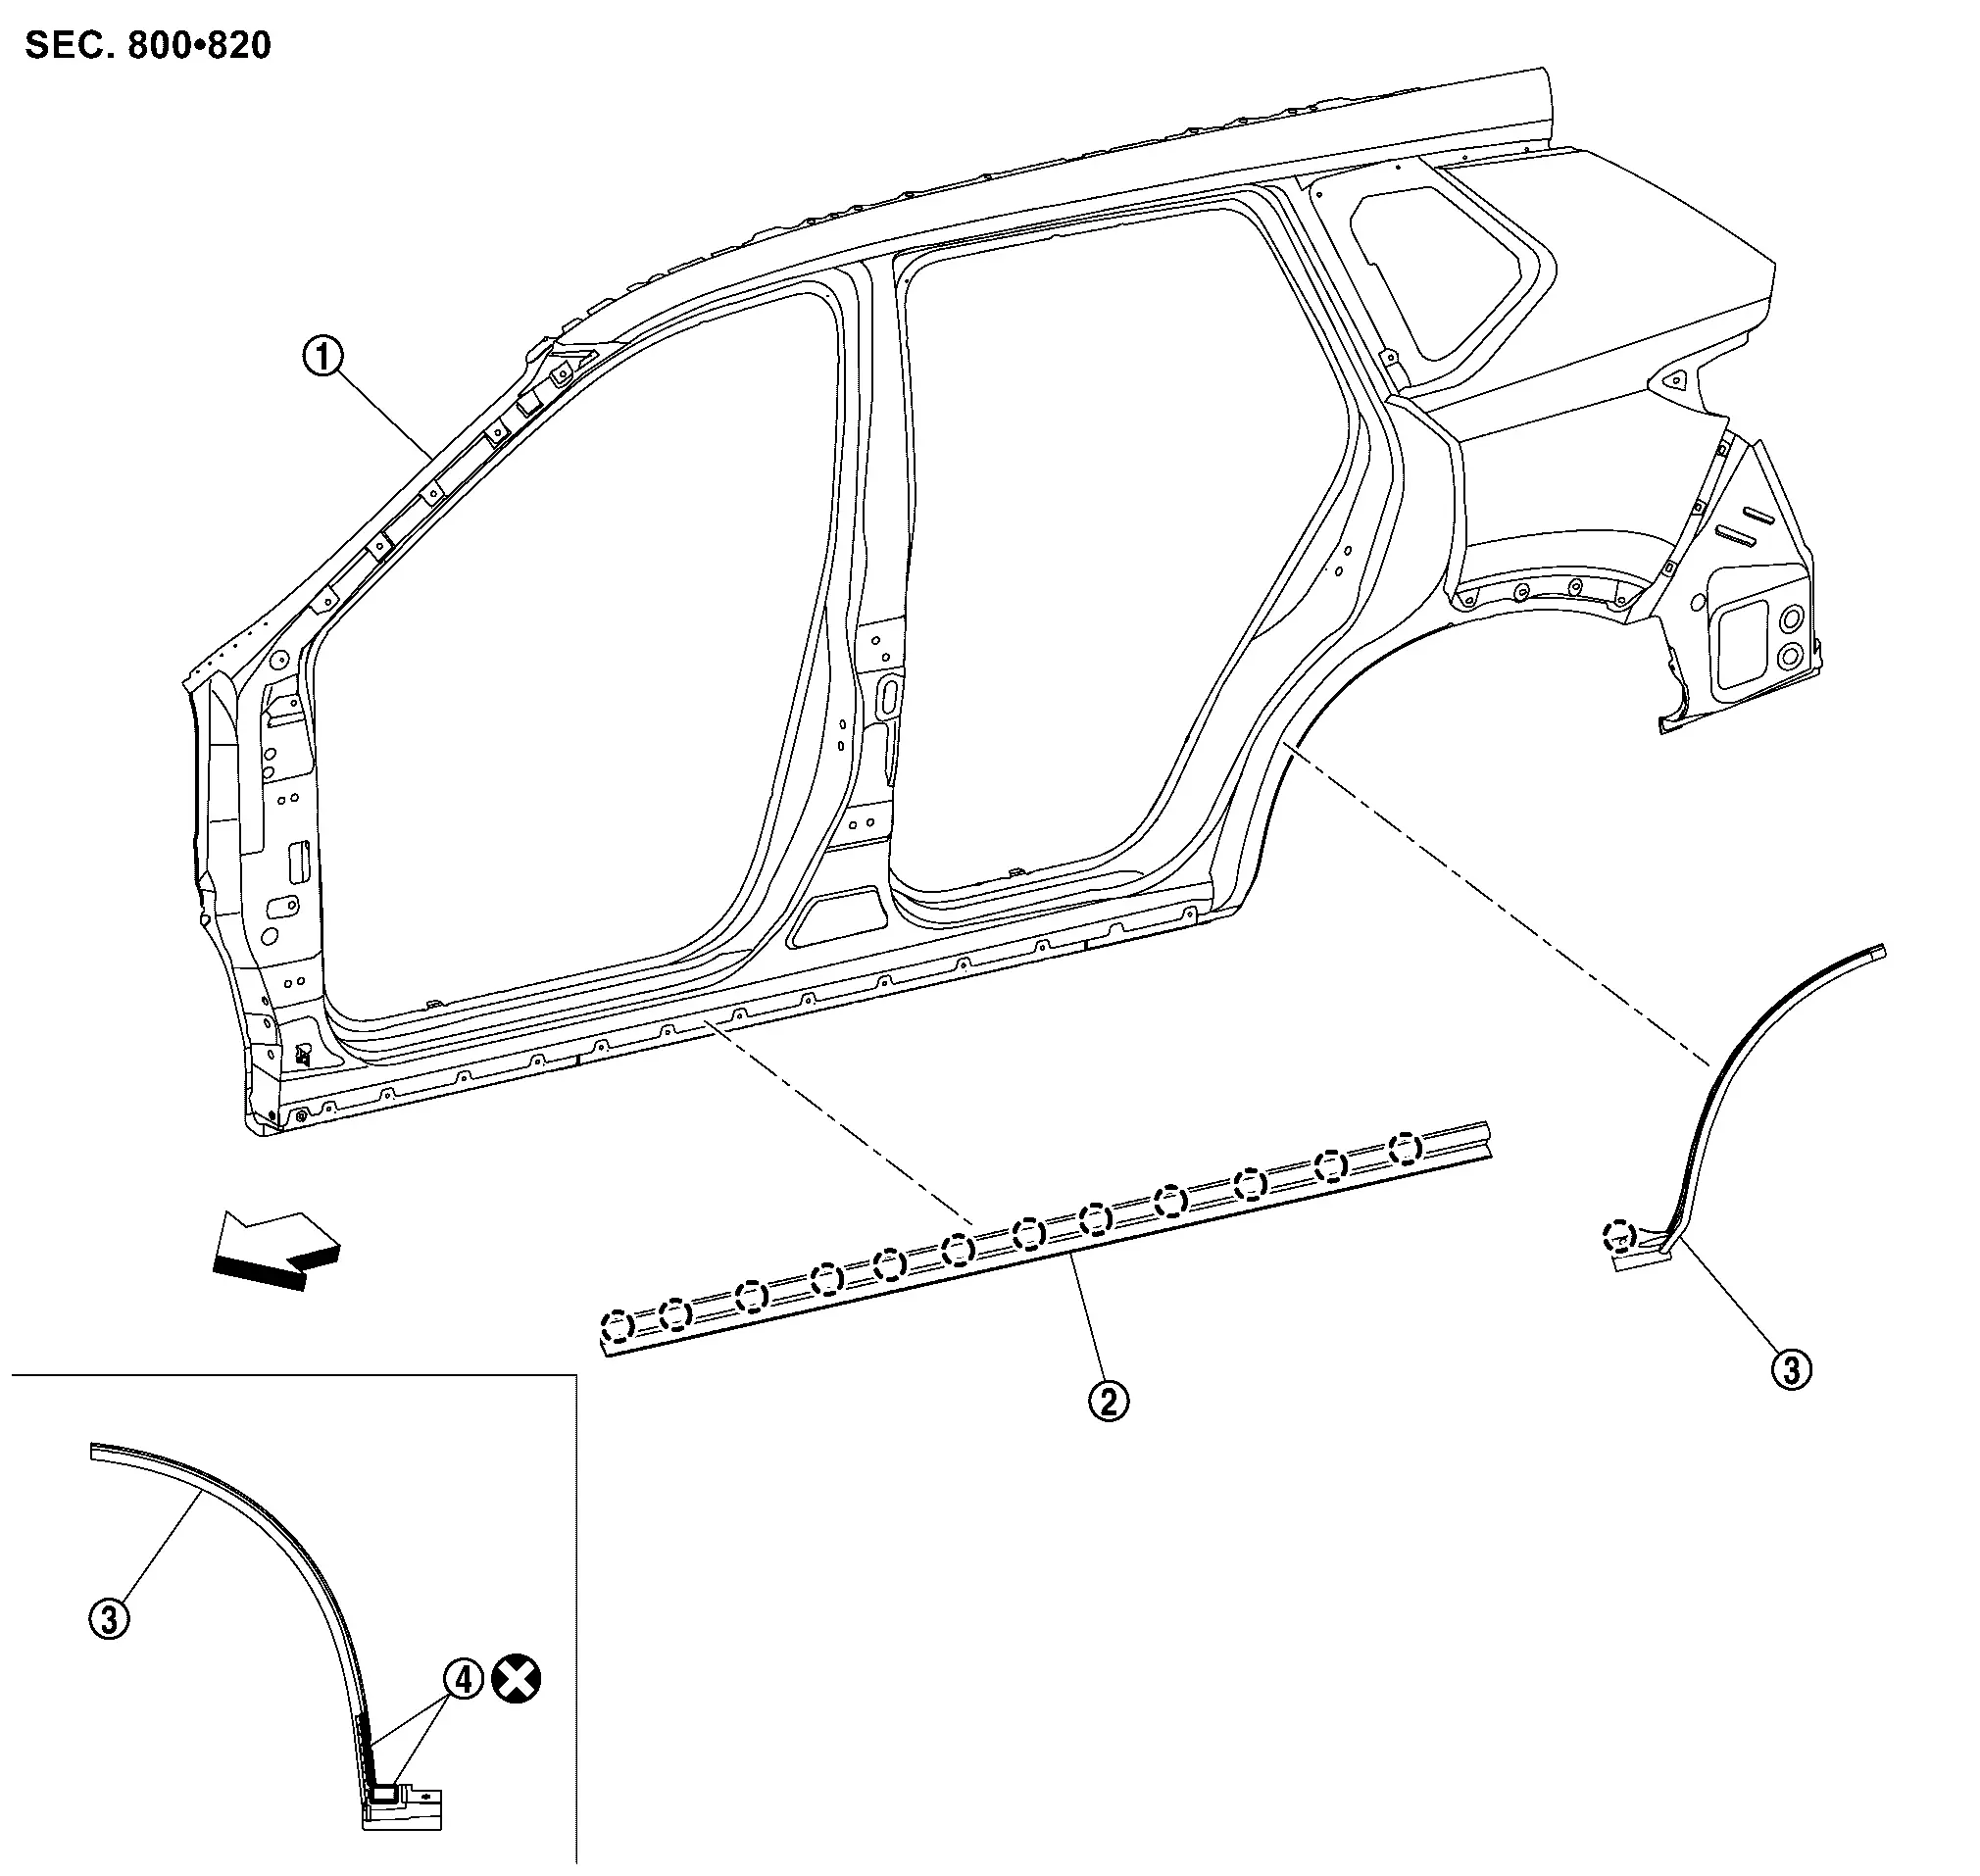
 |
Body side outer panel |  |
Front parting seal |  |
Rear parting seal |
 |
Double-sided tape [t: 0.8 mm (0.031 in)] |
||||
 |
’╝ÜClip | ||||
| ’╝ÜNissan Ariya Vehicle front | |||||
 |
: Always replace after every disassembly. | ||||
Removal and Installation
REMOVAL
Front Parting Seal
Remove rear parting seal.
Remove front parting seal fixing clips, and then remove front parting seal.
Rear Parting Seal
Remove rear parting seal fixing clip.
Cut double-sided tape using a cutter.
Remove rear parting seal.
INSTALLATION
Installation is in the reverse order of removal.
CAUTION:
-
When installing, visually check the parting seal and the clips, then replace them with new parts it they are damaged.
-
When installing parting seal, check that blind clips are securely fitted in door panel holes, and then press them in.
-
Always replace double-sided tape with a new one, it rear parting seal is reused.
-
Remove double-sided tape remaining on body side outer panel and back of rear parting seal with a double-sided tape remover, after removing rear parting seal.
-
Degrease body side outer panel mounting surface for rear parting seal.
-
Paint grain or dust on mounting surface of rear parting seal may spoil exterior appearance if it remains. Clean the mounting surface and check that no paint grain or dust remains, before starting the operation.
-
Never wash the Nissan Ariya vehicle within 24 hours after installing so as to keep adhesive.
Other materials:
System Description. System. Warning/indicator/chime List
Warning/indicator/chime List
Warning Lamp/Indicator Lamp/Information display
Warning lamp Item Design Reference
Seat belt warning lamp
For layout, refer to Design.
For function, refer to Seat Belt Warning Lamp.
Information display Item Reference
Rear seat belt warning
Ref ...
Kr15ddt. Removal and Installation
Fuel Level Sensor Unit, Fuel Filter and Fuel Pump Assembly
Exploded View
REMOVAL2WD
Lock ring
Fuel level sensor unit, fuel filter and fuel pump assembly
O-ring
Fuel tank
: Nissan Ariya Vehicle front
: Always replace after every disas ...
Plug
Description
Replace the O-ring if oil leaks from the plug.
Exploded View
1.
Plug
2.
O-ring
3.
Plug
4.
O-ring
5.
O-ring
6.
Overflow plug
7.
O-ring
8.
Transaxle assembly
: N┬Ęm (kg-m, ft-lb) : N┬Ęm (kg-m, in-lb) : Always replace ...