Nissan Rogue (T33) 2021-Present Service Manual: Removal and Installation :: Moonroof Unit Assembly
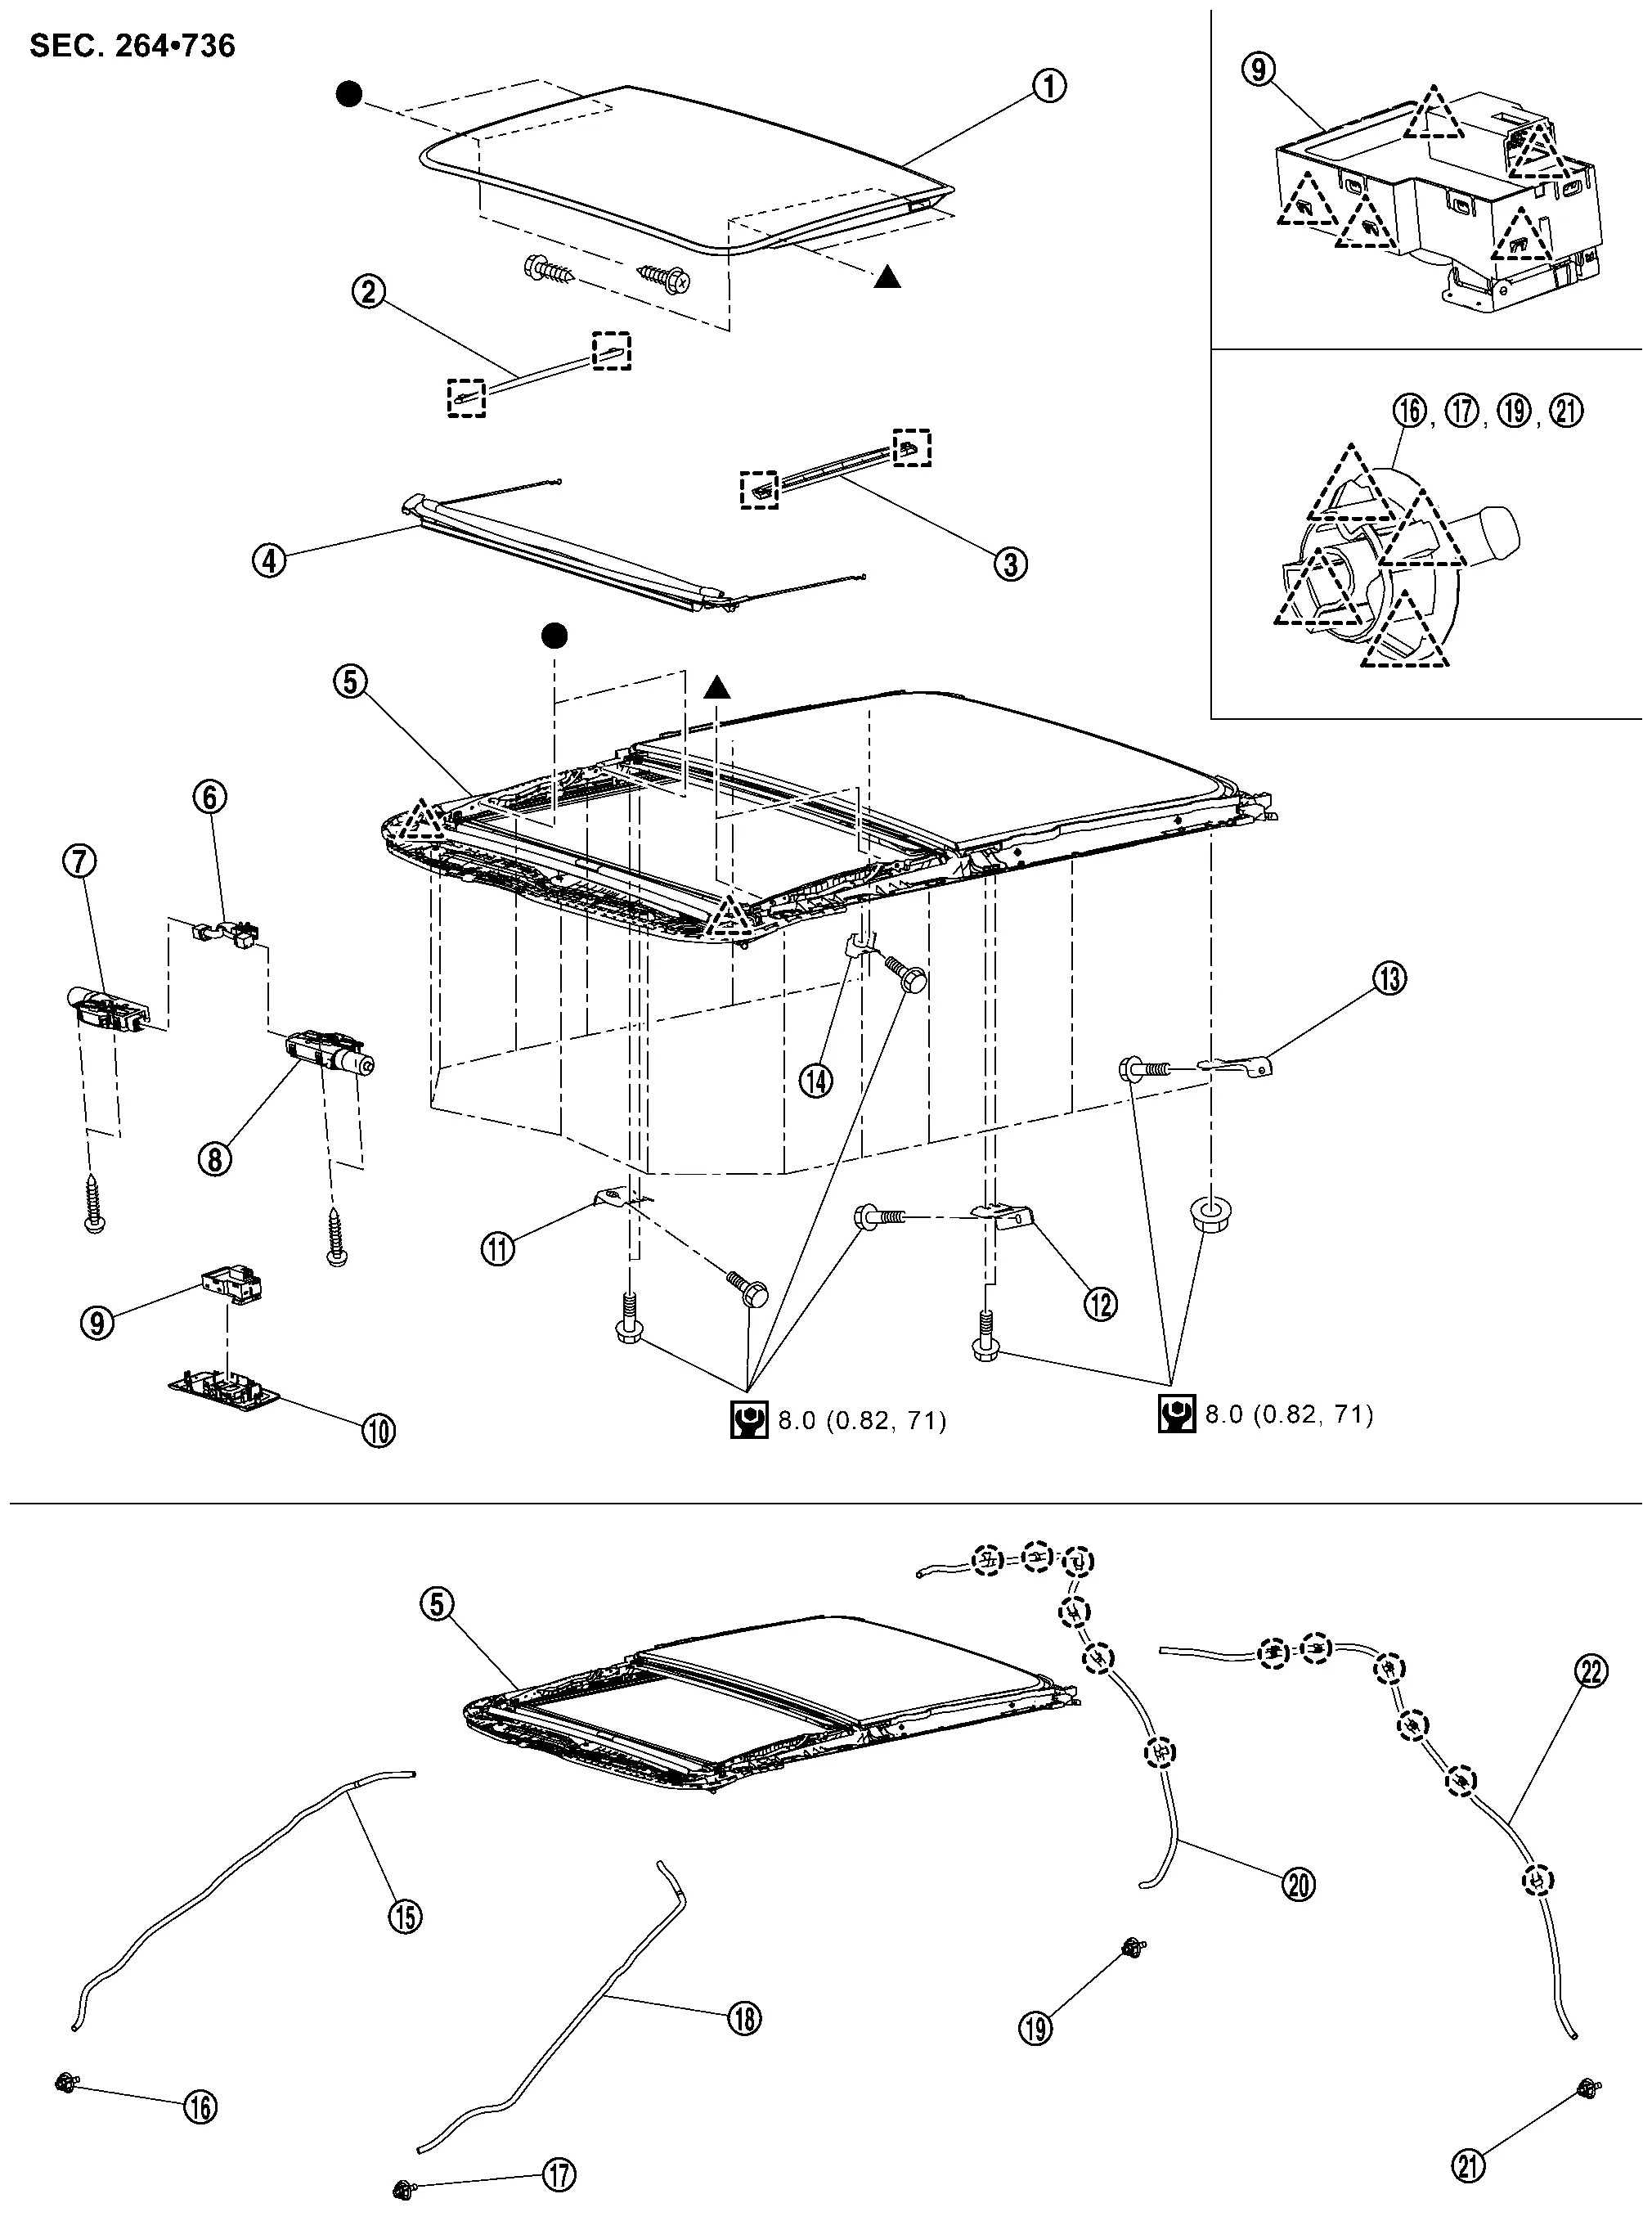
Exploded View
REMOVAL
 |
Glass lid |  |
Side trim RH |  |
Side trim LH |
 |
Wind deflector |  |
Moonroof unit assembly |  |
Harness connector assembly |
 |
Moonroof motor assembly |  |
Sunshade motor assembly |  |
Moonroof switch |
 |
Map lamp finisher |  |
Front moonroof bracket RH |  |
Front moonroof bracket LH |
 |
Rear moonroof bracket LH |  |
Rear moonroof bracket RH |  |
Front drain hose RH |
 |
Front drain connector RH |  |
Front drain connector LH |  |
Front drain hose LH |
 |
Rear drain connector RH |  |
Rear drain hose RH |  |
Rear drain connector LH |
 |
Rear drain hose LH | ||||
 |
: Clip | ||||
 |
: Pawl | ||||
 |
: Metal clip | ||||
 |
: N·m (kg-m, in-lb) | ||||
 , ,  : Indicates that the part is connected at points with same symbol in actual Nissan Ariya vehicle. : Indicates that the part is connected at points with same symbol in actual Nissan Ariya vehicle. |
|||||
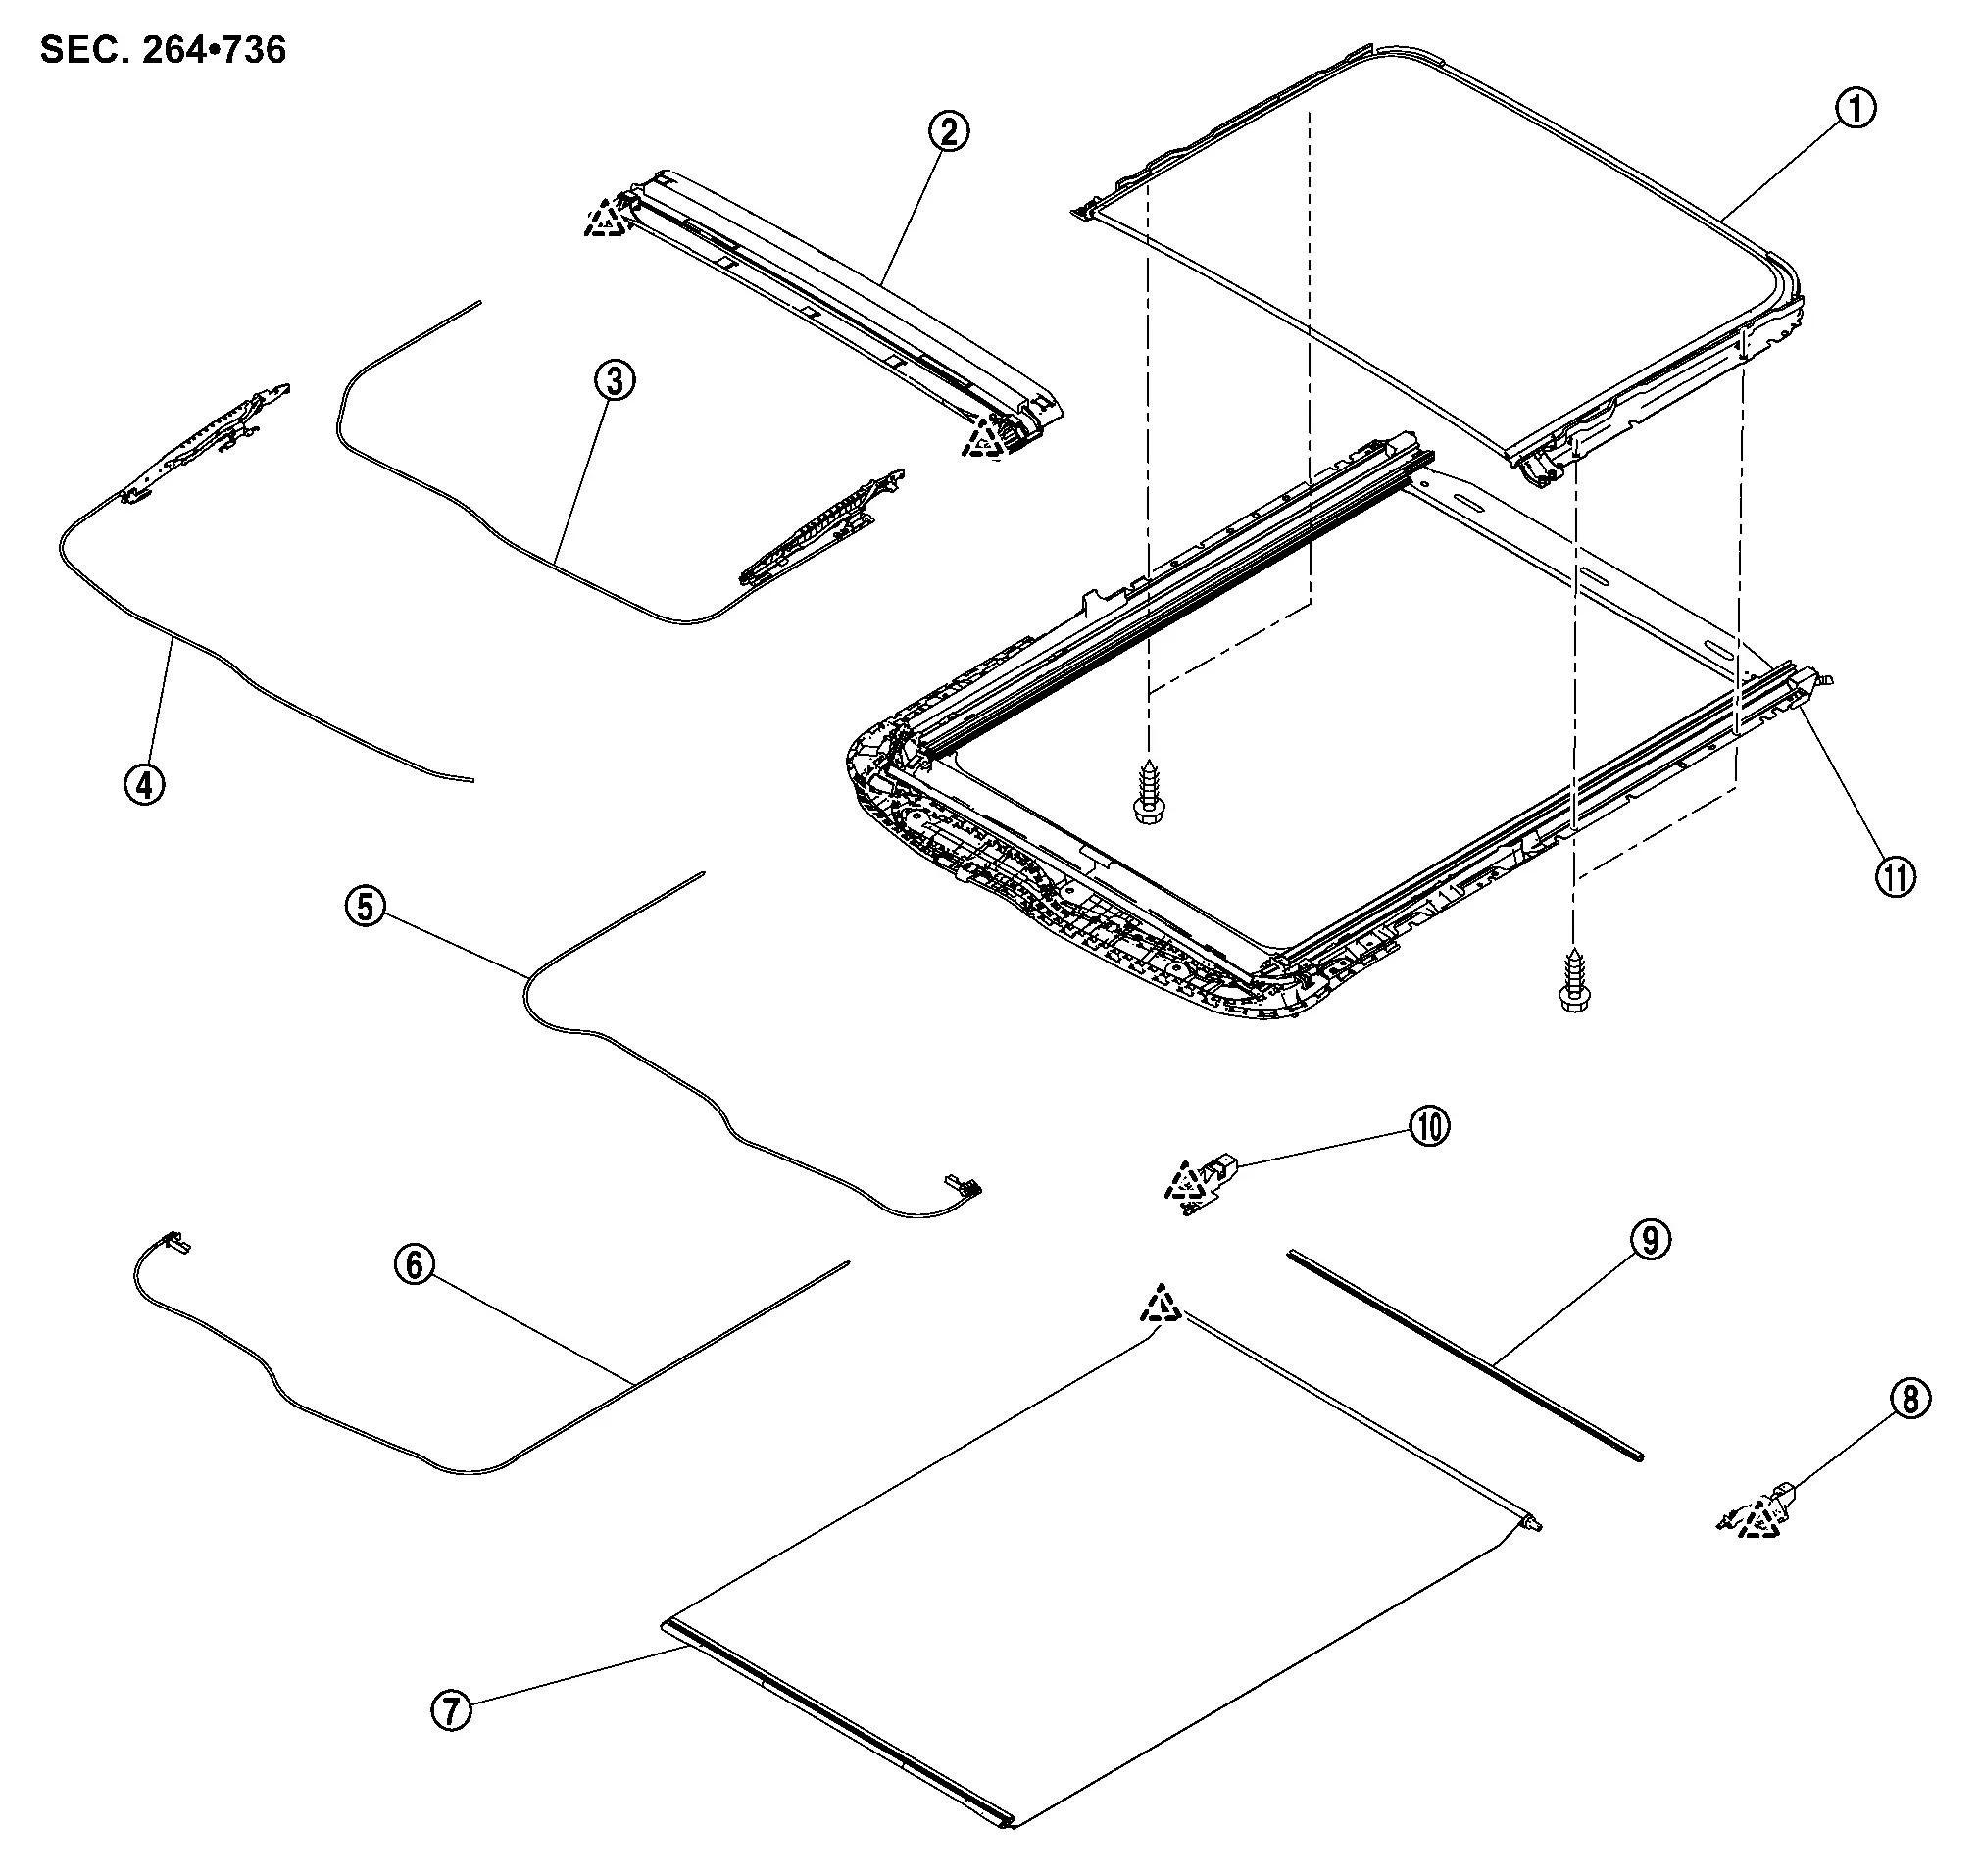
DISASSEMBLY
|
Rear moonroof glass | |
Drain assembly | |
Glass lid guide LH |
|
Glass lid guide RH | |
Sunshade slider LH | |
Sunshade slider RH |
|
Sunshade | |
Sunshade base LH | |
Roolshade stay |
|
Sunshade base RH | |
Moonroof frame assembly | ||
|
: Pawl | ||||
Removal and Installation
CAUTION:
-
Always work with a helper.
-
When removing/installing moonroof unit, use cloths to protect the seats and trim from damage.
REMOVAL
Remove wind deflector. Refer to Removal and Installation.
Remove glass lid. Refer to Removal and Installation.
Remove headlining. Refer to Removal and Installation.
Disconnect front drain hoses and rear drain hoses from moonroof unit assembly .
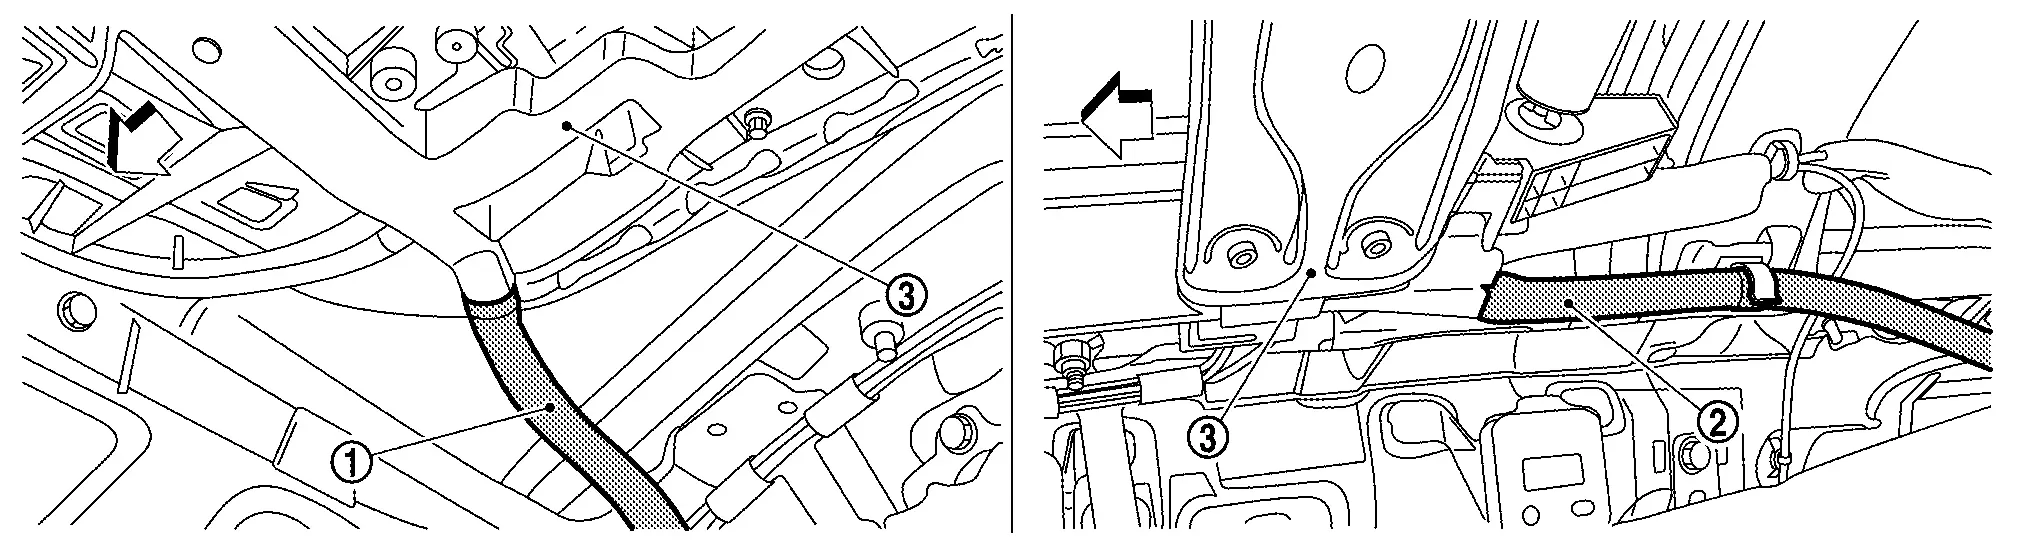
| : Nissan Ariya Vehicle front |
Remove moonroof motor assembly. Refer to Removal and Installation.
Remove sunshade motor assembly. Refer to Removal and Installation.
Remove front moonroof bracket mounting bolts  , and then remove front moonroof bracket.
| : Nissan Ariya Vehicle front |
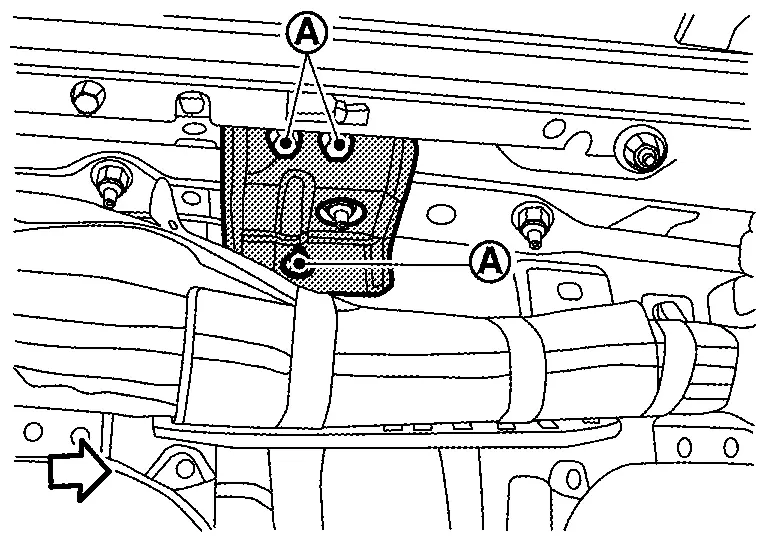
Remove rear assist grip bracket. Refer to Exploded View.
Remove rear moonroof bracket mounting bolt and nut  , and then remove rear moonroof bracket.
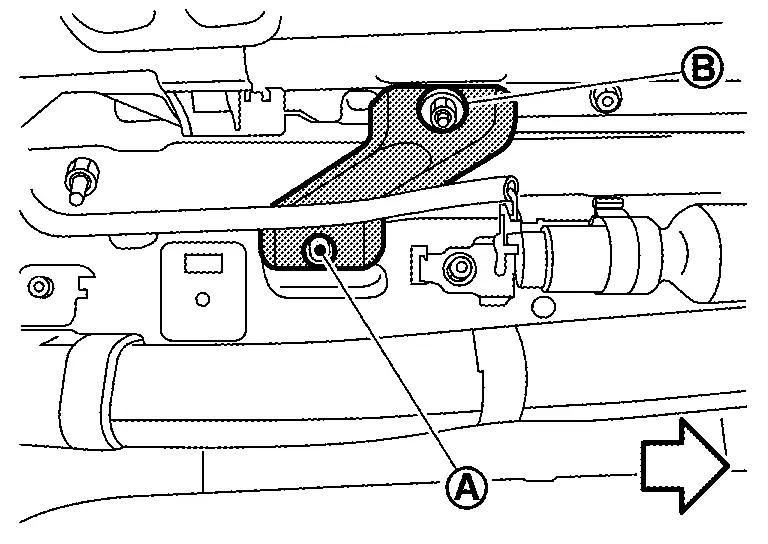
| : Nissan Ariya Vehicle front |
Remove moonroof unit assembly mounting nuts.
Remove moonroof unit assembly from back door opening.
INSTALLATION
Temporarily tighten the mounting nuts to the front end and side rail of moonroof unit assembly.
Temporarily tighten the mounting bolts and nuts to the front moonroof brackets and rear moonroof brackets.
Tighten the front end and side rail mounting nuts diagonally in order. Refer to Exploded View.
CAUTION:
Install moonroof unit assembly evenly without any distortion on moonroof unit assembly.
Tighten the mounting bolt to the rear moonroof bracket. Refer to Exploded View.
Install rear assist grip bracket. Refer to Exploded View.
Tighten the mounting bolts to the front moonroof brackets. Refer to Exploded View.
Install moonroof motor assembly. Refer to Removal and Installation.
Install sunshade motor assembly. Refer to Removal and Installation.
Connect front drain hoses and rear drain hoses.
Install headlining. Refer to Removal and Installation.
Install glass lid. Refer to Removal and Installation.
Install wind deflector. Refer to Removal and Installation.
 NOTE:
NOTE:
-
After installation, perform fitting adjustment. Refer to Adjustment.
-
After installation of moonroof unit assembly, perform additional service. Refer to Description.
Disassembly and Assembly
DISASSEMBLY
Remove rear moonroof glass. Refer to Removal and Installation.
Remove sunshade. Refer to Removal and Installation.
Remove sunshade slider. Refer to Removal and Installation.
Remove drain assembly. Refer to Removal and Installation.
Remove glass lid guide. Refer to Removal and Installation.
ASSEMBLY
Assemble in the reverse order of disassembly.
Other materials:
Its Can Communication 4 Circuit
Diagnosis Procedure
CHECK NETWORK DIAGNOSIS
Check the "Network diagnosis" results from CONSULT to see that the diagnostic CAN communication circuit have no malfunction.
Are the diagnostic CAN communication circuit normal?
YES>>
GO TO 2.
NO>>
Check and repair diagnostic CAN commu ...
Dtc/circuit Diagnosis. B2046-42 Eeprom
DTC Description
DTC DETECTION LOGIC DTC No.
CONSULT screen items
(Trouble diagnosis content) DTC Detection Condition
B2046-42
EEPROM
(Electrically Erasable Programmable Read-Only Memory)
Diagnosis condition
Ignition switch ON
Signal (terminal)
—
Threshold
EEPROM ...
Symptom Diagnosis. Steering Wheel Turning Force Is Heavy or Light
Description
Steering wheel turning force is heavy or light.
Diagnosis Procedure
PERFORM SELF-DIAGNOSIS
CONSULT
Pull the parking brake switch.
NOTE:
Check to make sure that the parking brake switch indicator is turned ON.
Ignition switch OFF.
Get out of the Nissan Ariya vehicl ...