Nissan Rogue (T33) 2021-Present Service Manual: Removal and Installation :: Inside Mirror
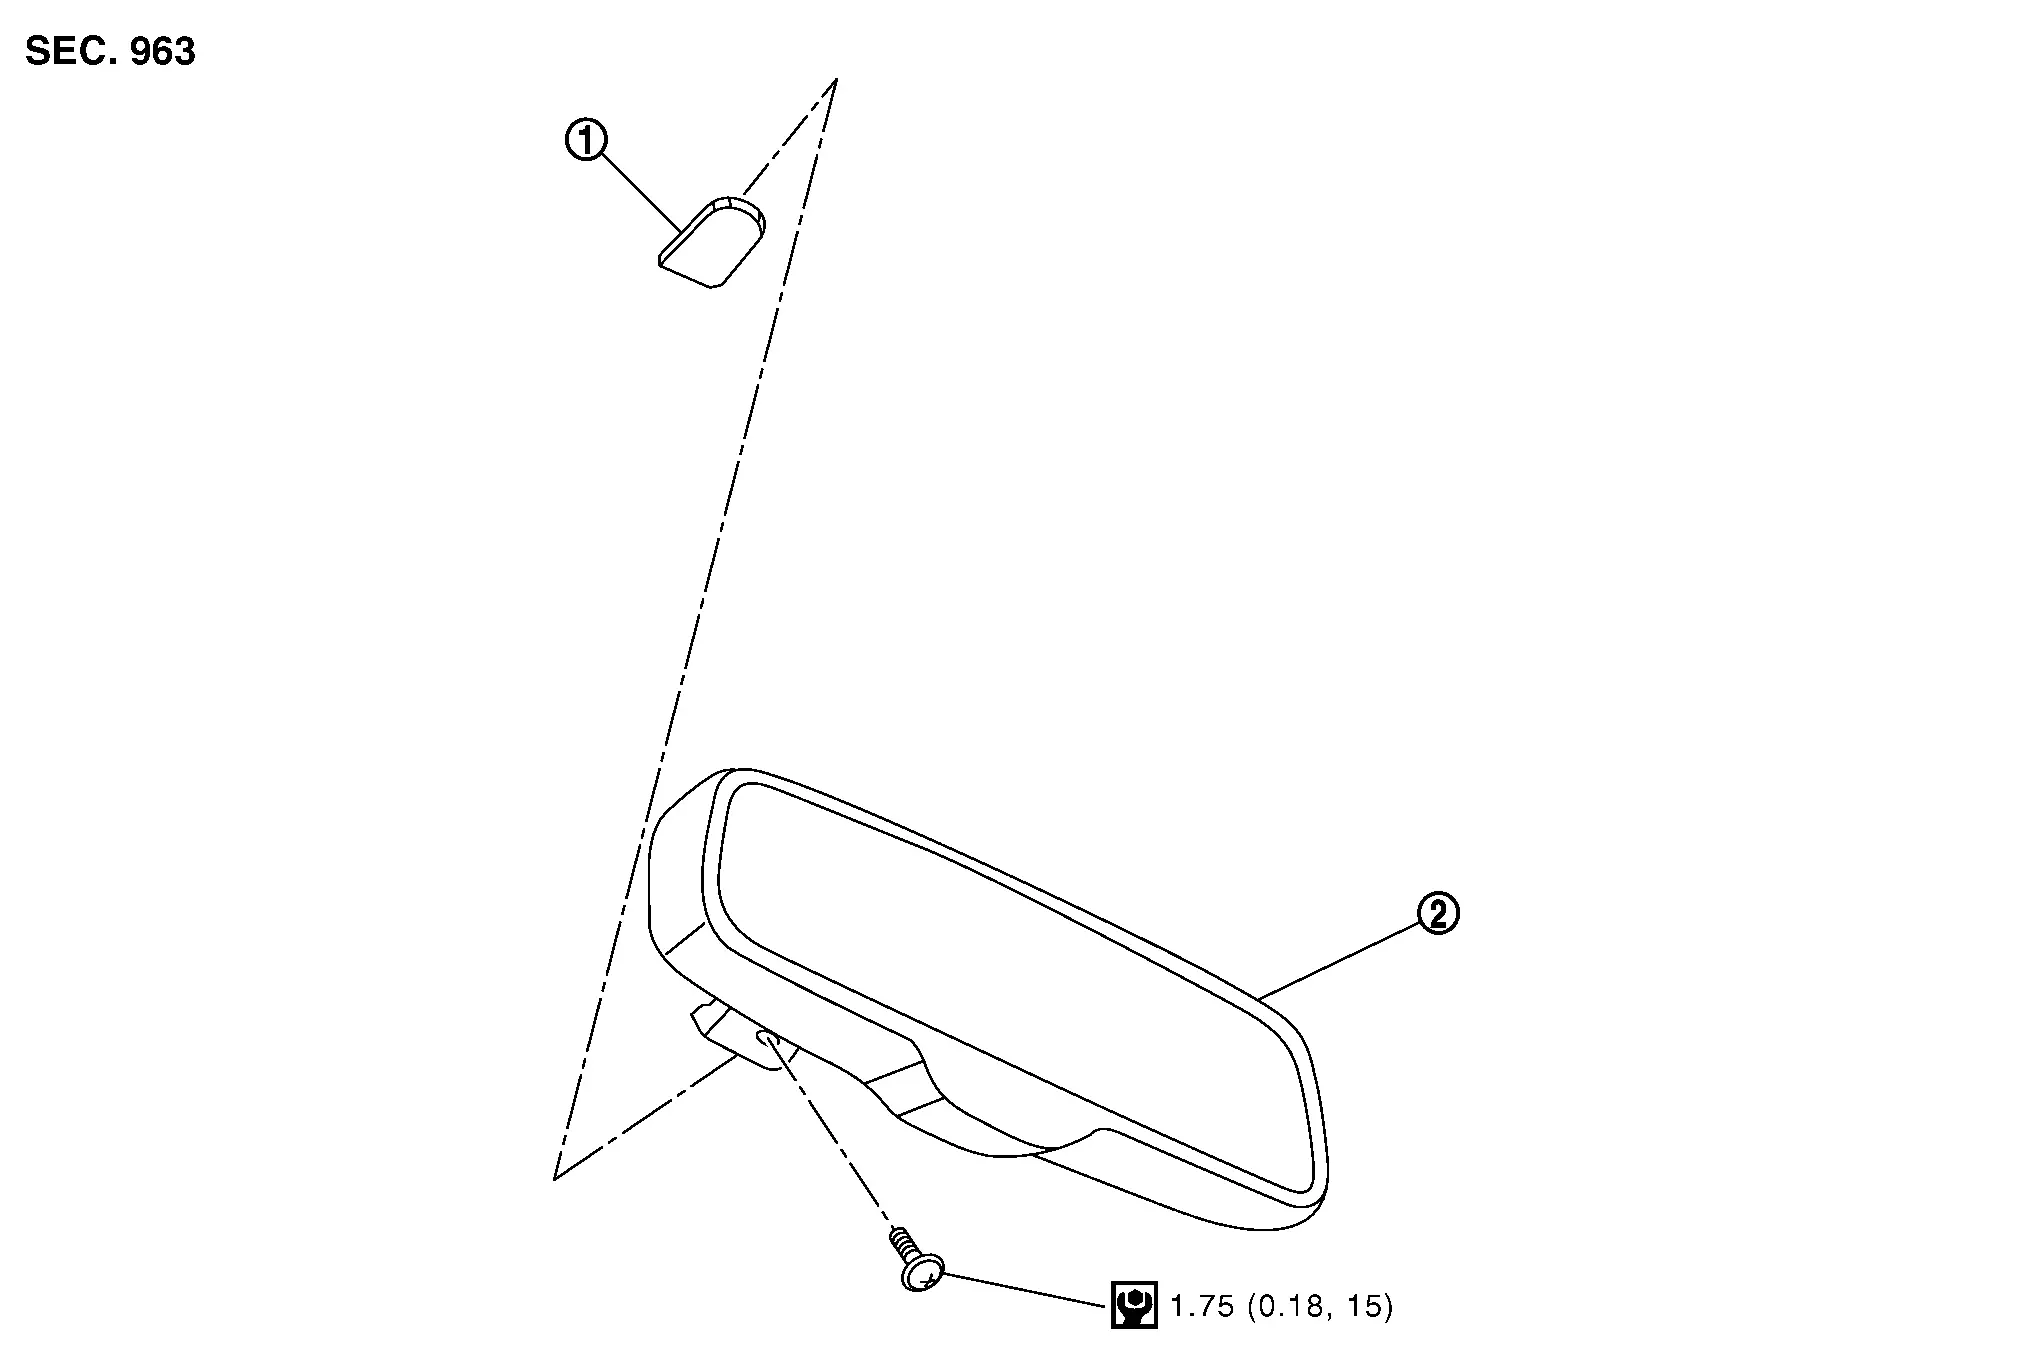
Exploded View
AUTO ANTI-DAZZLING
 |
Inside mirror base |  |
Inside mirror assembly | ||
 |
: Nm (kg-m, in-lb) | ||||
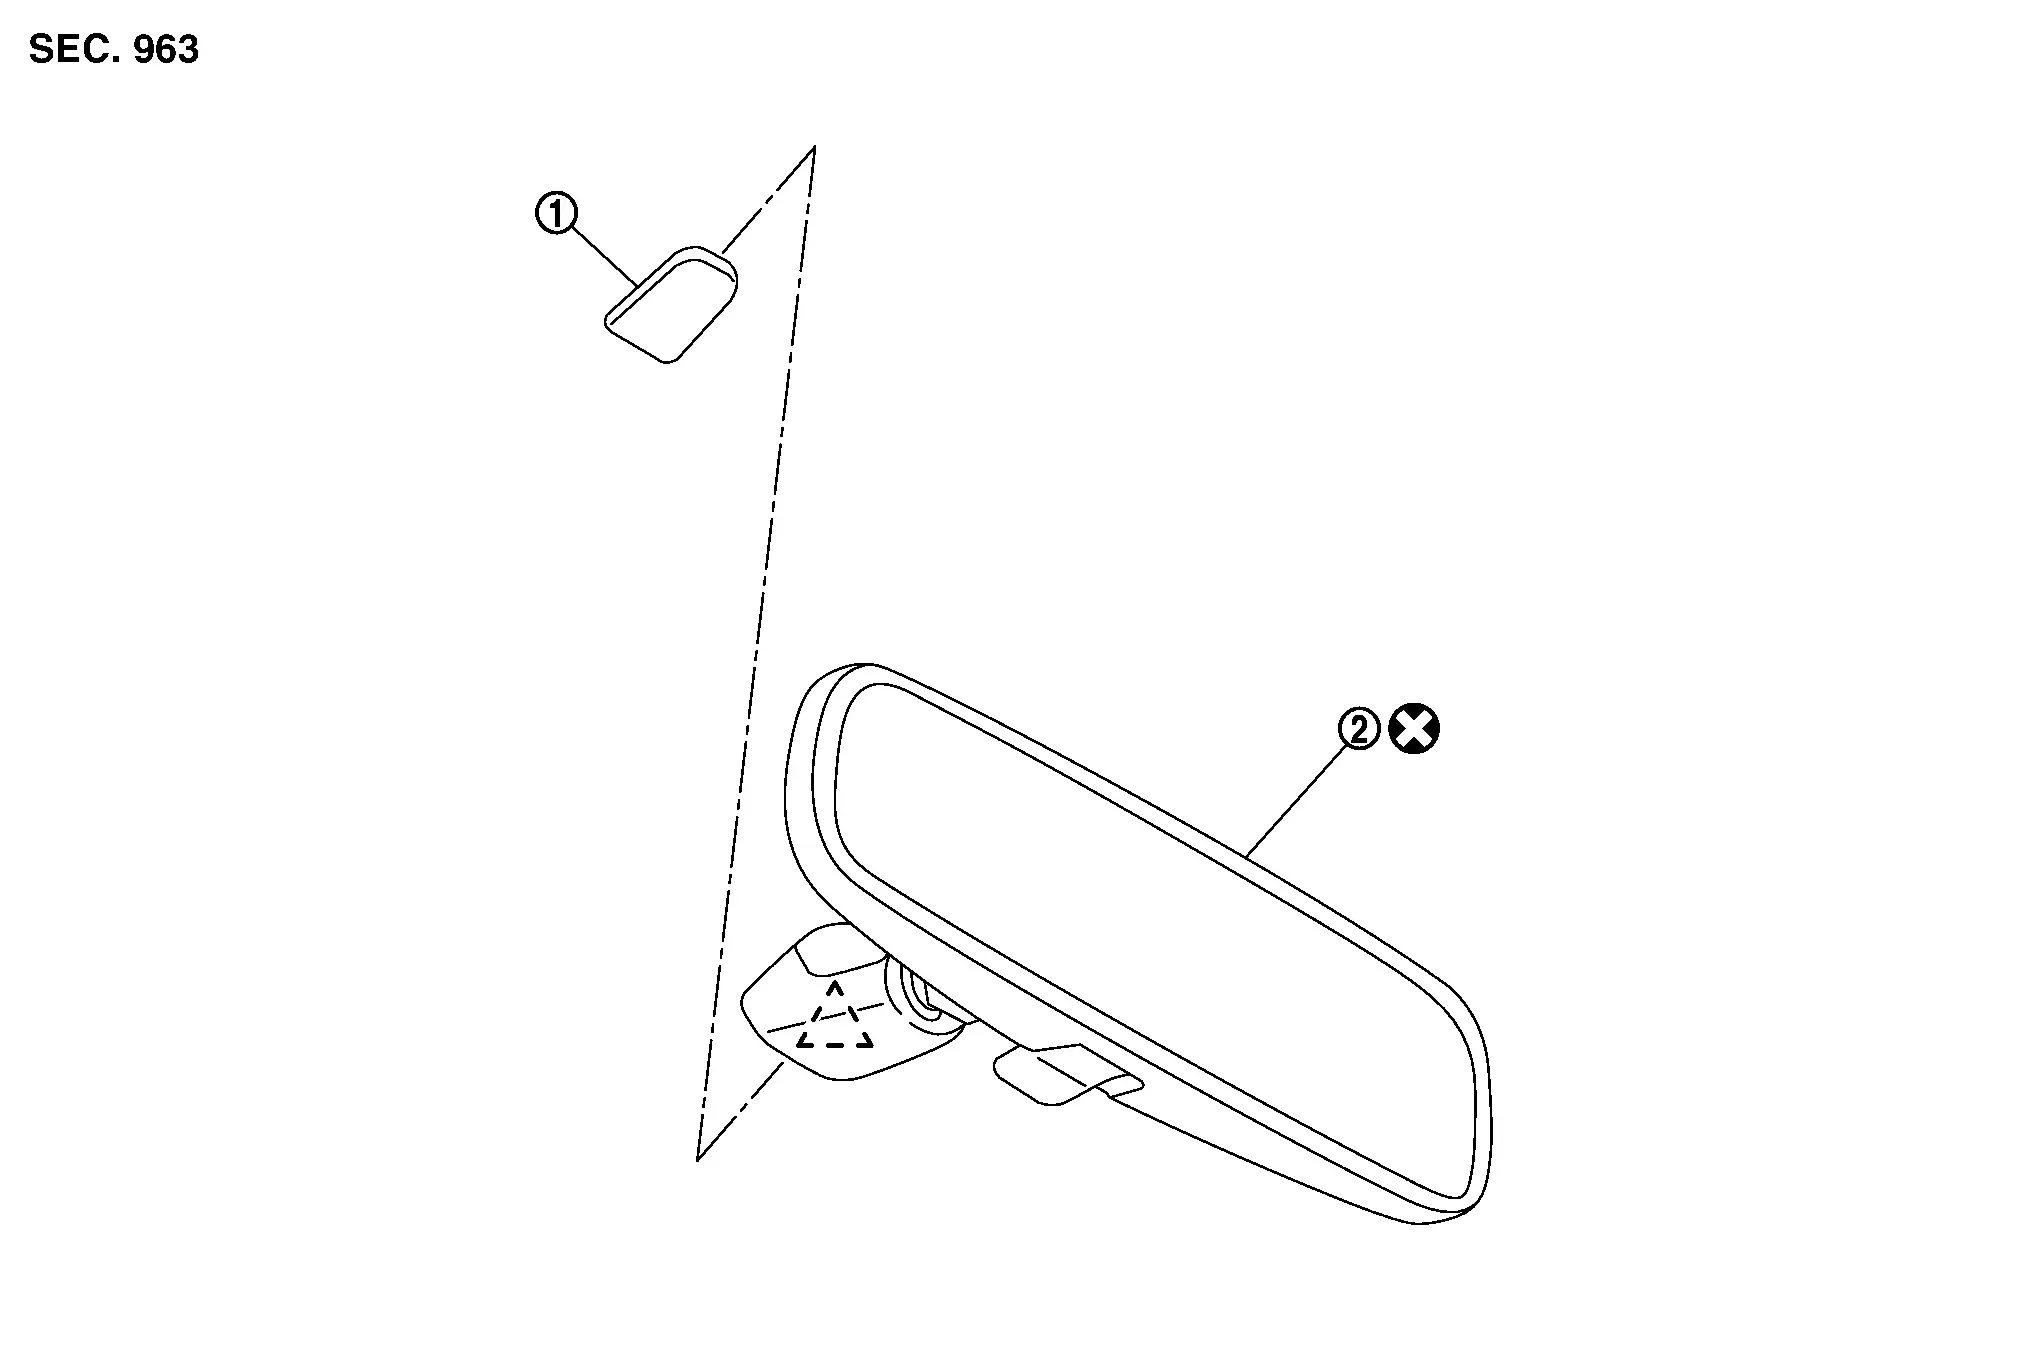
MANUAL ANTI-DAZZLING
|
Inside mirror base | |
Inside mirror assembly | ||
 |
: Pawl | ||||
 |
: Always replace after every disassembly. | ||||
Removal and Installation
REMOVAL
CAUTION:
Never damage the windshield glass.
Auto Anti-Dazzling
Disconnect inside mirror harness connector  .
.
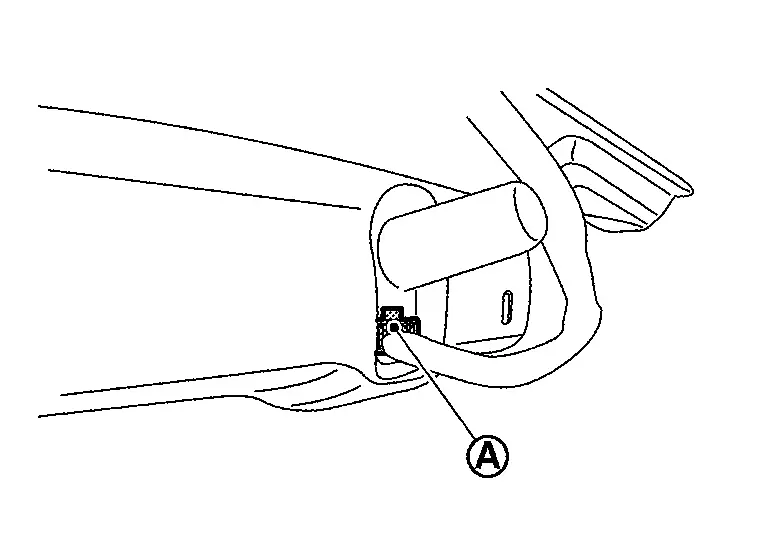
Remove inside mirror assembly mounting TORX bolt .
Remove inside mirror assembly as shown by the arrow in the figure.
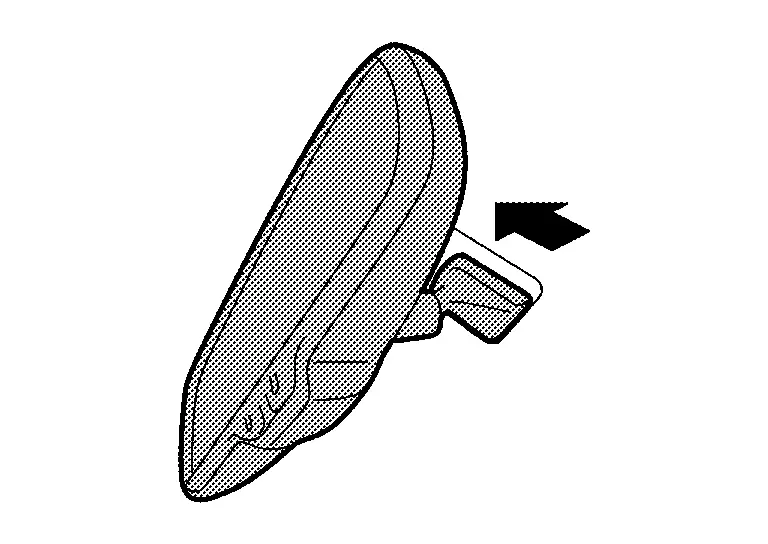
CAUTION:
Never use excessive force to remove the inside mirror assembly because it is inserted tightly into the inside mirror base.
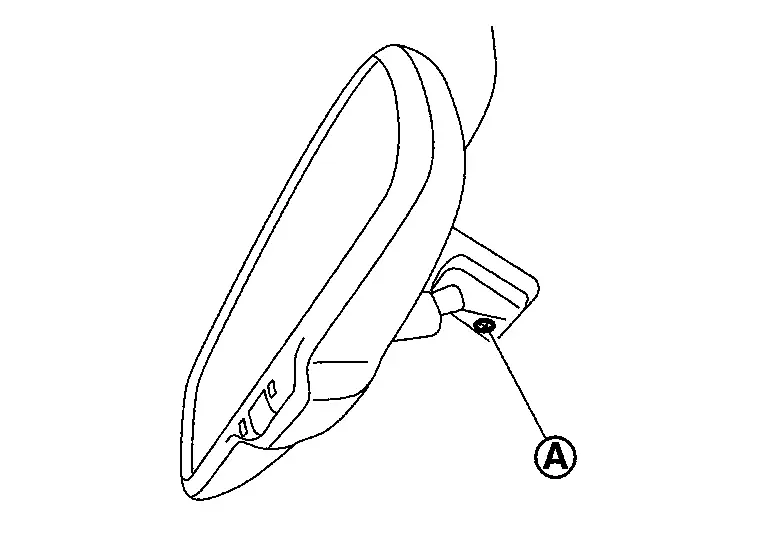
Manual Anti-Dazzling
Disengage inside mirror assembly fixing pawl using a remover tool (A), and then remove inside mirror assembly.
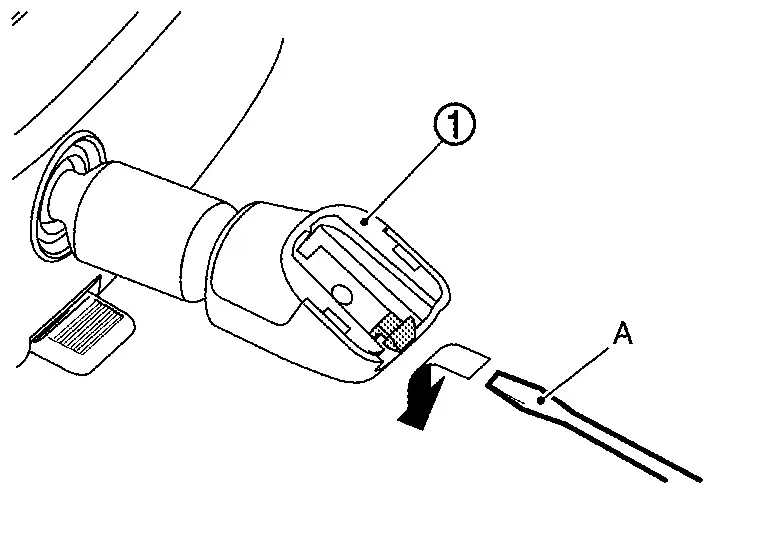
CAUTION:
-
Use a remover tool wrapped in tape.
-
Never use excessive force to remove the inside mirror assembly because it is inserted tightly into the inside mirror base.
INSTALLATION
Note the following items, and then install in the reverse order of removal.
Auto Anti-Dazzling
CAUTION:
Tighten inside mirror assembly fixing TORX bolt to the specified torque. Refer to Exploded View.
Manual Anti-Dazzling
CAUTION:
Replace inside mirror assembly with a new part after removal. Never reuse inside mirror assembly.
Other materials:
For system temporarily unavailable
Warning message/Warning light:
"Limited driver's aidVDC setting OFF" and
Illuminating
Possible cause: VDC switched off
System to check: AEB with Pedestrian Detection
Remedy: Turn VDC back on.
Warning message/Warning light:
"Driving Aids temporarily limited" and
...
Headlight and turn signal switch
Headlight switch
Basic information
CAUTION
Use headlights only with the engine running to prevent battery drain.
Lighting
Type A (if so equipped):
Rotate the switch to the position to turn on the parking, tail, license plate, and instrument panel lights.
Rotate to the position to activate ...
Information Display (combination Meter)
Door Open Warning
DESIGN/PURPOSEInformation display warns the driver that each door is open or is not fully closed. Symbol Message
–
SYNCHRONIZATION WITH MASTER WARNING LAMPSynchronization is applied.Refer to Master Warning Lamp.SYSTEM DIAGRAMSIGNAL PATH
BCM transmits door switch ...