Nissan Rogue (T33) 2021-Present Service Manual: Removal and Installation :: Hood Lock
Exploded View

 |
Hood lock |  |
Hood lock release cable assembly |  |
Hood lock release handle |
 |
: Clip | ||||
 |
: N·m (kg-m, in-lb) | ||||
 |
: Body grease | ||||
Hood Lock
Removal and Installation
REMOVAL
Remove front grill cover. Refer to Removal and Installation.
Disconnect hood lock switch harness connector (if equipped).
Remove hood lock mounting bolts, and then remove hood lock.
CAUTION:
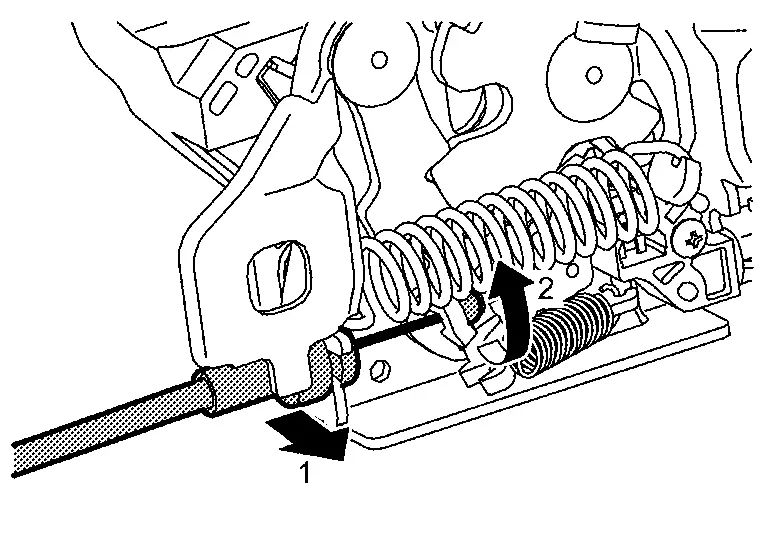
Never bend hood lock release cable strongly.
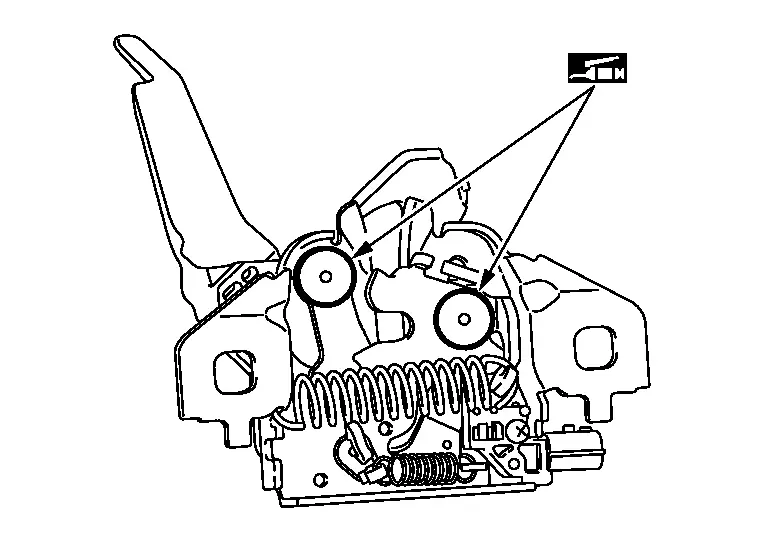
Disconnect hood lock release cable from hood lock according to the numerical order 1→2 indicated by arrows as shown in figure.
INSTALLATION
Note the following items, and then install in the reverse order of removal.
CAUTION:
-
Check that hood lock release cable is properly engaged with hood lock.
-
After installation, perform hood fitting adjustment. Refer to Adjustment.
-
After installation, perform hood lock control inspection. Refer to Inspection.
Inspection
 NOTE:
NOTE:
If the hood lock release cable is bent or deformed, replace it.
Check that operating force of hood lock release handle shall be less than 49 N (5.0 kg, 11.0 lb).
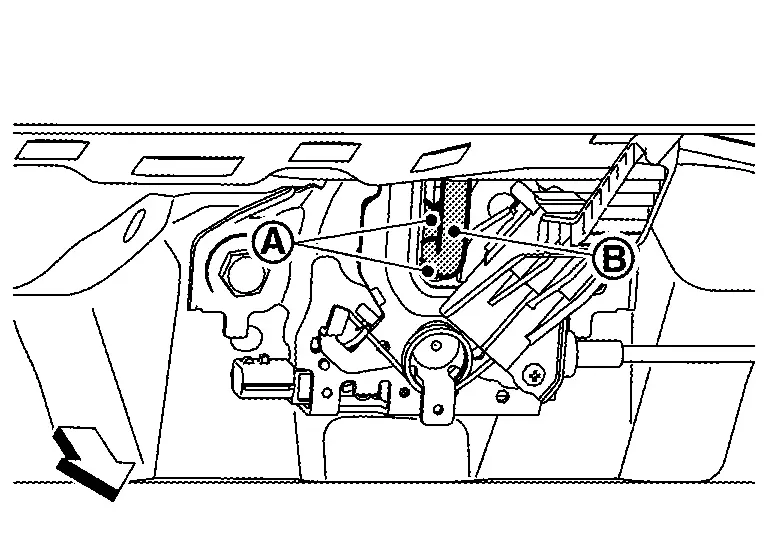
Check that primary latch  is securely engaged with striker
  when hood assembly is closed [free-fall from approximately 200mm (7.874 in) height].
| : Nissan Ariya Vehicle front |
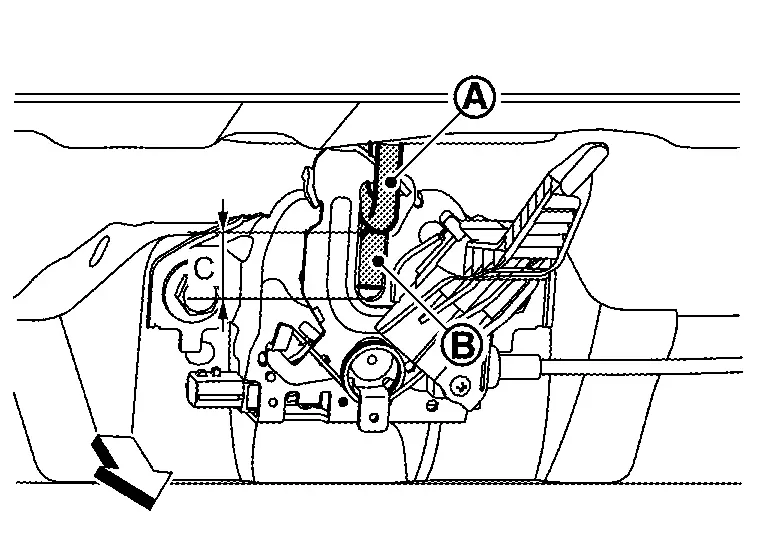
While operating the hood opener carefully, check that the front end of the hood is lifted by approximately 20 mm (0.787 in) (C). Also, check that the hood opener returns to the original position.
|
Striker | |
Primary latch |
| : Nissan Ariya Vehicle front |
Check that secondary latch is properly engaged with striker [8.1mm (0.319 in) MIN] (C).
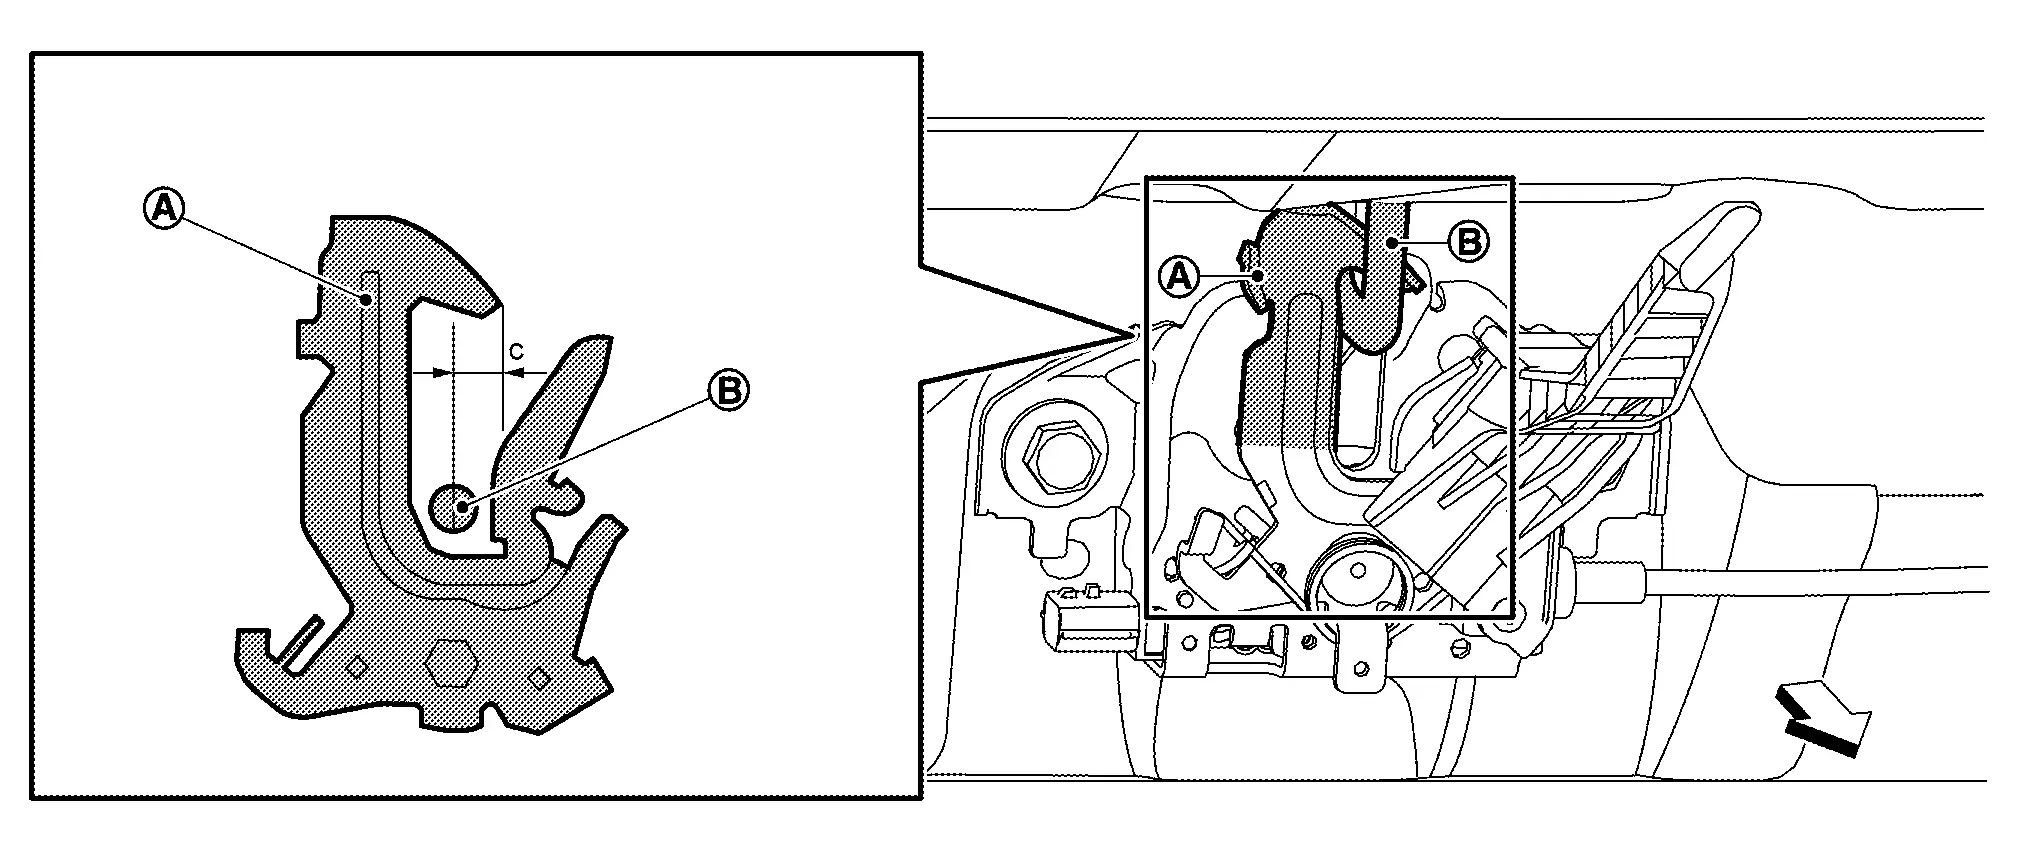
| : Nissan Ariya Vehicle front |
Check that secondary latch is securely engaged with striker from dead load of hood assembly.
Check the hood lock lubrication condition. If necessary, apply body grease to hood lock.
|
: Body grease |
Hood Lock Release Handle
Removal and Installation
REMOVAL
Remove hood lock release handle from hood lock release cable assembly.
INSTALLATION
Note the following items, and then install in the reverse order of removal.
CAUTION:
-
After installation, perform hood lock control inspection. Refer to Inspection.
-
After installation, check hood open/close operation.
Hood Lock Release Cable Assembly
Removal and Installation
REMOVAL
Remove front fender protector LH. Refer to Removal and Installation.
Remove front combination lamp LH. Refer to Removal and Installation.
Disconnect hood lock release cable assembly from hood lock. Refer to Removal and Installation.
Disengage hood lock release cable assembly fixing clips.
Remove hood lock release cable assembly mounting bolt.
Remove grommet of the lower dash, and pull the hood lock release cable assembly toward inside Nissan Ariya vehicle.
CAUTION:
While pulling, never damage (peeling) the outside of hood lock release cable.
INSTALLATION
Note the following items, and then install in the reverse order of removal.
CAUTION:
-
Never bend cable too much, keeping the radius 100 mm (3.937 in) or more.
-
Install grommet in the panel hole surely.
-
Check that cable is not offset from the positioning grommet, and apply the sealant to the grommet
properly.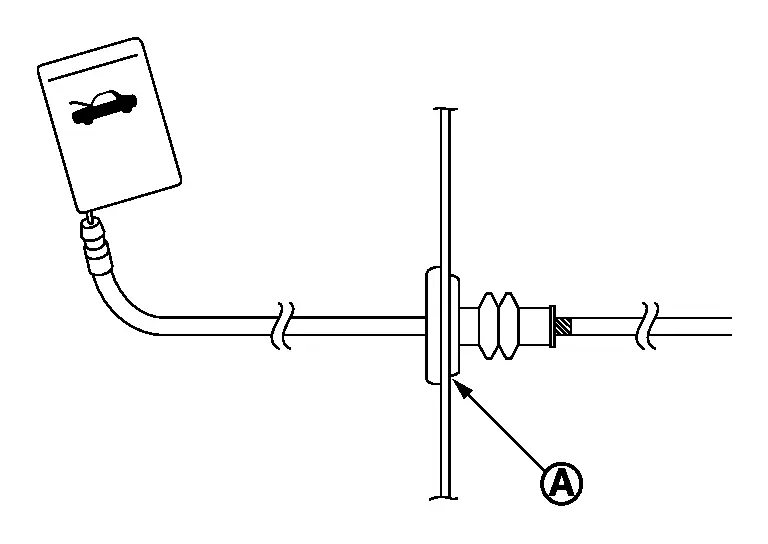
-
After installation, perform hood lock control inspection. Refer to Inspection.
Other materials:
Comment utiliser l'écran d'informations du véhicule
L'écran d'informations du véhicule peut être personnalisé à l'aide de la commande et des boutons situés sur le volant. Ces commandes du Nissan Rogue permettent de naviguer rapidement, sans quitter la route des yeux.
Commande de défilement - permet de naviguer parmi les paramètres e ...
Intelligent Forward Collision Warning (I-FCW)
Basic information
WARNING
Failure to follow the warnings and instructions for proper use of the I-FCW system on the Nissan Rogue could result in serious injury or death.
The I-FCW system helps alert the driver before a potential collision but cannot prevent one. The driver must remain attentive, ...
Variable Compression Ratio Control Shaft 2 Rotation Angle Sensor
Component Inspection
CHECK VCR CONTROL SHAFT 2 ROTATION ANGLE SENSOR
Turn ignition switch OFF.
Disconnect VCR control shaft 2 rotation angle sensor harness connector.
Check the continuity between VCR control shaft 2 rotation angle sensor harness connectors.
VCR control shaft 2 rota ...