Nissan Rogue (T33) 2021-Present Service Manual: Removal and Installation :: Fuel Filler Lid Opener
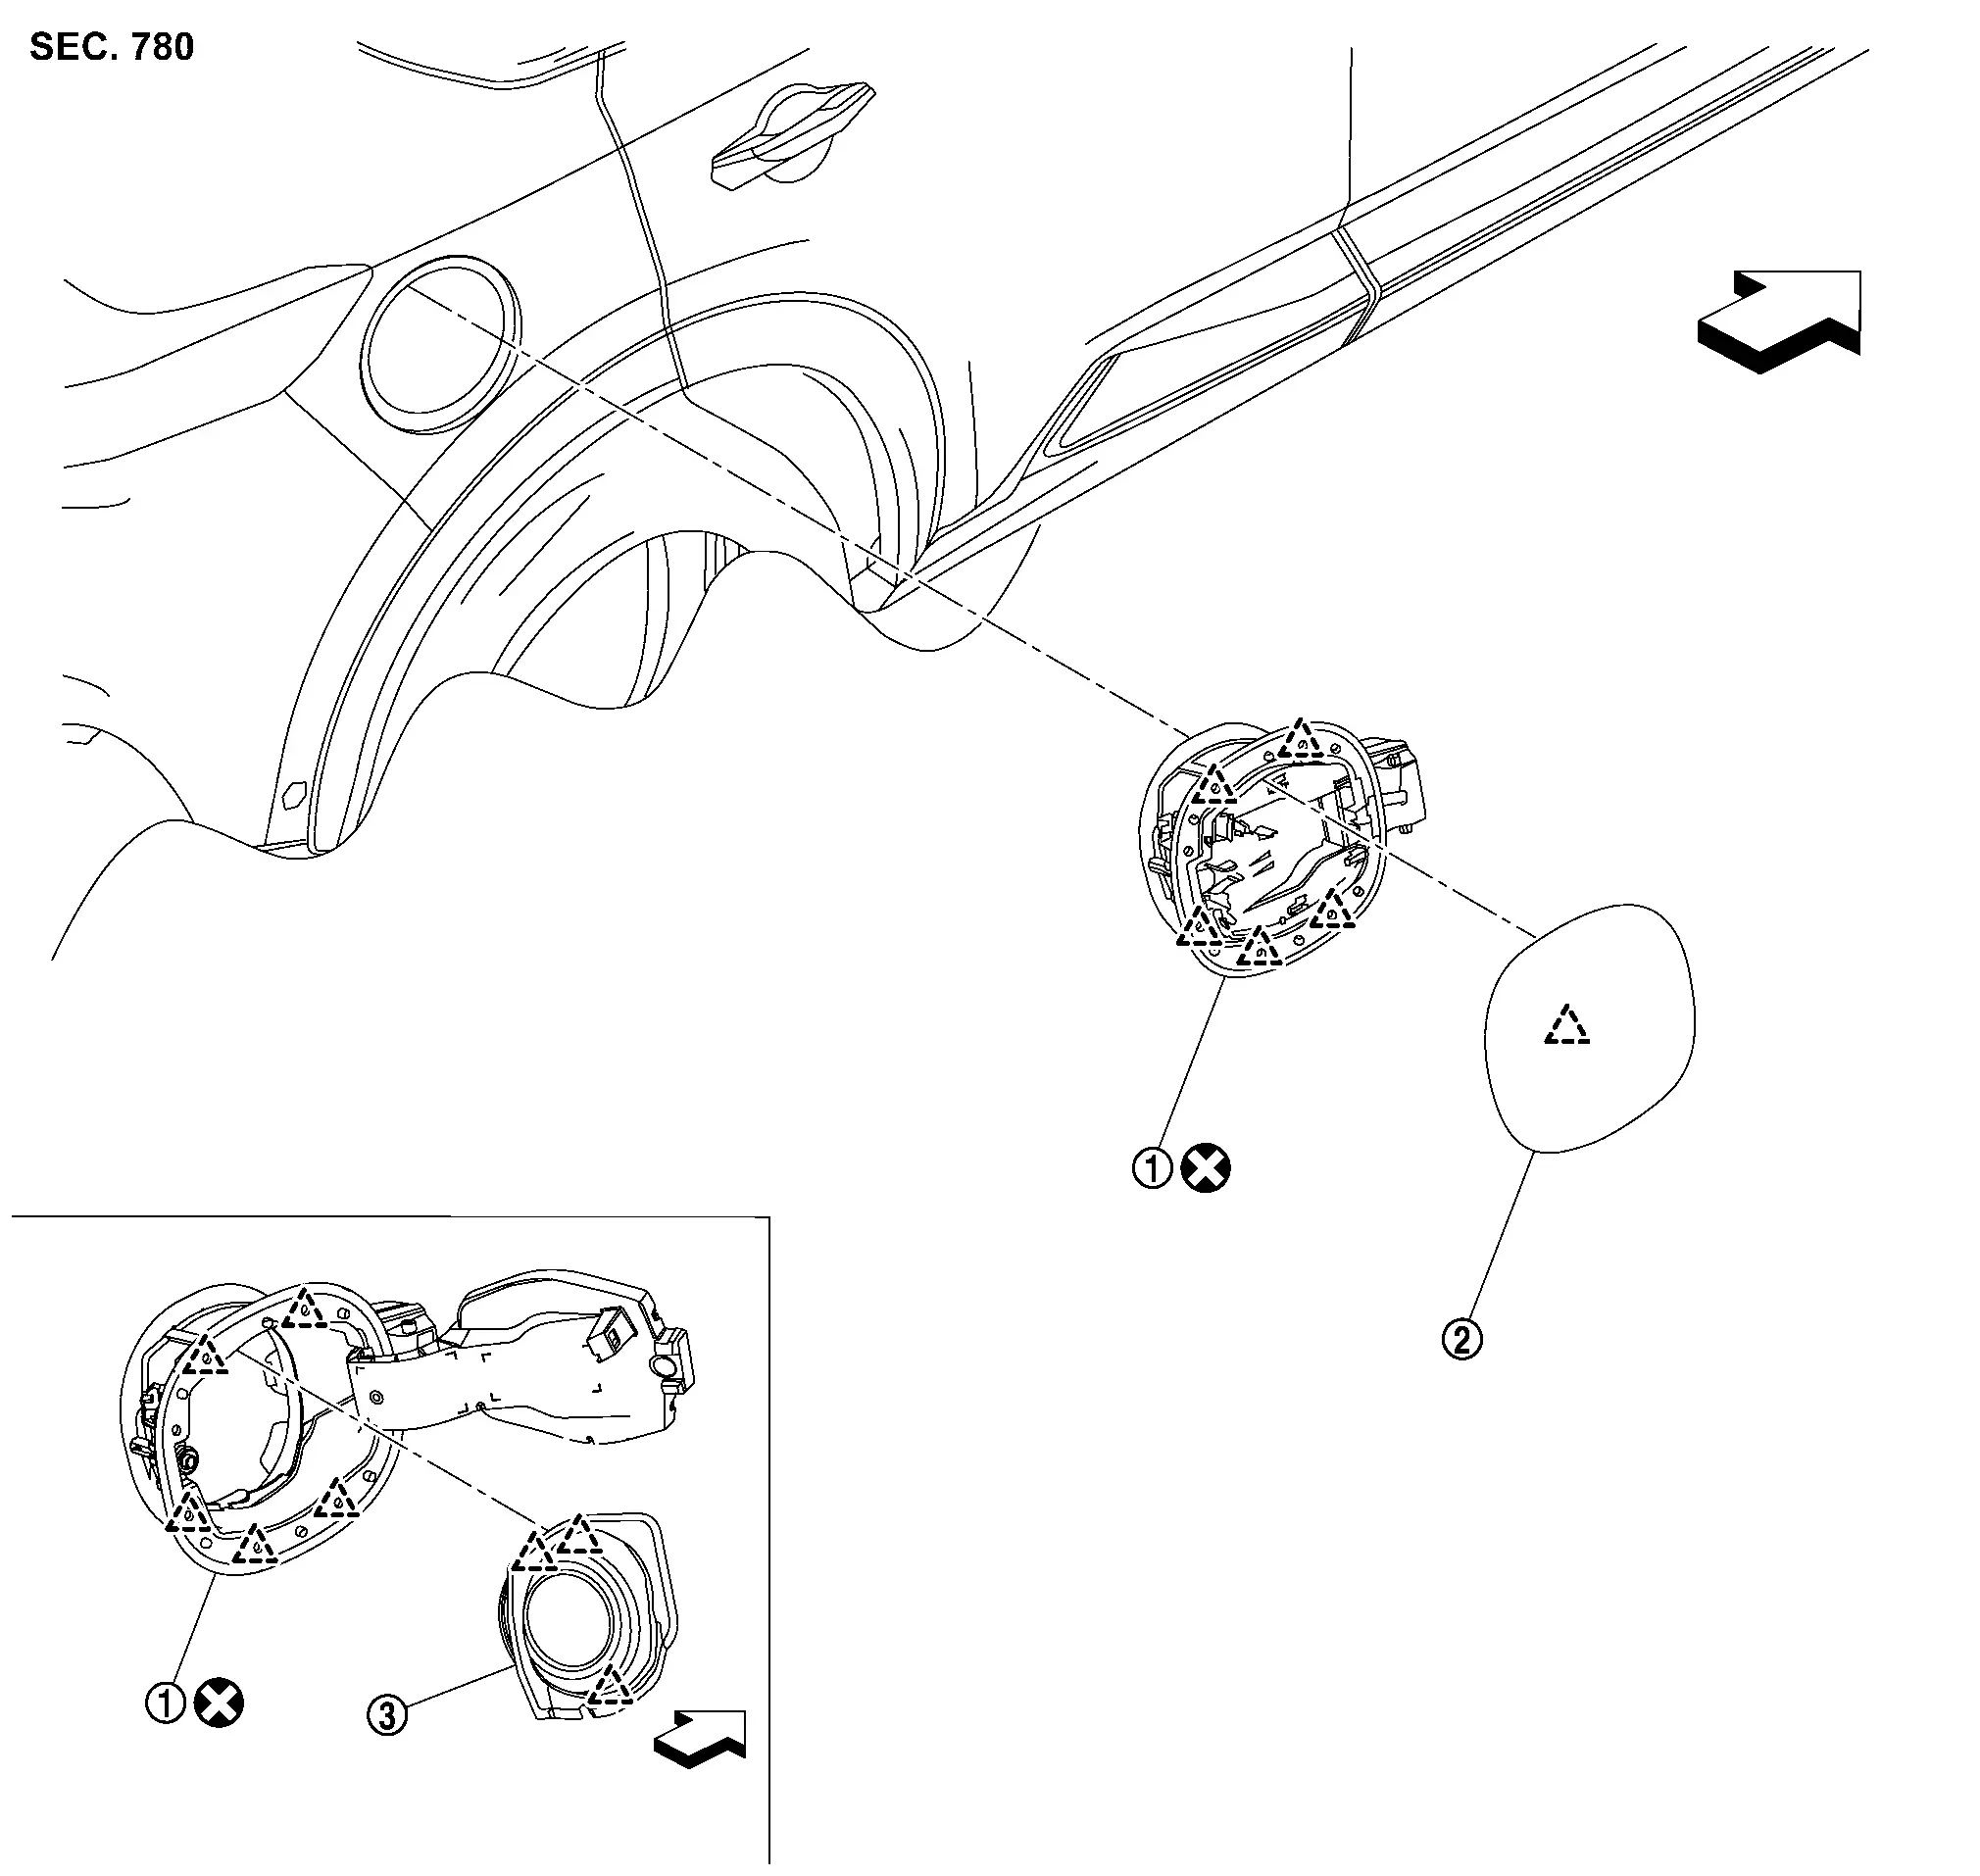
Exploded View
 |
Fuel filler base assembly |  |
Fuel filler lid |  |
Fuel filler base mask |
 |
: Pawl | ||||
| : Nissan Ariya Vehicle front | |||||
 |
: Always replace after every disassembly. | ||||
Fuel Filler Lid
Removal and Installation
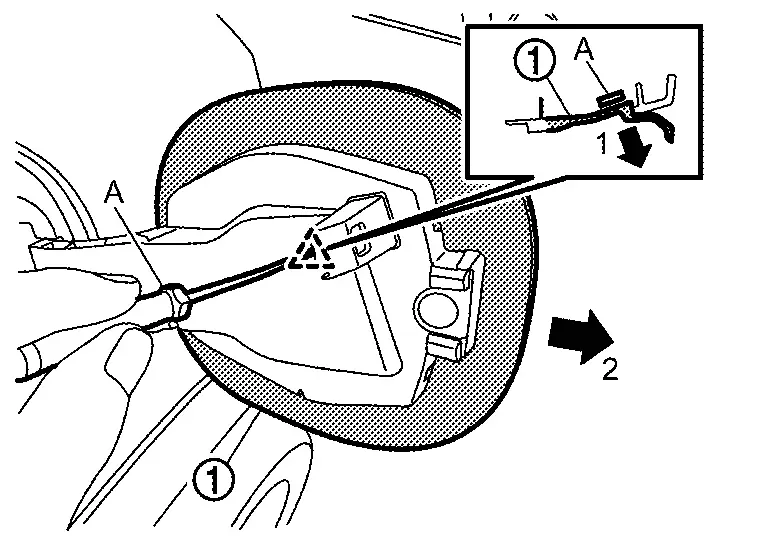
REMOVAL
Fully open fuel filler base assembly.
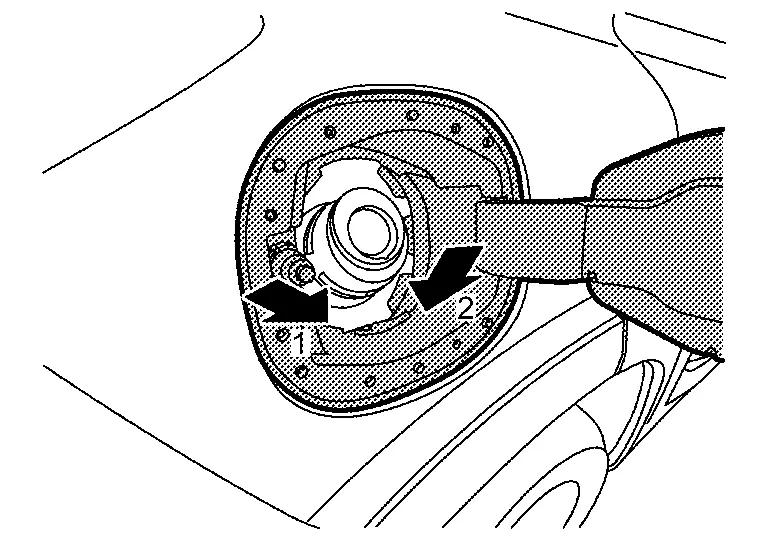
Disengage fuel filler lid fixing pawl using a removal tool (A), and then remove fuel filler lid according to numerical order 1ŌåÆ2 indicated by arrows as shown in figure.
|
: Pawl |
INSTALLATION
Note the following items, and then install in the reverse order of removal.
CAUTION:
After installation, check fuel filler lid assembly open/close, lock/unlock operation.
 NOTE:
NOTE:
-
The following table shows the specified values for checking normal installation status.
-
Fitting adjustment cannot be performed.
Unit: mm [in]
| Portion | Clearance | Evenness |
|---|---|---|
| Fuel filler lid ŌĆō Body side outer |
2.0 ŌĆō 4.0 [0.079 ŌĆō 0.157] |
(-1.0) ŌĆō (+1.0) [(-0.039) ŌĆō (+0.039)] |
Fuel Filler Base Assembly
Removal and Installation
CAUTION:
Never reuse fuel filler base assembly. Always replace it with a new one when it is removed.
REMOVAL
Remove fuel filler lid. Refer to Removal and Installation.
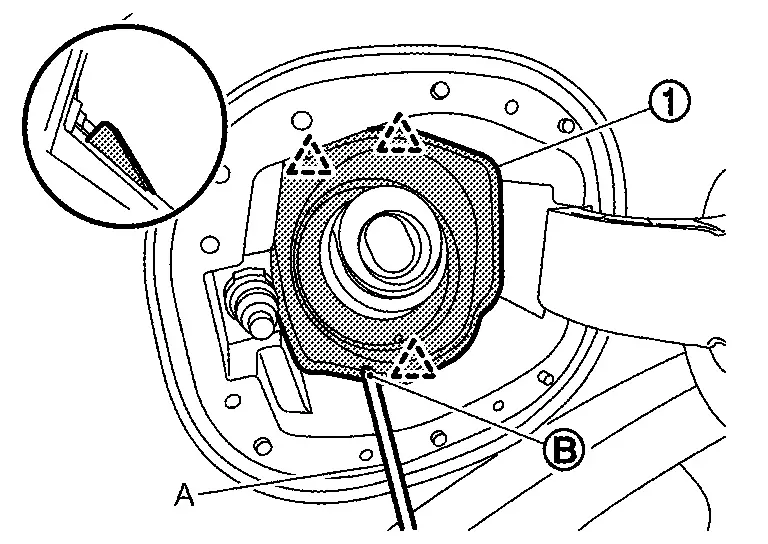
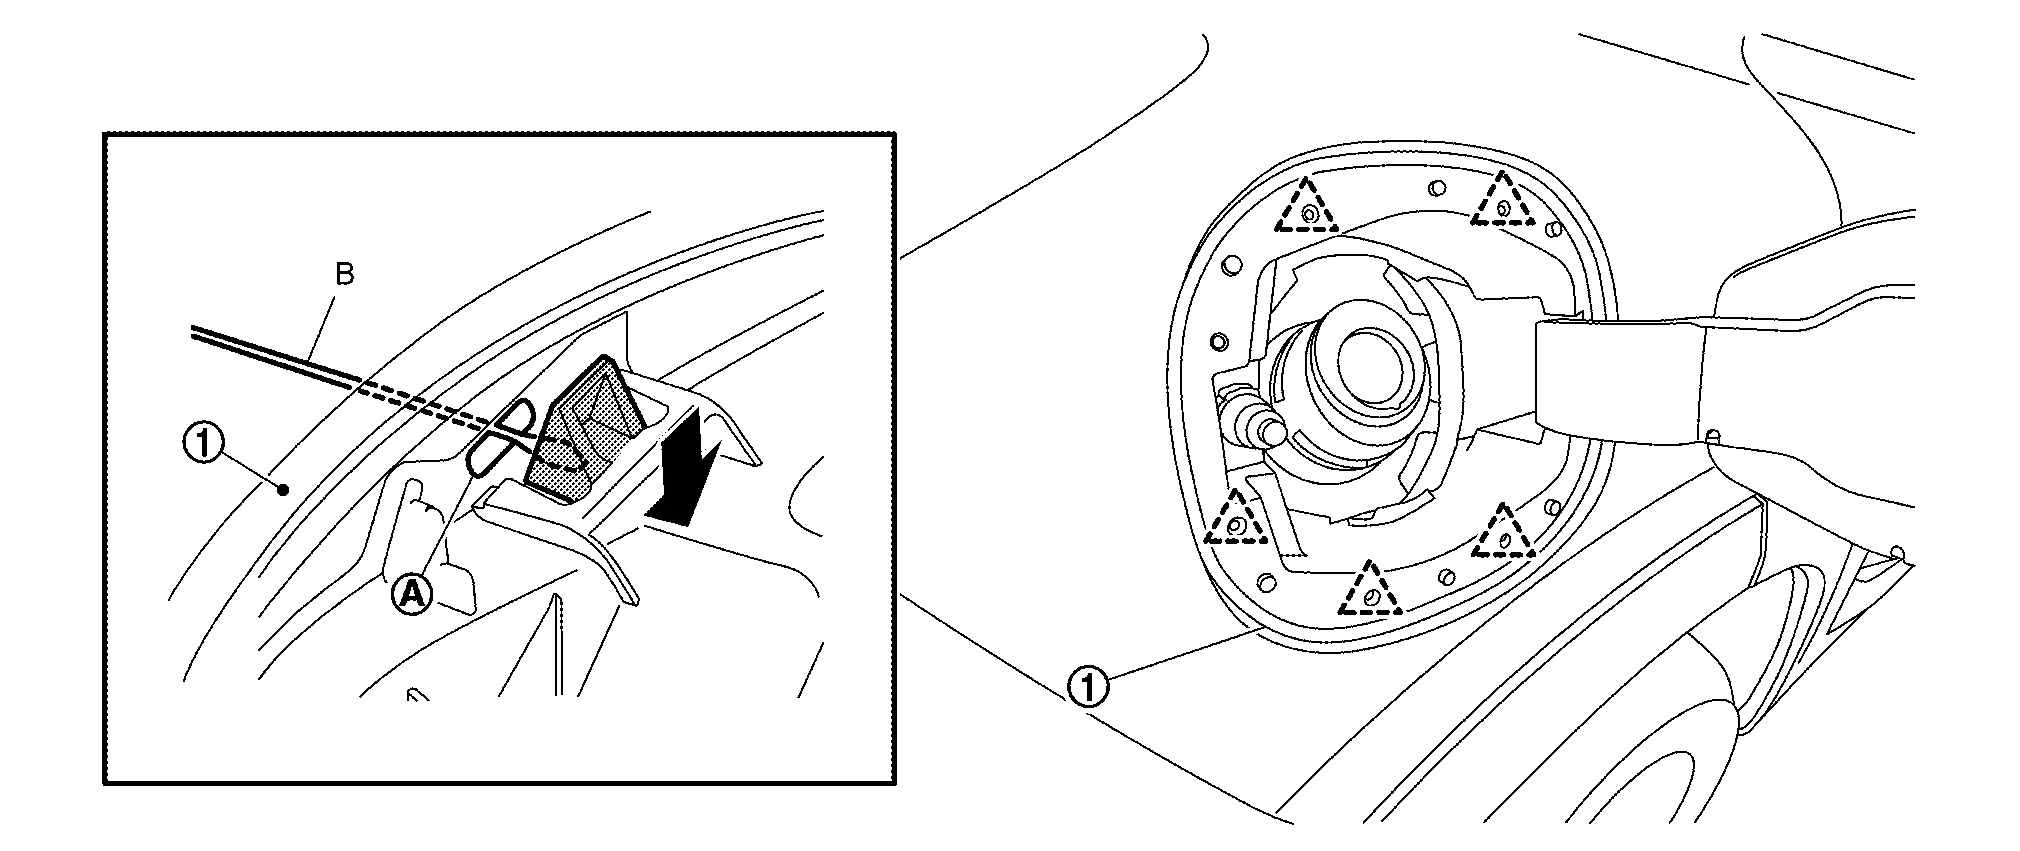
Disengage fuel filler base mask fixing pawls using a remover tool (A) into drain hole  , and then remove fuel filler base mask.
|
: Pawl |
Drill a hole at recessed part  of fuel filler base.
CAUTION:
-
Use a drill bit of ╬”3.0 - 4.0 mm (╬”0.12 - 0.16 in) not to damage the Nissan Ariya vehicle body.
-
Never insert over 3.5 mm (0.138 in) from tip of drill bit not to break and/or damage pawl of fuel filler base.
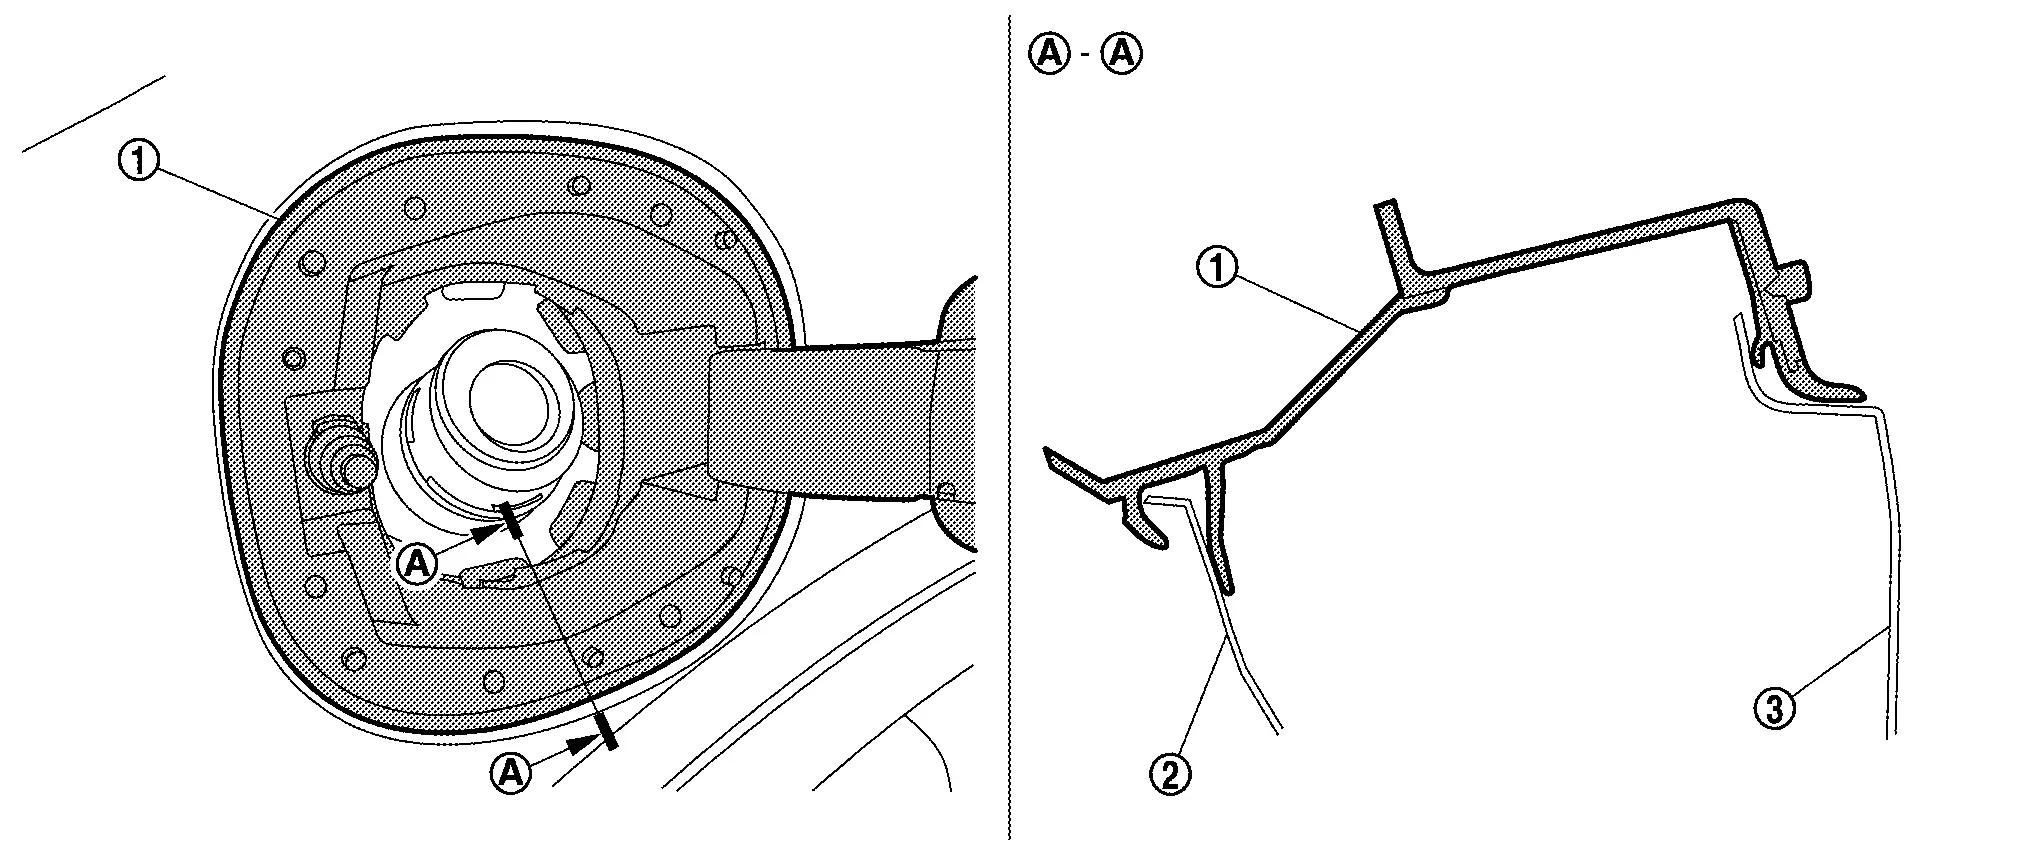
Insert a remover tool (B) into access hole of fuel filler base assembly , and then disengage pawls while pushing pawl using a remover tool.
|
: Pawl |
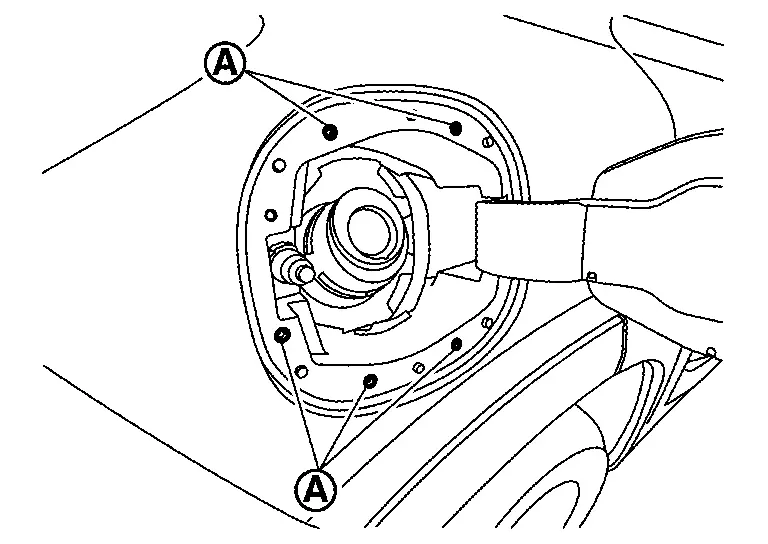
Remove fuel filler base assembly from Nissan Ariya vehicle body according to the numerical order 1ŌåÆ2 indicated by arrows as shown in figure.
CAUTION:
Never damage Nissan Ariya vehicle body.
INSTALLATION
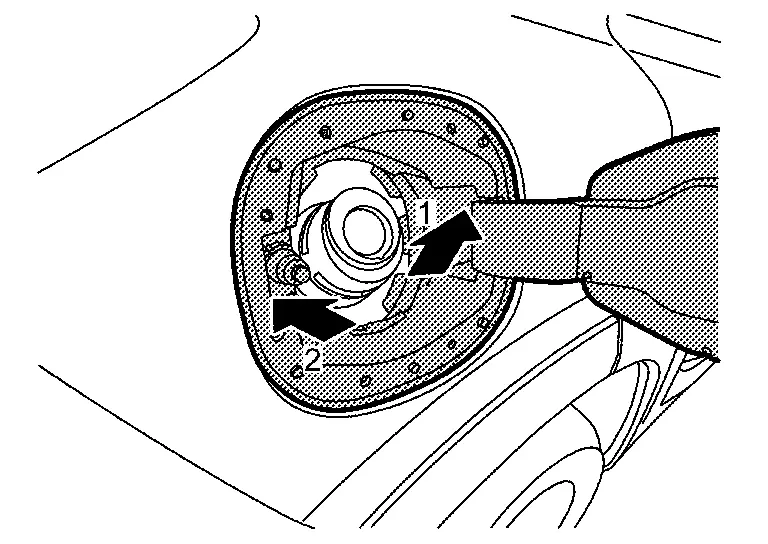
Install fuel filler base assembly to vehicle body according to the numerical order 1ŌåÆ2 indicated by arrows as shown in figure.
CAUTION:
Never damage Nissan Ariya vehicle body.
Install fuel filler base to rear wheel outer panel RH and body side inner panel .
Install fuel filler base mask to fuel filler base.
Install fuel filler lid to fuel filler base assembly. Refer to Removal and Installation.
CAUTION:
After installation, check fuel filler base assembly open/close, lock/unlock operation.
NOTE:
-
The following table shows the specified values for checking normal installation status.
-
Fitting adjustment cannot be performed.
Unit: mm [in]
| Portion | Clearance | Evenness |
|---|---|---|
| Fuel filler lid ŌĆō Body side outer |
2.0 ŌĆō 4.0 [0.079 ŌĆō 0.157] |
(-1.0) ŌĆō (+1.0) [(-0.039) ŌĆō (+0.039)] |
Other materials:
Pr├®cautions pour ├®viter tout risque de collision et de tonneau
AVERTISSEMENT
Une utilisation imprudente ou dangereuse de ce v├®hicule peut entra├«ner une perte de contr├┤le, un accident grave ou un retournement.
Restez vigilant et adoptez une conduite prudente en toutes circonstances. Respectez scrupuleusement le code de la route et adaptez votre vitesse au ...
Symptom Diagnosis. Door Does Not Lock/unlock with Intelligent Key (one Key)
Description
All doors do not lock/unlock using Intelligent Key button. (One Intelligent Key has the symptom, other keys operate normally.)NOTE:
Before starting diagnosis check that vehicle condition is
as shown in ŌĆ£Conditions of Nissan Ariya vehicleŌĆØ, and check each
symptom.
SYMPTOM TABLE ...
System
Automatic Air Conditioning System
System Description
SYSTEM DIAGRAM Component Function
ABS actuator and electric unit (control unit)
ABS actuator and electric unit
(control unit) transmits Nissan Ariya vehicle speed signal to A/C amp.
via CAN communication line.
AV control unit
...