Nissan Rogue (T33) 2021-Present Service Manual: Removal and Installation :: Front Pillar Finisher
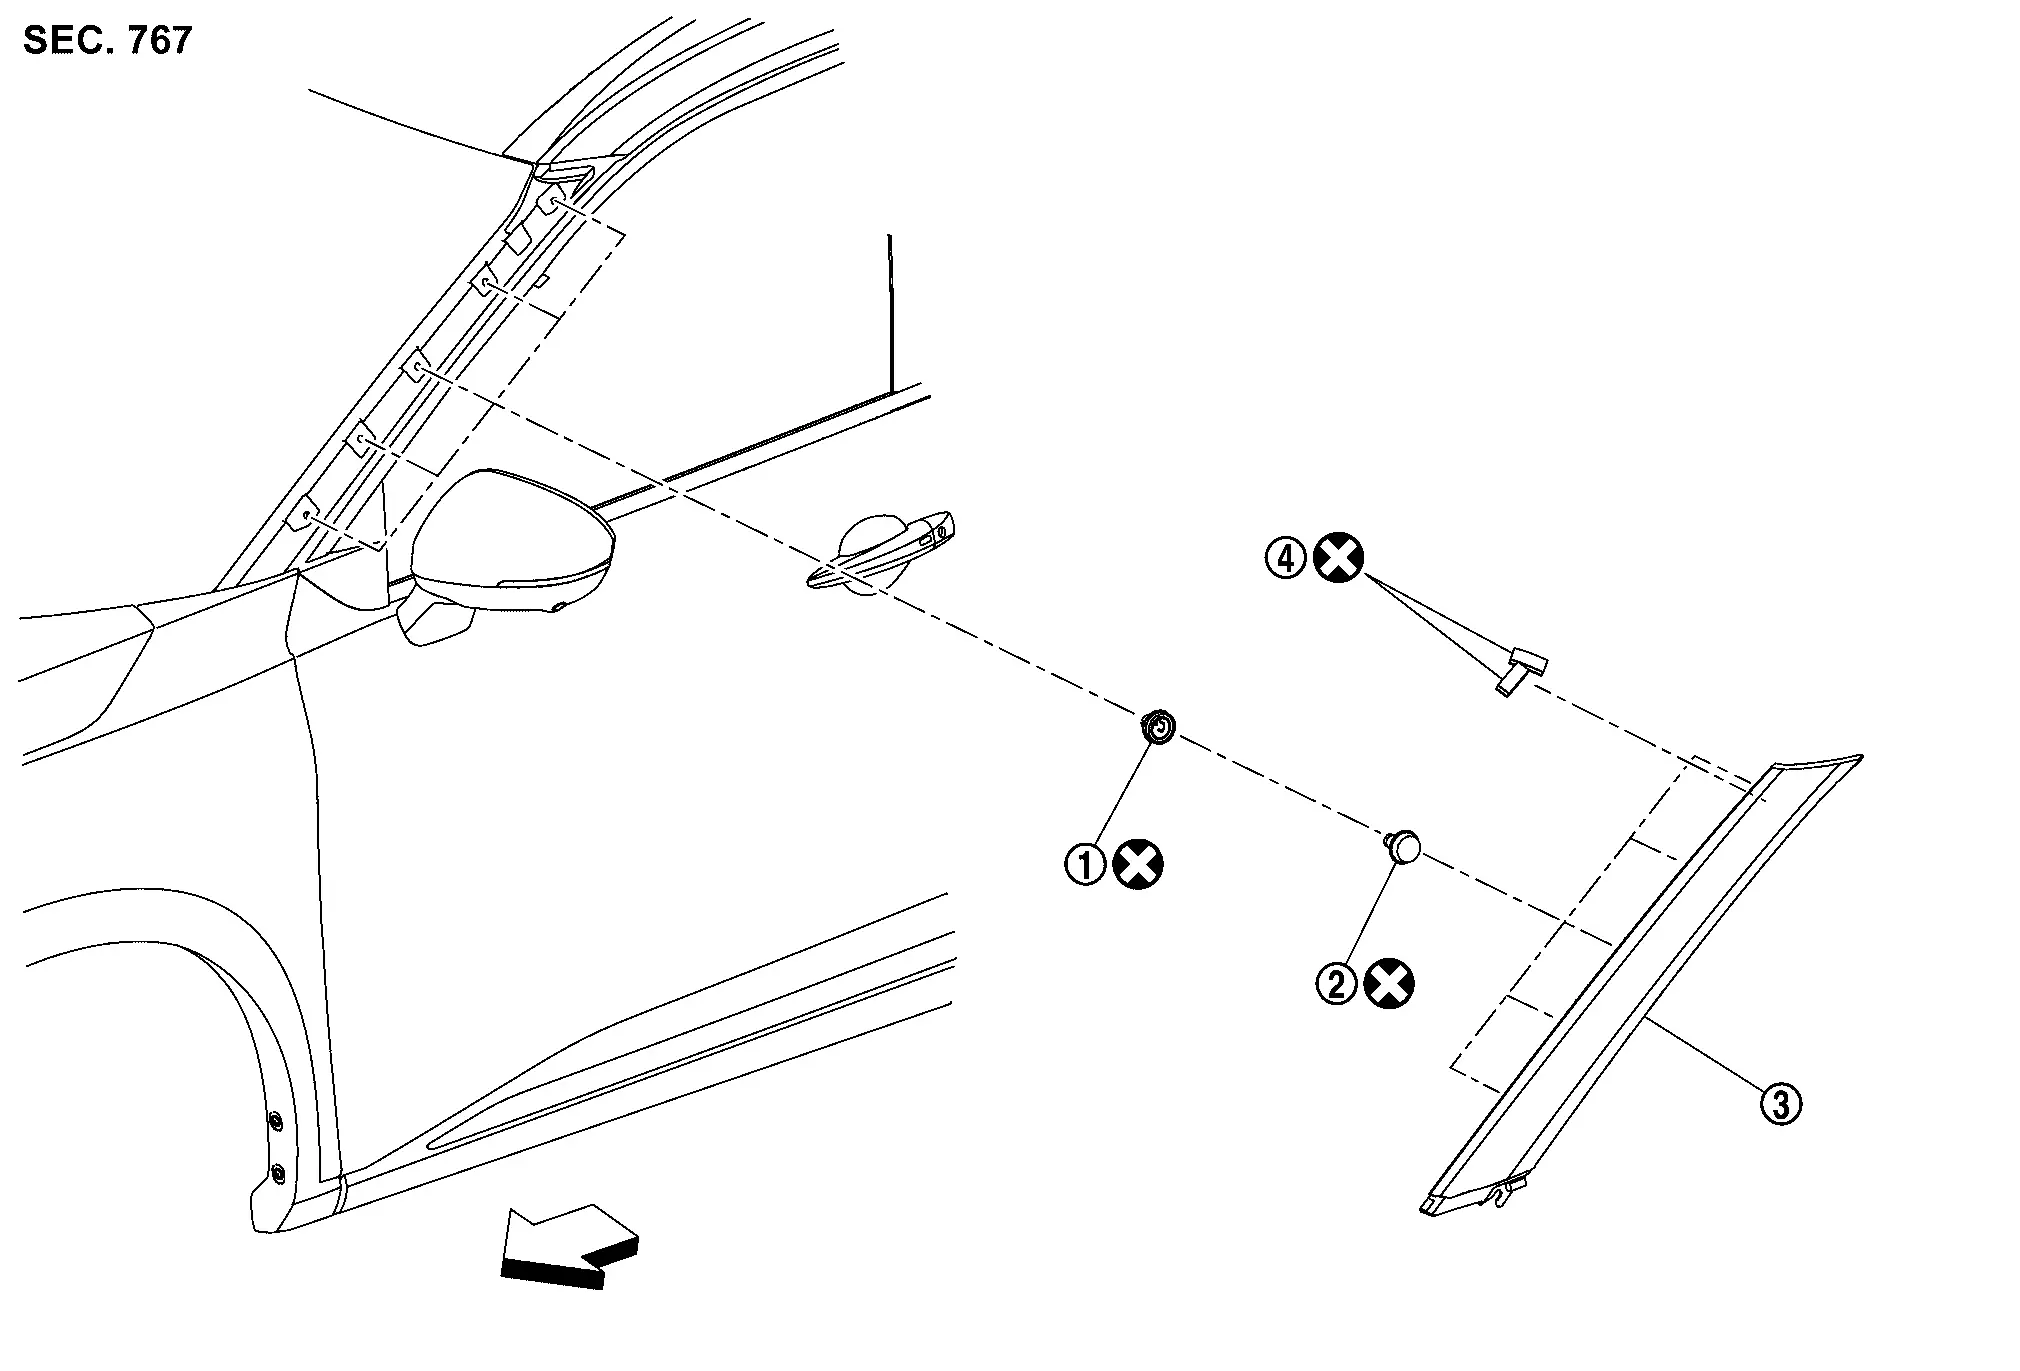
Exploded View
 |
Grommet |  |
Clip |  |
Front pillar finisher |
 |
Rubber | ||||
| : Nissan Ariya Vehicle front | |||||
 |
: Always replace after every disassembly. | ||||
Removal and Installation
REMOVAL
Fully open front door.
Remove fender cover. Refer to Removal and Installation.
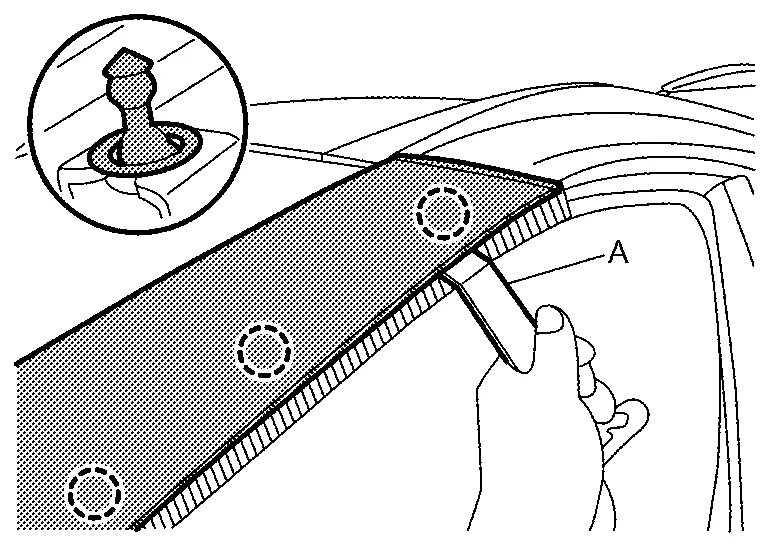
Apply protective tape (A) on the part to protect it from damage.

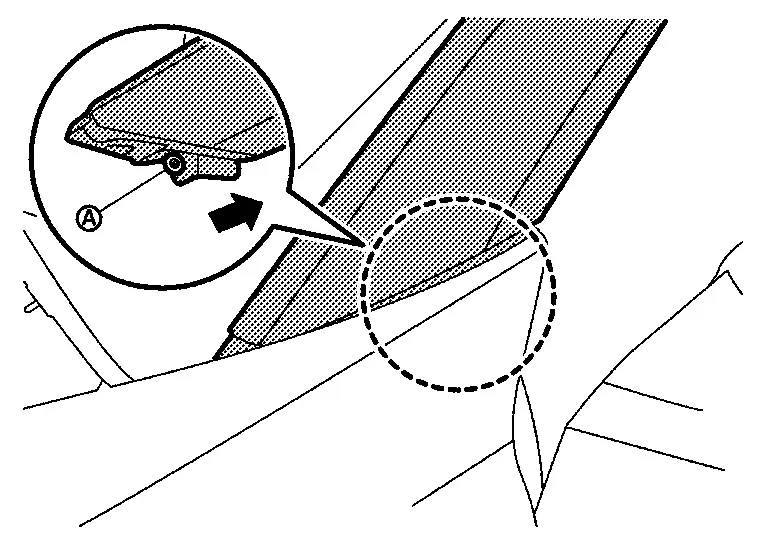
Disengage front pillar finisher fixing clips using a remover tool (A), and then cut double-sided tape of rubber.
 |
: Clip |
Remove front pillar finisher from clip  as shown by the arrow in the figure.
INSTALLATION
Installation is in the reverse order of removal.
CAUTION:
-
Never reuse rubber, clip and grommet.
-
Clean the mounting surface and check that no paint grain or dust remains, before starting the operation.
-
Degrease body side outer panel mounting surface for front pillar finisher.
-
Apply primer to the rubber mounting surface.
-
Never wash the Nissan Ariya vehicle within 24 hours after installing so as to keep adhesive.
Other materials:
Admission Valve
Exploded View
Air duct bracket
Admission valve
gasket
Air duct hose
Air duct
Comply with the installation procedure when tightening. Refer to Removal and Installation.
To air duct. Refer to Exploded View.
To turbocharger. Refer to Exploded V ...
U2259 Can Comm Circuit
DTC Description
DTC DETECTION LOGIC DTC
CONSULT screen terms
(Trouble diagnosis content)
DTC detection condition
U2259
87
CAN comm err (steering control unit)
[CAN comm err (steering control unit)]
Diagnosis condition
Ignition switch ON
Signal (terminal)
CAN commu ...
Dtc/circuit Diagnosis. U3d00-06 Cell Voltage Circuit
DTC Description
DTC DETECTION LOGIC DTC No.
CONSULT screen items
(Trouble diagnosis content) DTC Detection Condition
U3D00-06
Cell voltage circuit
(Cell voltage circuit)
Diagnosis condition
Ignition switch is ON.
Signal (terminal)
BCM (CPU).
Threshold
When a CPU fu ...