Nissan Rogue (T33) 2021-Present Service Manual: Removal and Installation :: Roof Rail
Exploded View
WITHOUT ROCK CREEKÂŪ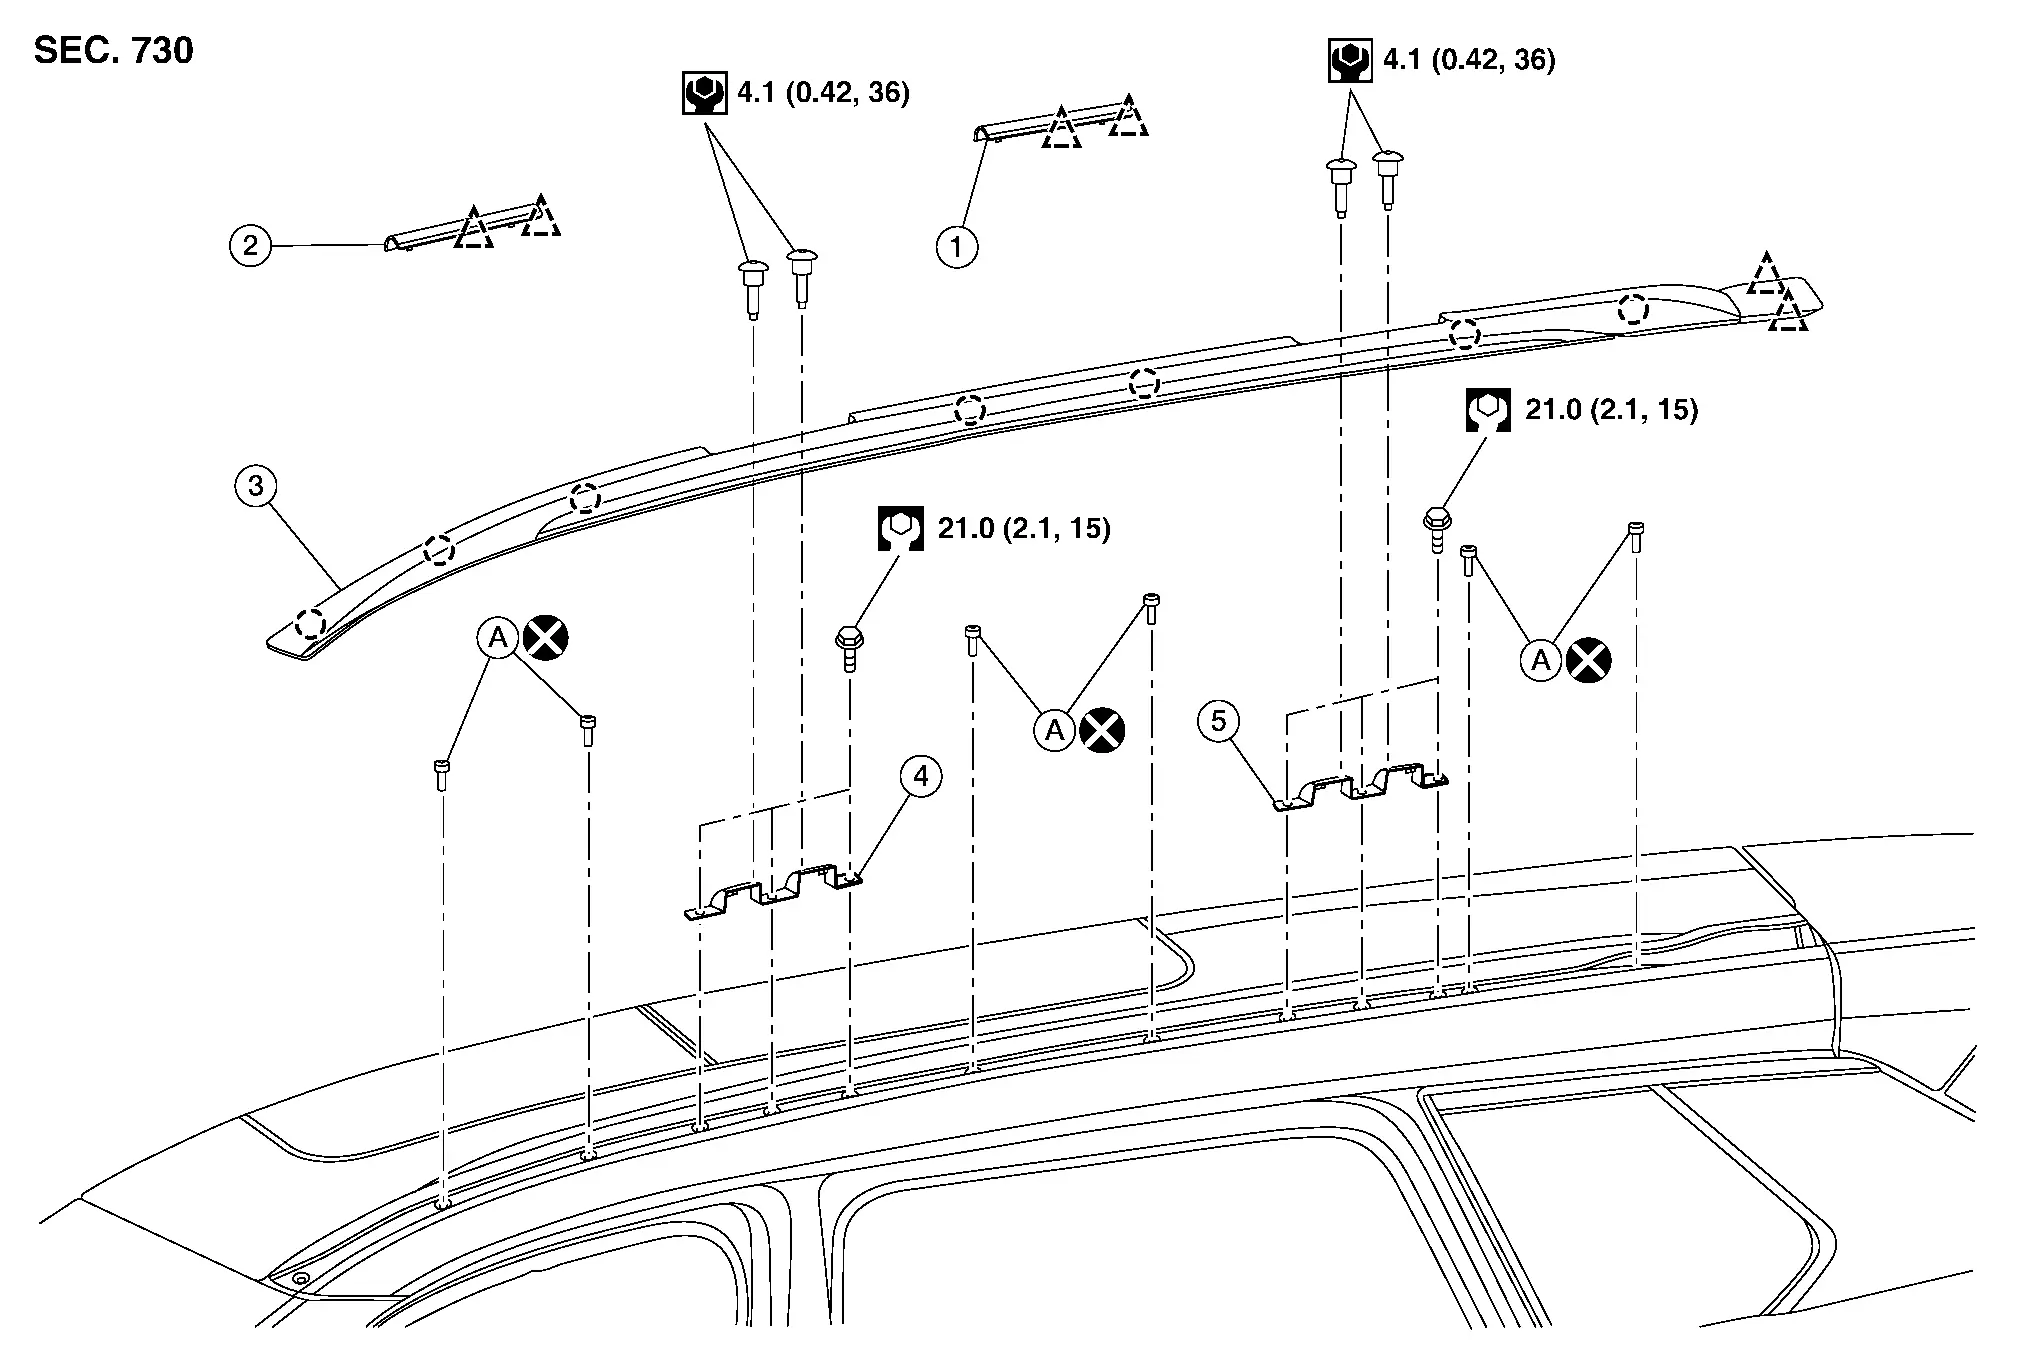
 |
Roof rail cover rear |  |
Roof rail cover front |  |
Roof rail |
 |
Roof rail bracket front |  |
Roof rail bracket rear | ||
 |
: Rivet | ||||
 |
: Clip | ||||
 |
: Pawl | ||||
 |
: Always replace after every disassembly | ||||
 |
: N·m (kg-m, ft-lb) | ||||
WITH ROCK CREEKÂŪ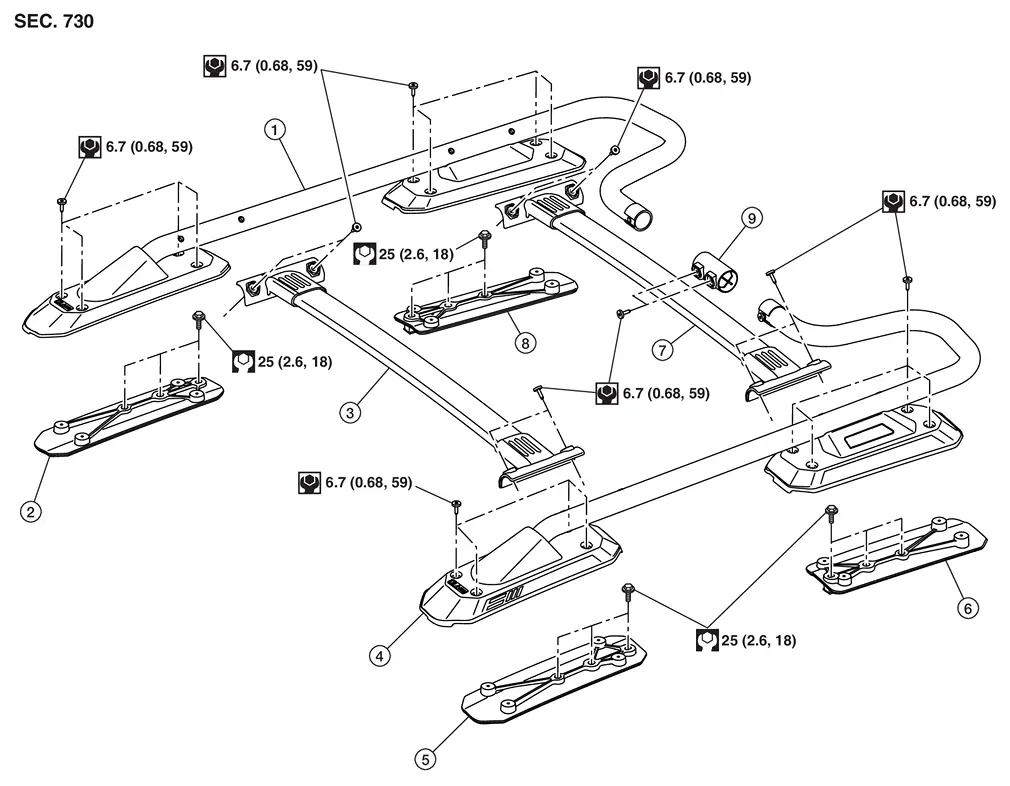
|
Roof rail RH | |
Roof rail bracket front RH | |
Crossbar front |
|
Roof rail LH | |
Roof rail bracket front LH |  |
Roof rail bracket rear LH |
 |
Crossbar rear |  |
Roof rail bracket rear RH |  |
Connector |
|
: N·m (kg-m, ft-lb) | ||||
Removal and Installation
Without Rock CreekÂŪ
REMOVAL
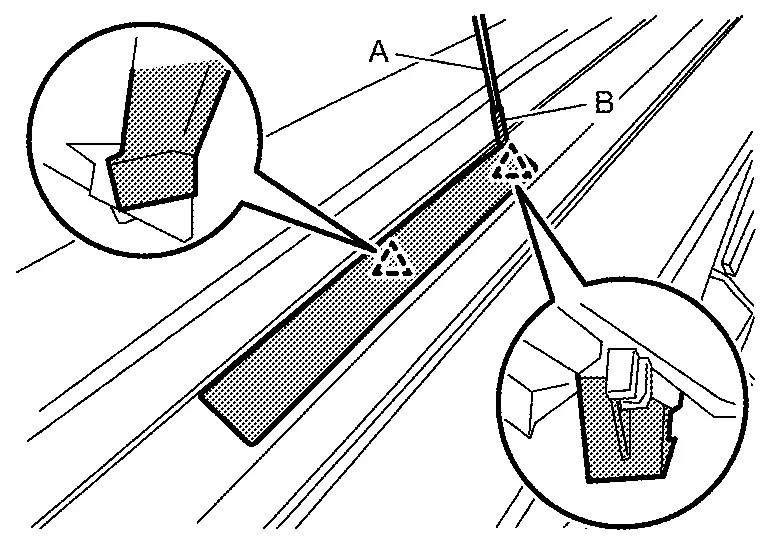
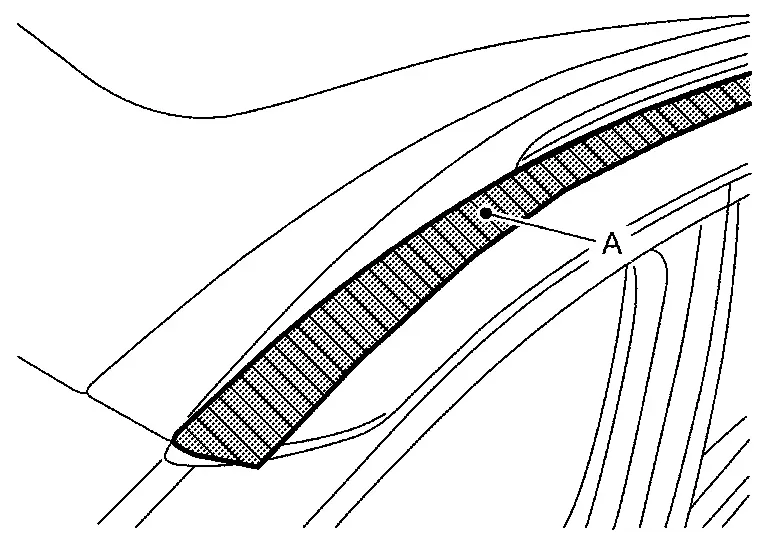
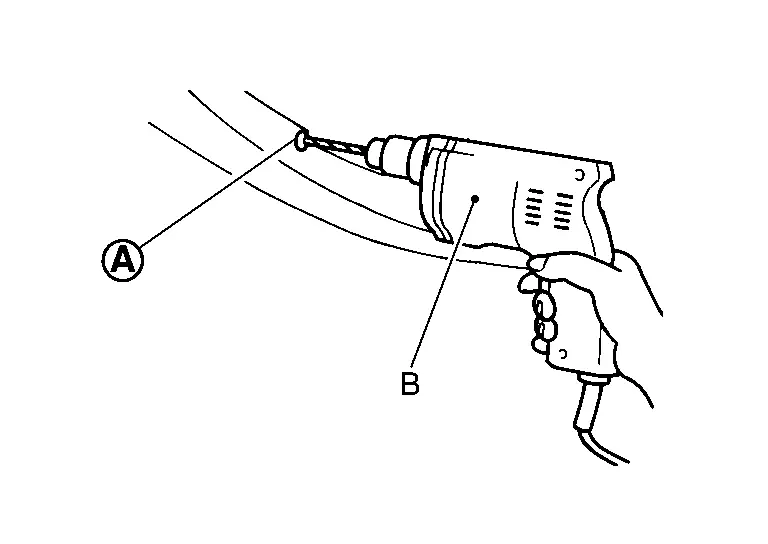
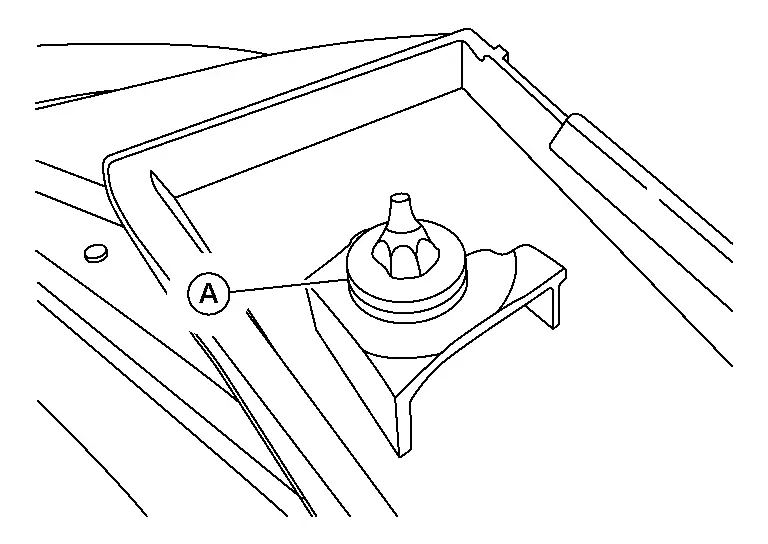
Remove roof rail cover fixing pawls using a remover tool (A), and then remove roof rail cover front and roof rail cover rear.
CAUTION:
Use a remover tool wrapped in tape (B).
|
: Pawl |
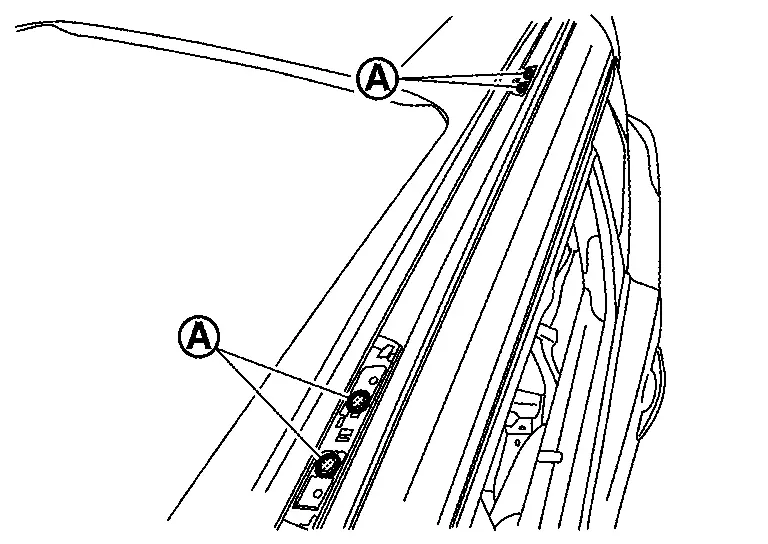
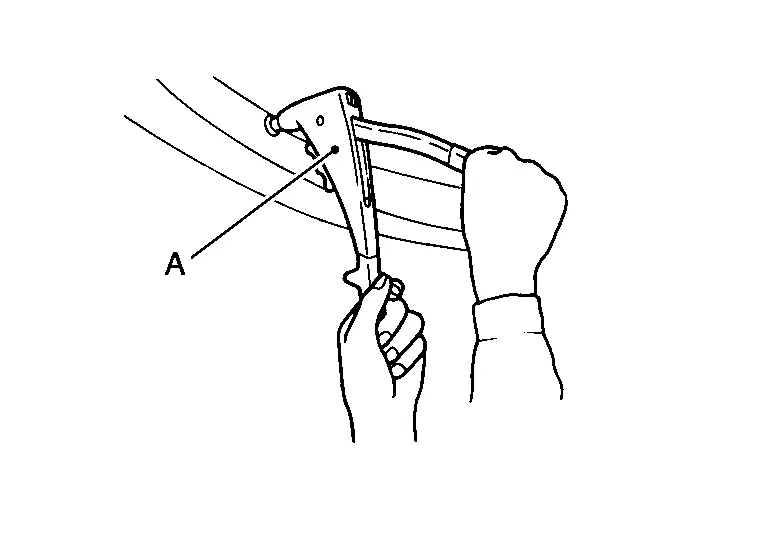
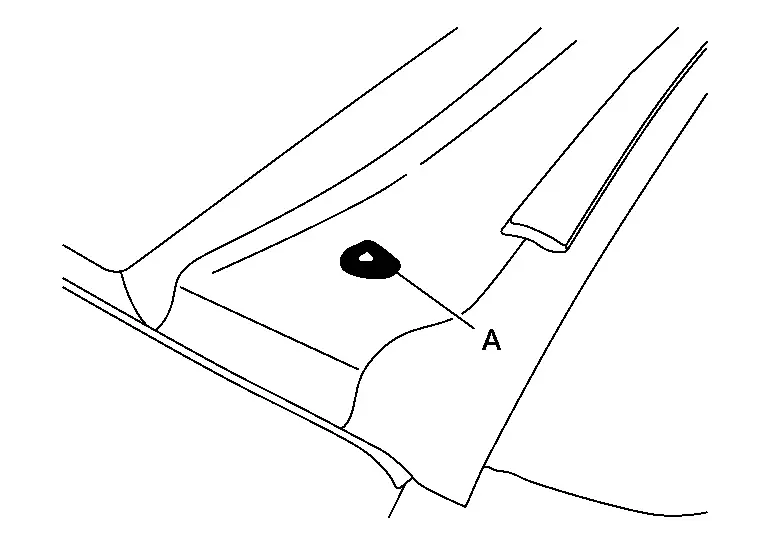
Remove roof rail fixing clips .
Apply protective tape (A) on the part to protect it from damage.
Disengage roof rail fixing clips using a remover tool (A).
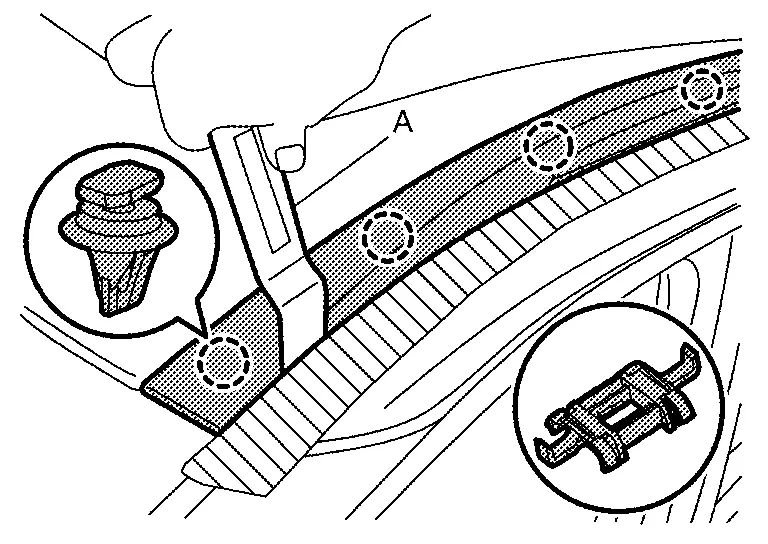
|
: Clip |
Remove roof rail fixing pawls, and then remove roof rail.
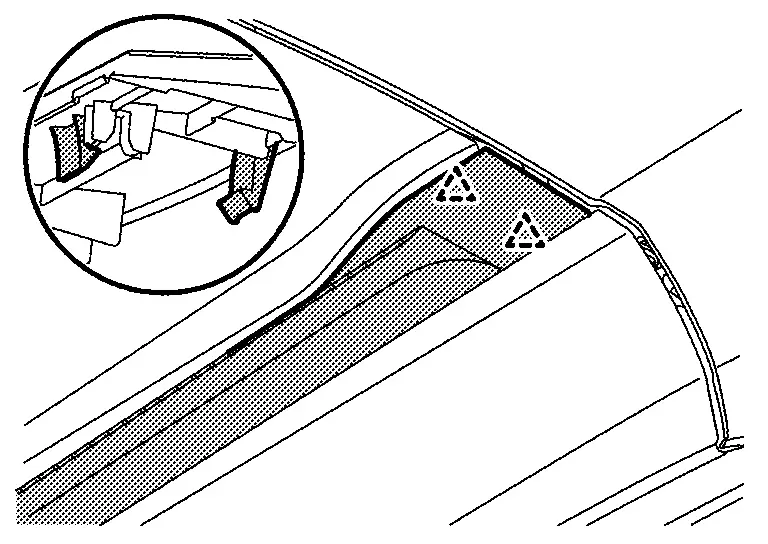
|
: Pawl |
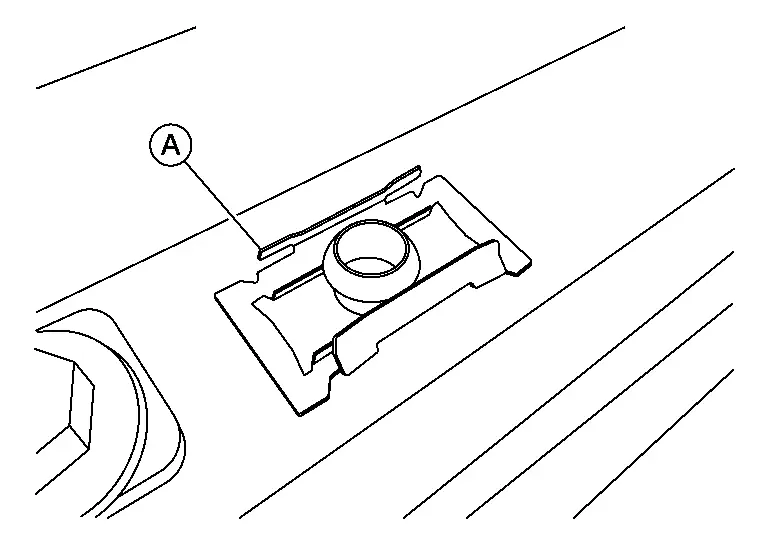
Remove any roof rail clips (A) that may have detached from the roof rail, and then reattach them to the roof rail.
Remove roof rail bracket mounting bolts, and then remove roof rail bracket front and roof rail bracket rear.
Remove roof rail rivet.
 NOTE:
NOTE:
Grind the head of rivet with a drill (B) [bit of Ï4.7 âÏ4.9 mm (Ï0.185 âÏ0.193 in)].
INSTALLATION
Securely crimp roof rail rivet with a hand riveter (A).
Inspect roof rail clips still attached to the roof rail, and confirm that they are completely seated. Seat the roof rail clips as needed.
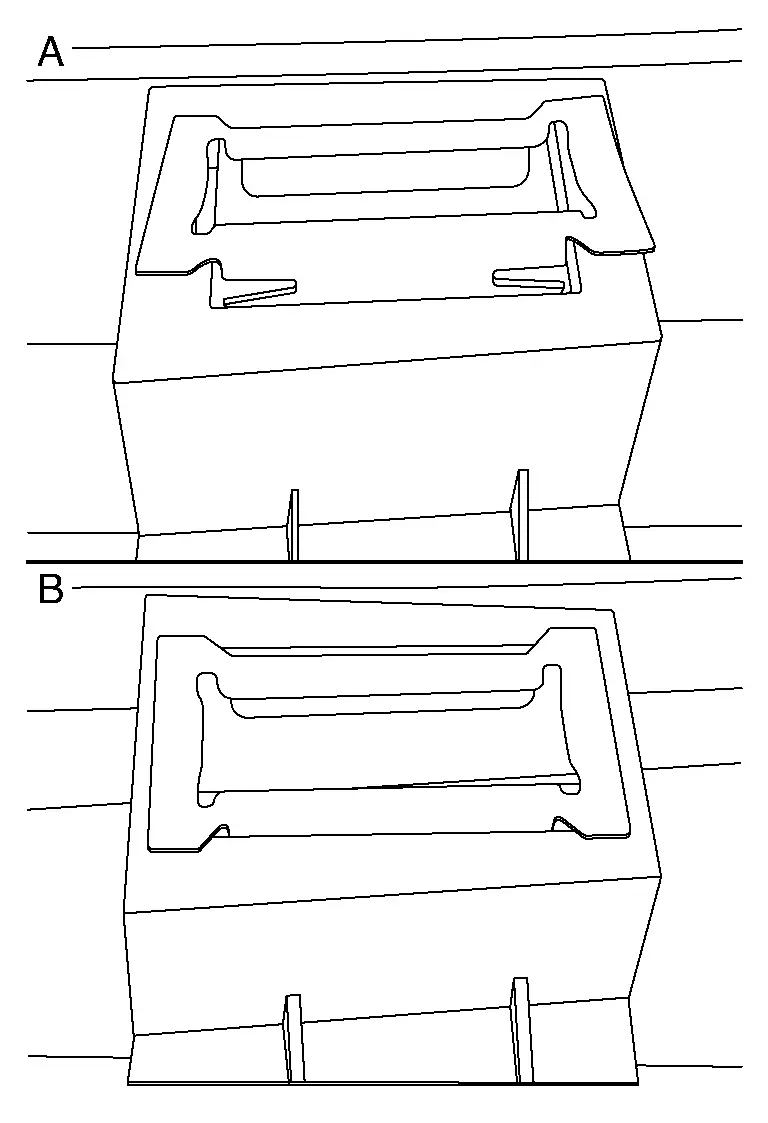
| (A) | : Partially seated |
| (B) | : Fully seated |
Using suitable tool (A), remove any sealer and any remaining pieces of the roof rail clip that are present from the leading roof rail clip hole.
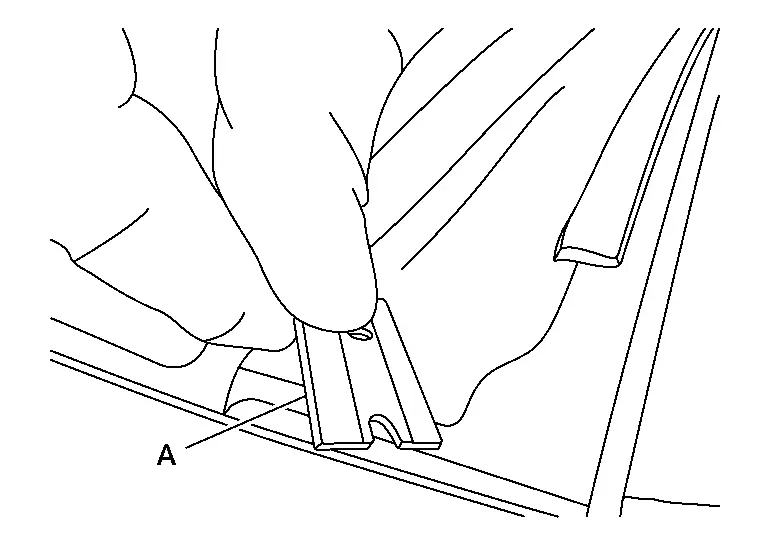
NOTE:
-
Remove any remaining sealer with isopropyl alcohol.
-
Ensure that the paint is not damaged. If paint damage occurs, follow NISSAN paint guidelines.
Replace roof rail clip, and remove seal (A) from roof rail clip.
Apply a small bead of silicone sealer around hole (A).
Install the roof rail.
With Rock CreekÂŪ
REMOVAL
Remove crossbar bolts then remove crossbars.
Remove roof rack bolts then remove roof rack (LH/RH).
Remove roof rail bracket mounting bolts, and then remove roof rail brackets.
INSTALLATION
Installation is in the reverse order of removal.
Other materials:
C1220-54 Incomplete Air Bleeding
DTC Description
DTC DETECTION LOGIC DTC
CONSULT screen terms
(Trouble diagnosis content) DTC detecting condition
C1220-54
INCOMP AIR BLEEDING
(Incomplete air bleeding)
Diagnosis condition
Ignition switch: ON
Signal
â
Threshold
Air bleeding of electro-hydraulic co ...
SystÃĻme d'essuie-glace automatique avec dÃĐtecteur de pluie du Nissan Rogue
Le Nissan Rogue est dotÃĐ d'une technologie de dÃĐtection de prÃĐcipitations intelligente. Ce systÃĻme d'essuie-glace automatique, assistÃĐ par un capteur de pluie optique situÃĐ sur la partie supÃĐrieure du pare-brise (derriÃĻre le rÃĐtroviseur intÃĐrieur), est capable d'activer les balais sa ...
Sheet Metal Work
Sheet Metal Work Tools
Sheet Metal Work Tools
This section explains various tools used in body repair work.
Hammers
A hammer is used to correct dents, projections or other deformations.
Various shapes have been designed according to their purposes.(1) TYPES AND FEATURES OF HAMMERS(2) SELECTI ...