
Nissan Rogue (T33) 2021-Present Service Manual: Removal and Installation :: Front Fender
Exploded View
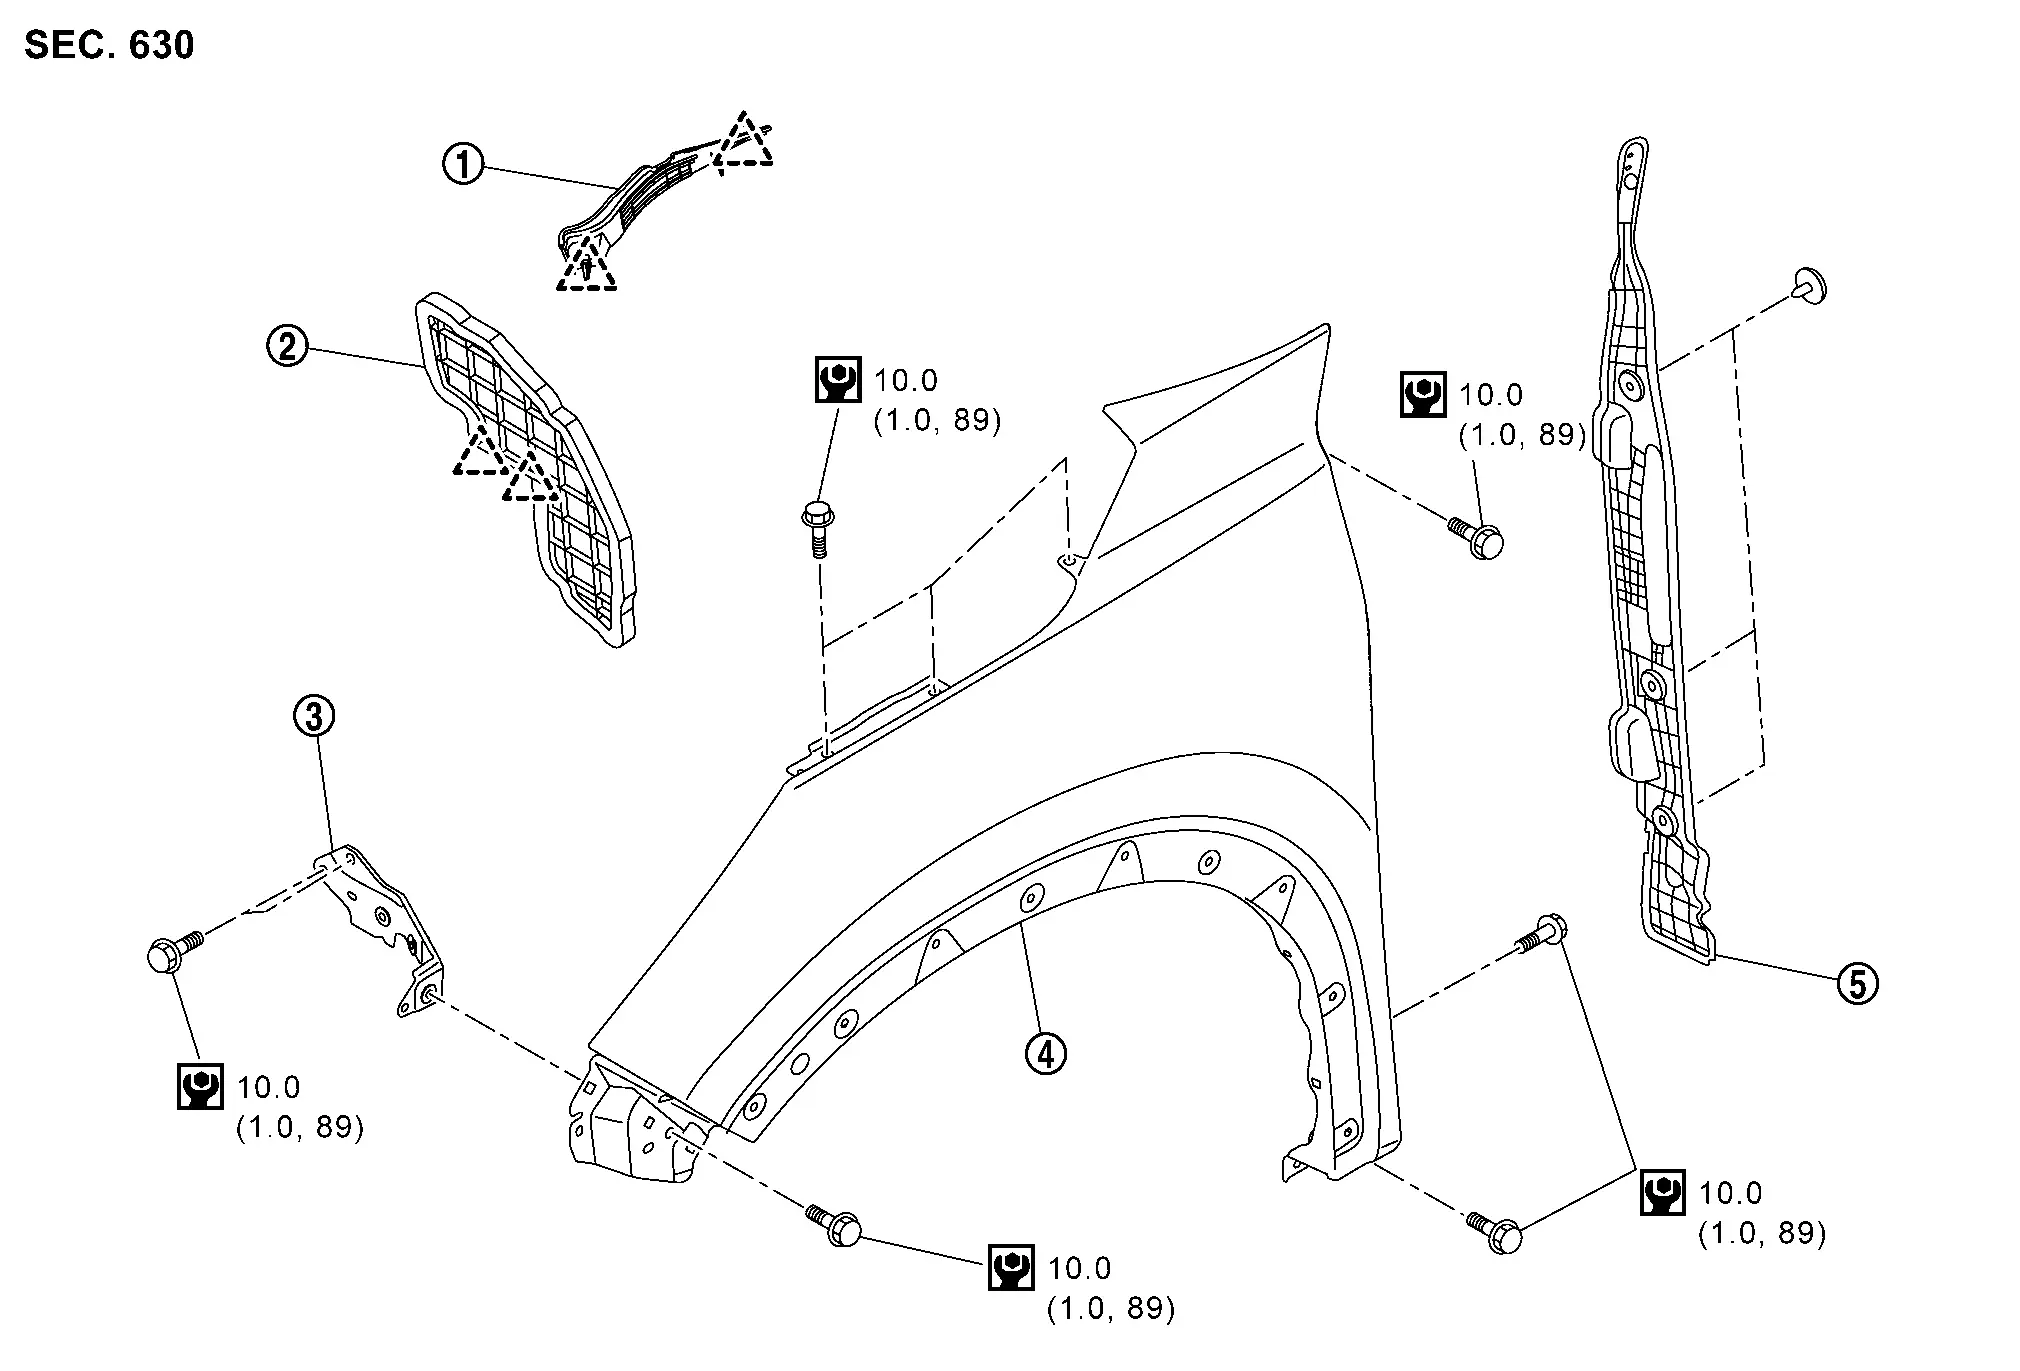
 |
Fender cover |  |
Front fender ledge cover |  |
Front fender bracket |
 |
Front fender assembly |  |
Front fender baffle | ||
 |
: Pawl | ||||
 |
: N·m (kg-m, in-lb) | ||||
Front Fender
Removal and Installation
REMOVAL
Remove front fender protector. Refer to Removal and Installation.
Remove front bumper fascia and front bumper side bracket. Refer to Removal and Installation.
Remove front combination lamp. Refer to Removal and Installation.
Remove front fender baffle fixing clips, and then remove front fender baffle.
Remove fender cover. Refer to Removal and Installation.
Remove front fender assembly mounting bolts, and then remove front fender assembly.
Remove front fender bracket mounting bolts, and then remove front fender bracket.
Disengage front fender ledge cover fixing pawls, and then remove front fender ledge cover.
INSTALLATION
Note the following items, and then install in the reverse order of removal.
CAUTION:
-
After installation, adjust the following part.
-
Hood assembly: Refer to Adjustment.
-
Front door panel: Refer to Adjustment.
-
-
After installation, apply the touch-up paint (the body color) onto the head of front fender mounting bolts.
Fender Cover
Removal and Installation
REMOVAL
Fully open hood assembly.
Disengage fender cover fixing pawl  .
.
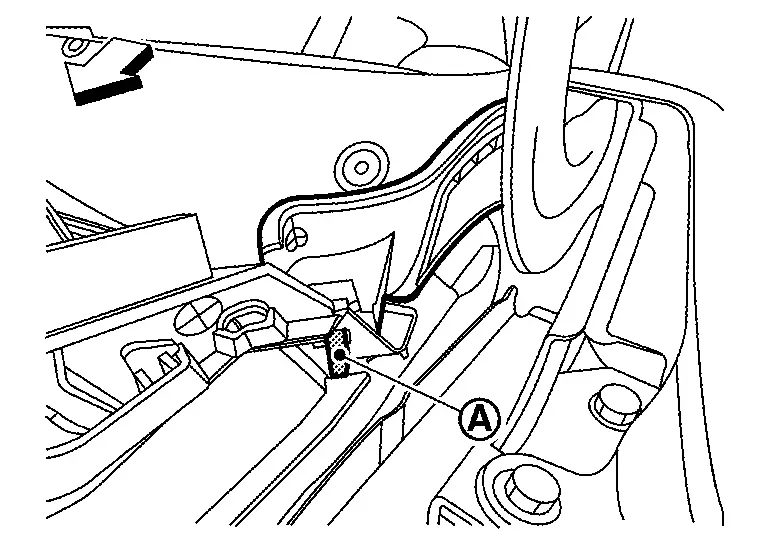
 |
: Nissan Ariya Vehicle front |
Disengage fender cover fixing pawl, and then remove fender cover toward shown in figure.
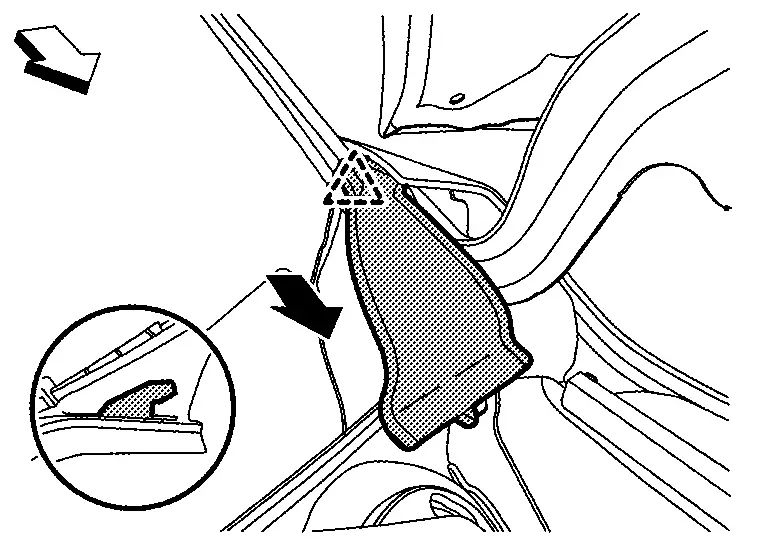
|
: Pawl |
|
: Nissan Ariya Vehicle front |
INSTALLATION
Note the following item, and then install in the reverse order of removal.
CAUTION:
Install so that there is no clearance between windshield and cowl top cover.
Other materials:
Cvt: Ge0f14a. Basic Inspection
Diagnosis and Repair Work Flow
Work Flow
NOTE:
“DTC� includes DTC at the 1st trip.
OBTAIN INFORMATION ABOUT SYMPTOM
Refer to Diagnostic Work Sheet and interview the customer to obtain
the malfunction information (conditions and environment when the
malfunction occurred) as much as possi ...
Operation
Operation
SWITCH NAME AND FUNCTION No. Switch name Description
ProPILOT Assist switch
ProPILOT Assist switch to activate the system
CANCEL switch
Pressing the switch cancels ProPILOT Assist 2.1 control
RES± switch (RES+ operation)
Resumes set speed or increases speed ...
Type a. Preparation. Preparation
Preparation
Commercial Service Tools
Tool name Description
Variable resistor
Check fuel gauge indication position
Power tool
Loosening screws
...