
Nissan Rogue (T33) 2021-Present Service Manual: Removal and Installation :: Floor Under Cover
Exploded View
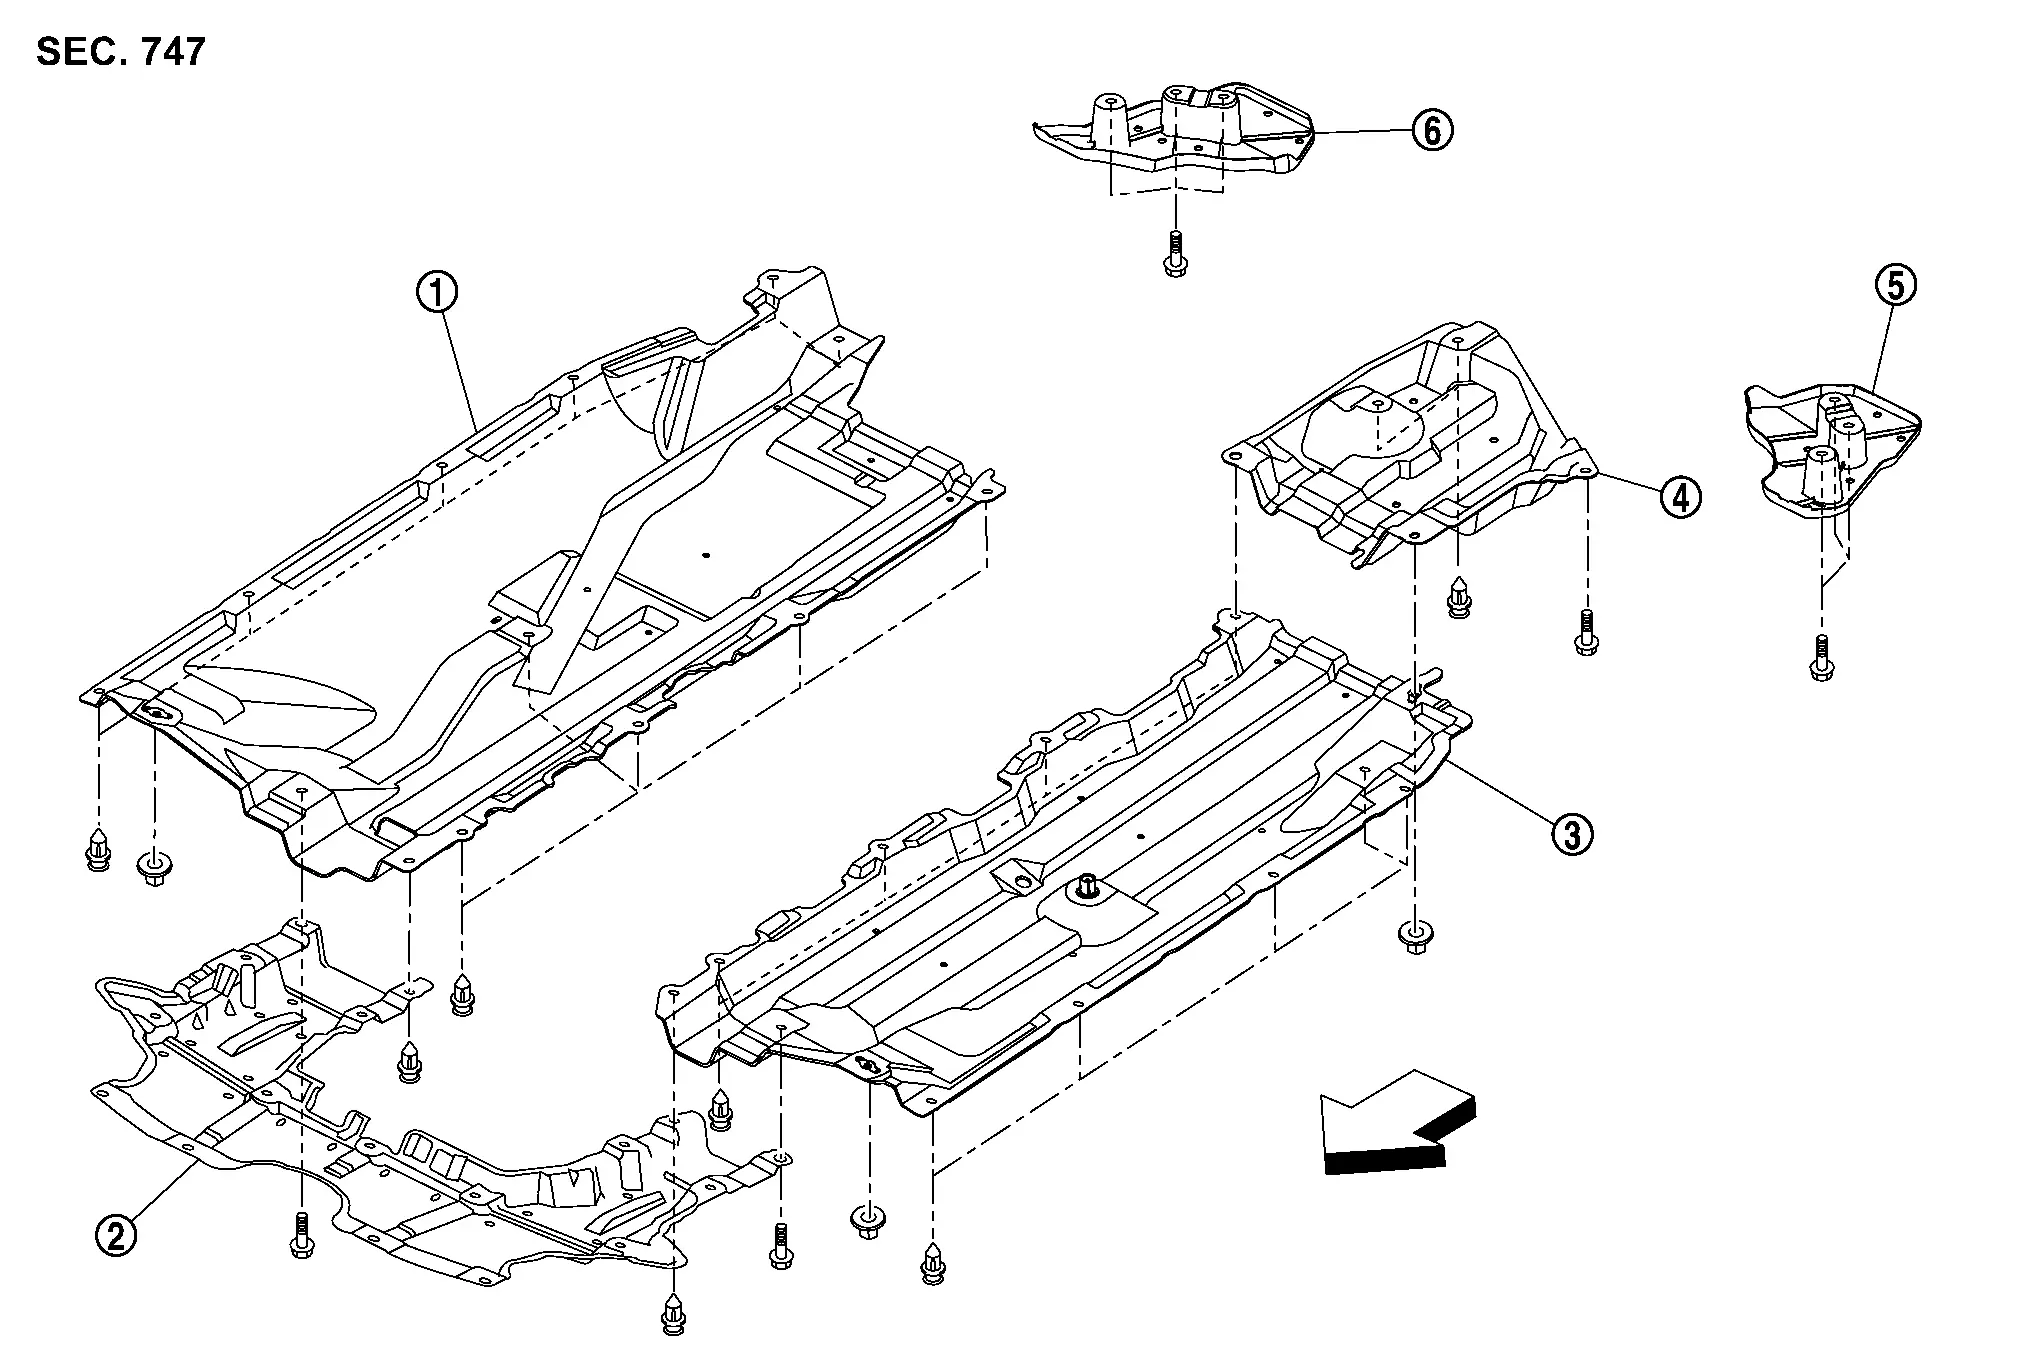
 |
Floor under cover RH |  |
Engine under cover rear |  |
Floor under cover LH |
 |
Rear under cover (with 2WD models) |  |
Rear floor under cover LH |  |
Rear floor under cover RH |
 |
: Nissan Ariya Vehicle front | ||||
Removal and Installation
REMOVAL
Floor Under Cover
Remove engine under cover rear. Refer to Removal and Installation.
Remove floor under cover fixing clips.
Remove floor under cover mounting bolt and nuts, and then remove floor under cover.
Rear Under Cover (with 2WD models)
Remove engine under cover rear. Refer to Removal and Installation.
Remove floor under cover LH fixing clips.
Remove floor under cover LH mounting bolt and nuts, and then remove floor under cover LH.
Remove rear under cover mounting bolt and fixing clips, and then remove rear under cover.
Rear Floor Under Cover
Remove rear floor under cover mounting bolts, and then remove rear floor under cover.
INSTALLATION
Installation is in the reverse order of removal.
Other materials:
U2140 Can Comm Circuit
DTC Description
DTC DETECTION LOGIC DTC
CONSULT screen terms
(Trouble diagnosis content)
DTC detection condition
U2140
87
CAN comm err (ECM)
[CAN communication error (ECM)]
Diagnosis condition
Ignition switch ON
Signal (terminal)
CAN communication signal
Thre ...
Usb Charge Port. Removal and Installation. Usb Charge Port
Usb Charge Port
Rear Usb Charge Port
Removal and Installation
REMOVALRemove console rear finisher. Refer to Removal and Installation.
Press the USB charge port fixing pawl from the back of the console rear finisher to remove the USB charge port.
: Pawl
INSTALLATIONNote the followin ...
Removal and Installation. Driver Seat Control Unit
Removal and Installation
REMOVALRemove driver seat. Refer to Removal and Installation.
Disconnect driver seat control unit connector.
Remove fixing screws , and then remove driver seat control unit .
INSTALLATIONInstall in the reverse order of removal.CAUTION:
Be sure to perform ADDITIONAL SE ...