
Nissan Rogue (T33) 2021-Present Service Manual: Removal and Installation :: Engine Under Cover
Exploded View
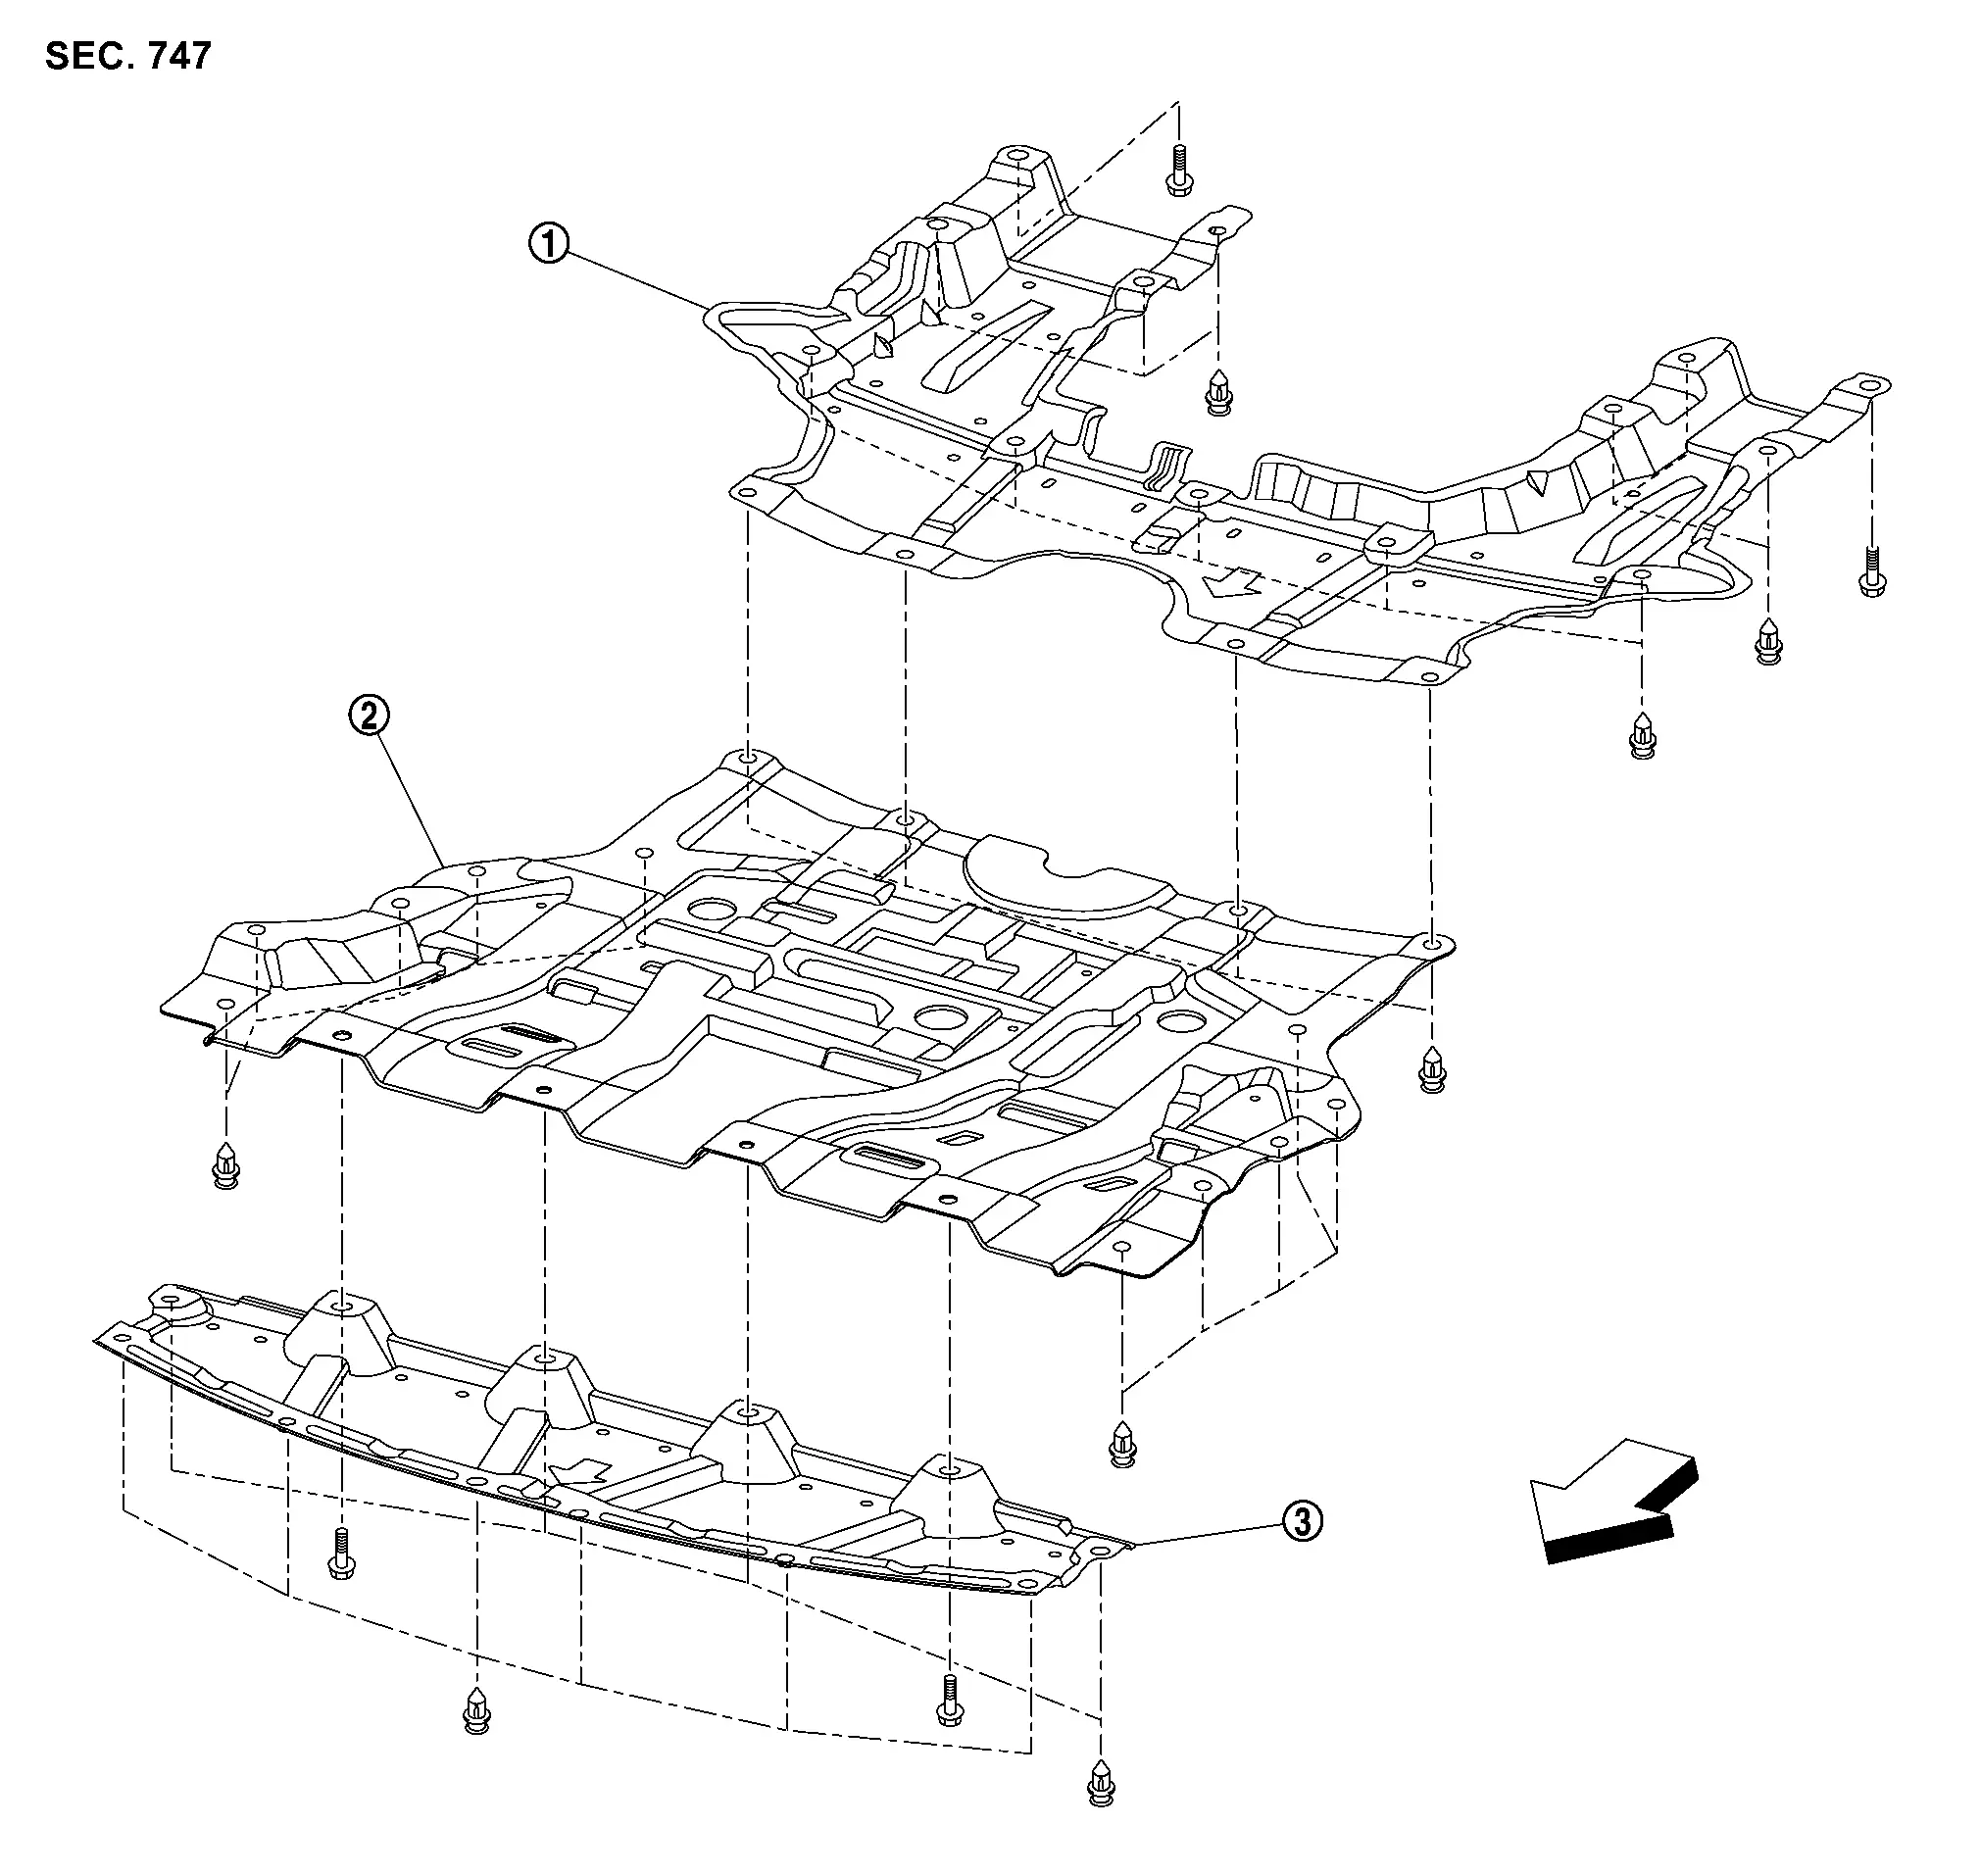
 |
Engine under cover rear |  |
Engine under cover |  |
Engine under cover front |
 |
: Nissan Ariya Vehicle front | ||||
Removal and Installation
REMOVAL
Engine Under Cover Front
Remove engine under cover front mounting bolts and fixing clips, and then remove engine under cover front.
Engine Under Cover
Remove engine under cover front mounting bolts and fixing clips, and then remove engine under cover front.
Remove engine under cover fixing clips, and then remove engine under cover.
Engine Under Cover Rear
Remove engine under cover front mounting bolts and fixing clips, and then remove engine under cover front.
Remove engine under cover fixing clips, and then remove engine under cover.
Remove engine under cover rear mounting bolts and fixing clips, and then remove engine under cover rear.
INSTALLATION
Installation is in the reverse order of removal.
Other materials:
Front Drive Shaft (kr15ddt)
Exploded View
LEFT SIDE 1.
Circular clip
2.
Dust shield
3.
Housing
4.
Snap ring
5.
Spider assembly
6.
Stopper ring
7.
Boot band
8.
Boot
9.
Shaft
10.
Damper band
11.
Dynamic damper
12.
Circular clip
13.
Joint sub-asse ...
Chassis Control. Basic Inspection
Diagnosis and Repair Work Flow
Work Flow
DETAILED FLOWINTERVIEW FROM THE CUSTOMER
Clarify customer complaints before inspection. First of all, perform
an interview utilizing Diagnostic Work Sheet and reproduce the symptom
as well as fully understand it. Ask customer about his/her complaints
...
Usb Charge Port. Removal and Installation. Usb Charge Port
Usb Charge Port
Rear Usb Charge Port
Removal and Installation
REMOVALRemove console rear finisher. Refer to Removal and Installation.
Press the USB charge port fixing pawl from the back of the console rear finisher to remove the USB charge port.
: Pawl
INSTALLATIONNote the followin ...