Nissan Rogue (T33) 2021-Present Service Manual: Removal and Installation :: Cowl Top
Exploded View
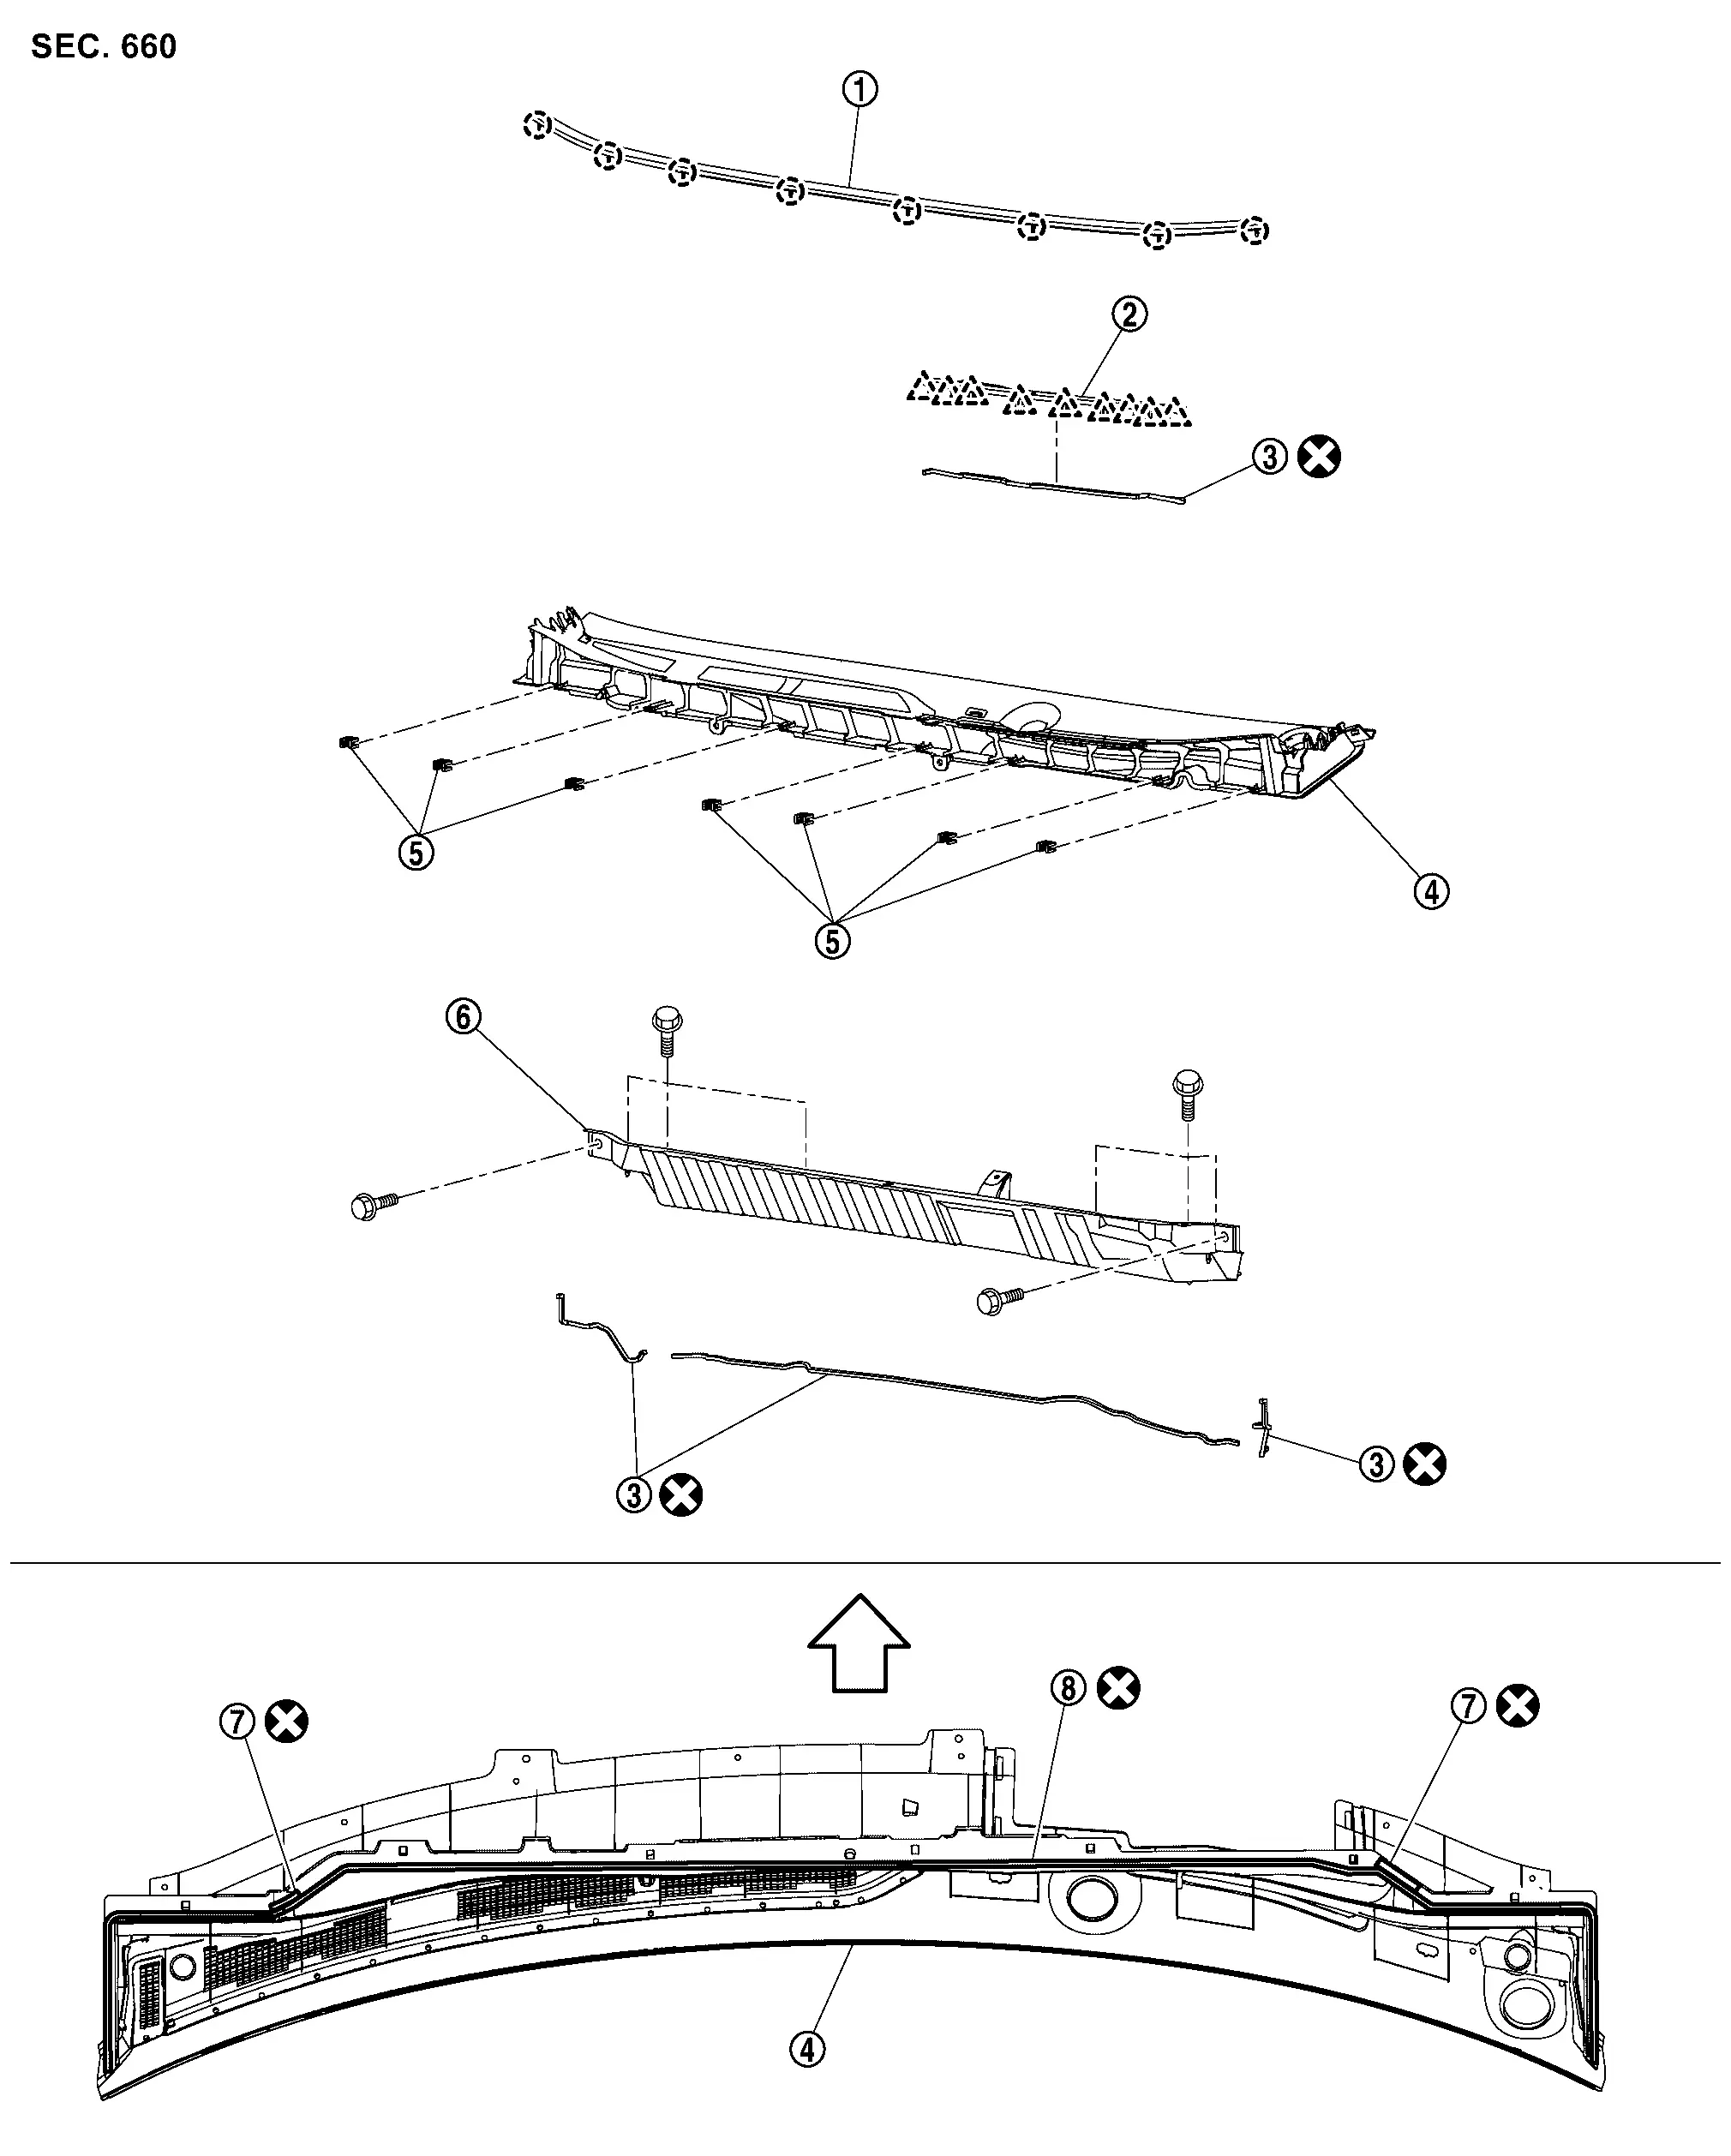
| 1. | Cowl top seal | 2. | Cowl top cover cap | 3. | EPT seal [t: 5.0 mm (0.197 in)] |
| 4. | Cowl top cover | 5. | Cowl top grille clip | 6. | Cowl top extension |
| 7. | EPT seal [t: 6.0 mm (0.236 in)] | 8. | EPT seal [t: 3.0 mm (0.118 in)] | — | — |
 |
: Clip | ||||
 |
: Pawl | ||||
| : Nissan Ariya Vehicle front | |||||
 |
: Always replace after every disassembly. | ||||
Removal and Installation
REMOVAL
Remove front wiper arm (LH and RH). Refer to Removal and Installation.
Remove fender cover (LH and RH). Refer to Removal and Installation.
Remove cowl top insulator fixing clips, and then remove cowl top insulator. (KR15DDT models)
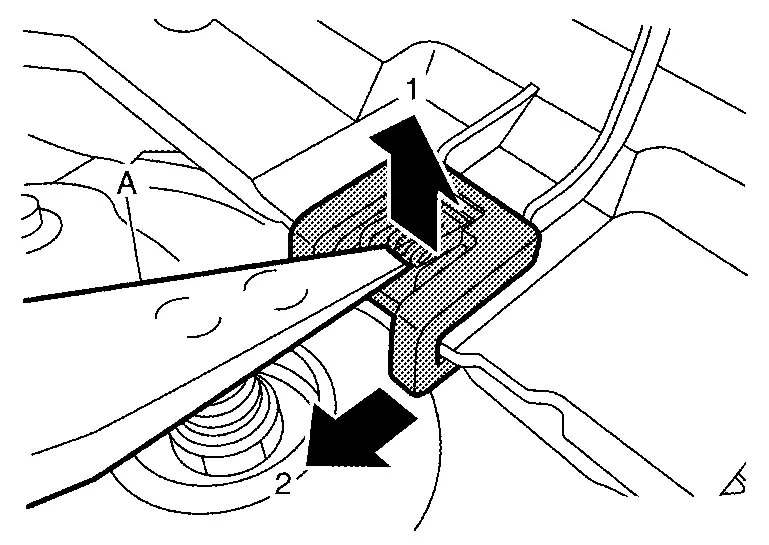
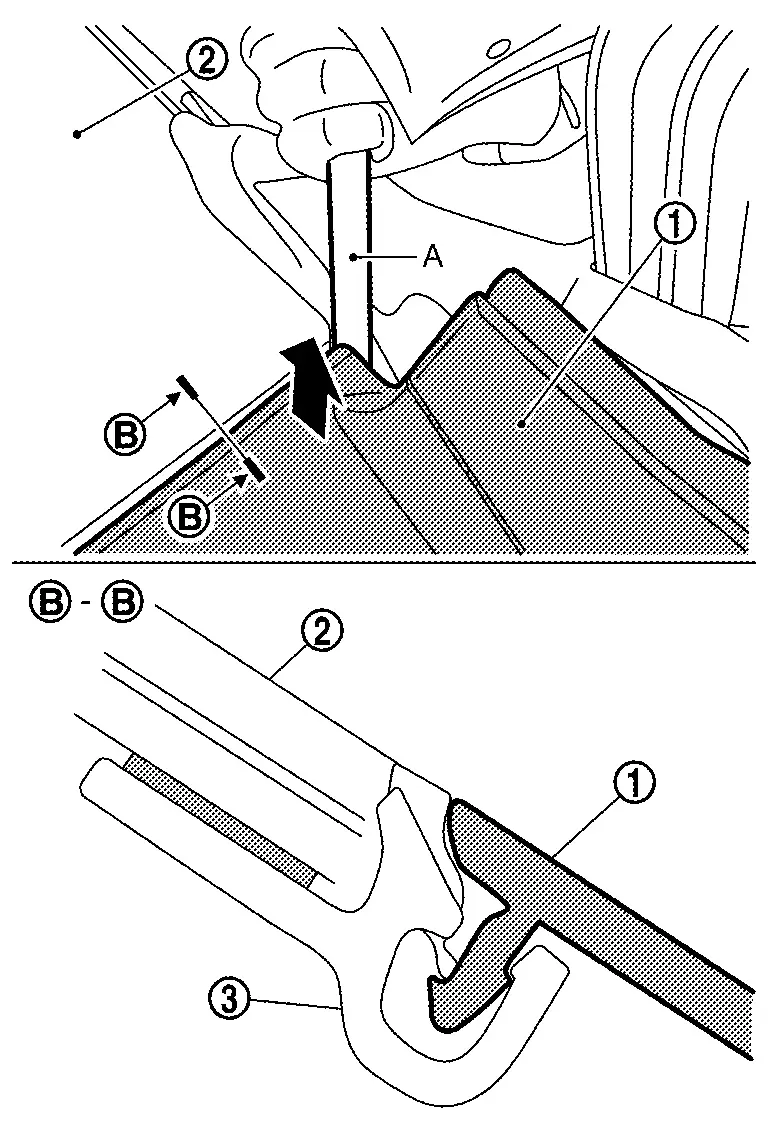
Remove cowl top grille clip using a remover tool (A) according to the numerical order 1→2 as shown by the arrows in the figure.
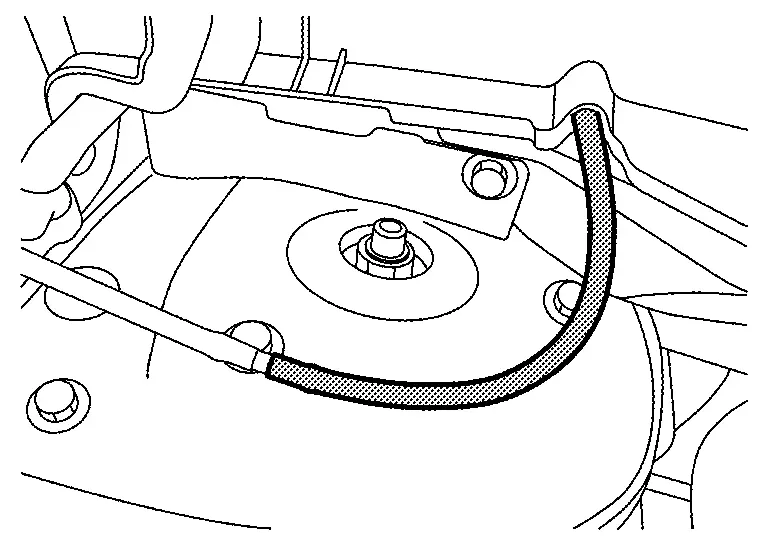
Disconnect washer tube B.
Cover cowl top cover  and upper side of front fender panel with a shop cloth (A) to prevent damage.
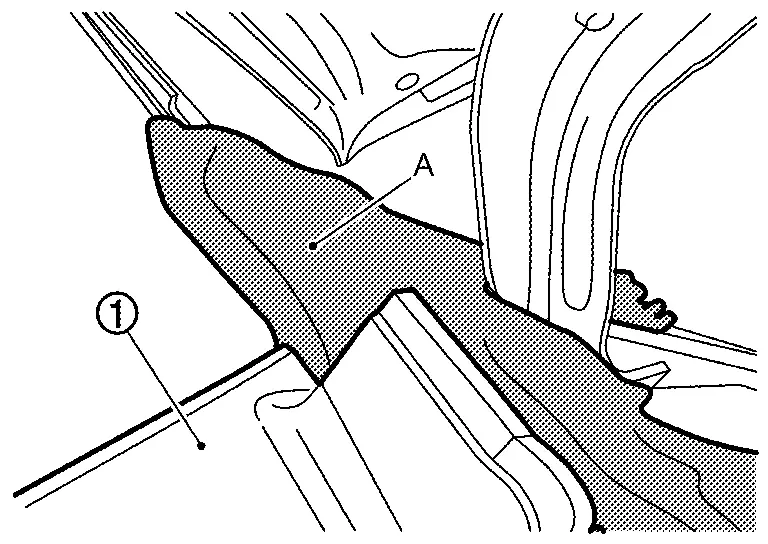
Disengage cowl top cover using a remover tool (A) from windshield glass lower molding  .
.
 |
: Windshield glass |
Remove cowl top cover.
Remove the following parts after removing cowl top cover.
-
Front washer tube and tube connector. Refer to Removal and Installation.
-
EPT seal
-
Cowl top seal
-
Cowl top seal LH and RH (Japan production models)
-
Cowl top cover cap
-
Cowl top cover center (Japan production models)
Remove front wiper drive assembly. Refer to Removal and Installation.
Remove cowl top extension mounting bolts, and then remove cowl top extension.
Remove EPT seal after removing cowl top extension.
INSTALLATION
Installation is in the reverse order of removal.
CAUTION:
-
Clean the joint between the cowl top cover and the windshield glass, and then install them.
-
Replace the EPT seal on the back surface with new EPT seal when reusing the cowl top cover.
-
When installing cowl top cover
, always engage perfectly the portion  of cowl top cover with the windshield glass lower molding , so that the surface height difference between the cowl top cover and windshield glass becomes “0”.
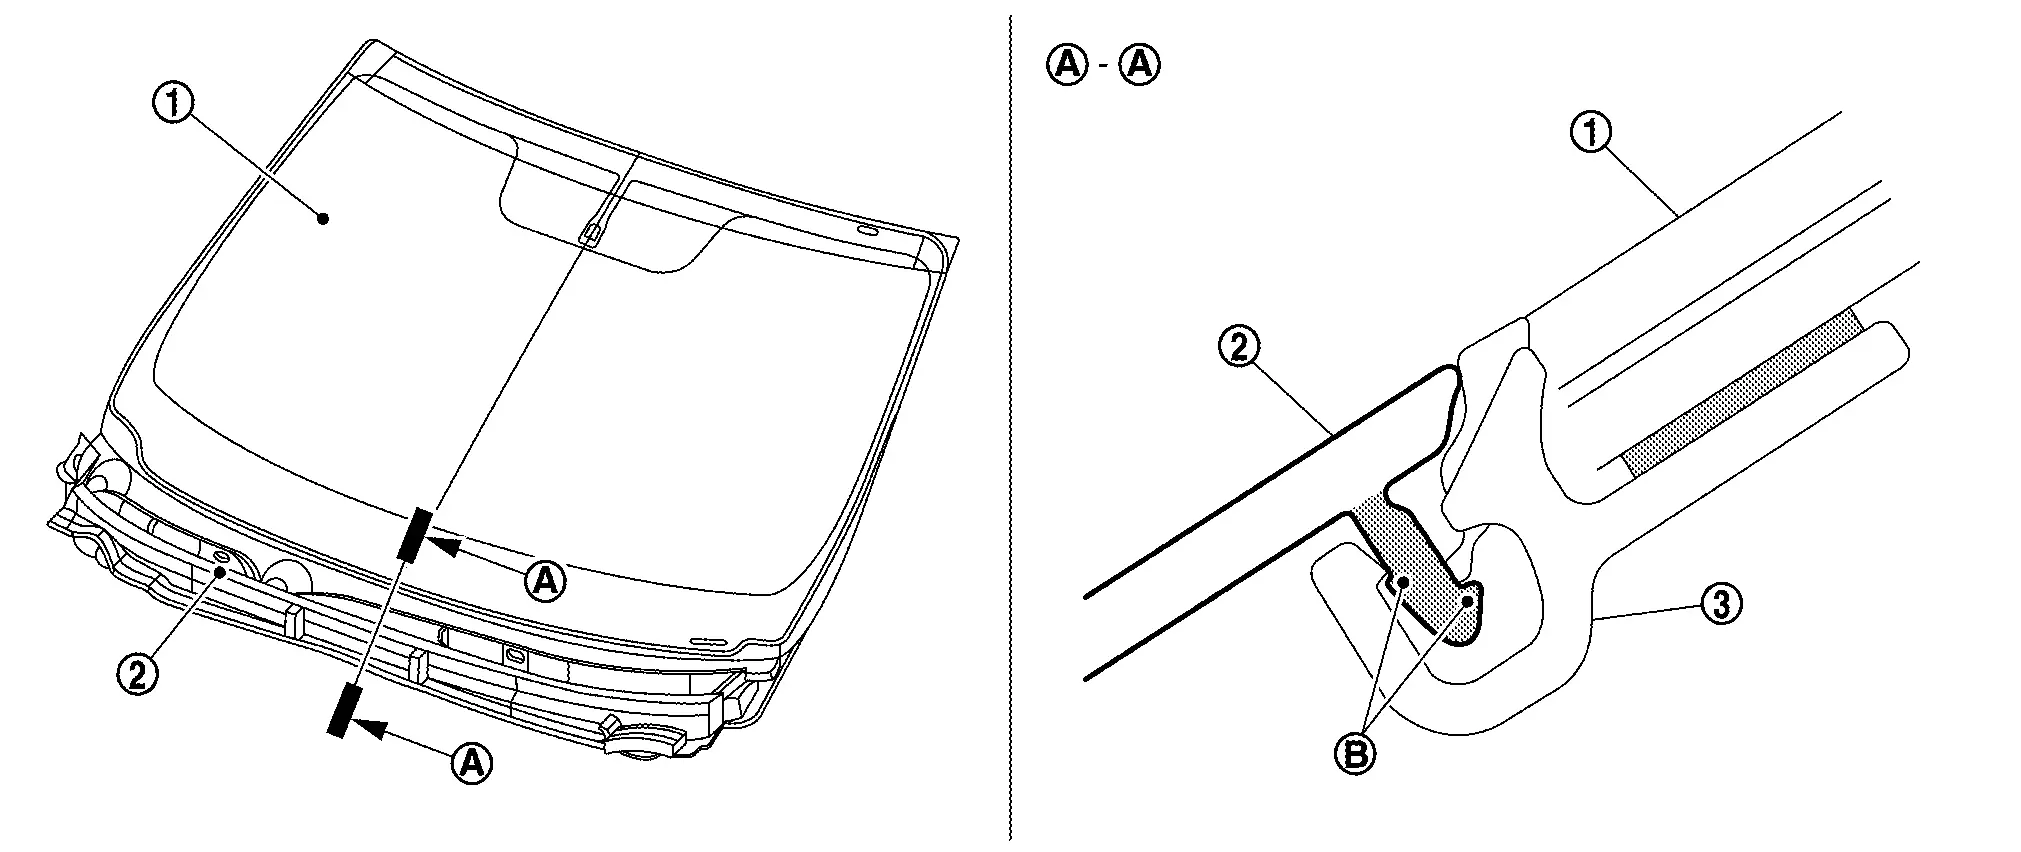
-
Never wash the Nissan Ariya vehicle within 24 hours after installing so as to keep adhesive.
-
After installing, perform adjustment of front wiper arms. Refer to Adjustment.
Other materials:
Engine oil
Checking engine oil level
Park the vehicle on a level area and apply the parking brake.
Warm up the engine to operating temperature.
Shut the engine off and wait at least 10 minutes.
Remove the dipstick, wipe it clean, then fully reinsert it.
Remove the dipstick again and check the oil le ...
Symptom Diagnosis. Intelligent Key Interlock Function Does Not Operate
Diagnosis Procedure
CHECK VEHICLE SPECIFICATION
Check if vehicle equipped navigation system.
Is equipped navigation system?
YES>>
GO TO 2.
NO>>
GO TO 3.
CHECK LOG-IN FUNCTION
Check log-in function. Refer to System Description.
Is the inspection result normal?
YES>>
G ...
B2e01-4a Tcu
DTC Description
DTC DETECTION LOGIC DTC No.
CONSULT screen terms
(Trouble diagnosis content) DTC detection condition
B2E01-4A
Internal battery
(Internal battery)
Diagnosis condition
When ignition switch is ON
Signal (terminal)
Internal battery power supply
Threshold
...