Nissan Rogue (T33) 2021-Present Service Manual: Oil Pan
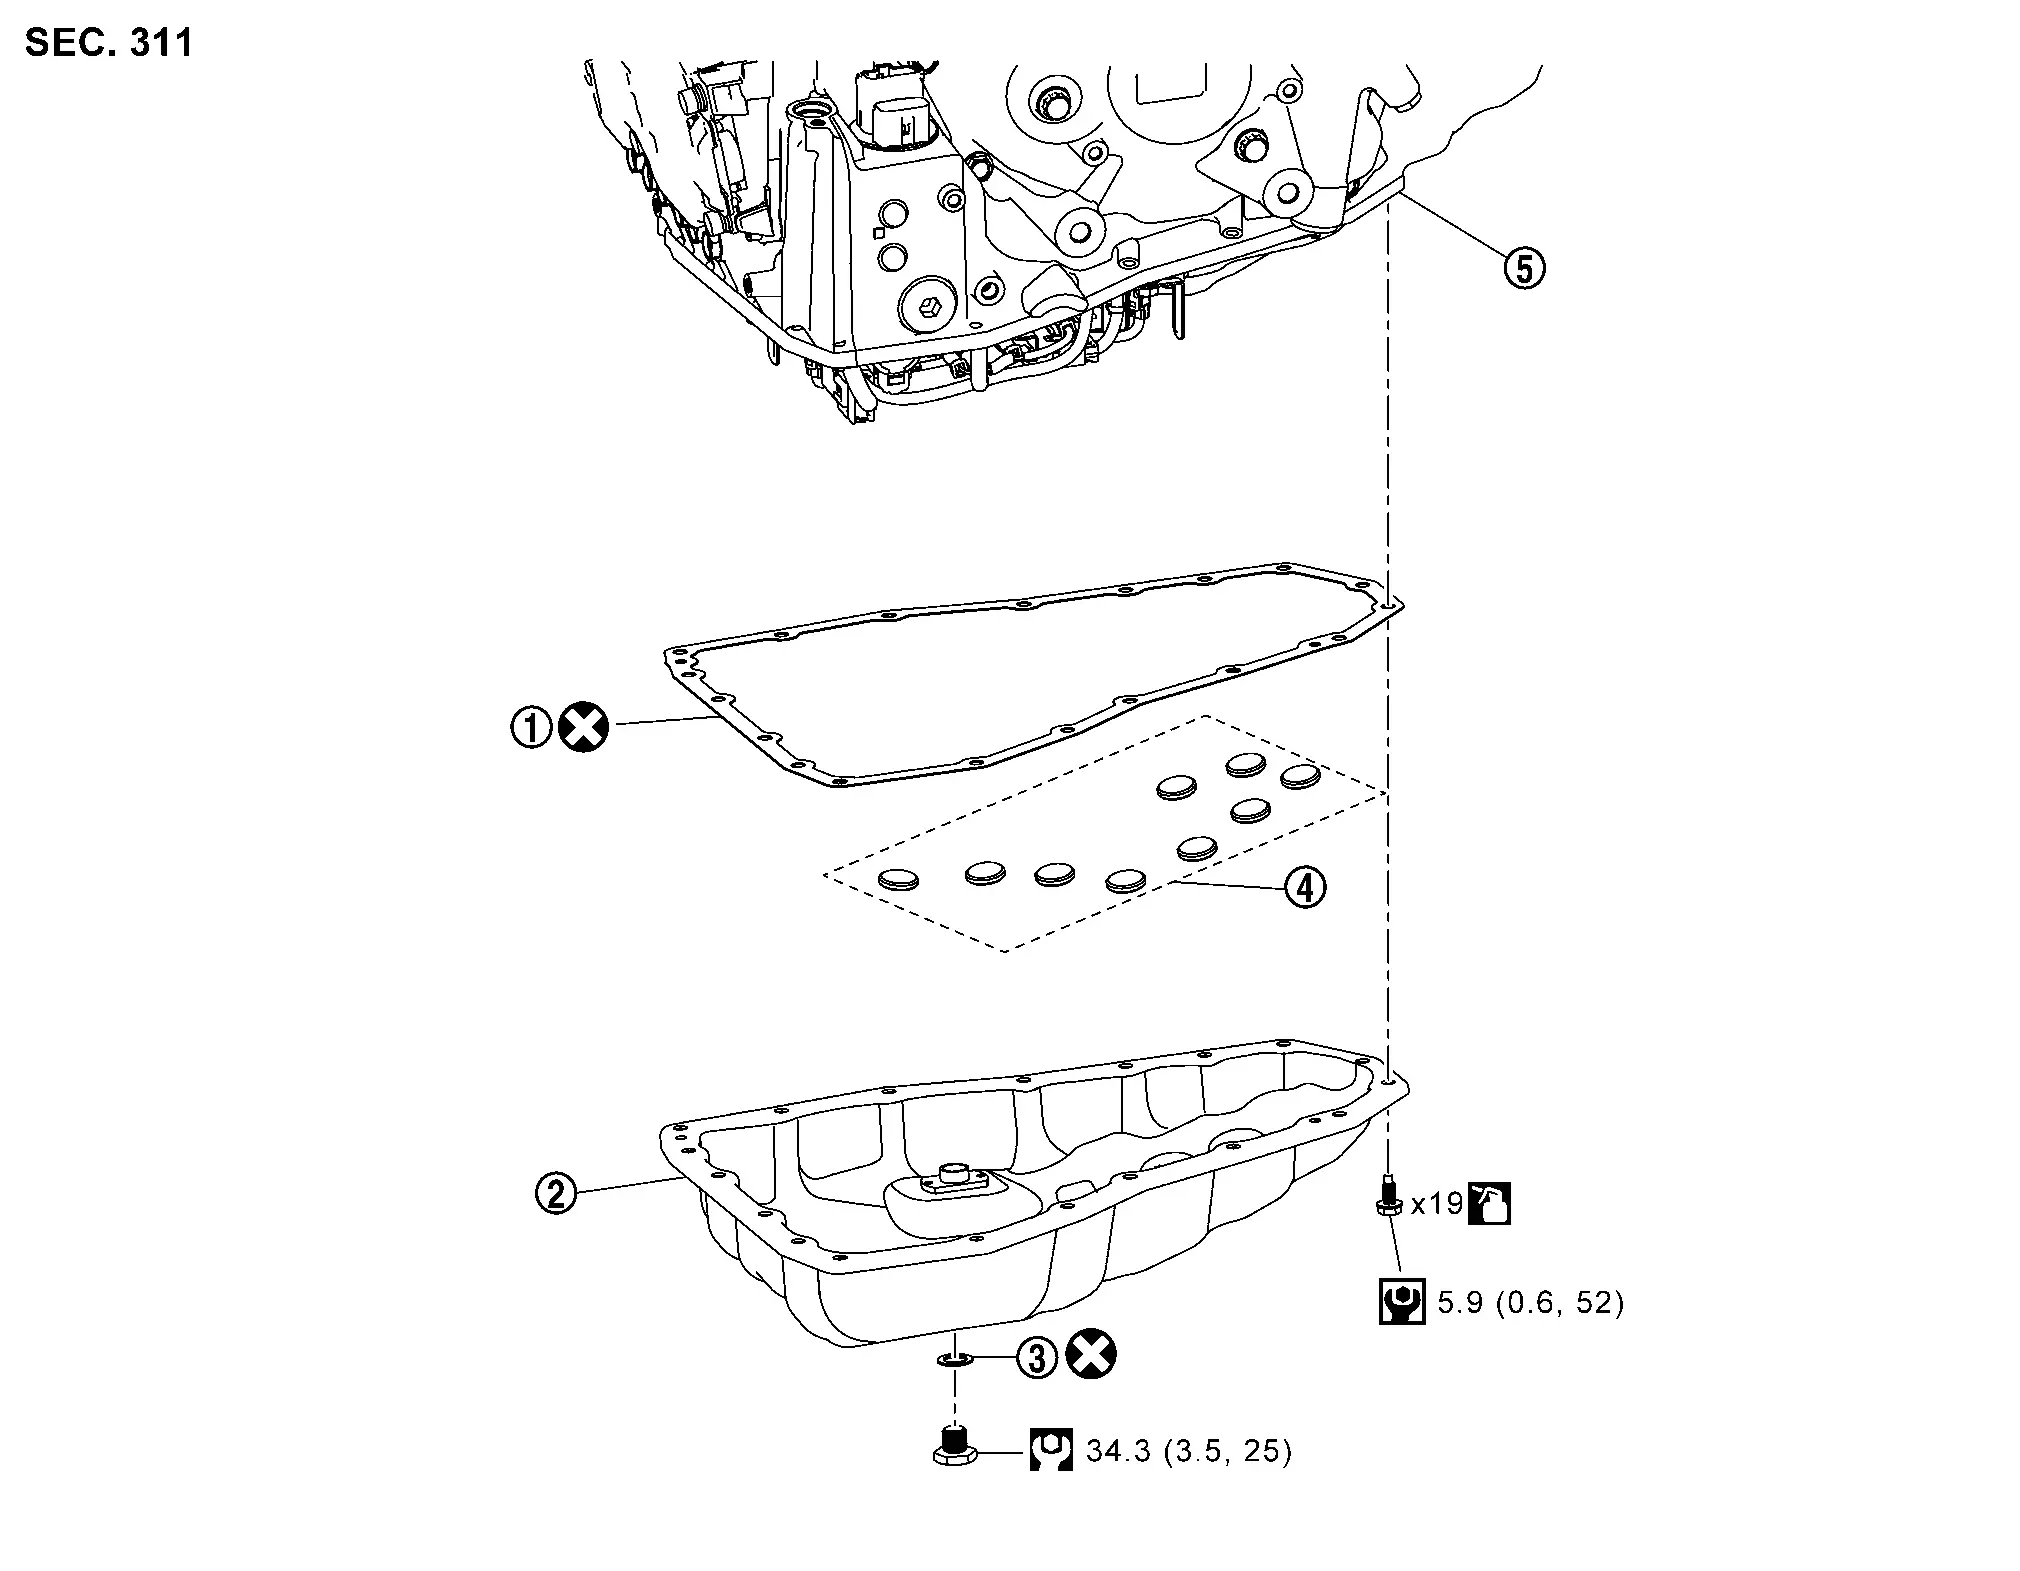
Exploded View
 |
Oil pan gasket |  |
Oil pan |  |
Drain plug gasket |
 |
Magnet |  |
Transaxle assembly |
 : N·m (kg-m, in-lb)
 : N·m (kg-m, ft-lb)
 : Always replace after every disassembly.
 : Apply CVT fluid.
Removal and Installation
REMOVAL
| Never Reuse These Parts | Part Code | For additional information: |
|---|---|---|
| Gasket-oil pan | 31397 | Exploded View |
| Washer-drain plug | 31394E | Exploded View |
Remove engine under cover. Refer to Exploded View.
Remove drain plug (1) from oil pan and then drain the CVT fluid.
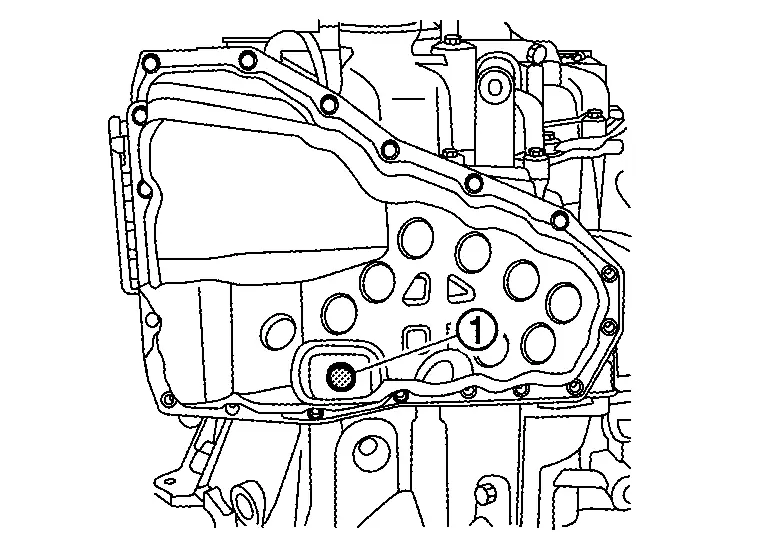
Remove drain plug gasket.
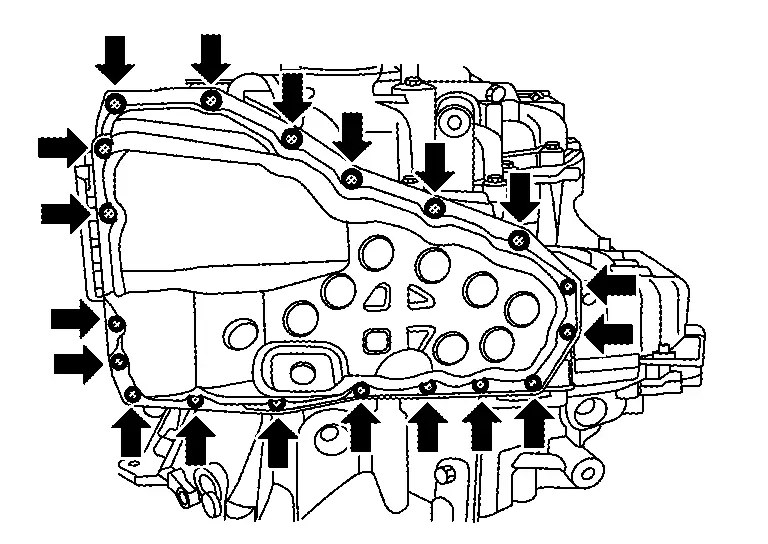
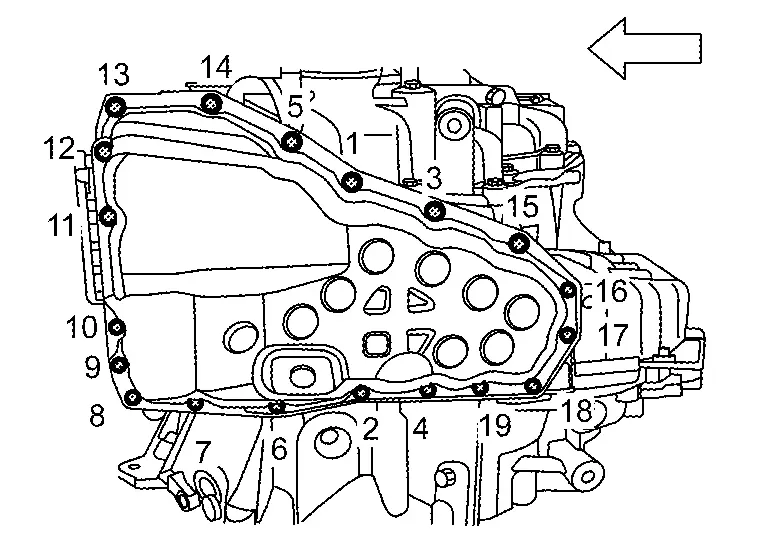
Remove oil pan mounting bolts (  19 pieces) and then remove oil pan.
Remove the oil pan gasket (1).
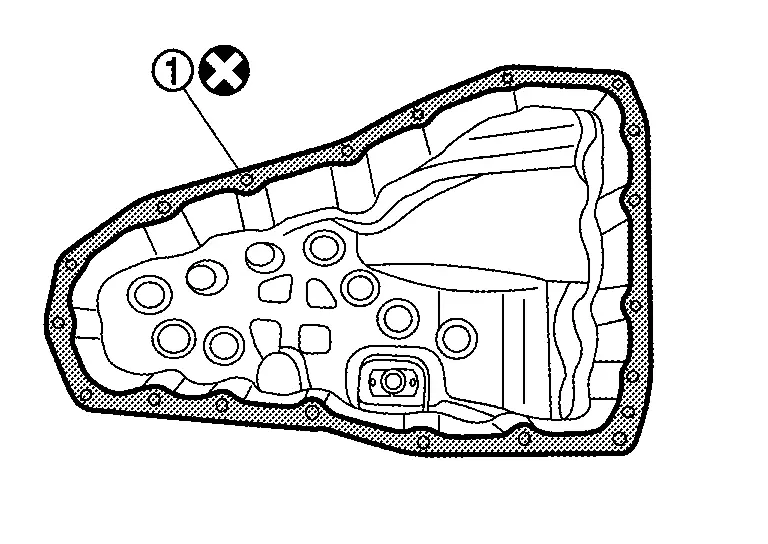
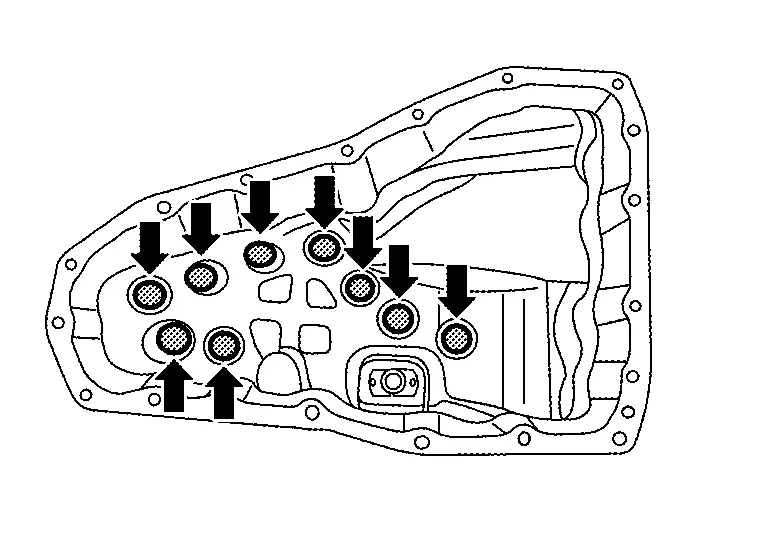
Remove oil pan magnets ( 9 pieces).
 NOTE:
NOTE:
Be sure to note the location of the magnets in the oil pan before removal.
INSTALLATION
Install the oil pan to the transaxle case with the following procedure.
-
Install oil pan magnets (
9 pieces).CAUTION:
-
Clean the magnets.
-
Clean the oil pan.
-
Align the magnets with the recesses in the oil pan to install them as shown in the figure.
-
-
Install the oil pan to the transaxle case with the following procedure.
- Install oil pan gasket (1).
CAUTION:
Never reuse the oil pan gasket.
-
Install the oil pan to the transaxle case, and then temporarily tighten the oil pan bolts.
CAUTION:
Apply CVT fluid to the bolts when installing.
-
Install oil pan and then tighten oil pan mounting bolts to the specified torque innumerical order shown in the figure.
Refer to Exploded View

: Nissan Ariya Vehicle front
- Install oil pan gasket (1).
- Install drain washer and drain plug (1) .
CAUTION:
Never reuse the drain washer.
-
Refill with CVT fluid. Refer to Refilling.
-
Install engine under cover. Refer to Exploded View.
Inspection and Adjustment
INSPECTION AFTER REMOVAL
Check oil pan for foreign material.
-
If a large amount of worn material is found, clutch plate may be worn.
-
If iron powder is found, bearings, gears, or clutch plates may be worn.
-
If aluminum powder is found, bushing may be worn, or chips or burrs of aluminum casting parts may enter.
Check points where wear is found in all cases.
INSPECTION AFTER INSTALLATION
Check for CVT fluid leakage. Refer to Inspection.
Other materials:
Engine oil
Checking engine oil level
Park the vehicle on a level area and apply the parking brake.
Warm up the engine to operating temperature.
Shut the engine off and wait at least 10 minutes.
Remove the dipstick, wipe it clean, then fully reinsert it.
Remove the dipstick again and check the oil le ...
Symptom Diagnosis. Squeak and Rattle Trouble Diagnoses
Work Flow
CUSTOMER INTERVIEWInterview
the customer if possible, to determine the conditions that exist when
the noise occurs. Use the Diagnostic Worksheet during the interview to
document the facts and conditions when the noise occurs and any customer
comments. Refer to Diagnostic Worksheet ...
System Description. System (automatic Back Door System)
System Description
SYSTEM DIAGRAMThe
automatic back door system performs the automatic open/close operation
of the back door by operating the automatic back door switch, automatic
back door close switch, automatic back door lock and close switch, back
door opener switch, hands free sensor, ...