Nissan Rogue (T33) 2021-Present Service Manual: Transfer Case
Kr15ddt
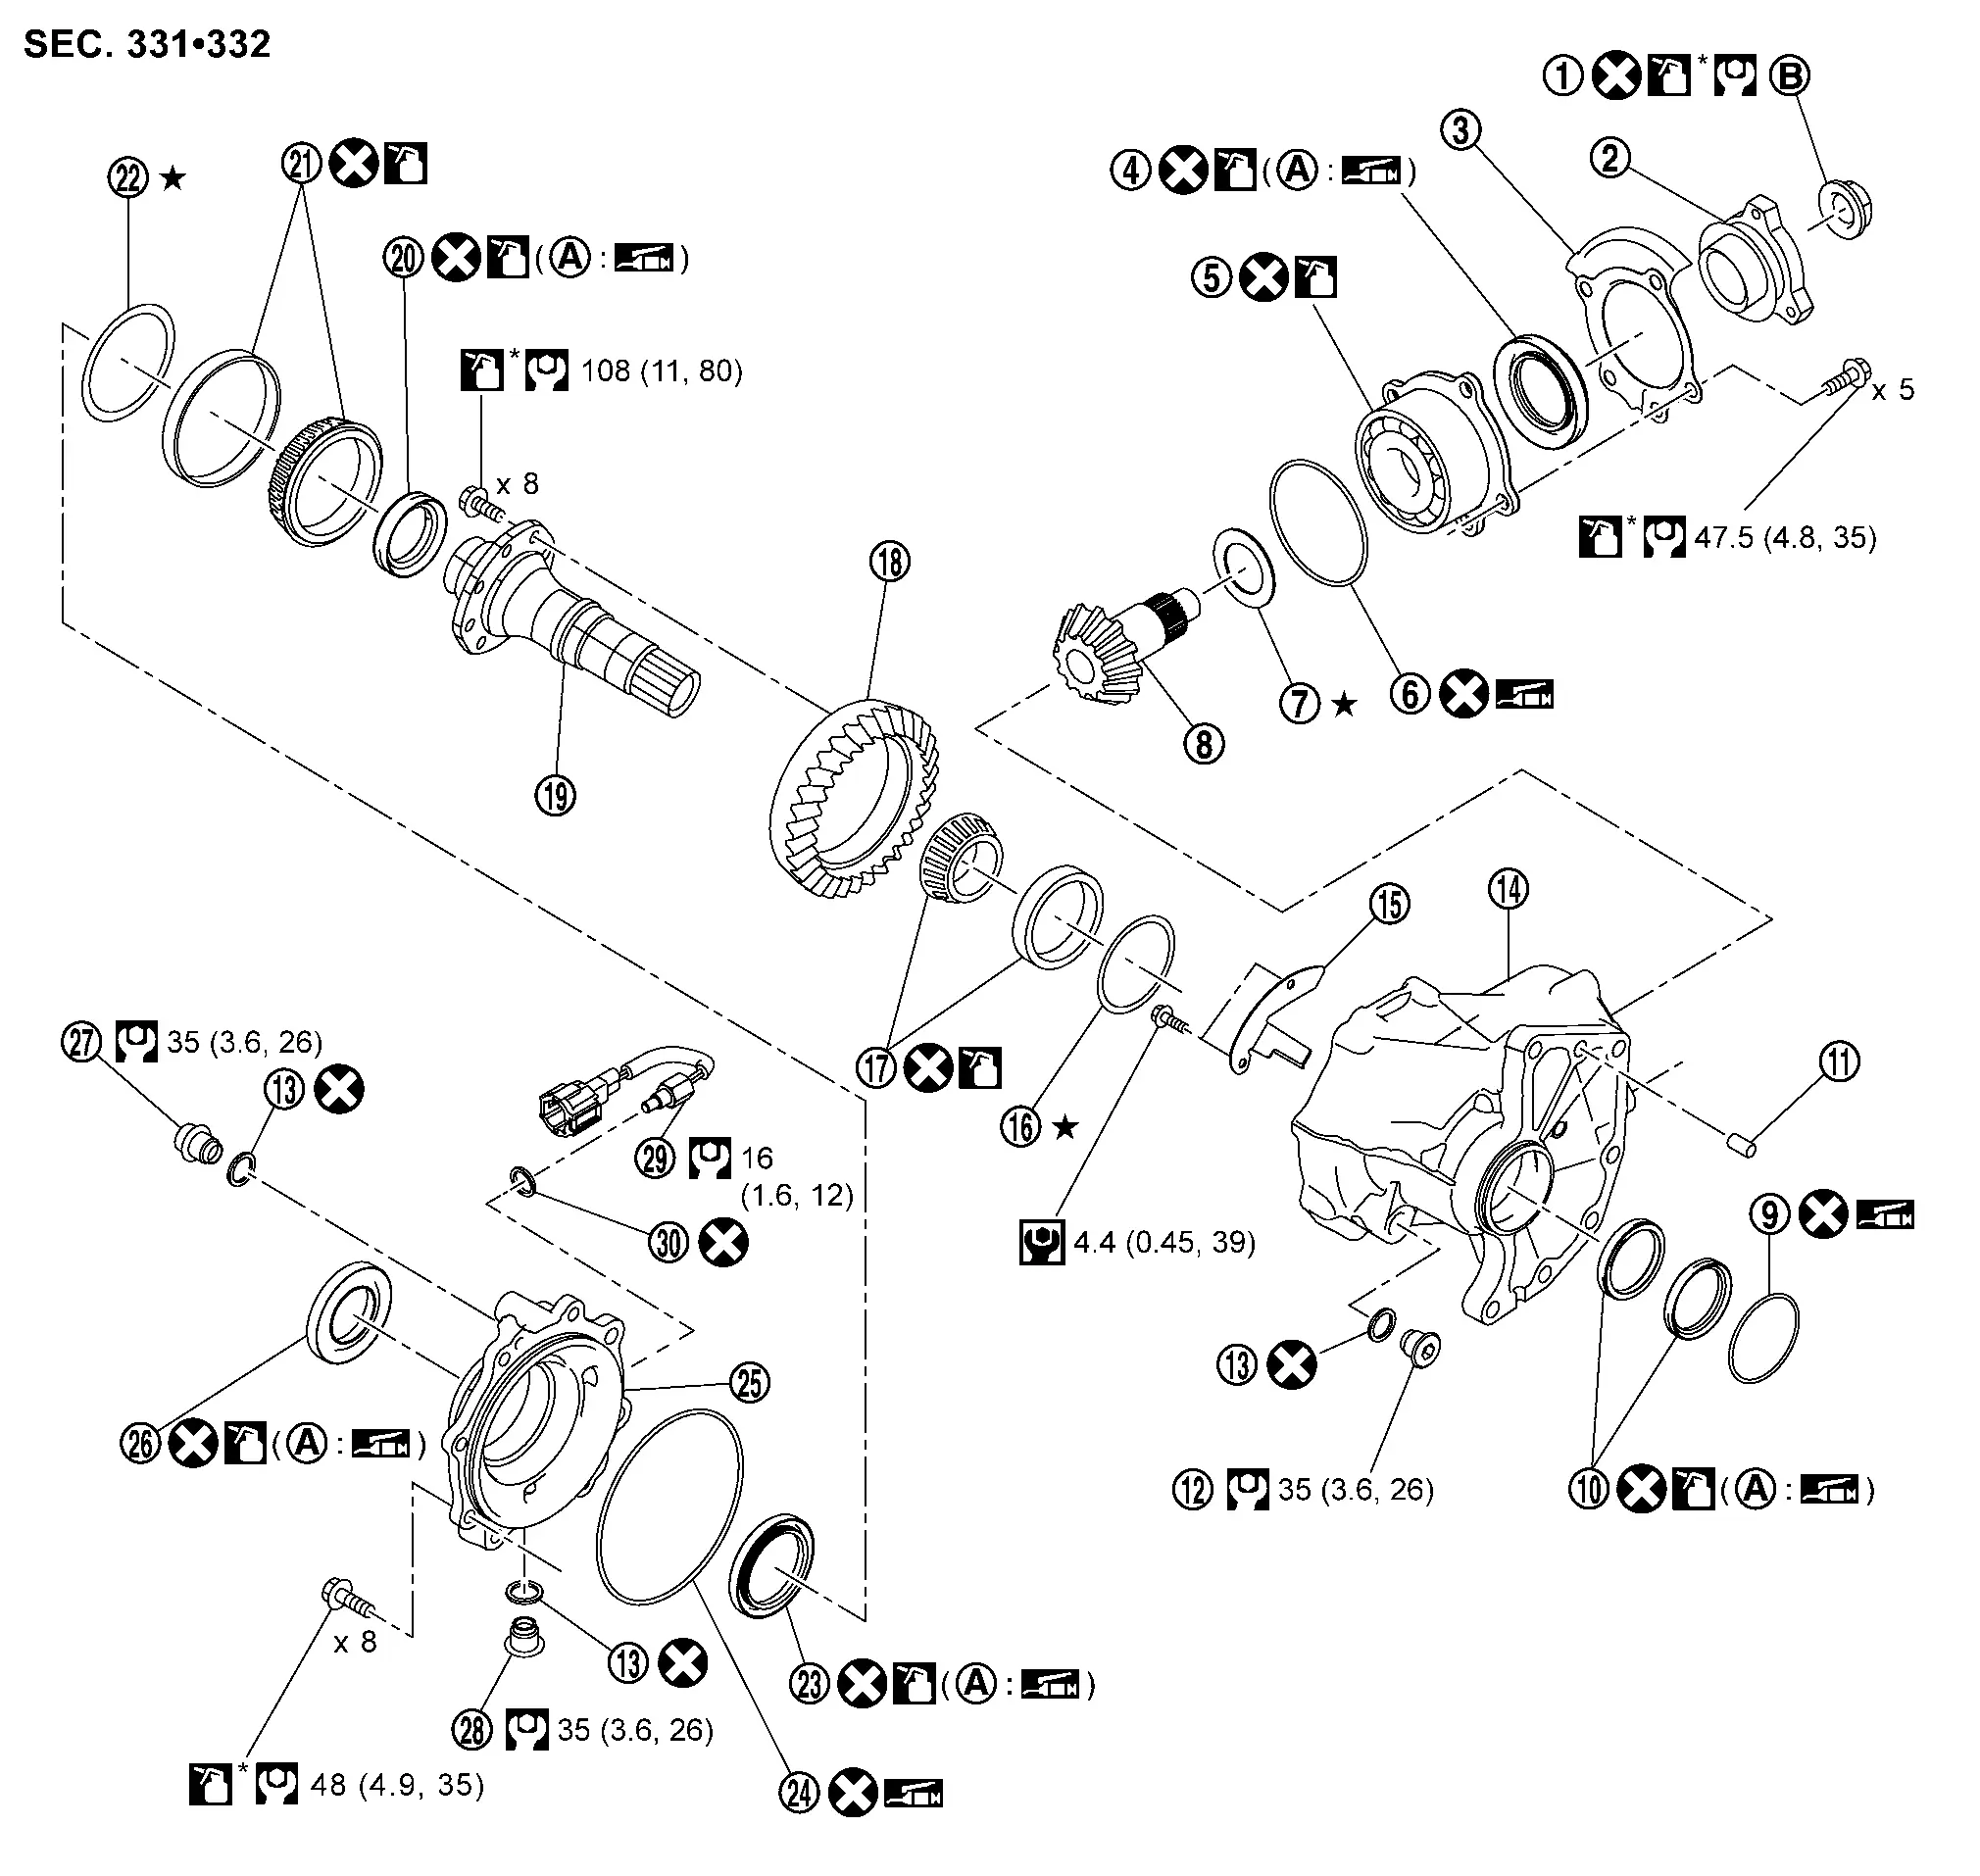
Exploded View
 |
Drive pinion lock nut |  |
Companion flange |  |
Dust shield |
 |
Drive pinion oil seal |  |
Pinion bearing assembly |  |
O-ring |
 |
Drive pinion adjusting shim |  |
Drive pinion |  |
O-ring |
 |
Transfer case oil seal |  |
Dowel pin |  |
Plug |
 |
Gasket |  |
Transfer case |  |
Baffle plate |
 |
Ring gear bearing adjusting shim (transfer case side) |  |
Ring gear bearing (transfer case side) |  |
Ring gear |
 |
Ring gear shaft |  |
Drive shaft oil seal |  |
Ring gear bearing (transfer cover side) |
 |
Ring gear bearing adjusting shim (transfer cover side) |  |
Transfer cover oil seal |  |
O-ring |
 |
Transfer cover |  |
Transfer cover dust seal |  |
Filler plug |
 |
Drain plug |  |
Transfer oil temperature sensor |  |
Gasket |
 |
Oil seal lip |  |
Comply with the assembly procedure when tightening. Refer to Disassembly and Assembly. | ||
 : N┬Ęm (kg-m, in-lb) : N┬Ęm (kg-m, in-lb) |
|||||
 : N┬Ęm (kg-m, ft-lb) : N┬Ęm (kg-m, ft-lb) |
|||||
 : Always replace after every disassembly. : Always replace after every disassembly. |
|||||
 : Select with proper thickness. : Select with proper thickness. |
|||||
 : Apply transfer oil. : Apply transfer oil. |
|||||
| *: Apply anti-corrosive oil. |
|||||
 : Apply multi-purpose grease. : Apply multi-purpose grease. |
|||||
Disassembly and Assembly
DISASSEMBLY
Remove transfer cover. Refer to Disassembly and Assembly.
Remove ring gear shaft assembly. Refer to Disassembly and Assembly.
Remove drive pinion assembly. Refer to Disassembly and Assembly.
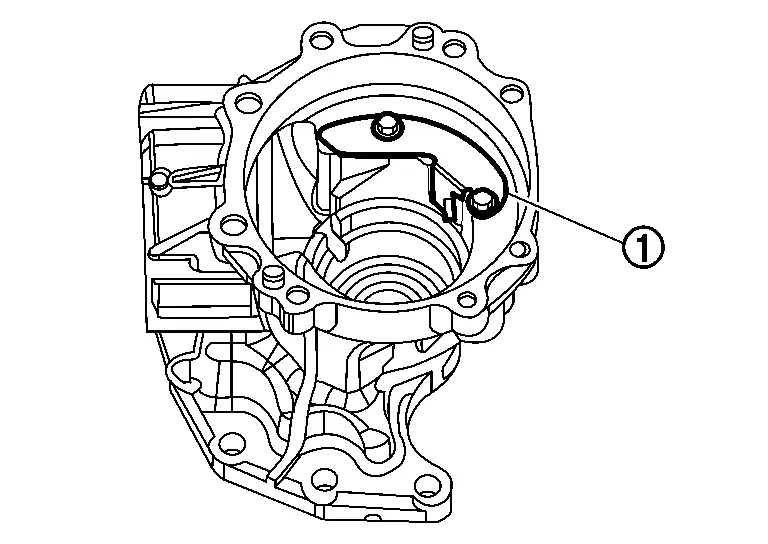
Remove O-ring from transfer case.
CAUTION:
-
Never use a tool.
-
Never damage transfer case.
Remove transfer case oil seals .
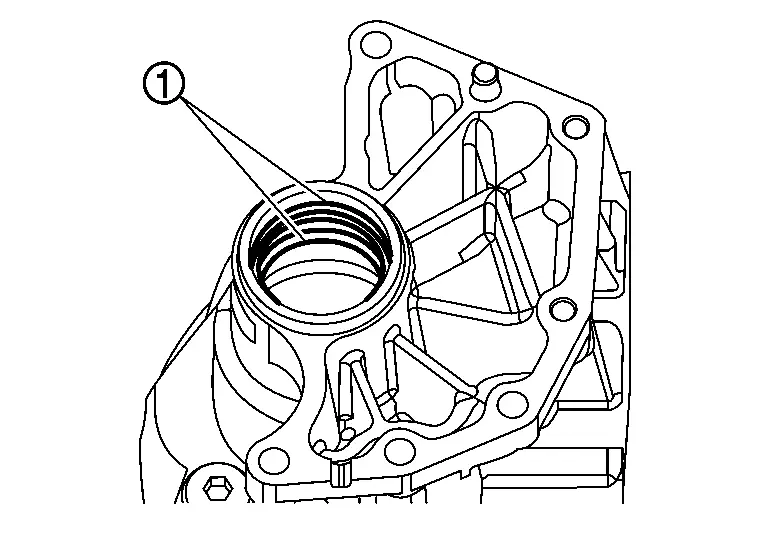
CAUTION:
Never damage transfer case.
Remove baffle plate .
Remove the ring gear bearing adjusting shim (transfer case side) and ring gear bearing outer race (transfer case side) by tapping from the 2 cutouts ( ) on the transfer case.
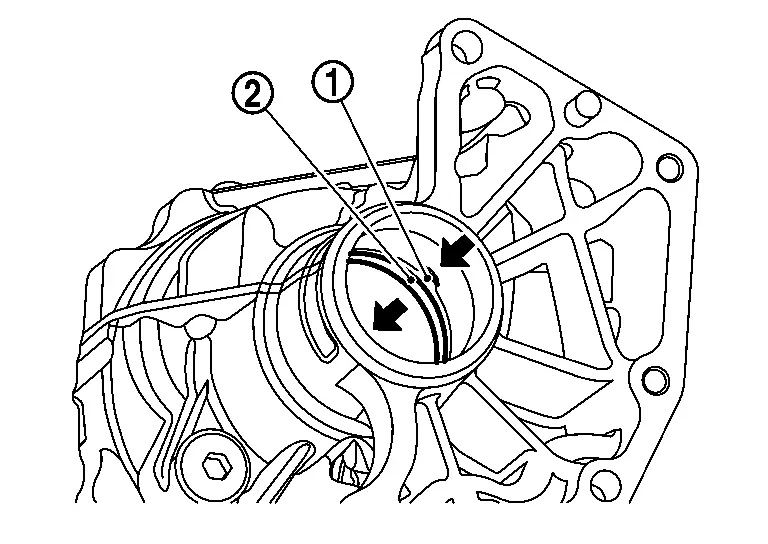
CAUTION:
Never damage transfer case.
Remove plug and gasket.
Perform inspection after disassembly. Refer to Inspection.
ASSEMBLY
Select the ring gear bearing adjusting shim (transfer case side). Refer to Adjustment.
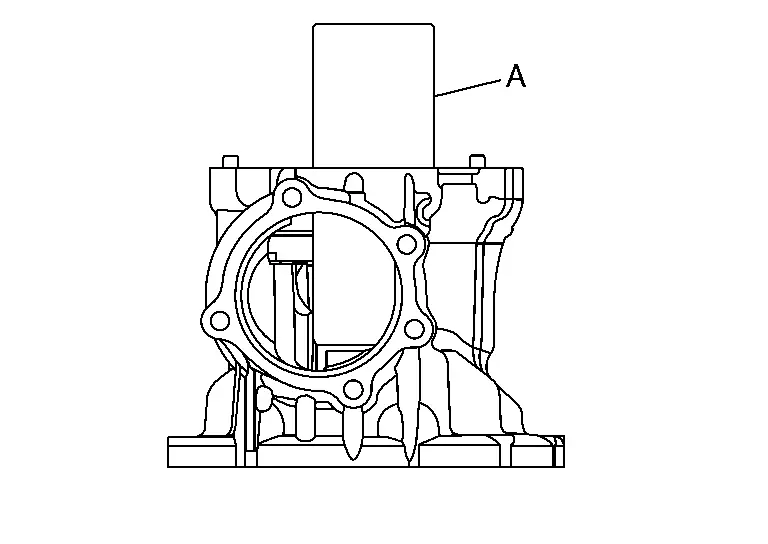
Install the selected ring gear bearing adjusting shim (transfer case side) and ring gear bearing outer race (transfer case side) using drift (A) (commercial service tool).
CAUTION:
-
Never reuse ring gear bearing (transfer case side).
-
Apply transfer oil to the ring gear bearing (transfer case side).
Install baffle plate .
-
For tightening torque, refer to Exploded View.
Install ring gear shaft assembly. Refer to Disassembly and Assembly.
CAUTION:
Protect transfer case oil seals beforehand from being damaged by the spline of ring gear shaft.
Install drive pinion assembly. Refer to Disassembly and Assembly.
Install transfer cover to check and adjust each part. Refer to Disassembly and Assembly.
 NOTE:
NOTE:
At this timing, O-ring installing to transfer cover is not necessary. Install O-ring after backlash and tooth contact are checked.
Check backlash, tooth contact, total preload and companion flange runout. Refer to Adjustment.
CAUTION:
Measure the total preload without oil seals of transfer cover and transfer case.
Reinstall transfer cover to install O-ring. Refer to Disassembly and Assembly.
Install transfer case oil seals using drift (commercial service tool).
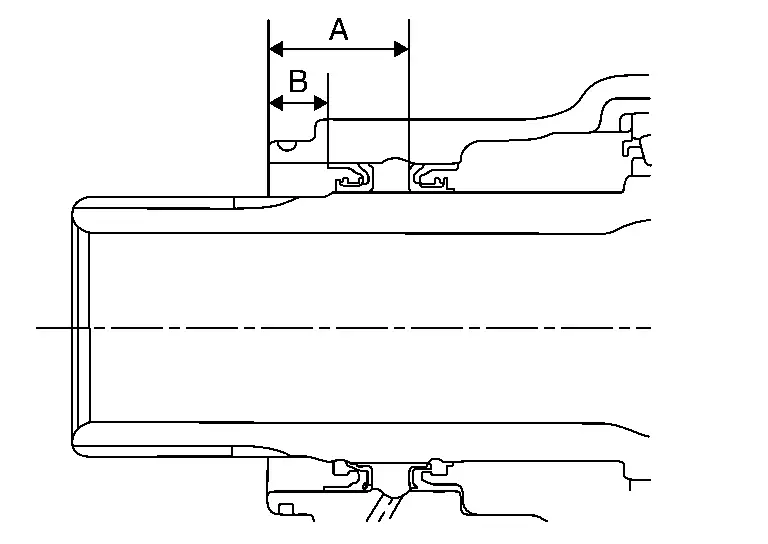
| A | : 24.8 mm (0.976 in) |
| B | : 10.3 mm (0.406 in) |
CAUTION:
-
When checking the total preload torque, measure it without the oil seal, then install the oil seal.
-
Never reuse the oil seal.
-
When installing, never incline oil seal.
-
Apply multi-purpose grease onto oil seal lips, and transfer oil onto the circumference of the oil seal.
-
Never damage oil seals by spline of ring gear shaft.
After installing transfer case oil seals to transfer case, remove wrapped vinyl from the spline of ring gear shaft.
Install O-ring to the transfer case.
CAUTION:
-
Never reuse O-ring.
-
Apply multi-purpose grease lightly and evenly onto O-ring.
-
When installing O-ring, never use a tool.
-
Never damage O-ring.
Inspection
INSPECTION AFTER DISASSEMBLY
Check items below. If necessary, replace them with new ones.
Case
Check the bearing mounting surface for wear, cracks and damages.
Other materials:
Adas Control Unit. Basic Inspection
Additional Service When Replacing Adas Control Unit 2
Without Propilot Assist 2.1
Work Procedure
Always perform the additional service after replacing the ADAS control unit 2.ADAS CONTROL UNIT 2 CONFIGURATION
Perform saving Nissan Ariya vehicle internal information according to "Replace ECU" i ...
System Description. System. Power Window System
Power Window System
System Description
SYSTEM DIAGRAM Component Function
Front door switch
Detects front door open/close condition and transmits door switch signal to BCM.
BCM
Controls power window relay.
Controls retained power function.
Power window main switch ...
Modes de fonctionnement des essuie-glaces
Type A (selon ├®quipement)
Type B (selon ├®quipement)
Les commandes de visibilit├® de votre Nissan Rogue s'activent lorsque le contact est sur "ON" :
Mode AUTO / Intermittent :
- Type A (Automatique) : Le Nissan Rogue ajuste seul la vitesse selon l'intensit├® de la pluie ...