Nissan Rogue (T33) 2021-Present Service Manual: Removal and Installation :: Rear Door Finisher
Exploded View
With rear door sunshade models
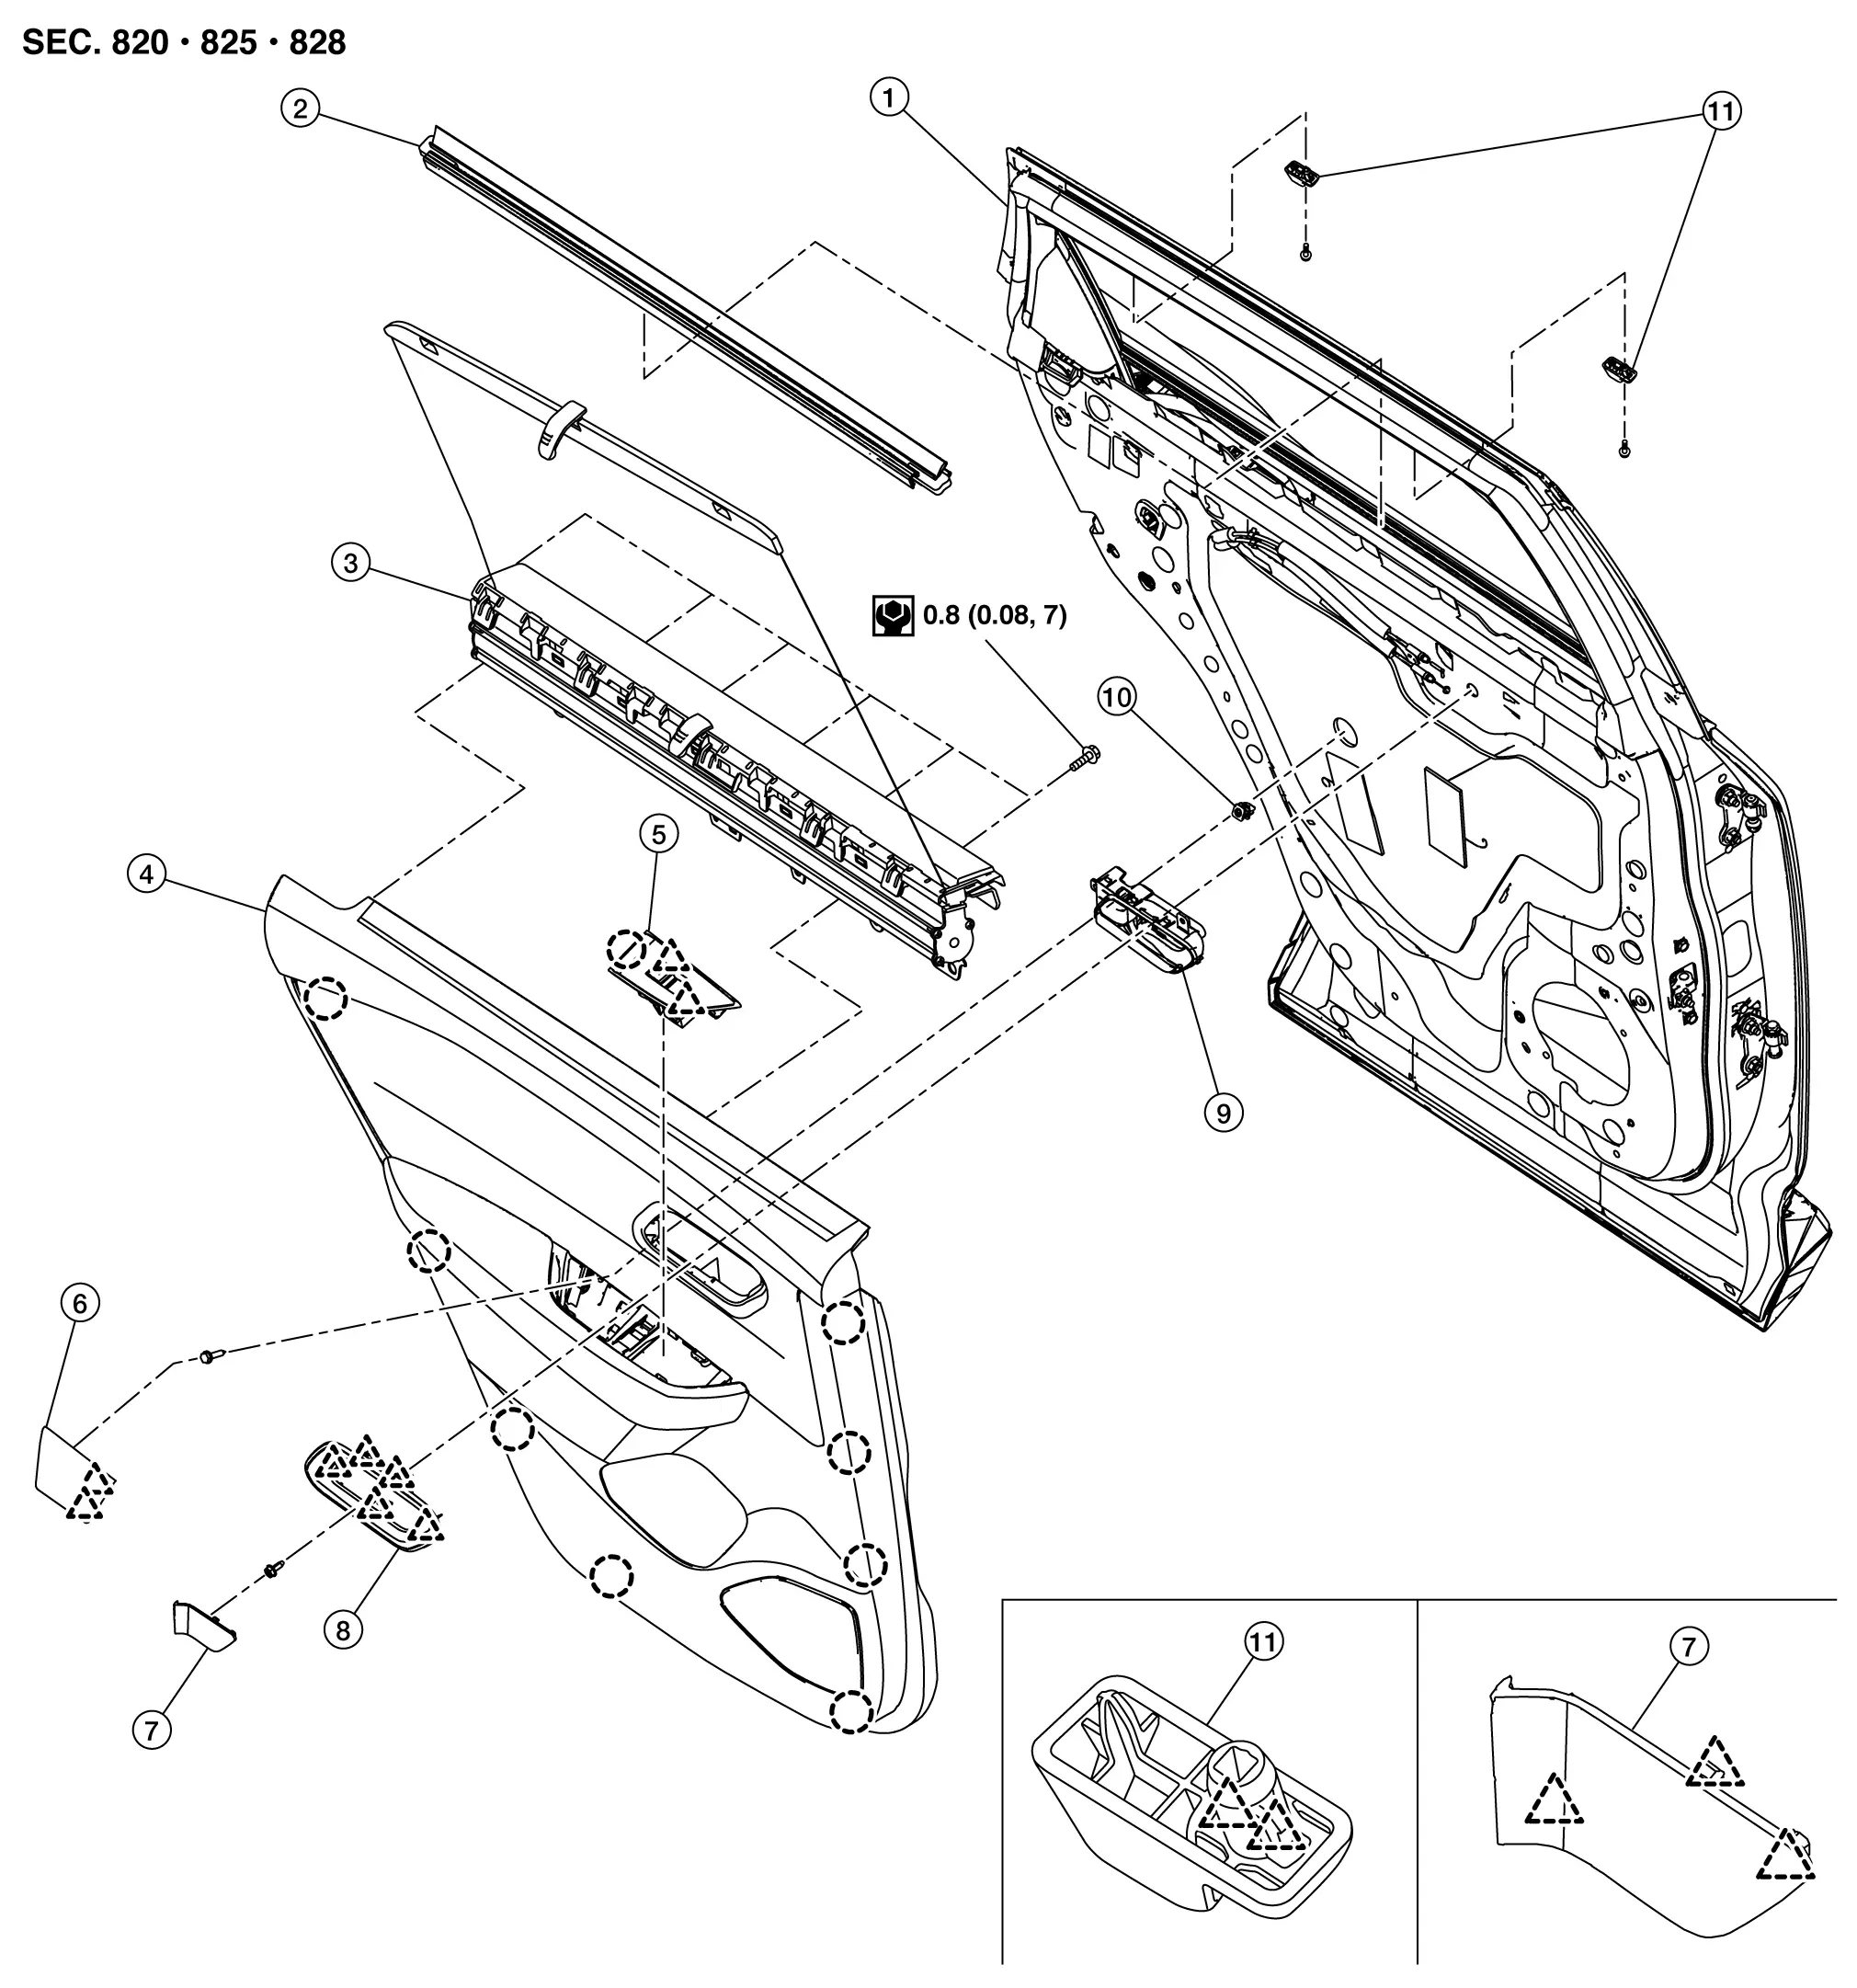
| 1. | Rear door panel | 2. | Inside seal | 3. | Rear door sunshade |
| 4. | Rear door finisher | 5. | Power window switch finisher | 6. | Pull handle cap |
| 7. | Inside handle cap | 8. | Inside handle finisher | 9. | Inside handle |
| 10. | Grommet | 11. | Shade hook | — | — |
 |
: Clip | ||||
 |
: Pawl | ||||
Without rear door sunshade models
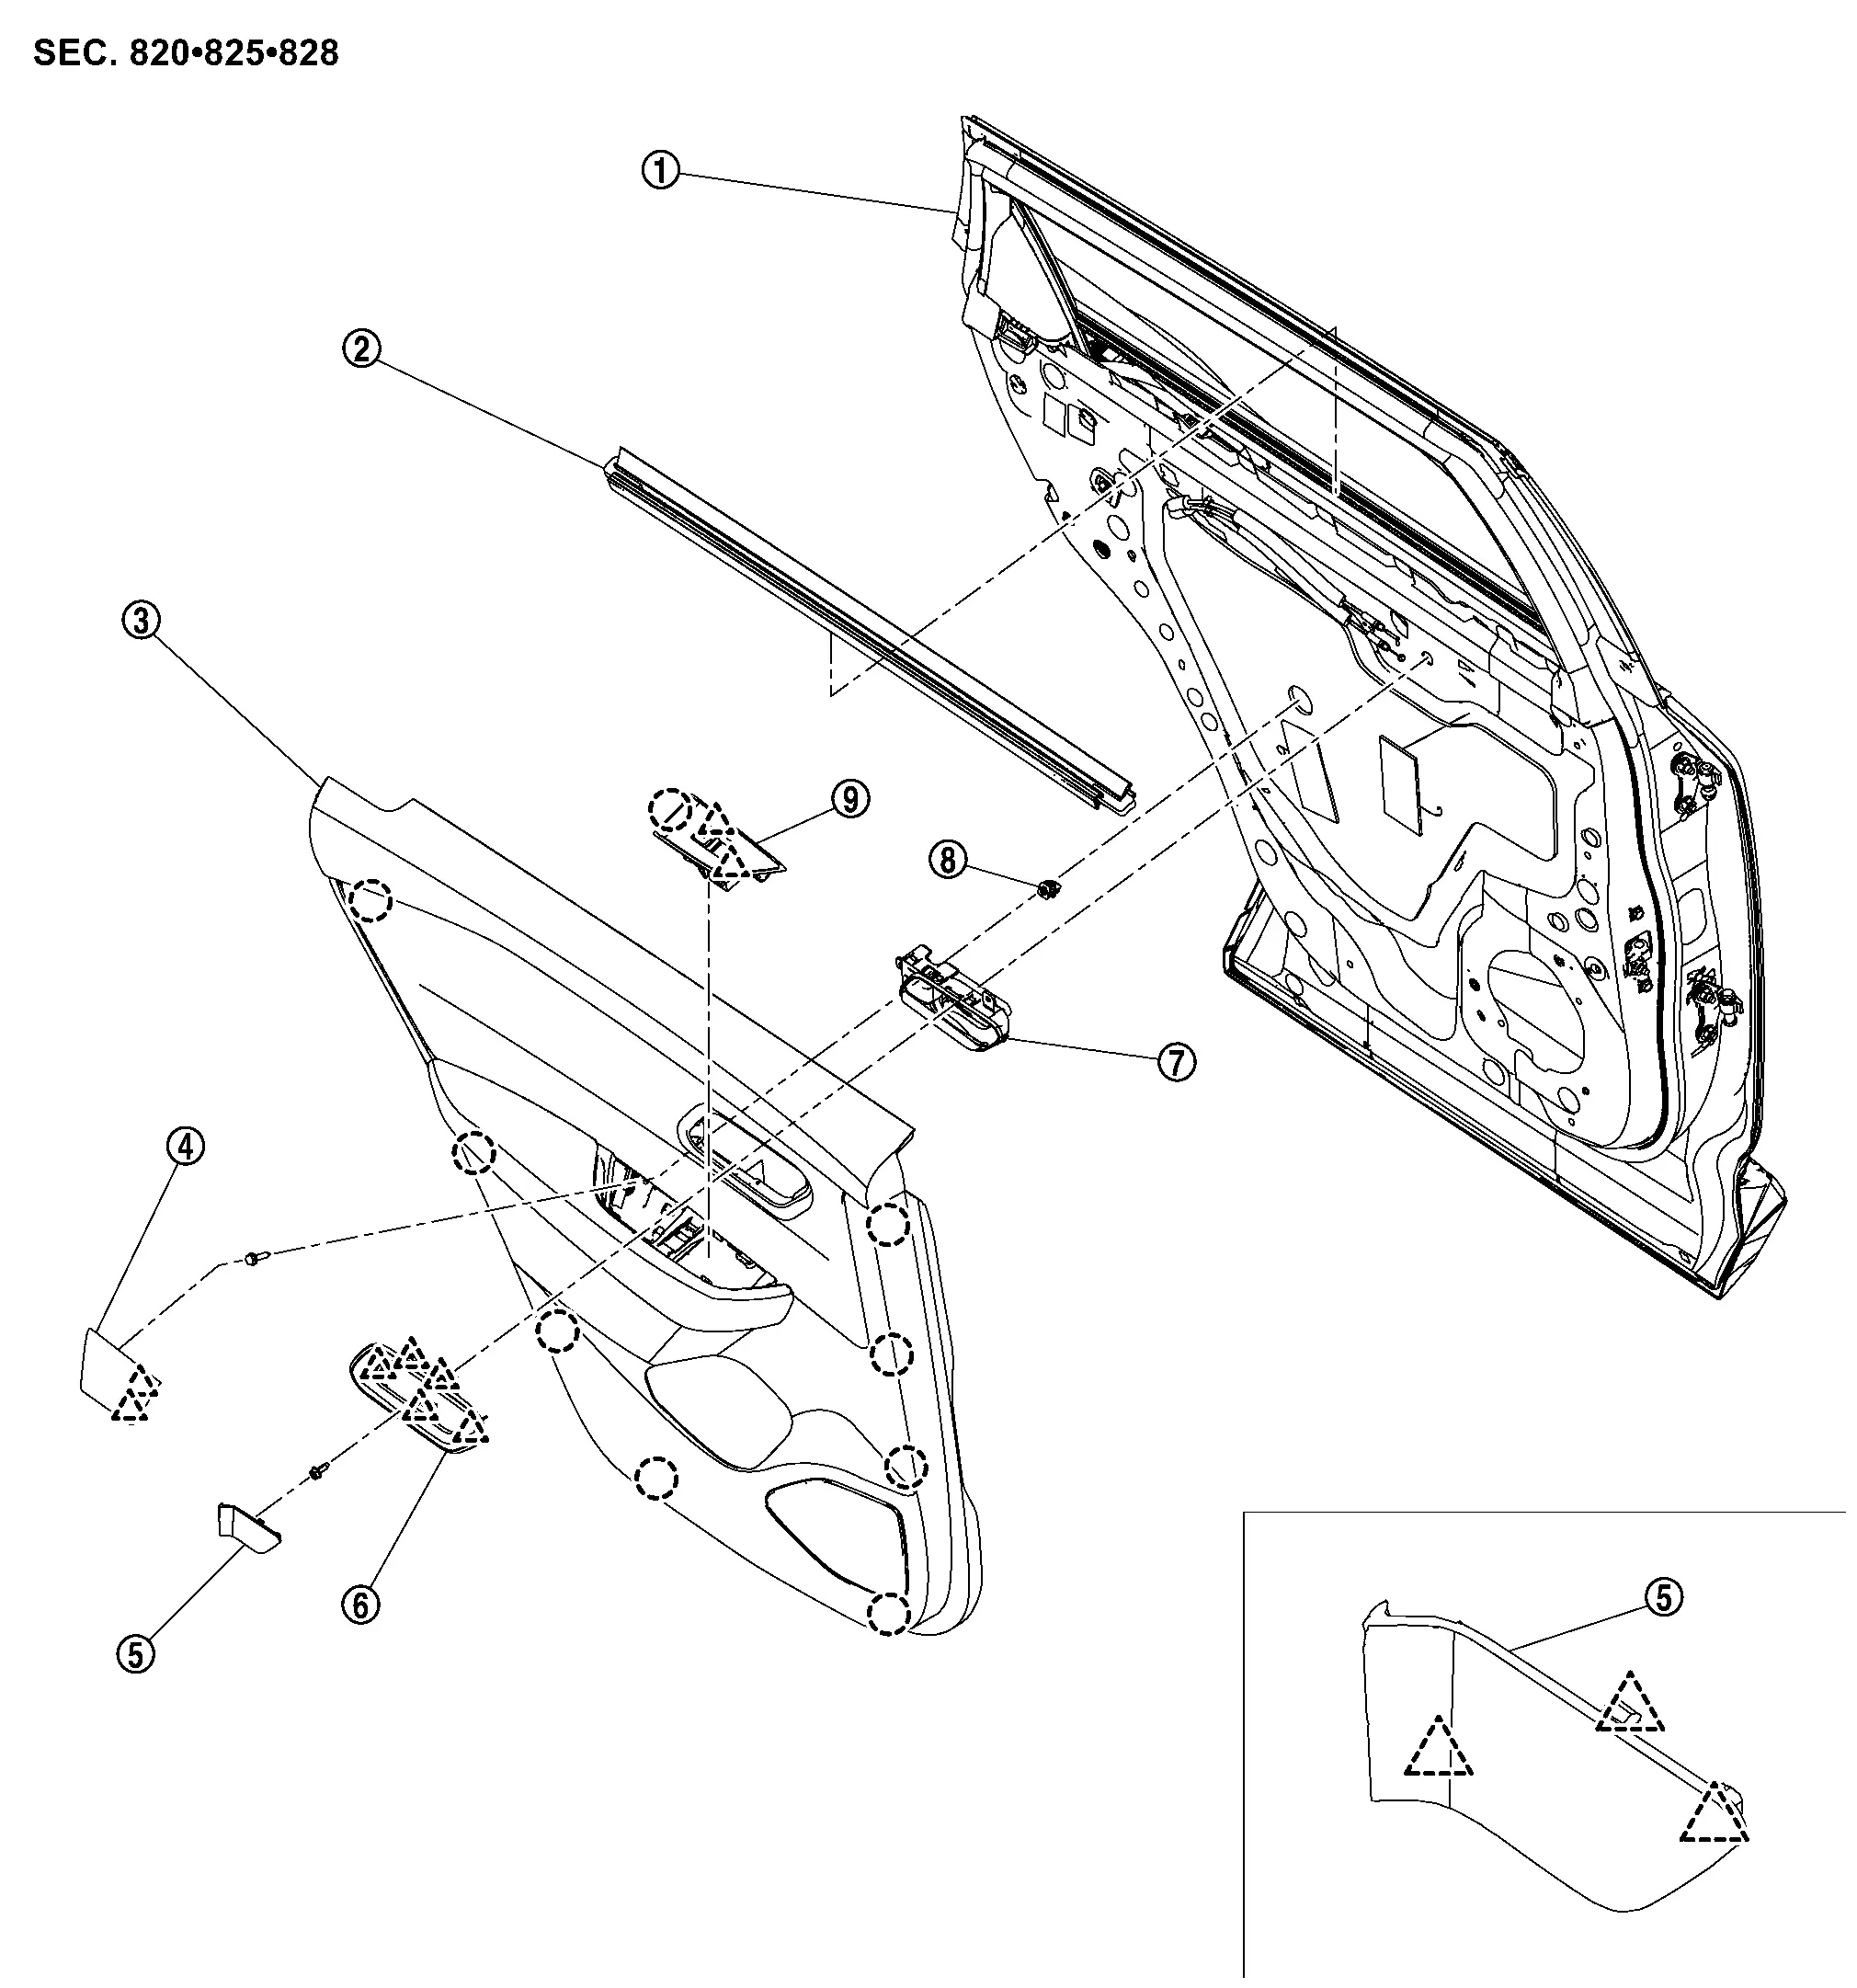
 |
Rear door panel |  |
Inside seal |  |
Rear door finisher |
 |
Pull handle cap |  |
Inside handle cap |  |
Inside handle finisher |
 |
Inside handle |  |
Grommet |  |
Power window switch finisher |
|
: Clip | ||||
|
: Pawl | ||||
Removal and Installation
CAUTION:
Never damage the rear door panel.
REMOVAL
Fully open rear door.
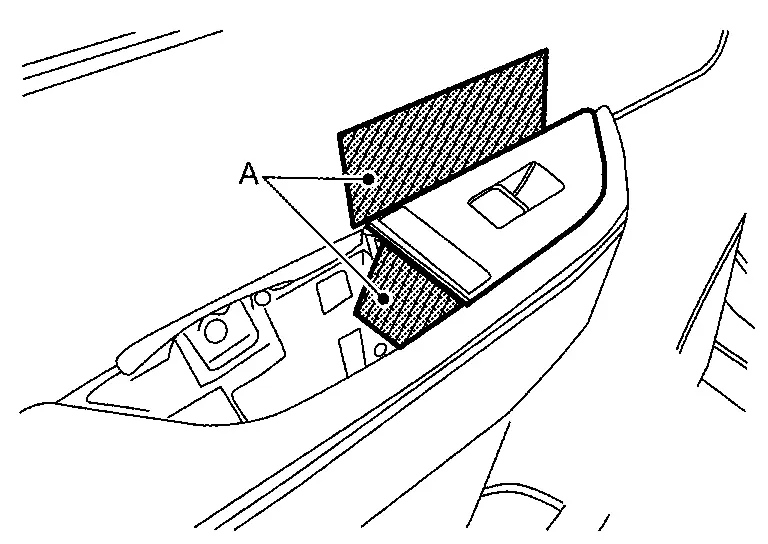
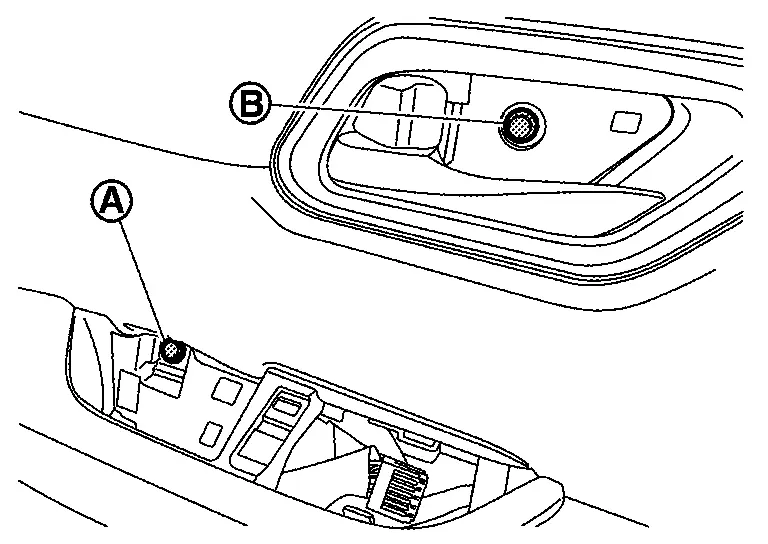
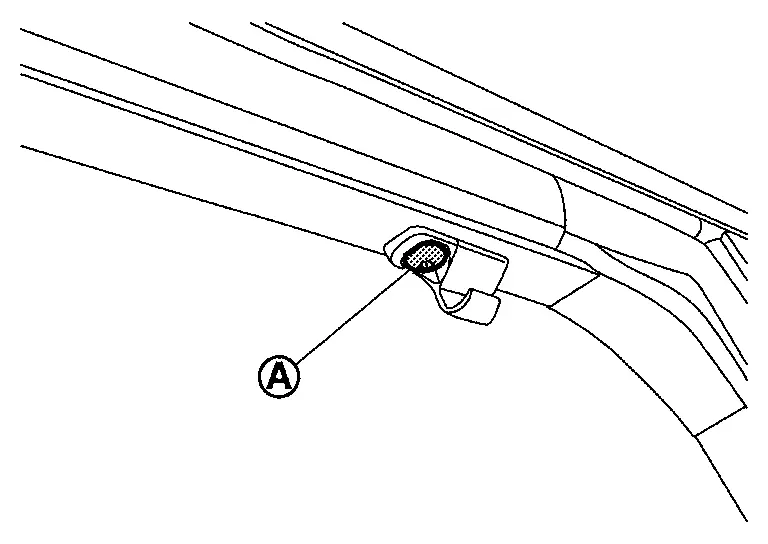
Remove pull handle cap.Apply protective tape (A) on rear door finisher to protect it from damage.
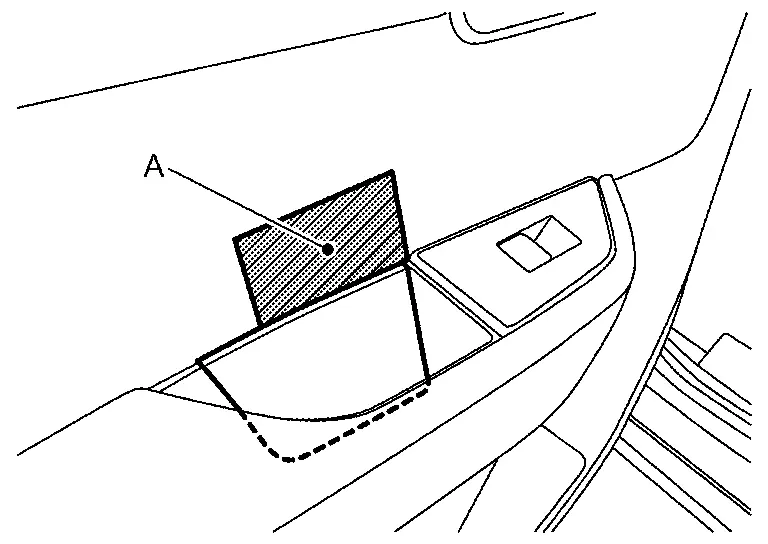
|
: Pawl |
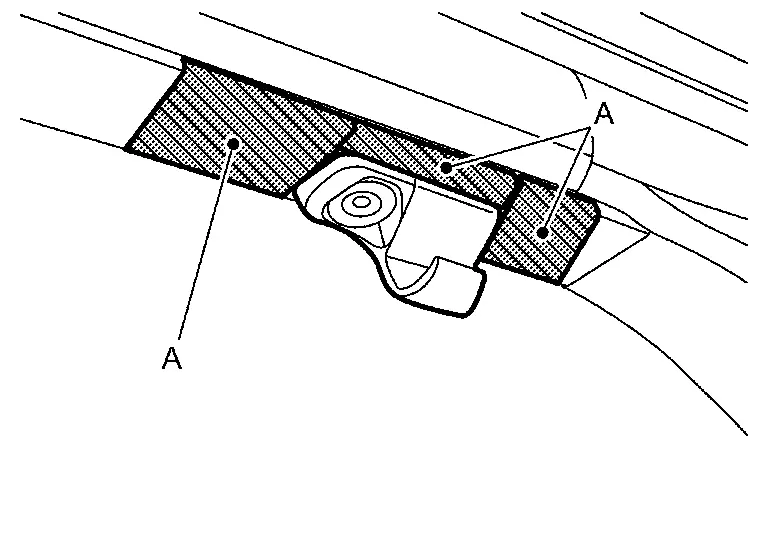
Remove power window switch finisher.Apply protective tape (A) on rear door finisher to protect it from damage.
|
: Clip |
|
: Pawl |
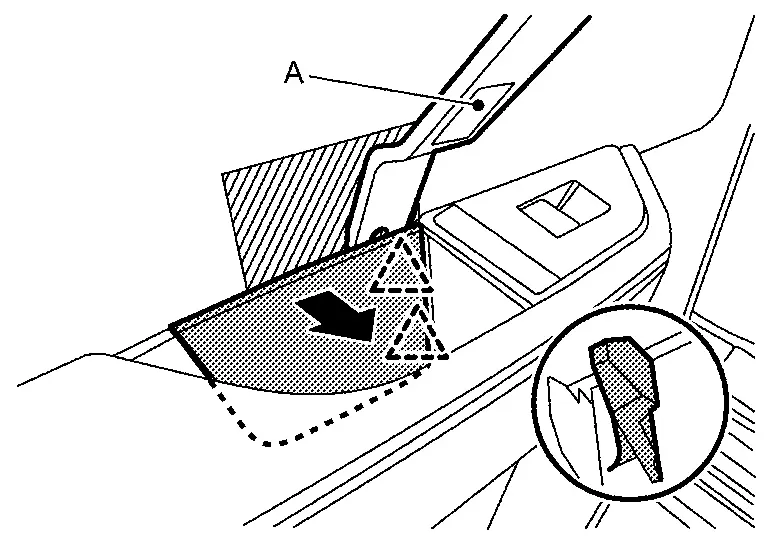
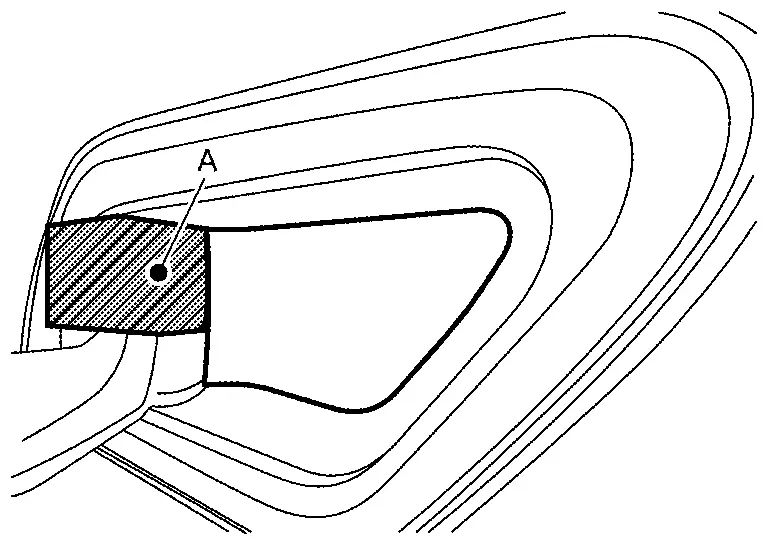
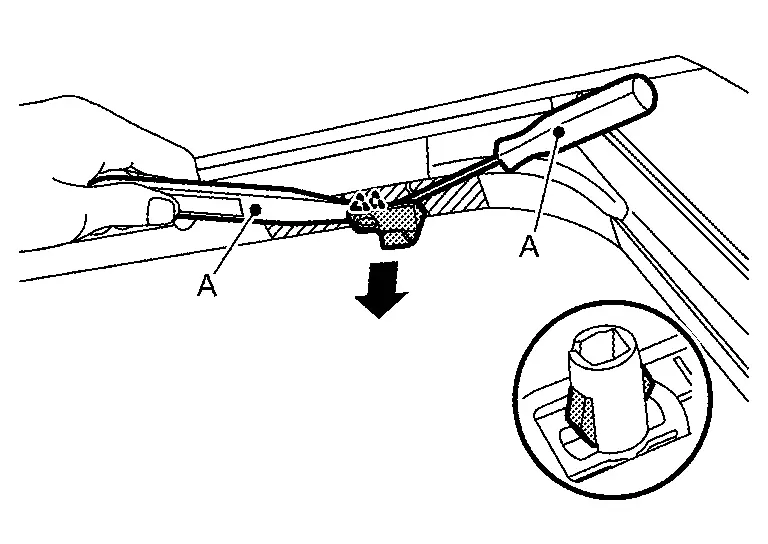
Remove inside handle cap.Apply protective tape (A) on inside handle to protect it from damage.
|
: Pawl |
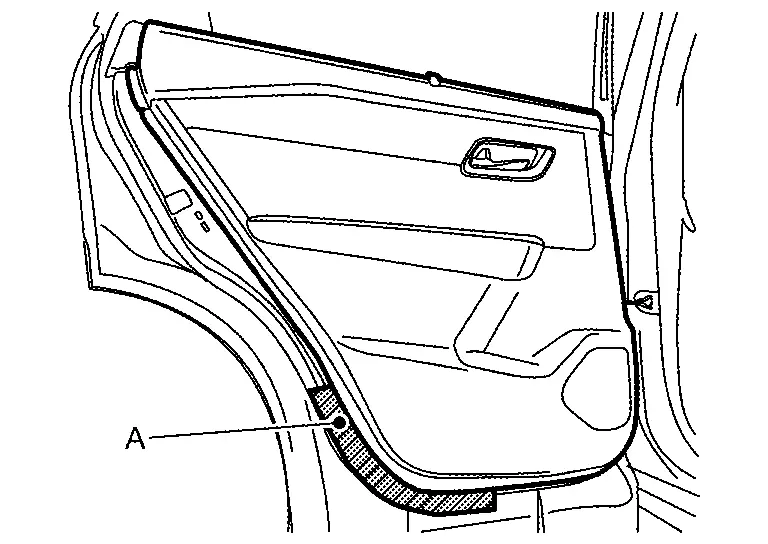
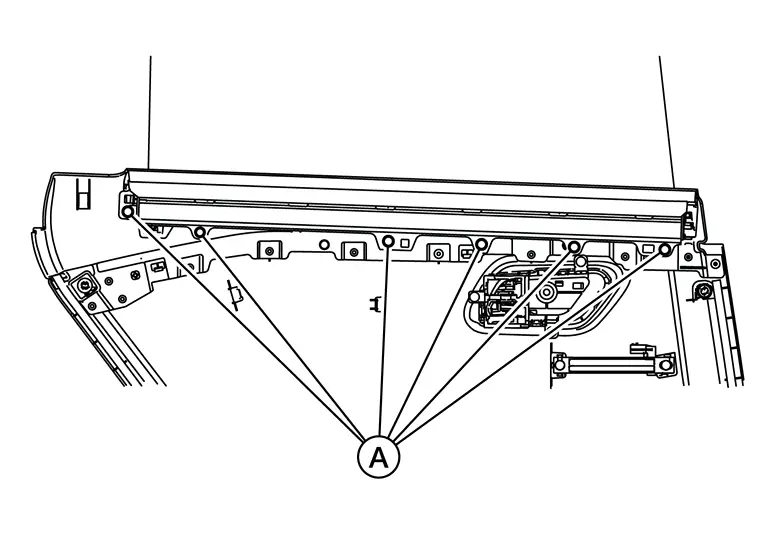
Remove rear door finisher mounting screw (A) and mounting bolt (B).
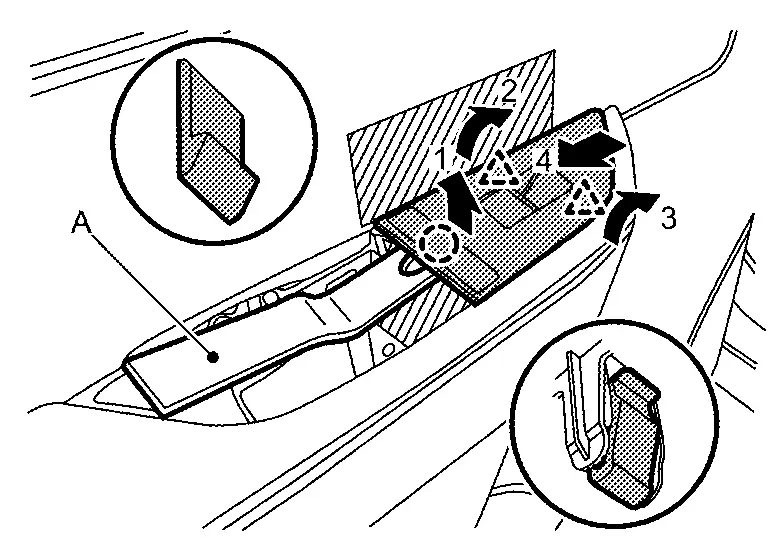
Apply protective tape (A) on rear door panel to protect it from damage.
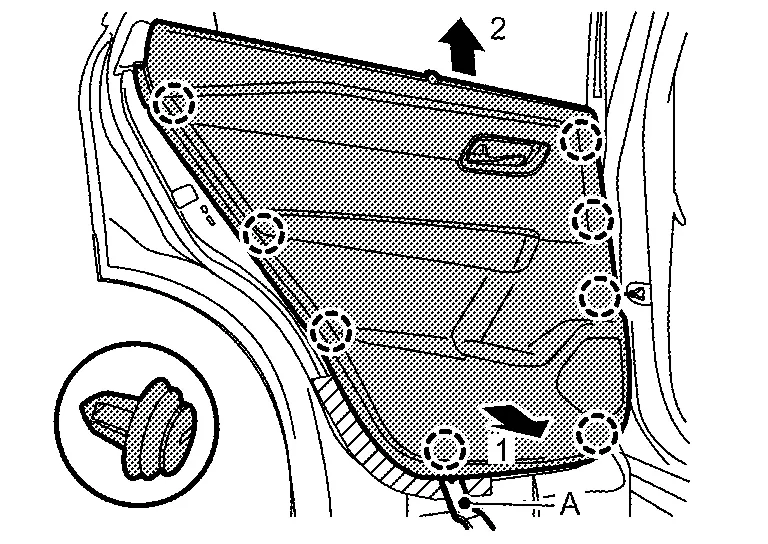
Disengage rear door finisher fixing clips using a remover tool (A) according to numerical order 1→2 indicated by arrows as shown in the figure.
|
: Clip |
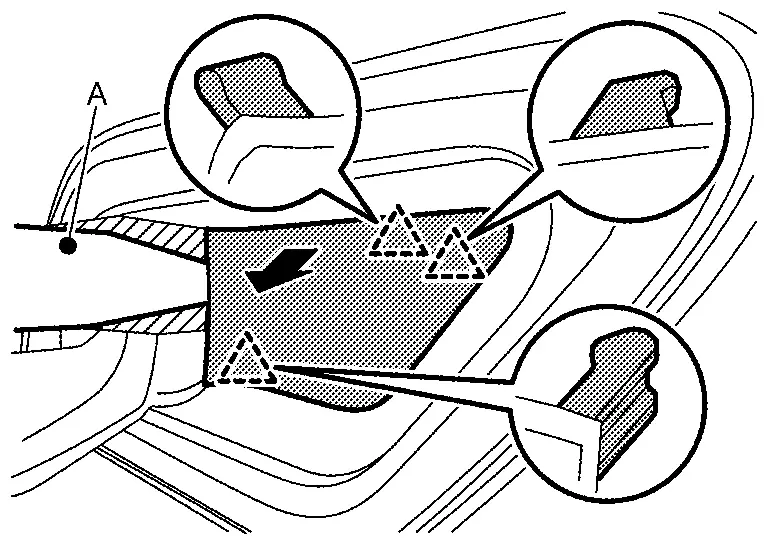
Disconnect lock knob cable (1) and inside handle cable (2) from inside handle according to numerical order 1→4 indicated by arrows as shown in the figure, and then remove rear door finisher.

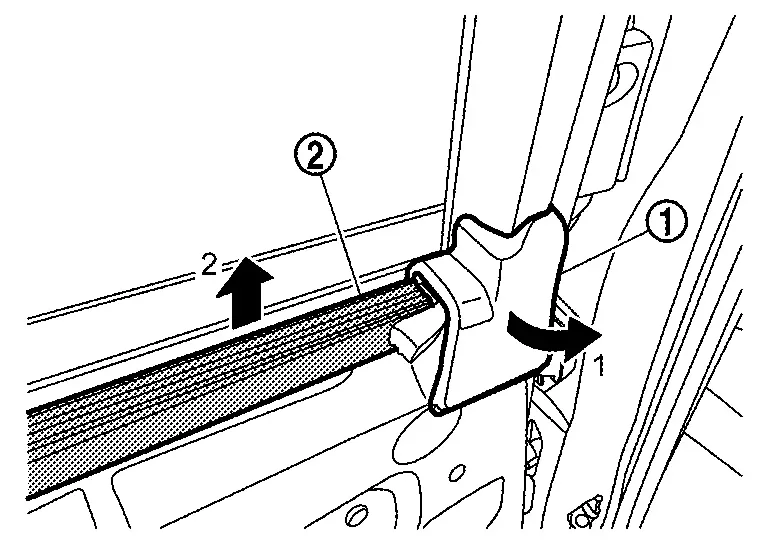
Disengage rear door weather-strip (1), and then remove inside seal (2), according to numerical order 1→2 indicated by arrows as shown in the figure,.
INSTALLATION
Installation is in the reverse order of removal.
CAUTION:
-
Visually check clips for deformation and damage during installation. Replace with new ones if necessary.
-
Check in advance that clips are accurately aligned with the portions on rear door panel, and then install by pressing in.
-
Never install lock knob cable while it is twisted.
REAR DOOR SHADE ASSEMBLY
REMOVAL
Remove rear door finisher. Refer to Removal and Installation.
Remove screws (A).
Remove rear door shade assembly.
INSTALLATION
Installation is in the reverse order.
REAR DOOR SHADE HOOK
REMOVAL
Remove shade hook mounting bolt (A).
Apply protective tapes (A) on rear door panel to protect it from damage.
Release shade hook pawls using a suitable tool (A), and then remove shade hook.
|
:Pawl |
INSTALLATION
Installation is in the reverse order of removal.
Other materials:
Input Speed Sensor
Exploded View
1.
O-ring
2.
Input speed sensor
3.
Transaxle assembly
: N·m (kg-m, in-lb) : Always replace after every disassembly. : Apply petroleum jelly.
Removal and Installation
REMOVAL Never Reuse These Parts Part Code For additional information:
Seal-O-ring
31051 ...
P0011 Ivt Control
DTC Description
DTC DETECTION LOGIC DTC
CONSULT screen terms
(Trouble diagnosis content)
DTC detection condition
P0011
00
INT/V TIM CONT-B1
(“A” Camshaft position - timing over-advanced or system performance bank 1)
Diagnosis condition
Engine running
Signal (term ...
Kr15ddt. Removal and Installation
Fuel Level Sensor Unit, Fuel Filter and Fuel Pump Assembly
Exploded View
REMOVAL2WD
Lock ring
Fuel level sensor unit, fuel filter and fuel pump assembly
O-ring
Fuel tank
: Nissan Ariya Vehicle front
: Always replace after every disas ...