Nissan Rogue (T33) 2021-Present Service Manual: Removal and Installation :: Passenger Air Bag Module
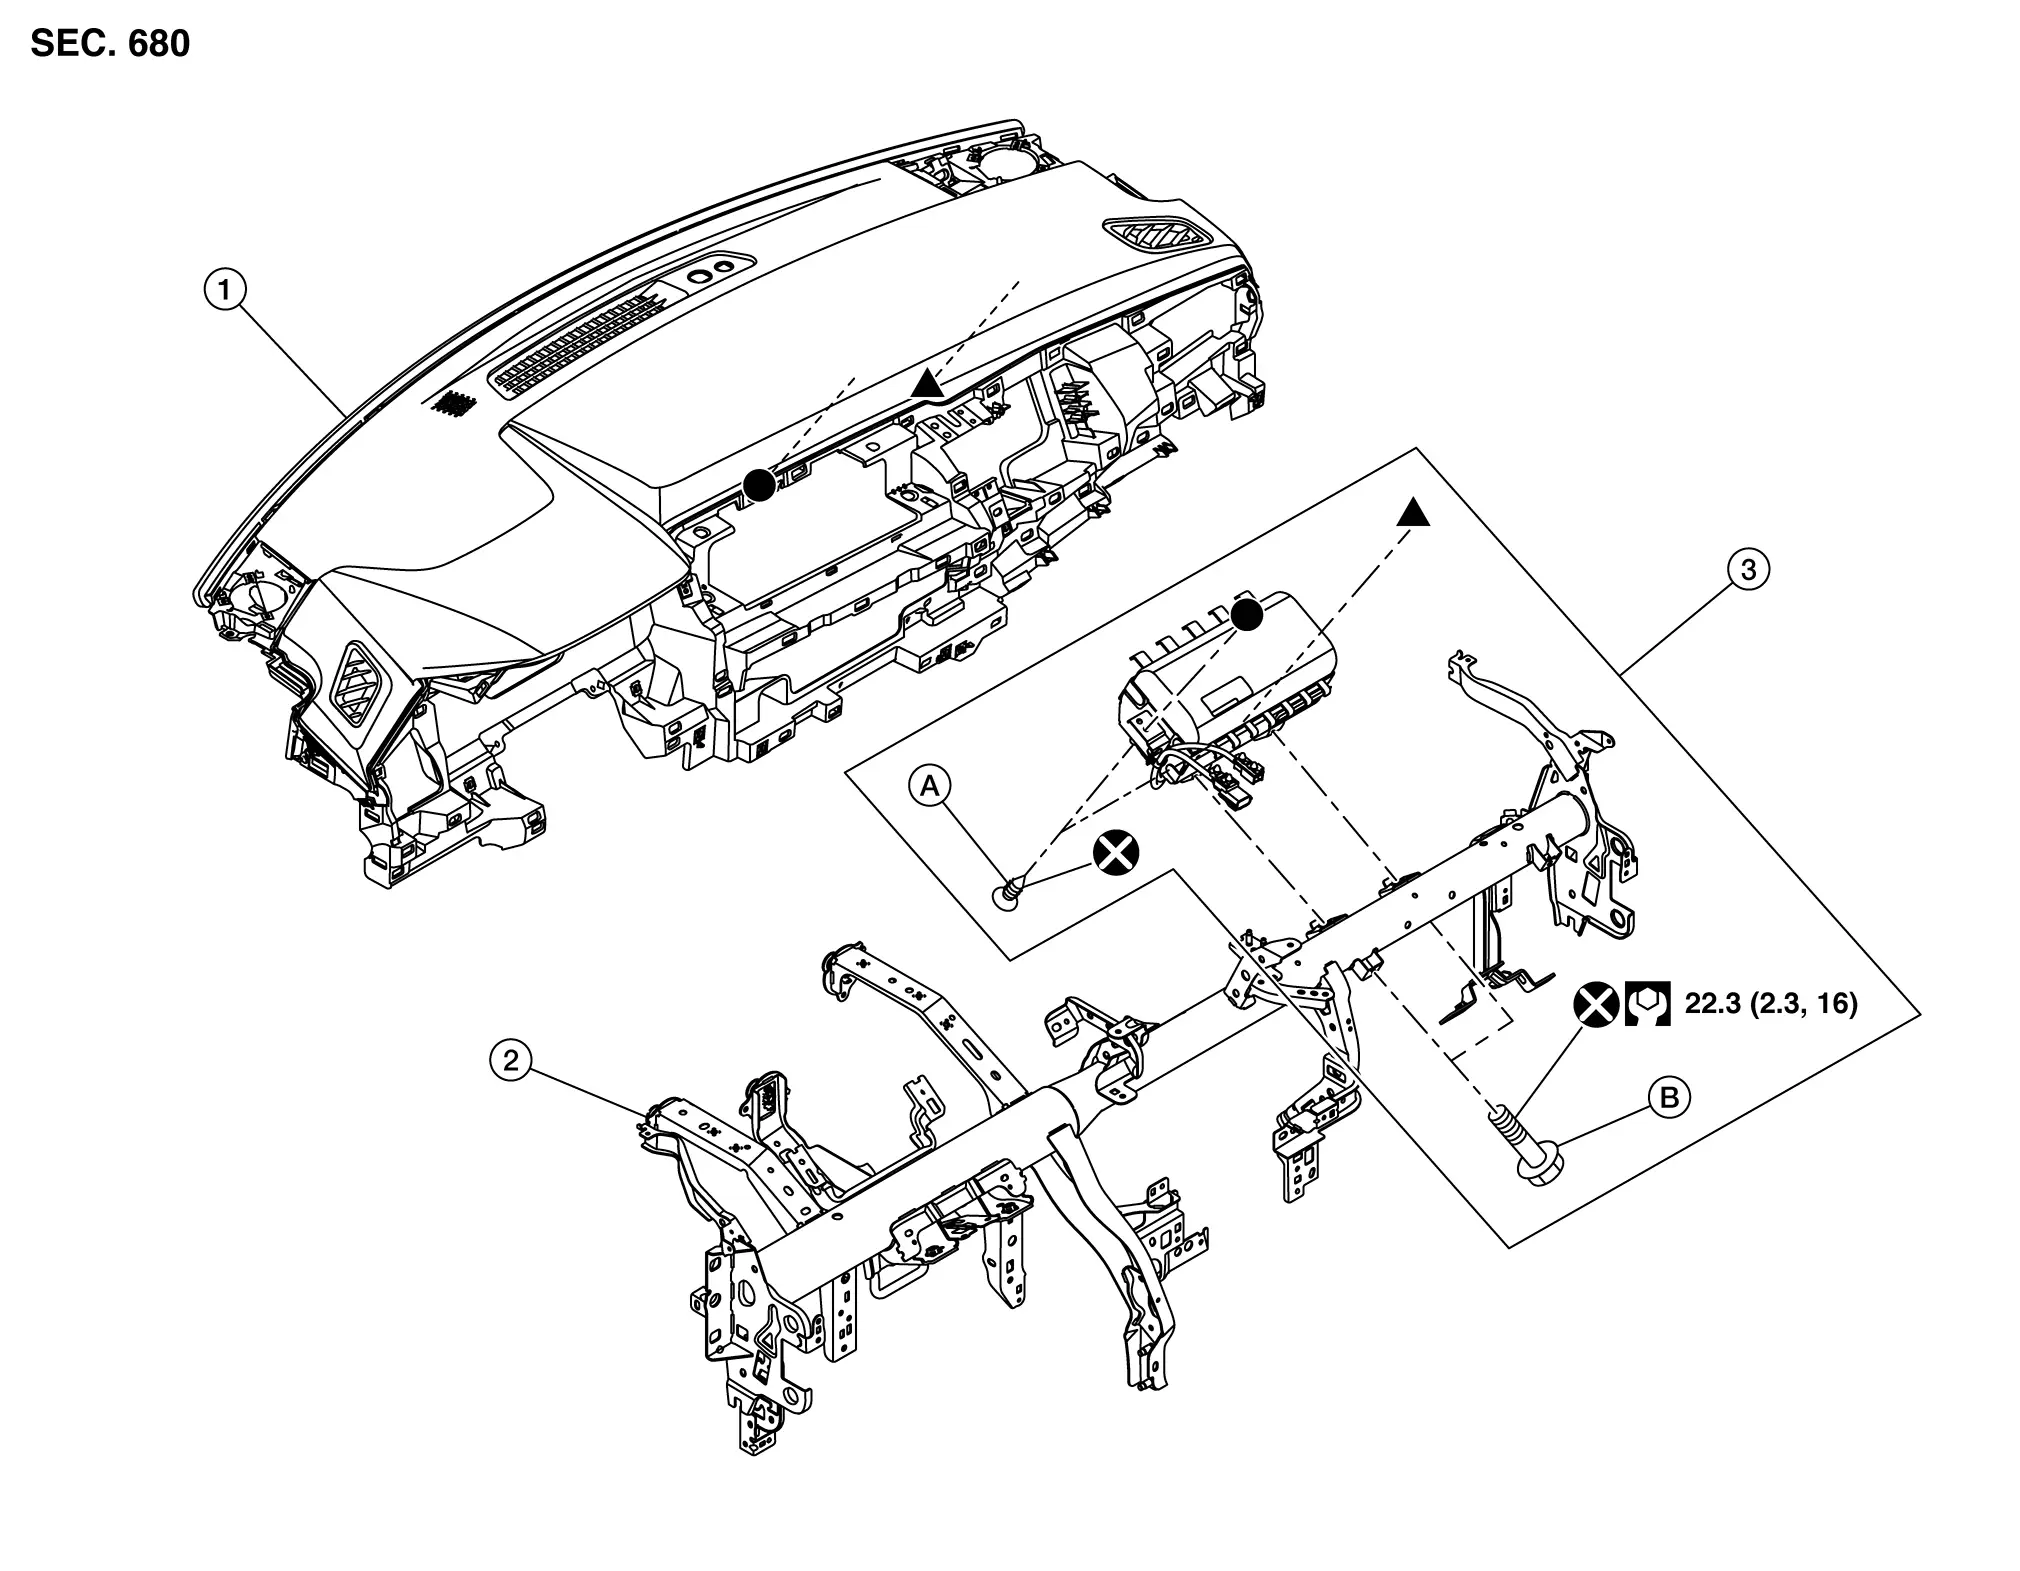
Exploded View
 |
Instrument panel assembly |  |
Steering member |  |
Passenger air bag module |
 |
Screw |  |
Bolt | ||
 |
: Always replace after every disassembly. | ||||
 |
: N·m (kg-m, ft-lb) | ||||
 , ,  : Indicates that the part is connected at points with same symbol in actual Nissan Ariya vehicle. : Indicates that the part is connected at points with same symbol in actual Nissan Ariya vehicle. |
|||||
Removal and Installation
WARNING:
Always observe the following items for preventing accidental activation.
-
Before servicing, place the ignition switch in the OFF position, disconnect battery negative terminal and wait for 3 minutes or more (discharges electricity held in the additional power supply circuit of the air bag diagnosis sensor unit).
-
Always work from the side of air bag module. Never work in front of it.
REMOVAL
Remove instrument panel assembly. Refer to Removal and Installation.
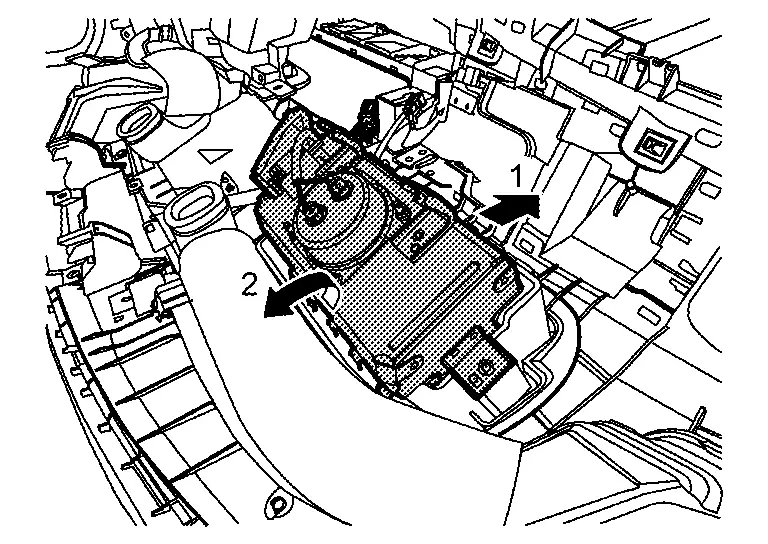
Remove passenger air bag module fixing screws.
Disengage fixing hooks of passenger air bag while pulling installment panel assembly, and then remove passenger air bag module according to numerical order 1→2 indicated by arrows as shown in figure.
CAUTION:
-
To prevent accidental explosion, always place the passenger air bag module with deploying direction facing upward.


: Upward -
To prevent damage to the parts, never impact the passenger air bag module.
-
Replace passenger air bag module if it is dropped or sustains an impact.
-
To prevent accidental explosion, never insert any foreign objects (screwdriver, etc.) into the passenger air bag module.
-
To prevent accidental explosion, never disassemble the passenger air bag module.
-
To prevent accidental explosion, never expose the passenger air bag module to temperature of more than 90 °C (194 °F).
-
To prevent damage to the parts, never allow oil, grease, detergent, or water to come in contact with the passenger air bag module.
INSTALLATION
Note the following items, and then install in the reverse order of removal.
CAUTION:
-
Never reuse mounting bolts after removal, replace with new bolts.
-
Never damage the harness while installing.
-
After installation is completed, perform self-diagnosis using CONSULT or air bag warning lamp, if the system is normal and ″PAST″ of ″Self Diagnostic Result″ is indicated, always perform ″ERASE″ of ″Self Diagnostic Result″ using CONSULT. Refer to Work Flow.
-
After the work is completed, check that no system malfunction is detected by air bag warning lamp.
Other materials:
U214a Can Comm Circuit
DTC Description
DTC DETECTION LOGIC DTC
CONSULT screen terms
(Trouble diagnosis content)
DTC detection condition
U214A
83
CAN comm err (AWD/4WD)
[CAN comm err (AWD/4WD)]
Diagnosis condition
Ignition switch ON
Signal (terminal)
CAN communication signal
87
T ...
Information Display (combination Meter)
Driving Position Memory
DESIGN/PURPOSEDisplay registration status of driving position. Display pattern Symbol Message
A
Press button
to save driving position
B
Driving position saved
C
Driving position saved
SYSTEM DIAGRAMSIGNAL PATH
The driver sea ...
Fonctionnement du système
Capteurs sonar centraux
Capteurs sonar d’angle
Capteurs sonar latéraux (si le véhicule en est équipé)
Le système informe le conducteur par des alertes visuelles et sonores de la présence :
D’obstacles situés à l’avant lorsque le levier de vitesses est en position D (c ...