Nissan Rogue (T33) 2021-Present Service Manual: Removal and Installation :: 12v Sub Battery (lithium Ion Battery)
Exploded View
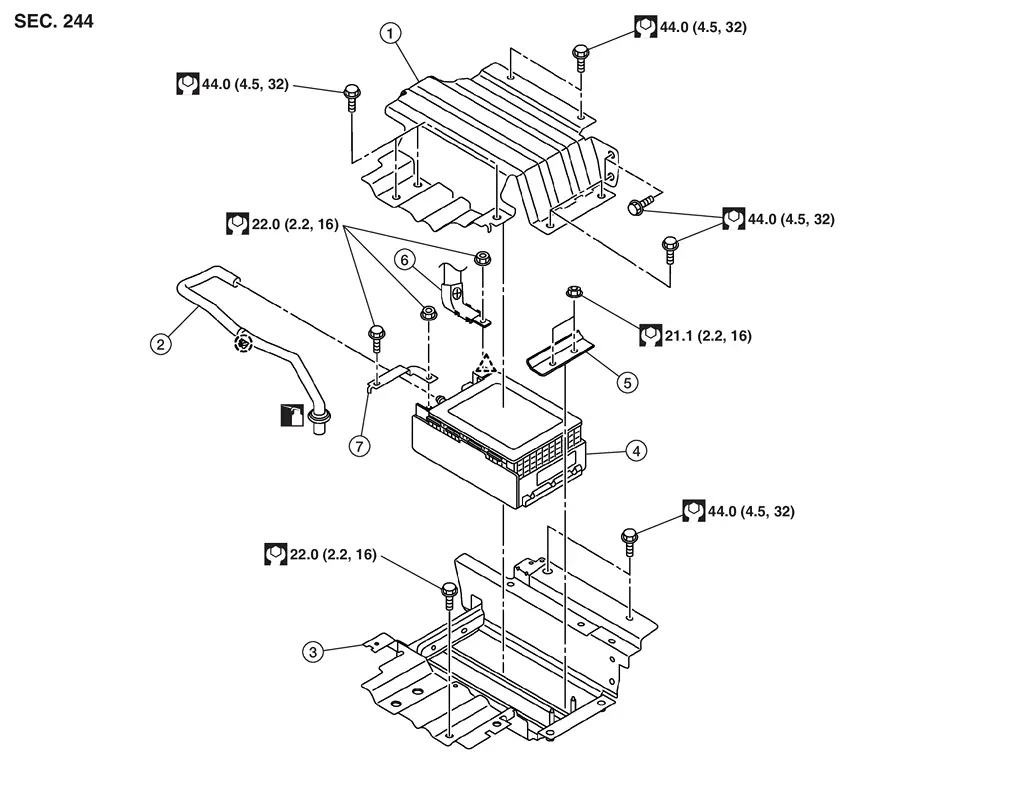
| 1. | Sub battery bracket A | 2. | Sub battery tube | 3. | Sub battery bracket B |
| 4. | 12V sub battery (lithium ion battery) | 5. | Sub battery bracket C | 6. | 12V sub battery (lithium ion battery) positive cable |
| 7. | 12V sub battery (lithium ion battery) negative bracket |  |
: Pawl |  |
: Clip |
Removal and Installation
CAUTION:
After the battery of a vehicle equipped with the Stop/Start System is replaced, the cumulative battery discharge current value stored in ECM must be erased, using CONSULT. Refer to Work Procedure.
REMOVAL
Disconnect 12V battery cable from negative terminal. Refer to Precautions for Removing Battery Terminal.
CAUTION:
To prevent damage to the parts, disconnect 12V battery cable from negative terminal first.
Remove front seat RH. Refer to Removal and Installation.
Remove center pillar lower garnish RH. Refer to Removal and Installation.
Remove the seat cushion assembly. Refer to Removal and Installation.
Unbolt and reposition the seat belt pre-tensioner retractor RH. Refer to Exploded View.
Remove dash side finisher RH. Refer to Removal and Installation.
Lift and reposition front floor carpet and front floor spacer RH. Refer to Exploded View.
Remove rear floor duct 3 RH. Refer to Exploded View.
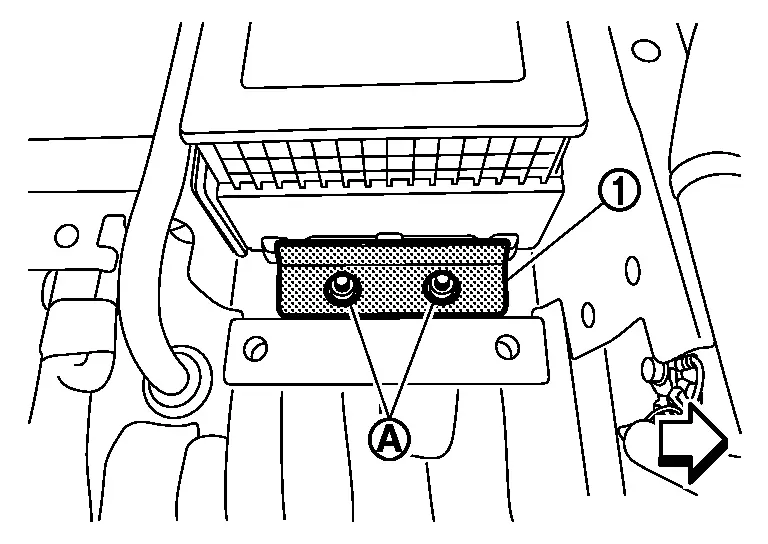
Remove mounting bolts (A), and then remove sub battery bracket A (1).
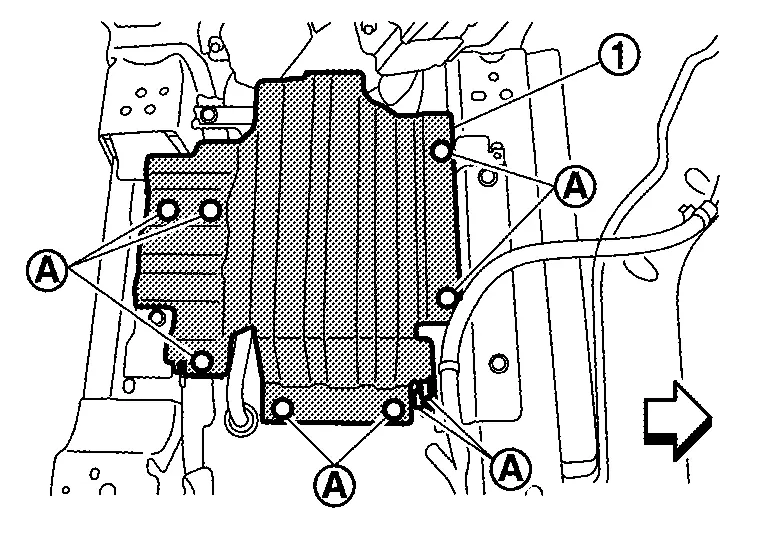
| : Nissan Ariya Vehicle front |
Disconnect the harness connector from the 12V sub battery (lithium ion battery).
Disengage pawl, and then remove positive terminal cover (A) part of 12V sub battery (lithium ion battery) in the direction of the arrow.
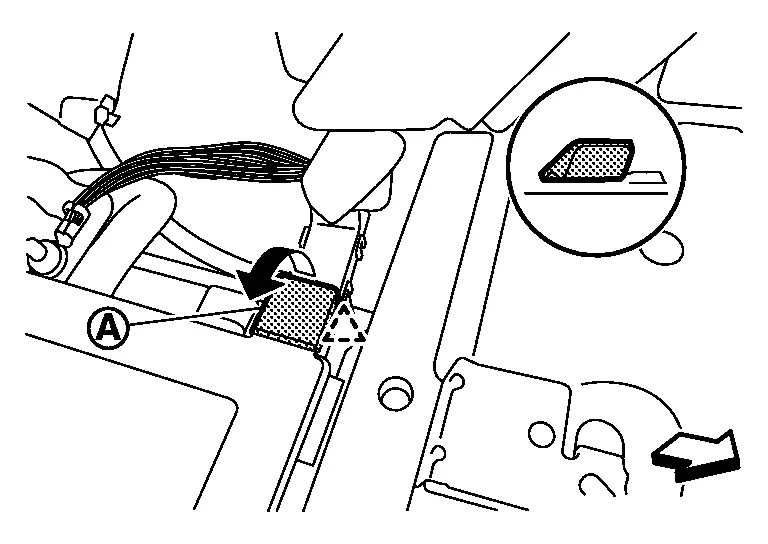
|
: Pawl |
| : Nissan Ariya Vehicle front |
Remove mounting nut (A), and then disconnect 12V sub battery (lithium ion battery) cable (1) from positive terminal.
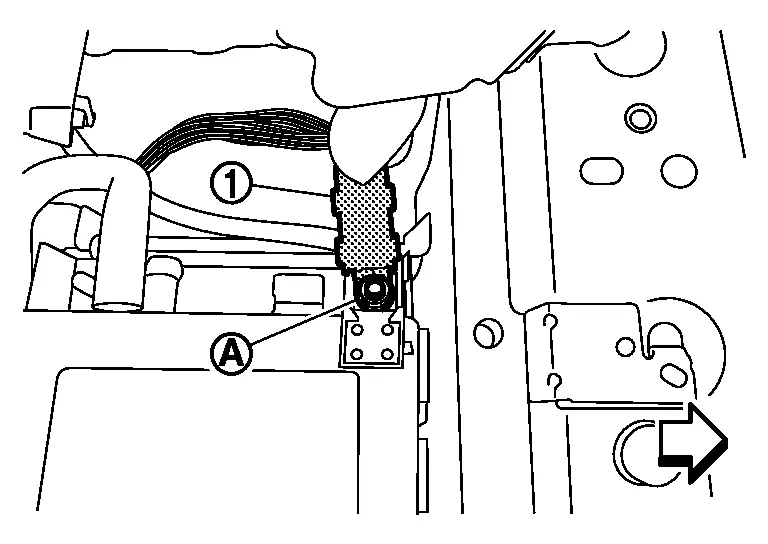
| : Nissan Ariya Vehicle front |
Remove nut from 12V sub battery (lithium ion battery) negative bracket.
Remove bolt (A), and then remove 12V sub battery (lithium ion battery) negative bracket (1).

| : Nissan Ariya Vehicle front |
Disconnect sub battery tube (1) from 12V sub battery [lithium ion battery (2)].
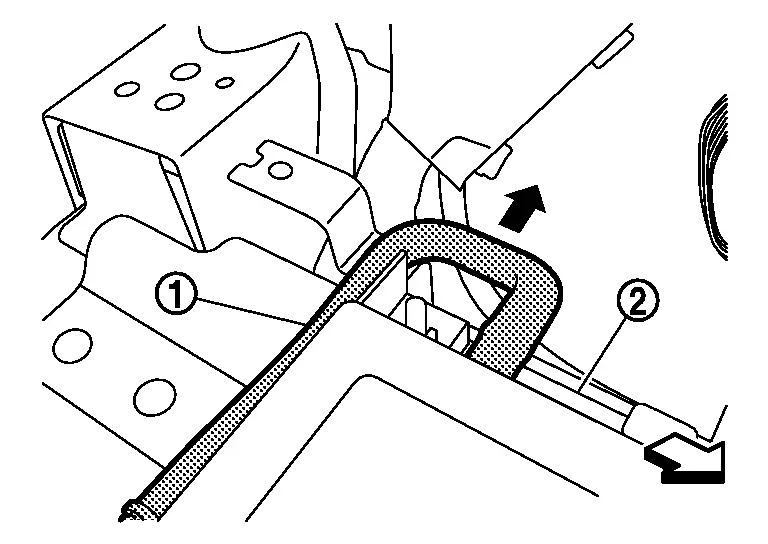
| : Nissan Ariya Vehicle front |
Remove nuts (A), and then remove sub battery bracket C (1).
| : Nissan Ariya Vehicle front |
Remove 12V sub battery (lithium ion battery).
Disengage sub battery tube clip, and then remove sub battery tube (1) from floor panel.
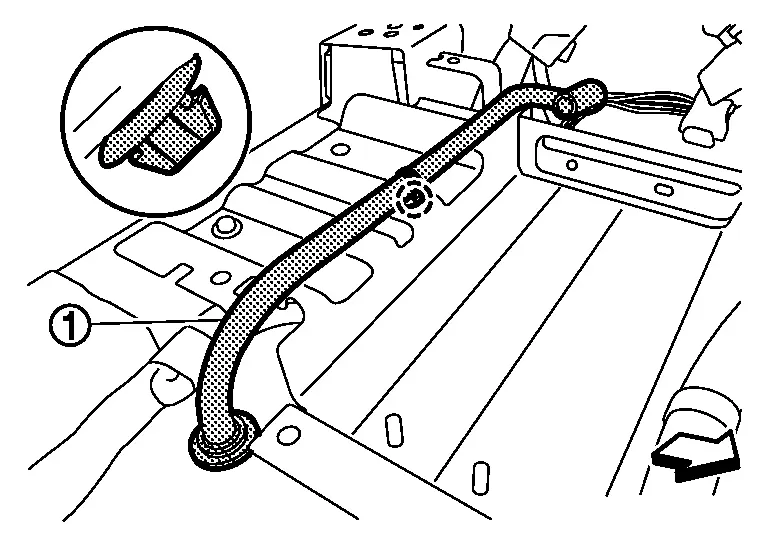
|
: Clip |
| : Nissan Ariya Vehicle front |
Remove bolts (A/B) and then remove sub battery bracket B (1).
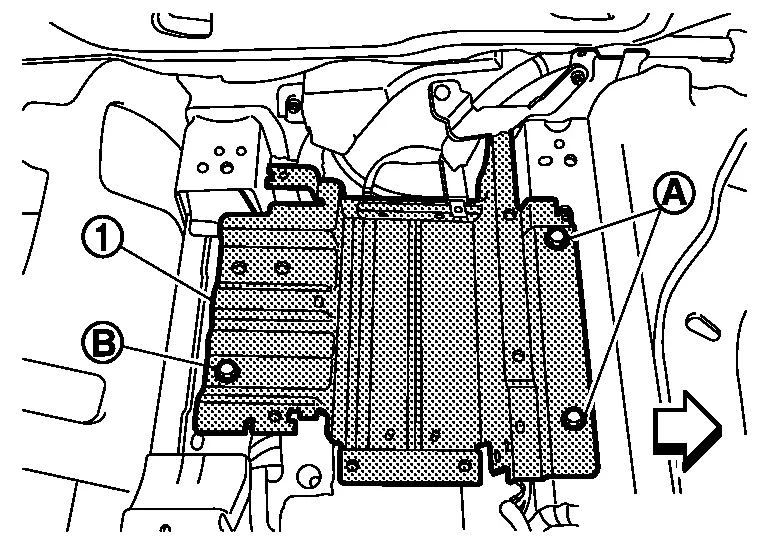
| : Nissan Ariya Vehicle front |
INSTALLATION
Installation is in the reverse order of removal.
CAUTION:
-
When connecting, connect battery cable to positive terminal first.
-
Reset electronic systems as necessary. Refer to Required Procedure After Battery Disconnection.
Other materials:
U2259 Can Comm Circuit
DTC Description
DTC DETECTION LOGIC DTC
CONSULT screen terms
(Trouble diagnosis content)
DTC detection condition
U2259
87
CAN comm err (steering control unit)
[CAN comm err (steering control unit)]
Diagnosis condition
Ignition switch ON
Signal (terminal)
CAN commu ...
P2616 Intake Camshaft Position Sensor
DTC Description
DTC DETECTION LOGIC DTC
CONSULT screen terms
(Trouble diagnosis content)
DTC detection condition
P2616
00
A camshaft posi signal B1
(Camshaft A Position Signal Output Circuit High Bank 1)
Diagnosis condition
Engine running at idle
Signal (terminal)
...
P0500 Vss
DTC Description
DESCRIPTIONECM receives vehicle speed signals from two
different paths via CAN communication line: One is from the ABS actuator
and electric unit (control unit) via the combination unit and the other
is from TCM.DTC DETECTION LOGIC DTC
CONSULT screen terms
(Trouble diagno ...