
Nissan Rogue (T33) 2021-Present Owner’s Manual & User Guide: Forward-facing child restraint installation using the seat belts
Basic information
WARNING
The three-point seat belt with ALR mode must be used when installing a child restraint. Not using ALR will result in an unsecured restraint, increasing injury risk during sudden stops or collisions.
Review all Warnings and Cautions in the “Child safety� and “Child restraints� sections before installation.
Do not use the lower anchors if the combined weight of child + restraint exceeds 65 lbs (29.5 kg). Install with the Nissan Rogue seat belt instead. Follow the restraint manufacturer’s instructions.
Steps to install a forward-facing restraint using the seat belt in the rear seat or front passenger seat:
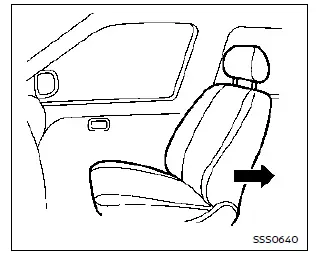
Forward-facing (front passenger seat) - step 1
1. If installing a child restraint in the front seat, it must be forward-facing only. Move the seat to the rearmost position.
Rear-facing restraints for infants must never be used in the front passenger seat.
2. Position the child restraint on the seat and follow the manufacturer’s instructions.
Ensure the back of the child restraint is firmly against the Nissan Rogue seatback.
Adjust or remove the head restraint/headrest if necessary. Store properly and reinstall after removing the child restraint. See “Head restraints/headrests.�
If the seating position has a fixed headrest that interferes, use a different seat or another child restraint model.

Forward-facing - step 3
3. Route the seat belt through the restraint as instructed and buckle until the latch engages.
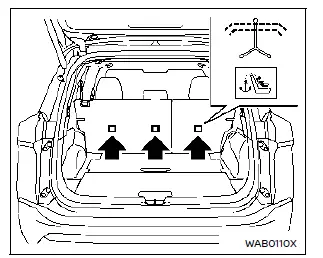
If equipped with a top tether, attach the tether strap to the appropriate tether anchor (rear seat only). Do not install tether-required restraints in seating positions without a tether anchor.
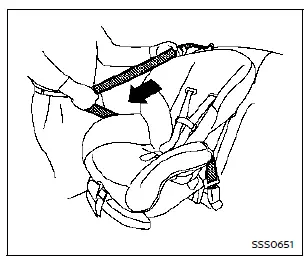
Forward-facing - step 4
4. Pull the shoulder belt until it is fully extended. At this moment, the retractor in your Nissan Rogue switches to Automatic Locking Retractor (ALR) mode, intended for securing child restraints. When the belt fully retracts, it returns to Emergency Locking Retractor (ELR) mode.
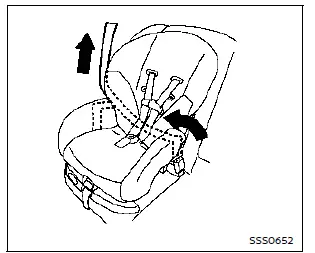
Forward-facing - step 5
5. Allow the seat belt to retract, then pull upward on the shoulder belt to remove slack.
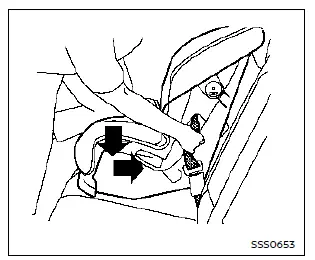
Forward-facing - step 6
6. Remove remaining slack by pressing downward and rearward firmly in the center of the child restraint with your knee, compressing the Nissan Rogue seat cushion and seatback while tightening the belt.
7. Tighten the tether strap according to the manufacturer's instructions.

Forward-facing - step 8
8. Test the installation before placing the child inside. Hold the restraint near the belt path and push it side-to-side.
The restraint should not move more than 1 inch (25 mm). Pull forward to confirm the belt holds securely. If movement exceeds 1 inch, tighten the belt or reinstall the restraint in another seating position of your Nissan Rogue. Not all child restraints fit all vehicles.
9. Ensure the restraint remains properly secured before each use. If the seat belt is not locked, repeat steps 2 through 8.
Forward-facing - step 10
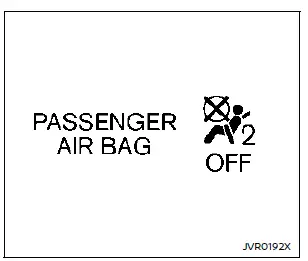
10. If the restraint is installed in the front passenger seat, place the ignition switch in the ON position. The front passenger air bag status light
 should illuminate. If it does not, see “Front passenger air bag and status light,� then move the restraint to another seating position and have the system inspected. Visiting a NISSAN dealer is recommended.
After the child restraint is removed and the seat belt fully retracts, ALR mode is cancelled.
Other materials:
C1203-86 Abs Signal
DTC Description
DTC DETECTION LOGIC DTC
CONSULT screen terms
(Trouble diagnosis content) DTC detecting condition
C1203-86
ABS SYSTEM
(Antilock brake system)
Diagnosis condition
Ignition switch: ON
Nissan Ariya Vehicle running
Signal
Wheel speed signals
...
P059f Active Grille Shutter
DTC Description
DTC DETECTION LOGICActive grille shutter normally stops within zone which is defined by zone (90°±10°).If the active grille shutter stops within zone stuck error is detected, and if the active grille shutter stops at position beyond zone overrun error is detected. DTC
CON ...
Removal and Installation. Crash Zone Sensor
Exploded View
Crash zone sensor
Radiator core support
Crash zone sensor bracket
: Nissan Ariya Vehicle front
: Always replace after every disassembly.
: N·m (kg-m, in-lb)
: N·m (kg-m, ft-lb)
Removal and Installation
WARNING:
Always observe the foll ...