Nissan Rogue Service Manual: Vehicle information
Identification information
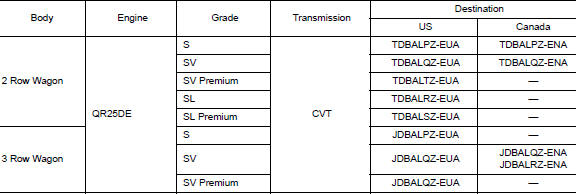
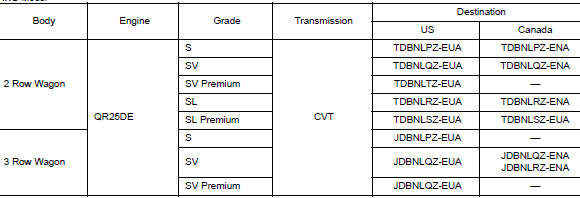
Model Variation
FWD Model
AWD Model
Prefix and Suffix Designations
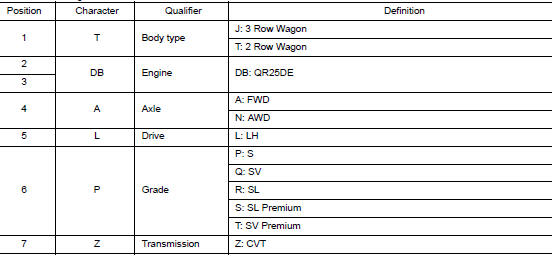
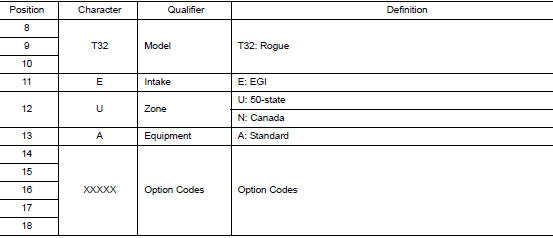
Identification Number
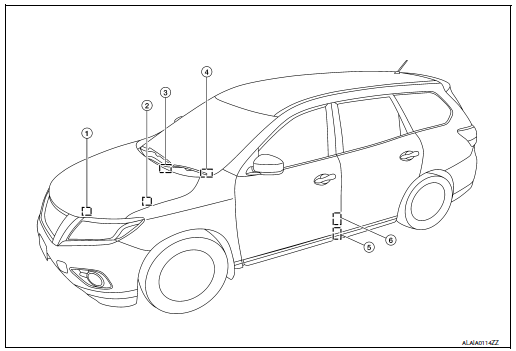
- Air conditioner specification label
- Emission control information label
- Vehicle identification number chassis number (center of bulkhead)
- Vehicle Identification Number (VIN) plate
- F.M.V.S.S./C.M.V.S.S. certification label
- Tire and loading information label
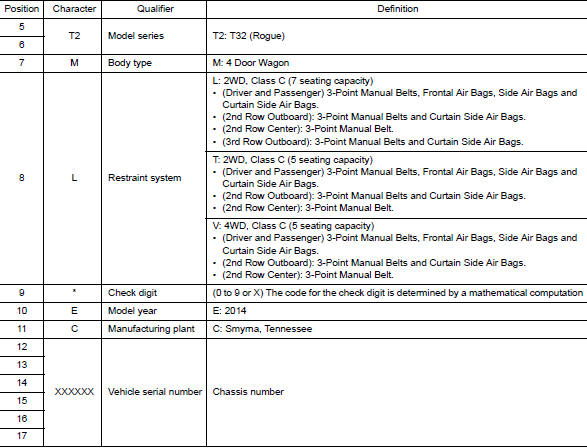
Vehicle Identification Number Arrangement

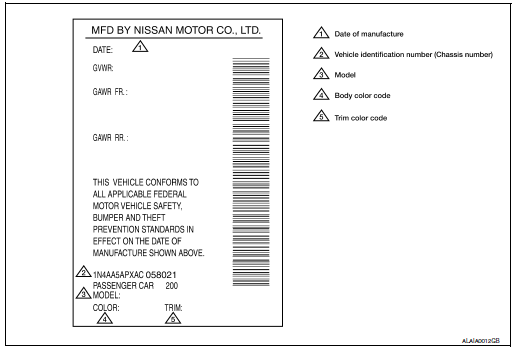
Identification Plate
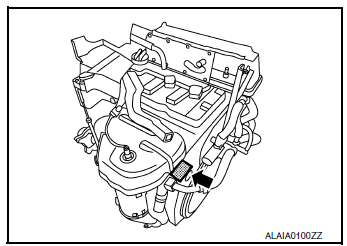
Engine Serial Number
QR25DE
 Vehicle front
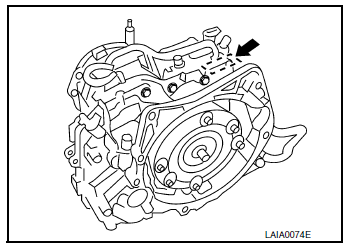
CVT Number
Dimensions

Wheels & Tires

 Vehicle recovery (freeing a stuck vehicle)
FRONT
Securely install the vehicle recovery hook stored with jacking tools.
Check that the hook is properly secured in the stored place after use.
WARNING:
Stand clear of a stuck vehicl ...
 Basic inspection
SERVICE INFORMATION FOR ELECTRICAL INCIDENT
Work flow
STEP
DESCRIPTION
STEP 1
Get detailed information about the conditions and the
environment when the incident occurred ...
Other materials:
Power window and door lock/unlock switch RH
Removal and Installation
REMOVAL
Remove the front door pull handle bracket (RH). Refer to INT-15,
"Removal and Installation".
Release pawls using a suitable tool (A) and remove front door
power window and door lock/unlock switch finisher (RH) (1).
: Pawl
D ...
Starting the engine (models with NISSAN
Intelligent Key® system)
Apply the parking brake.
Move the shift lever to P (Park) or N (Neutral).
P (Park) is recommended.
The starter is designed not to operate if
the shift lever is in any of the driving
positions.
Push the ignition switch to the ON position.
Depress the brake pedal and pus ...
C1730, C1731, C1732, C1733 flat tire
DTC Logic
NOTE:
The Signal Tech II Tool [- (J-50190)] can be used to perform the following
functions. Refer to the Signal Tech II
User Guide for additional information.
Activate and display TPMS sensor IDs
Display tire pressure reported by the TPMS sensor
Read TPMS DTC ...
