Nissan Rogue Service Manual: Second row seat
Exploded View
RH SEAT
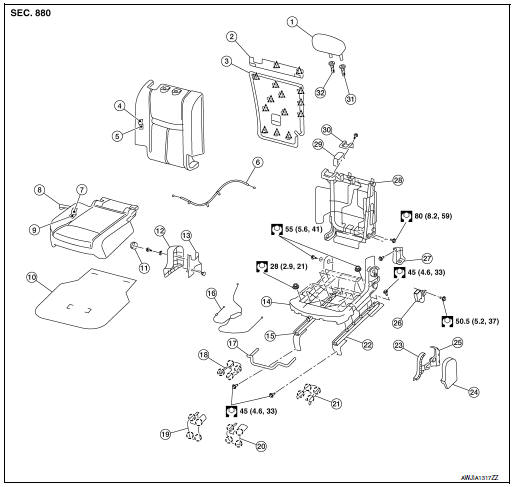
- Headrest
- Seatback upper luggage board
- Seatback luggage board
- Seatback trim
- Seatback pad
- Recline release cable
- Seat cushion trim
- Fold flat strap
- Seat cushion pad
- Seat cushion silencer
- Bolt cover
- Seat cushion outer finisher (RH)
- Seat cushion inner finisher (RH)
- Seat cushion frame
- Seat cushion slide (RH)
- Seat cushion slide cable
- Seat slide control lever
- Rear bolt cover (RH) (with third row seat)
- Front bolt cover (RH)
- Front bolt cover (LH)
- Rear bolt cover (LH) (with third row seat)
- Seat cushion slide (LH)
- Seat cushion inner finisher (LH)
- Seat cushion outer finisher (LH)
- Seat cushion rear finisher (LH)
- Seat belt buckle
- Recline lever finisher
- Seatback frame
- Recline device
- Recline device cover
- Headrest holder (locked)
- Headrest holder (free)
 Clip
Clip
 Pawl
Pawl
LH SEAT
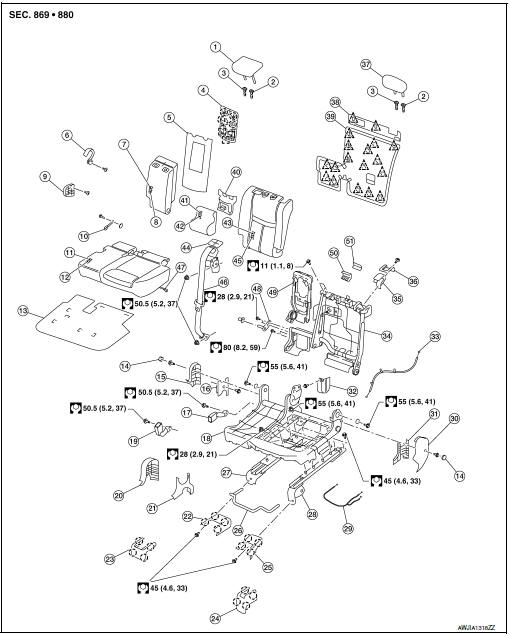
- Headrest (center)
- Headrest holder (locked)
- Headrest holder (free)
- Cup holder
- Armrest board
- Armrest inner finisher
- Armrest trim
- Armrest pad
- Armrest outer finisher
- Armrest fold flat strap
- Seat cushion trim
- Seat cushion pad
- Seat cushion silencer
- Bolt cover
- Seat cushion outer finisher (RH)
- Seat cushion inner finisher (RH)
- Seat belt buckle (center)
- Seat cushion frame
- Seat belt buckle (LH)
- Seat cushion center finisher (RH)
- Seat cushion center finisher (LH)
- Rear bolt cover (RH) (with third row seat)
- Front bolt cover (RH)
- Front bolt cover (LH)
- Rear bolt cover (LH) (with third row seat)
- Seat slide control lever
- Seat cushion slide (RH)
- Seat cushion slide (LH)
- Seat cushion slide cable
- Seat cushion outer finisher (LH)
- Seat cushion inner finisher (LH)
- Armrest inner finisher
- Recline release cable
- Seatback frame
- Recline device
- Recline device finisher
- Headrest (LH)
- Seatback luggage upper board
- Seatback luggage board
- Armrest lower pad
- Seatback center trim
- Seatback center pad
- Seatback trim
- Seat belt retractor finisher
- Seatback pad
- Seat belt retractor (center)
- Fold flat strap
- Armrest bracket
- Armrest frame
- Seat belt retractor inner finisher
- Seat belt retractor outer finisher
 Clip
Clip
 Pawl
Pawl
LH SEAT
LH SEAT : Seatback
DISASSEMBLY
- Remove second row seat LH. Refer to SE-39, "Removal and Installation".
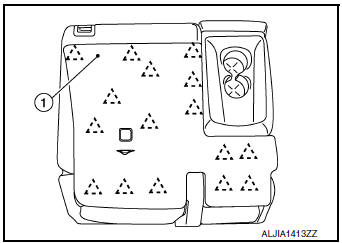
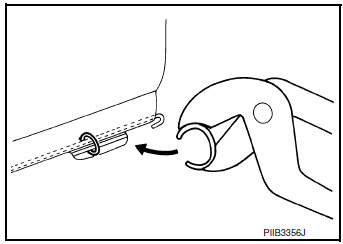
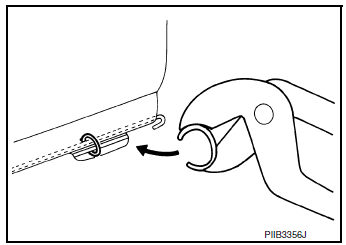
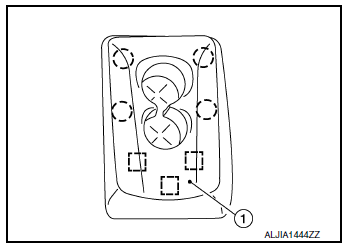
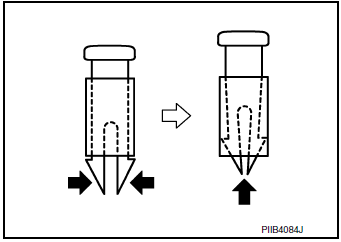
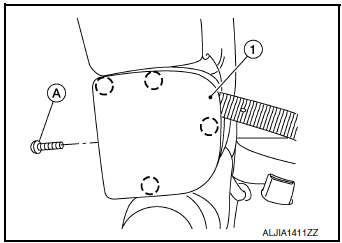
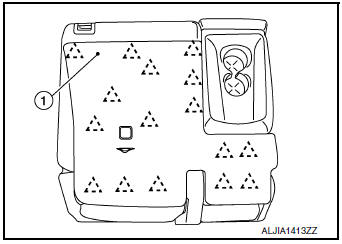
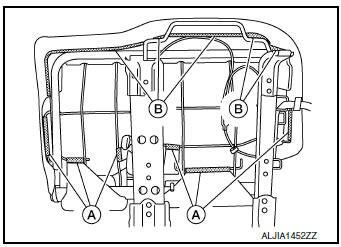
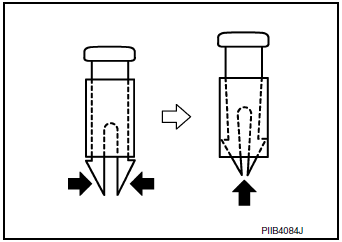
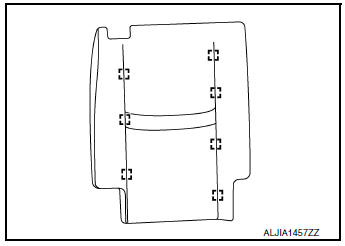
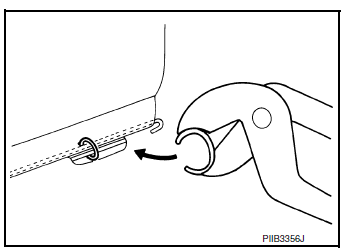
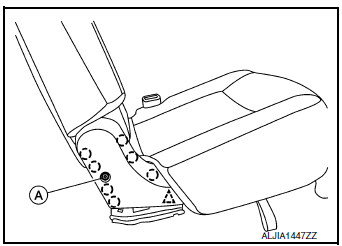
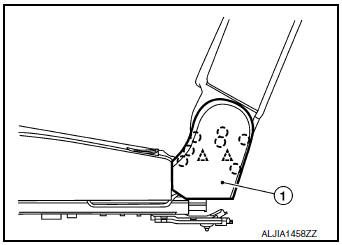
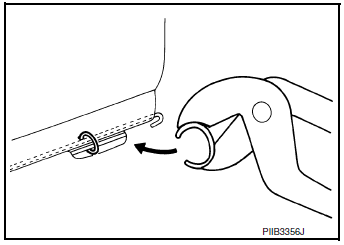
- Using a suitable tool release clips and remove seatback board
(1).: Clip
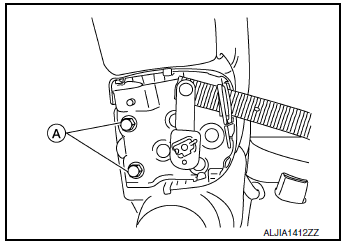
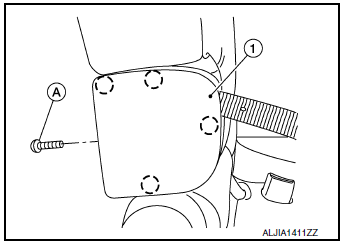
- Remove screw (A), then using a suitable tool release clip and
pawls, then remove seat cushion outside finisher (LH).: Clip
: Pawl
- Remove screw (A), then using a suitable tool release clips and
pawls and remove armrest finisher (1).: Clip
: Pawl

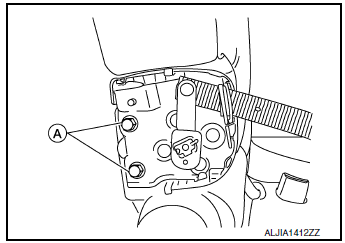
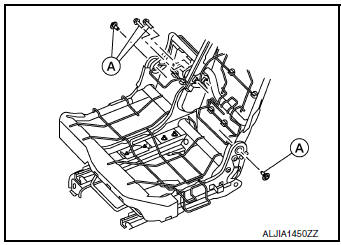
- Remove bolts (A) and armrest.
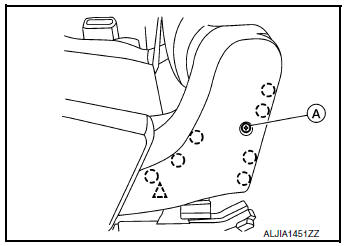
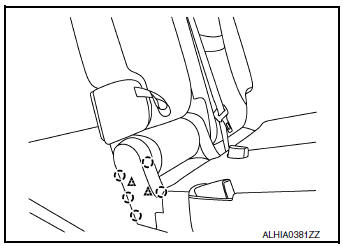
- Press the headrest holder lock button, then lift headrest up and remove.
- Reach up behind the seatback pad, release the headrest holder
locks as shown and remove the headrest holders.
CAUTION: Before removing/installing headrest holder, check its orientation (front/rear and right/left).
- Release pawls and remove recline handle finisher.
- Release pawls and remove seatbelt retractor outer finisher.
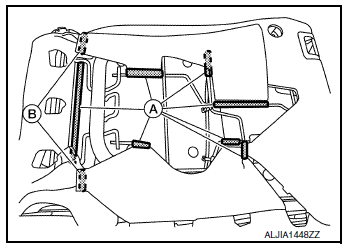
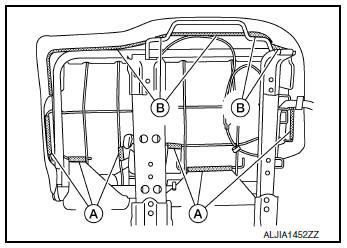
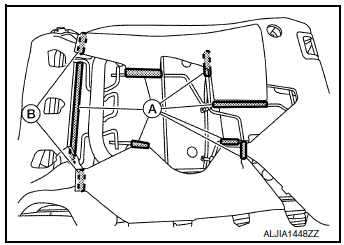
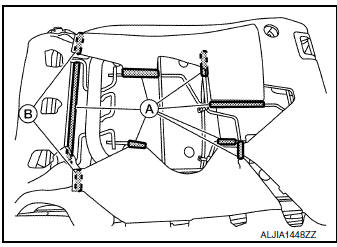
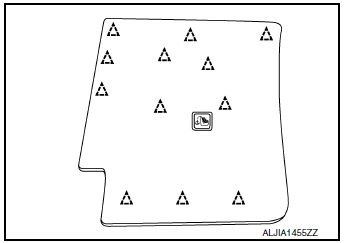
- . Release J-hooks (A) then release fastener (B) and remove seatback pad and seatback trim.
- Remove seat belt retractor (center) bottom anchor bolt then route seat belt retractor (center) through rear seat cushion and seatback.
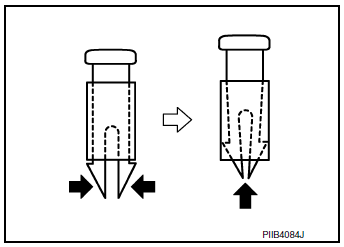
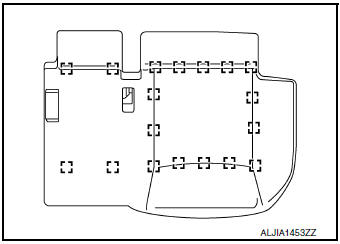
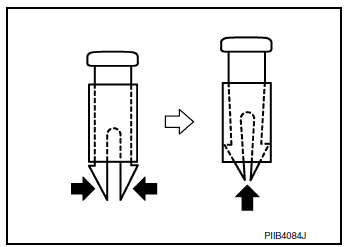
- Remove hog rings, then separate seatback trim from seatback pad.
NOTE:
Remove all pieces of hog rings and discard them.
 : Hog ring
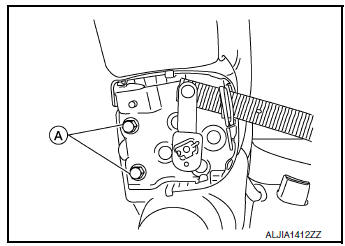
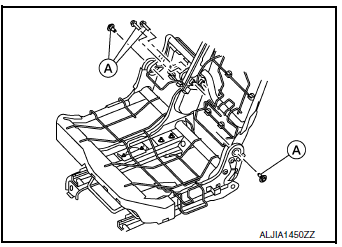
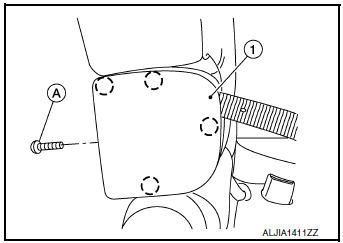
- Remove bolts (A) and seatback frame from seat cushion frame.
ASSEMBLY
Assembly is in the reverse order of disassembly.
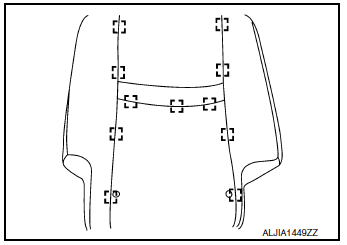
- Install new hog rings on the seatback trim in original positions.
- Use only one hog ring in each designated location.
- Make sure hog rings are correctly fastened around both the seatback trim and seatback pad wires.
- Use NISSAN standard hog rings and tools to assemble.
- Make sure hook fastener is pressed into place after seatback trim is assembled.
- Smooth out all wrinkles during assembly.
LH SEAT : Seat Cushion
DISASSEMBLY
- Remove second row seat LH. Refer to SE-39, "Removal and Installation".
- Remove screw (A), then using a suitable tool release pawls and
remove armrest finisher (1).
 : Pawl

- Remove bolts (A) and armrest.
- Remove screw (A), then using a suitable tool release clips and
pawls and remove seat cushion outside finisher (LH).
 : Clip
: Pawl
- Using a suitable tool, release clips and pawls, then remove seat
cushion outer finisher (RH)
 : Clip
: Pawl
- Remove bolts (A) and seatback frame.
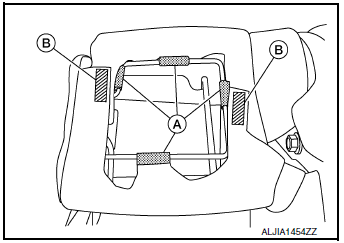
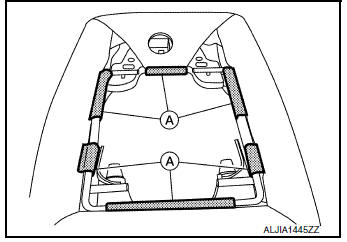
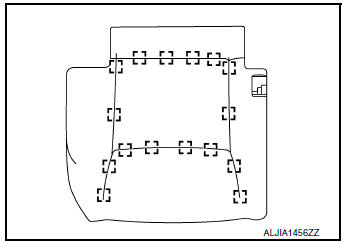
- Release J-hooks (A) and fasteners (B), then route seatbelt buckles through seat cushion and remove seat cushion pad and seat cushion trim.
- Remove hog rings, then separate seatback trim from seatback pad.
 : Hog ring
NOTE: Remove all pieces of hog rings and discard them.
ASSEMBLY
Assembly is in the reverse order of disassembly.
- Install new hog rings on the seat cushion trim in original positions.
- Use only one hog ring in each designated location.
- Make sure hog rings are correctly fastened around both the seat cushion trim and seat cushion pad wires.
- Use NISSAN standard hog rings and tools to assemble.
- Make sure hook fastener is pressed into place after seat cushion trim is assembled.
- Smooth out all wrinkles during assembly.
LH SEAT : Armrest Assembly
DISASSEMBLY
- Remove second row seat LH. Refer to SE-39, "Removal and Installation".
- Using a suitable tool release clips and remove seatback board
(1).
 : Clip
- Remove screw (A), then release pawls and remove armrest finisher
(1).
 : Pawl
- Remove bolts (A) and armrest.

- Release J-Hooks (A) and fasteners (B), then remove seatback center trim from seatback center pad.
- Using a suitable tool release metal clips and pawls and remove
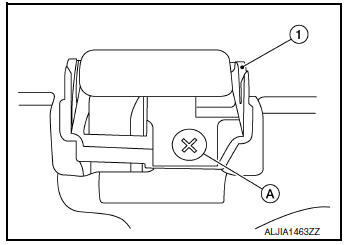
cup holder (1).
 : Metal clip
 : Pawl
- Press the headrest holder lock button, then lift headrest up and remove.
- Reach up behind the armrest assembly, release the headrest
holder locks as shown and remove the headrest holders.
CAUTION: Before removing/installing headrest holder, check its orientation (front/rear and right/left).
- Release J-Hooks (A) from armrest frame and remove armrest lower pad.
- Remove armrest trim, then remove armrest pad.
ASSEMBLY
Assembly is in the reverse order of disassembly.
- Make sure fastener is pressed into place after armrest trim is assembled.
- Smooth out all wrinkles during assembly.
LH SEAT : EZ Entry Cable
DISASSEMBLY
NOTE: LH shown : RH similar
- Remove second row seat LH. Refer to SE-39, "Removal and Installation".
- Using a suitable tool release clips and remove seatback board
(1).
 : Clip
- Remove screw (A), then using a suitable tool release pawls and
remove armrest finisher (1).
 : Pawl
- Remove bolts (A) and armrest.
- Release pawls and remove recline handle finisher.
- Release pawls and remove seatbelt retractor outer finisher.
- Remove seat belt retractor (center) bottom anchor bolt then route seat belt retractor (center) through second row seat cushion and seatback.
- Release J-hooks (A) then release fastener (B) and remove seatback pad and seatback trim.
- Remove screw (A), then using a suitable tool release pawl and
remove the armrest inner finisher (1).
 : Pawl
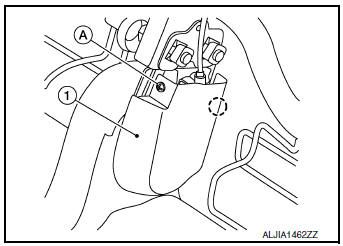
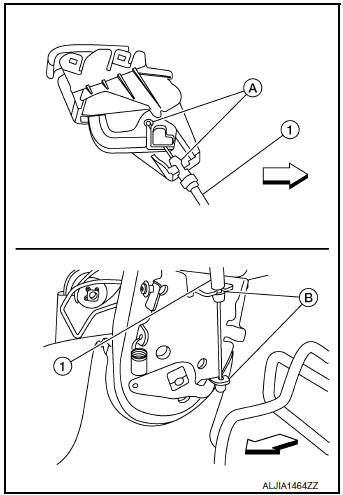
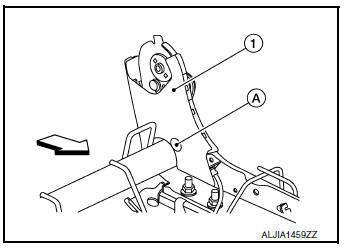
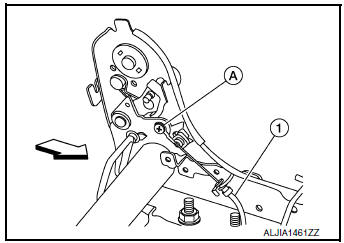
- Remove screw (A), then remove recline device (1) from seatback frame.
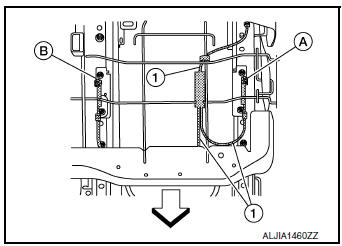
- Release EZ entry cable (1) from recline device (A) and seatback frame (B), then remove the EZ entry cable.
CAUTION:
Note the cable routing for correct installation.
 : Front
ASSEMBLY
Assembly is in reverse order of disassembly.
CAUTION: Make sure to route cables correctly for proper function.
LH SEAT : Seat Slide Release Cable
DISASSEMBLY
NOTE: LH seat shown, RH seat similar.
- Remove second row seat. Refer to SE-39, "Removal and Installation".
- Using a suitable tool release clips and remove seatback board
(1).
 : Clip
- Remove screw (A), then using a suitable tool release clips and
pawls and remove armrest finisher (1).: Clip
 : Pawl
- Remove bolts (A) and armrest.

- Release J-Hooks (A) and fasteners (B), then route seatbelt buckles through seat cushion and remove seat cushion pad and seat cushion trim.
- Press headrest holder lock button, then lift headrest up and remove.
- Reach up behind the seatback pad, release the headrest holder
locks as shown and remove the headrest holders.
CAUTION: Before removing/installing headrest holder, check its orientation (front/rear and right/left).
- Release pawls and remove recline handle finisher.
- Release pawls and remove seatbelt retractor outer finisher.
- Release J-hooks (A) then release fastener (B) and remove seatback pad and seatback trim.
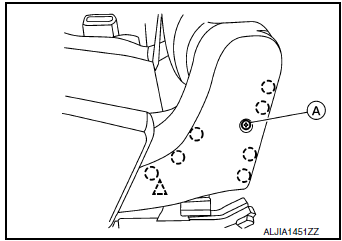
- Using a suitable tool release clip (A) and remove the seat cushion inner finisher LH (1).
NOTE:
Seatback frame removed for clarity.
 : Front
- Release seat slide release cable (1) ends from both LH side (A) and RH side (B) of seat frame.
CAUTION:
Note the cable routing for correct installation.
: Front
- Remove screw (A) and unclip seat cushion slide cable (1) from
seat cushion frame.: Front
- Unclip seat slide release cable clips from seat cushion frame and remove.
ASSEMBLY
Assembly is in reverse order of disassembly.
CAUTION: Make sure to route cables correctly for proper function.
RH SEAT
RH SEAT : Seatback
- Remove second row seat RH. Refer to SE-39, "Removal and Installation".
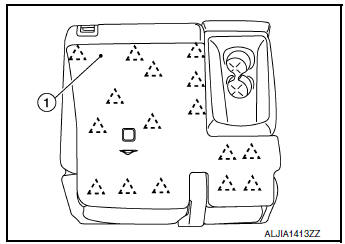
- Using a suitable tool release clips and remove seatback board.
 : Clip
- Remove screw (A) then using a suitable tool release clips and
pawls and remove seat cushion outer finisher (RH).
 : Clip
 : Pawl

- Using a suitable tool release clips and pawls and remove seat
cushion outer finisher (LH).: Clip
: Pawl
- Press headrest holder lock button, then lift headrest up and remove.
- Reach up behind the seatback pad, release the headrest holder locks as shown and remove the headrest holders.
CAUTION: Before removing/installing headrest holder, check its orientation (front/rear and right/left).

- Release pawls and remove recline handle finisher.
- Release pawls and remove seatbelt retractor outer finisher.
- Release J-hooks then release fasteners and remove seatback pad and seatback trim from seatback frame.
- Remove hog rings, then separate seatback trim from seatback pad.
NOTE:
Remove all pieces of hog rings and discard them.
 : Hog ring
- Remove screw (A), then using a suitable tool release pawl and
remove the armrest inner finisher (1).
NOTE: LH shown, RH similar.
 : Pawl

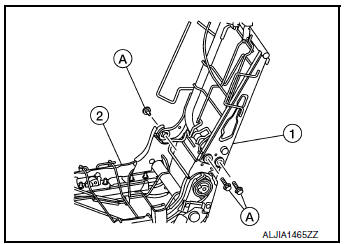
- Remove bolts (A) and seatback frame (1) from seat cushion frame (2).
ASSEMBLY
Assembly is in the reverse order of disassembly.
- Install new hog rings on the seat cushion trim in original positions.
- Use only one hog ring in each designated location.
- Make sure hog rings are correctly fastened around both the seat cushion trim and seat cushion pad wires.
- Use NISSAN standard hog rings and tools to assemble.
- Smooth out all wrinkles during assembly.
RH SEAT : Seat Cushion
DISASSEMBLY
- Remove second row seat RH. Refer to SE-39, "Removal and Installation".
- Using a suitable tool release clips and remove seatback board.
 : Clip
- Remove screw (A) then using a suitable tool release clip and
pawls and remove seat cushion outer finisher (RH).
 : Clip
 : Pawl
- Using a suitable tool release clips and pawls and remove seat
cushion outer finisher (LH) (1).
 : Clip
 : Pawl
- Press headrest holder lock button, then lift headrest up and remove.
- Reach up behind the seatback pad, release the headrest holder
locks as shown and remove the headrest holders.
CAUTION: Before removing/installing headrest holder, check its orientation (front/rear and right/left).
- Release pawls and remove recline handle finisher.
- Release pawls and remove seatbelt retractor outer finisher.
- Release J-hooks then release fasteners and remove seatback pad and seatback trim from seatback frame.
- Route seat belt buckle through seat cushion.
- Release J-hooks and remove the seat cushion pad and seat cushion trim.
- Remove hog rings, then separate seat cushion trim from seat
cushion pad.
NOTE: Remove all pieces of hog rings and discard them.
 : Hog ring
ASSEMBLY
Assembly is in the reverse order of disassembly.
- Install new hog rings on the seat cushion trim in original positions.
- Use only one hog ring in each designated location.
- Make sure hog rings are correctly fastened around both the seat cushion trim and seat cushion pad wires.
- Use NISSAN standard hog rings and tools to assemble.
- Smooth out all wrinkles during assembly.
 Front seat
Exploded View
DRIVER POWER SEAT
Headrest
Seatback support
Seatback board
Seatback heater (if equipped)
Seatback trim
Seatback pad
Seat cushion outer finisher (RH) ...
 Third row seat
Exploded View
Seatback board (RH)
Seatback trim (RH)
Seatback pad (RH)
Seat cushion trim (RH)
Seat cushion pad (RH)
Seat cushion silencer (LH/RH)
Seat hinge finisher (RH) ...
Other materials:
Precaution
Precaution for Supplemental Restraint System (SRS) "AIR BAG" and "SEAT
BELT
PRE-TENSIONER"
The Supplemental Restraint System such as “AIR BAG” and “SEAT BELT PRE-TENSIONER”,
used along
with a front seat belt, helps to reduce the risk or severity of injury to the
...
Tightening torque of standard
bolts
Description
This vehicle has both new standard based on ISO* and previous standard
bolts/nuts. There are some differences
between these two types of bolts/ nuts; shape of the head, grade of strength,
hexagonal width across
flats and the standard tightening torque.
For guidance in d ...
B0096 front side air bag satellite sensor RH
Description
DTC B0096 FRONT SATELLITE SENSOR RH
The front side air bag satellite sensor RH is wired to the air bag diagnosis
sensor unit. The air bag diagnosis
sensor unit will monitor the front side air bag satellite sensor RH for internal
failures and its circuits for communication
errors. ...
