Nissan Rogue Service Manual: Third row seat
Exploded View
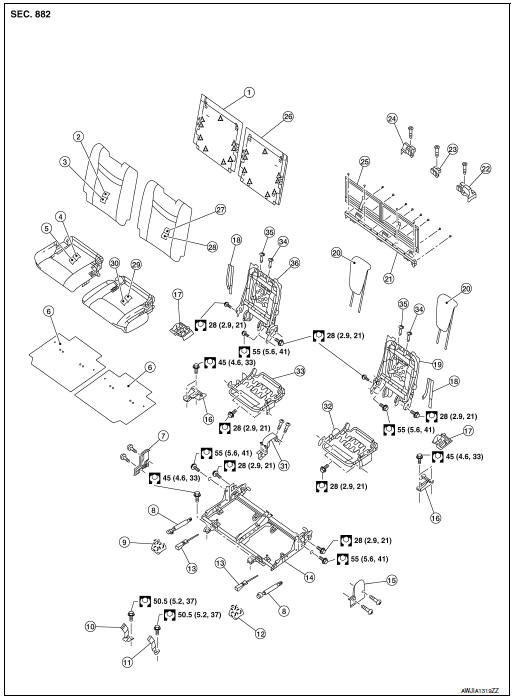
- Seatback board (RH)
- Seatback trim (RH)
- Seatback pad (RH)
- Seat cushion trim (RH)
- Seat cushion pad (RH)
- Seat cushion silencer (LH/RH)
- Seat hinge finisher (RH)
- Gas stay
- Bolt cover (RH)
- Seat belt buckle (RH)
- Seat belt buckle (LH)
- Bolt cover (LH)
- Stopper pin
- Seat frame support
- Seat hinge finisher (LH)
- Seat striker (LH/RH)
- Seat striker finisher (LH/RH)
- Seatback pull strap (LH/RH)
- Seatback frame (LH)
- Headrest (LH/RH)
- Third row seat cross member
- Third row seat cross member finisher (LH)
- Third row seat cross member finisher (center)
- Third row seat cross member finisher (RH)
- Third row luggage floor
- Seatback board (LH)
- Seatback trim (LH)
- Seatback pad (LH)
- Seat cushion trim (LH)
- Seat cushion pad (LH)
- Seat frame finisher (center)
- Seat cushion frame (LH)
- Seat cushion frame (RH))
- Headrest holder (locked)
- Headrest holder (free)
- Seatback frame (RH)
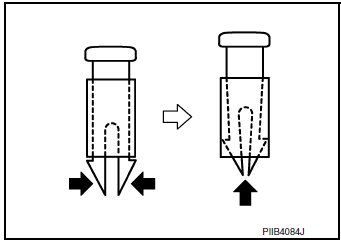
 Clip
Clip
 Pawl
Pawl
Seatback
DISASSEMBLY
NOTE: LH shown : RH similar
- Remove third row seat. Refer to SE-43, "Removal and Installation".
- Remove headrest.
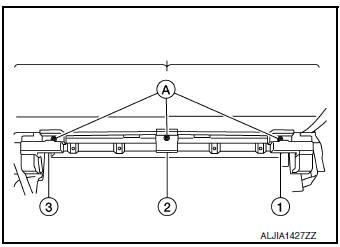
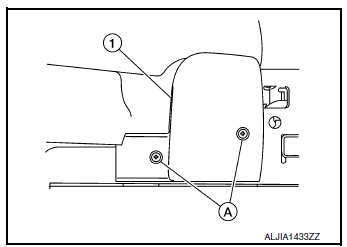
- Remove screws (A) and third row seat cross member finishers (1, 2, 3).
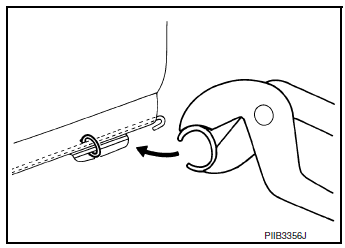
- Release seatback pull strap stop using a suitable tool.
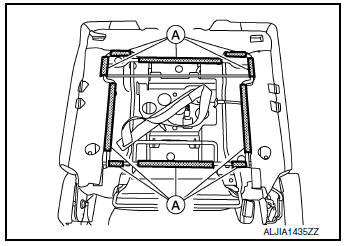
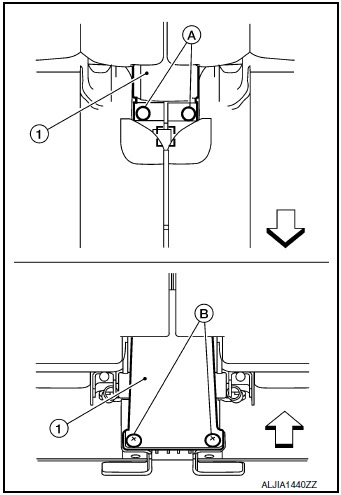
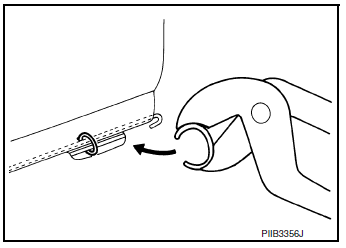
- Release third row luggage board outer clips (A) and inner clips (B) using a suitable tool.
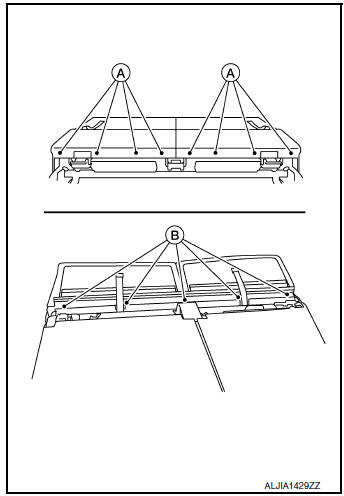
- Release third row luggage board retainer strap clips (A) (LH/RH) using a suitable tool and remove third row luggage board.

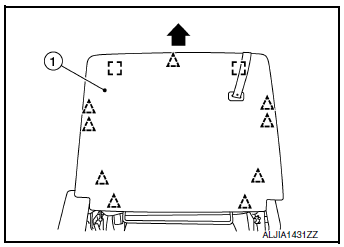
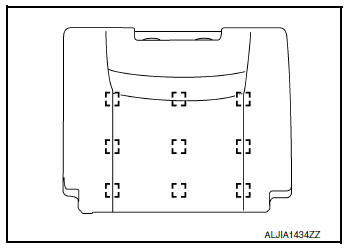
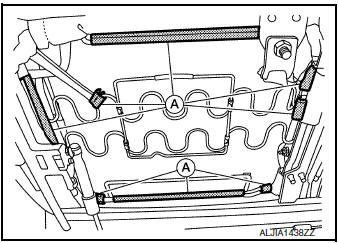
- Release clips using a suitable tool then gently pull seatback
board (1) forward and out and remove as shown (
 ).
).
CAUTION:
After removing the seatback board, check the orientation of
clips. Improper installation of clips could result in damage
to the seatback board.
 : Clip
- Reinstall clips in proper locations on the seatback board.
- Remove screws (A) and remove seat hinge finisher (1).
- Release J-hooks from seat frame and remove seatback trim and seatback pad as an assembly.
- Reach up behind the seatback pad, release the headrest holder
locks as shown and remove the headrest holders.
CAUTION: Before removing/installing headrest holder, check its orientation (front/rear and right/left).
- Release hook and loop finisher and remove hog rings, then separate
seatback trim from seatback pad.
NOTE: Remove all pieces of hog rings and discard them.
 : Hog ring
ASSEMBLY
Assembly is in the reverse order of disassembly.
- Install new hog rings on the seatback trim in original positions.
- Use only one hog ring in each designated location.
- Make sure hog rings are correctly fastened around both the seatback trim and seatback pad wires.
- Use NISSAN standard hog rings and tools to assemble.
- Make sure hook fastener is pressed into place after seatback trim is assembled.
- Smooth out all wrinkles during assembly.
Seat Cushion
DISASSEMBLY
NOTE:
- Remove third row seat. Refer to SE-43, "Removal and Installation".
- Remove third row seat cross member. Refer to SE-44, "Third Row Seat Cross Member".
- Using a suitable tool, release seat cushion trim clips (A) and
remove rear screws (B). Then, release metal clip and remove
the center seat frame finisher (1).
 : Metal clip
 : Front
- Release J-hooks (A) from seat frame and remove seat cushion trim and seat cushion pad.
- Remove hog rings and separate the seat cushion trim from the
seat cushion pad.
NOTE: Remove all pieces of hog rings and discard them.
: Hog ring
 : Front
ASSEMBLY
Assembly is in the reverse order of disassembly.
- Install new hog rings on the seat cushion trim in original positions.
- Use only one hog ring in each designated location.
- Make sure hog rings are correctly fastened around both the seat cushion trim and seat cushion pad wires.
- Use NISSAN standard hog rings and tools to assemble.
- Make sure hook fastener is pressed into place after seat cushion trim is assembled.
- Smooth out all wrinkles during assembly.
 Second row seat
Exploded View
RH SEAT
Headrest
Seatback upper luggage
board
Seatback luggage board
Seatback trim
Seatback pad
Recline release cable
Seat cushion trim
Fold flat strap ...

Other materials:
Inspection and adjustment
ADDITIONAL SERVICE WHEN REPLACING CONTROL UNIT
ADDITIONAL SERVICE WHEN REPLACING CONTROL UNIT : Special Repair
Requirement
INITIALIZATION PROCEDURE
Moonroof
If the moonroof does not open or close automatically, use the following
procedure to return moonroof operation
to normal.
Tu ...
P117A air fuel ratio
DTC Description
DTC DETECTION LOGIC
DTC No.
CONSULT screen terms
(Trouble diagnosis content)
DTC detecting condition
P117A
AIR FUEL RATIO B1
(AIR FUEL RATIO B1)
ECM detects a lean/rich air fuel ratio state in any cylinder for a
specified
length of time.
...
Passenger side door mirror defogger
Description
Heats the heating wire with the power supply from the rear window defogger
relay to prevent the door mirror
from fogging up.
Component Function Check
1.CHECK DOOR MIRROR DEFOGGER RH
Check that the heating wire of door mirror defogger RH is heated when turning
the rear window def ...
