Nissan Rogue Service Manual: Rear regulator
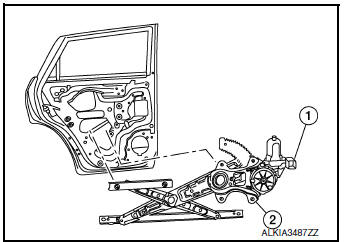
Exploded View
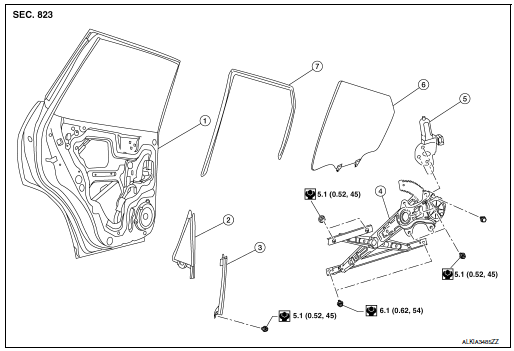
- Rear door panel
- Rear door glass corner finisher
- Rear door glass rear run channel
- Rear door regulator assembly
- Rear door glass power window motor
- Rear door glass
- Rear door glass rubber run channel
Removal and Installation
REMOVAL
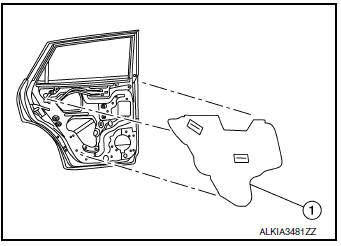
- Remove the rear door finisher. Refer to INT-18, "Removal and Installation".
- Remove vapor barrier.
- Temporarily reconnect the rear power window switch.
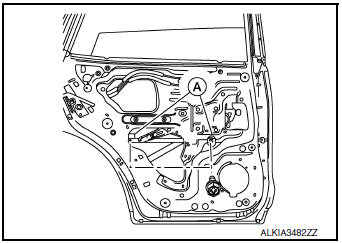
- Operate the rear power window switch to raise/lower the rear door glass until the rear door glass regulator to rear door glass bolts (A) can be seen and remove.
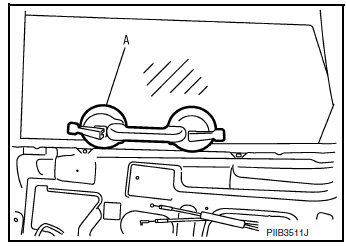
- Raise the rear door glass and hold in place with suitable tool (A).
- Remove the bolts (B) and nuts (A) from the rear door glass regulator (1).
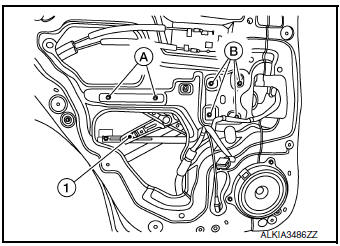
- Disconnect the harness connector from the rear door regulator (1).
- Remove rear door regulator (2).
INSPECTION AFTER REMOVAL
Check the rear door glass regulator for the following items:
- Gear wear
- Rear door glass regulator deformation
- Spring damage
- Grease condition for each sliding part
If a malfunction is detected, replace or grease it.
INSTALLATION
Installation is in reverse order of removal.
CAUTION:
- Tighten the rear door regulator to specification Refer to GW-22, "Exploded View"
 Rear door glass
Exploded View
Rear door panel
Rear door glass corner finisher
Rear door glass rear run channel
Rear door glass regulator assembly
Rear door glass power window motor
Rear door glas ...
 Rear power window motor
Removal and Installation
REMOVAL
Remove rear door glass regulator. Refer to GW-22, "Removal and
Installation".
Remove screws (A) and rear door power window motor (1) fr ...
Other materials:
Removal and installation
REAR WHEEL HUB AND HOUSING
Exploded View
Axle housing
Suspension arm
Back plate
Hub bolt
Wheel hub and bearing
Wheel hub lock nut
Cotter pin
Disc brake rotor
Plug
Removal and Installation
REMOVAL
Remove the wheel and tire using power tool. Refer to ...
How to use the vehicle information display
The vehicle information display can be changed
using the buttons and ENTER located
on
the steering wheel.
— navigate through the
items in vehicle
information
ENTER — change or select an item in the
vehicle information display
— select/enter the
Vehicle i ...
Parking brake switch
Component Function Check
1.CHECK PARKING BRAKE SWITCH OPERATION
Check that brake warning lamp in combination meter turns ON/OFF when parking
brake is operated.
Is the inspection result normal?
YES >> Inspection End.
NO >> Proceed to BRC-115, "Diagnosis Procedure".
D ...
