Nissan Rogue Service Manual: Door outside lower molding
Exploded View
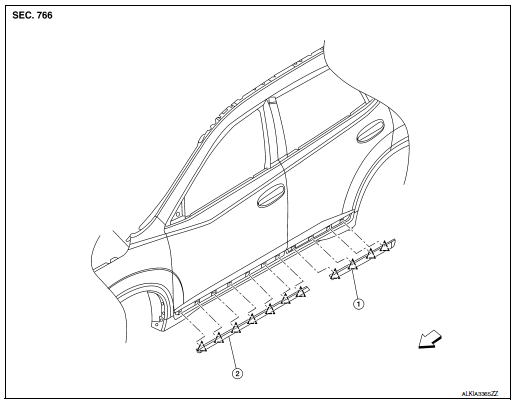
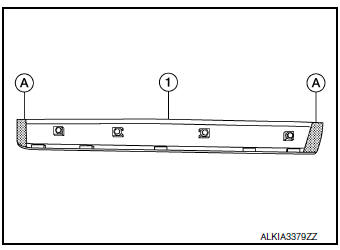
- Rear door outside lower molding
- Front door outside lower molding
 Clip
Clip
 Front
Front
Removal and Installation
FRONT DOOR OUTSIDE LOWER MOLDING
Removal
- Using a suitable tool (A) release clips from front door outside lower molding (1) starting at the rear and working forward.
CAUTION:
- Release the clips slowly and carefully.
- Do not pull the front door outside lower molding.
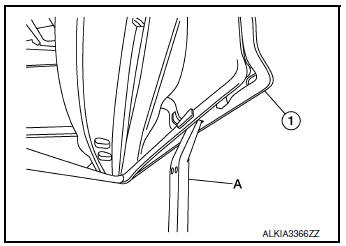
- Remove the front door outside lower molding.
Installation
Installation is in the reverse order of removal.
CAUTION:
- Do not reuse double-sided tape, always replace with new tape.
- When installing, visually check the front door outside lower molding and clips, replace with new clips if they have been damaged.
- When installing front door outside lower molding, make sure clips are attached to the molding. Make sure old clips have all been removed from door.
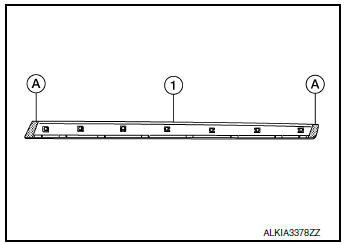
NOTE: Install new double-sided tape (A) to front door outside lower molding as shown.
REAR DOOR OUTSIDE LOWER MOLDING
Removal
- Using a suitable tool (A) release clips from rear door outside lower molding (1) starting at the rear and working forward.
CAUTION:
- Release the clips slowly and carefully.
- Do not pull the front door outside lower molding.
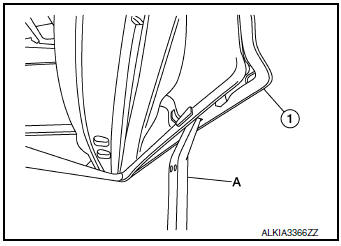
- Remove the rear door outside lower molding.
Installation
Installation is in the reverse order of removal.
CAUTION:
- Do not reuse double-sided tape, always replace with new tape.
- When installing, visually check the front door outside lower molding and clips, replace with new clips if they have been damaged.
- When installing front door outside lower molding, make sure clips are attached to the molding. Make sure old clips have all been removed from door.
NOTE: Install new double-sided tape (A) to front door outside lower molding as shown.
 Roof rack
Exploded View
Roof rack rear bolt cover
Roof rack front bolt cover
Roof rack
Roof side molding
Back door hinge cover
Metal Clip
Pawl
Removal and Installation
RE ...
 Rear spoiler
Removal and Installation
The rear spoiler is part of the back door assembly. Refer to DLK-248, "BACK
DOOR ASSEMBLY : Removal
and Installation" (WITH INTELLIGENT KEY SYSTEM) or DLK-365, & ...
Other materials:
Moonroof switch
Description
Transmits switch operation signal to moonroof motor and sunshade motor
assembly.
Diagnosis Procedure
Regarding Wiring Diagram information, refer to RF-17, "Wiring Diagram".
1.CHECK MOONROOF SWITCH INPUT SIGNAL
Turn ignition switch ON.
Check voltage betwe ...
Difference between predictive and actual
distances
Backing up on a steep uphill
When backing up the vehicle up a hill, the distance
guide lines and the vehicle width guide
lines are shown closer than the actual distance.
For example, the display shows 3 ft (1.0 m) to the
place A , but the actual 3 ft (1.0 m) distance on
the hill is the p ...
Precaution
Precaution for Supplemental Restraint System (SRS) "AIR BAG" and "SEAT
BELT
PRE-TENSIONER"
The Supplemental Restraint System such as “AIR BAG” and “SEAT BELT PRE-TENSIONER”,
used along
with a front seat belt, helps to reduce the risk or severity of injury to the
...
