
Nissan Rogue (T33) 2021-Present Owner’s Manual & User Guide: Cleaning interior
Basic information
From time to time, remove loose dust from the interior trim, plastic elements and seats of the Nissan Rogue using a vacuum cleaner or a soft-bristle brush.
Vinyl and leather areas should be wiped with a clean, soft cloth dampened in mild soapy water and then dried with another cloth.
Regular cleaning is important to maintain the appearance of leather upholstery (if equipped on your Nissan Rogue).
Before applying any type of fabric protector, carefully read the manufacturer’s instructions.
Certain protectors contain chemicals that may bleach or stain seat fabric.
Use only a cloth dampened with water to clean the meter and gauge lenses.
WARNING
Do not use water or acidic cleaners (including steam devices) on seats. This can damage the material or the occupant detection sensors, and may affect air bag operation.
CAUTION
- Avoid benzine, thinner and similar solvents.
- Use only a soft cloth dampened with water. Rough cloths, alcohol, solvents or chemically treated paper towels will scratch lenses or cause discoloration.
- Do not spray liquid cleaners on the meter lens — this may cause malfunction.
- Remove small dirt particles from leather promptly, as they can be abrasive. Do not use saddle soap, waxes, oils, detergents or ammonia-based cleaners.
- Use fabric protectors only if approved by the manufacturer.
- Do not use glass or plastic cleaner on gauge covers.
- Avoid spilling cosmetics, perfumes, sunscreen or aroma oils on interior surfaces of the Nissan Rogue, as permanent stains or peeling may occur. Wipe spills immediately.
- Avoid chlorine-based cleaning agents. If sterilization is required, use ethanol below 75%, wipe with a dry cloth afterward, and keep away from fire.
Air fresheners
Most air fresheners contain solvents that may damage interior trim. If using one, observe the following precautions:
- Hanging types must be kept away from surfaces to prevent discoloration.
- Liquid types that clip to vents can cause instant staining if spilled.
Always follow the product instructions carefully.
Floor mats
Basic information
WARNING
To avoid pedal interference that could lead to a collision or injury:
- Never stack mats or install them upside down.
- Use only genuine NISSAN mats designed specifically for your Nissan Rogue model year.
- Position mats properly using the retention hooks.
- Ensure the mat does not obstruct pedal movement.
- Check mat placement regularly.
- After cleaning the interior, verify mats are secured correctly.
Genuine NISSAN mats help protect the carpet and simplify interior cleaning. Replace mats if excessively worn.
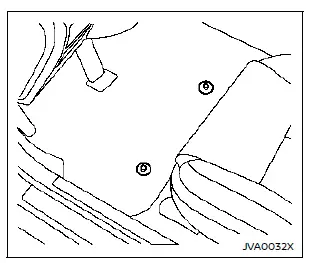
Floor mat installation
Your Nissan Rogue features floor mat retention hooks, which vary in shape and number by seating position.
When installing genuine NISSAN mats, follow the supplied instructions and the steps below:
1. Position the mat so that the grommet holes align with the hooks.
2. Press the grommets onto the hooks until fully seated.
3. Confirm that the mat does not interfere with pedal operation. With ignition OFF and the vehicle in P (Park), fully depress and release all pedals to ensure free movement. If unsure, consult a NISSAN dealer.
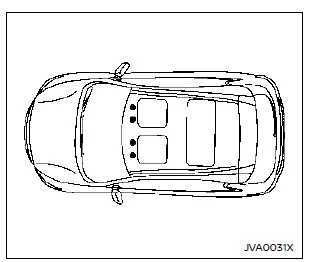
Positioning hook(s)
The illustration shows where the floor mat positioning hook(s) are located inside the Nissan Rogue.
Seat belts
Seat belts can be cleaned with a sponge dampened in mild soapy water. Let them dry fully in the shade before use.
WARNING
Do not allow wet seat belts to retract into the mechanism. NEVER use bleach, dye or chemical solvents — they can severely weaken the webbing.
Cleaning the seat tracks
CAUTION
Clean the seat tracks periodically to maintain smooth seat movement.
Use a high-powered vacuum cleaner to remove dirt and debris. A damp cleaning solution may be used if needed.
Other materials:
C1f04-48 Feb Ope Count Limit
Without Propilot Assist 2.1
DTC Description
DTC DETECTION LOGIC DTC
CONSULT screen terms
(Trouble diagnosis content) DTC detection condition
C1F04
48
FEB OPE COUNT LIMIT
(Forward Emergency Braking operation count limit)
Diagnosis condition
When engine is running
...
Fonctionnement du système d'intervention de changement de voie intelligent
Témoin d'activation du système d'intervention de changement de voie intelligent (sur l'écran d'informations du véhicule)
Témoin du système d'intervention de changement de voie intelligent (sur l'écran d'informations du véhicule)
Écran d'informations du véhicule et commande P ...
Additional Service When Replacing Side Radar
Work Procedure
Always perform the side radar configuration after replacing the side radar.SIDE RADAR CONFIGURATION
Perform saving vehicle internal information according to "Replace ECU" in CONSULT Operation Manual.
>>
GO TO 2.
SIDE RADAR ALIGNMENT
Perform the side radar alignment with ...