Nissan Rogue Service Manual: Front bumper
Exploded View
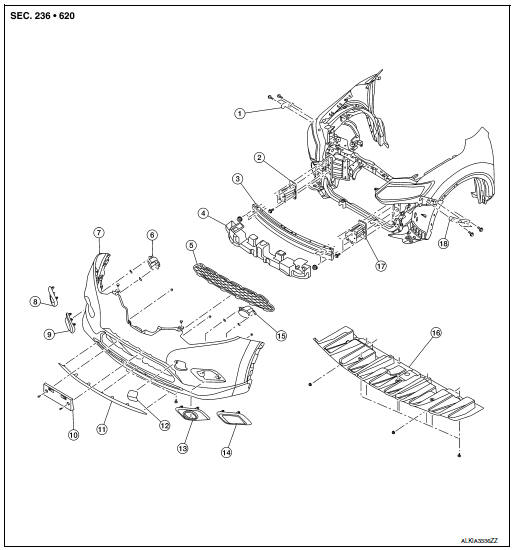
- Front bumper fascia side bracket (RH)
- Front bumper reinforcement support (RH)
- Front bumper reinforcement
- Front energy absorber
- Front lower grille
- Front fog lamp (RH) (if equipped)
- Front bumper fascia
- Front bumper fascia finisher (RH) (if equipped)
- Front fog lamp finisher (RH) (if equipped)
- Front license plate bracket
- Front air spoiler
- Tow cover
- Front fog lamp finisher (LH) (if equipped)
- Front bumper fascia finisher (LH) (if equipped)
- Front fog lamp (LH) (if equipped)
- Front under cover
- Front bumper reinforcement support (LH)
- Front bumper fascia side bracket (LH)
Removal and Installation
REMOVAL
CAUTION: Bumper fascia is made of resin. Use care when handling to prevent damage. Avoid contact with oily substances.
- Remove front grille. Refer to EXT-23, "Removal and Installation".
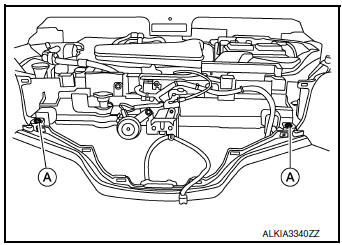
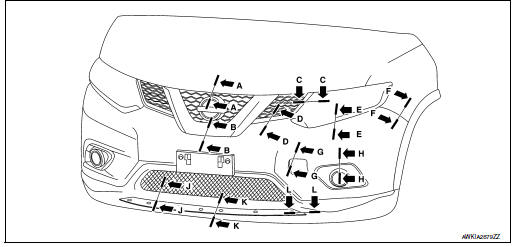
- Remove front bumper fascia clips (A).
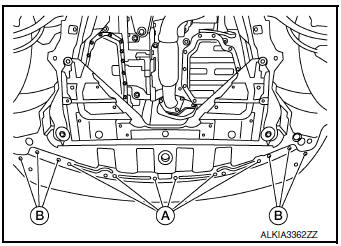
- Remove front bumper fascia clips (A) and screws (B).
- Partially remove front fender protectors (LH/RH). Refer to EXT-28, "FENDER PROTECTOR : Exploded View".
- Partially remove front over fender molding. Refer to EXT-30, "FRONT OVER FENDER : Removal and Installation".
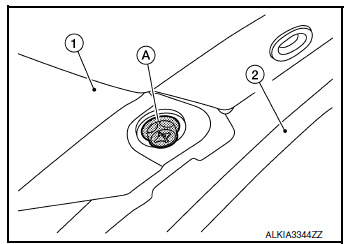
- Remove front bumper fascia screws (A) (LH/RH).
(1): Front bumper fascia
(2): Front over fender molding
- Disconnect fog lamp harness connectors (LH/RH) (if equipped).
- Release front bumper fascia pawls from front bumper fascia side brackets (LH/RH) and remove.
CAUTION: When removing front bumper fascia, two people are required to avoid damaging.
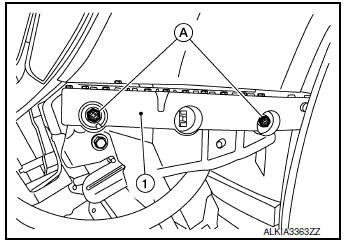
- Remove front bumper fascia bolts (A) and the front bumper side bracket (1) (LH/RH) (if necessary).
- Remove intelligent key warning buzzer. Refer to DLK-273, "Removal and Installation".
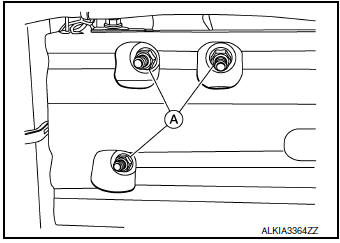
- Release harness connector clips from bumper reinforcement, then remove bumper reinforcement nuts (A) and bumper reinforcement (1) (LH/RH).
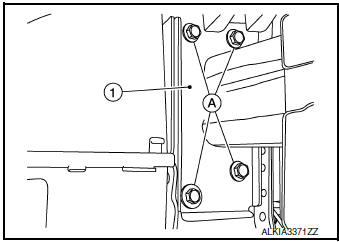
- Remove front bumper reinforcement support bolts (A) and front bumper reinforcement supports (1) (LH/RH).
- Remove the following parts (if necessary) after removing front bumper fascia assembly.
- Front fog lamps (if equipped). Refer to EXL-121, "Removal and Installation".
- Front fog lamp finishers
- Front fascia grille
- Front license plate bracket
INSTALLATION
Installation in the reverse order of removal.
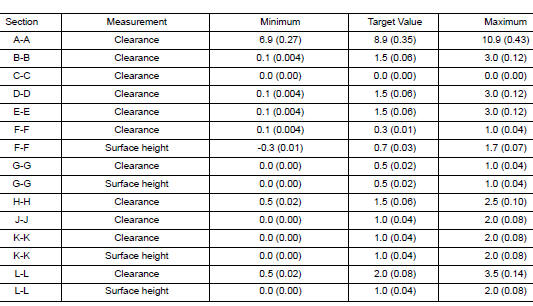
- The following table shows the specified values for checking normal installation status.
- Fitting adjustment cannot be performed.

 Rear bumper
Exploded View
Rear bumper fascia side bracket
(LH)
Rear mud protector
Rear bumper reinforcement support
(LH)
Rear bumper fascia undercover
(LH)
Rear bumper reinforcement
...
Other materials:
System description
COMPONENT PARTS
POWER DOOR LOCK SYSTEM
POWER DOOR LOCK SYSTEM : Component Parts Location
No
Component
Function
1
BCM
Controls the door lock system.
Refer to BCS-79, "BODY CONTROL SYSTEM : Component Parts Location" for
detailed
instal ...
P0031, P0032 A/F sensor 1 heater
DTC Description
DTC DETECTION LOGIC
DTC No.
CONSULT screen terms
(Trouble diagnosis content)
DTC detecting condition
P0031
A/F SEN1 HTR (B1)
[Air fuel ratio (A/F) sensor 1 heater (bank
1)control circuit low]
The current amperage in the A/F sensor 1 heater circu ...
Sensor rotor
FRONT SENSOR ROTOR
FRONT SENSOR ROTOR : Removal and Installation - Front Sensor Rotor
The front wheel sensor rotor is an integral part of the wheel hub and bearing
and cannot be disassembled.
Refer to FAX-9, "Removal and Installation" (FWD) or FAX-40, "Removal and
Installatio ...
