Nissan Rogue Service Manual: Third row seats
Exploded View
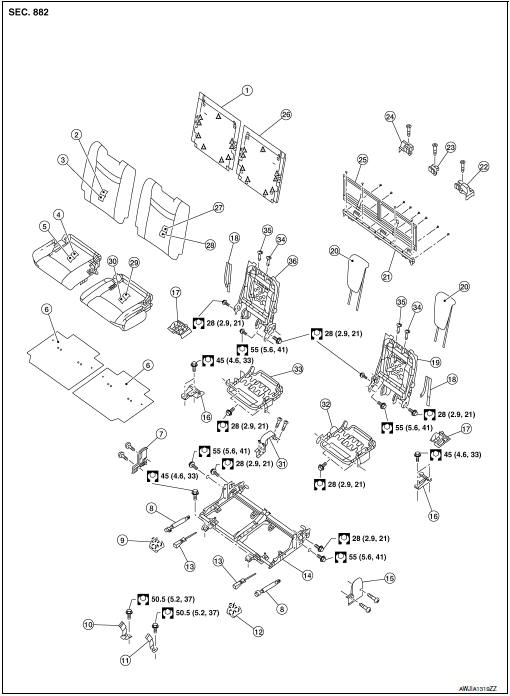
- Seatback board (RH)
- Seatback trim (RH)
- Seatback pad (RH)
- Seat cushion trim (RH)
- Seat cushion pad (RH)
- Seat cushion silencer (LH/RH)
- Seat hinge finisher (RH)
- Gas stay
- Bolt cover (RH)
- Seat belt buckle (RH)
- Seat belt buckle (LH)
- Bolt cover (LH)
- Stopper pin
- Seat frame support
- Seat hinge finisher (LH)
- Seat striker (LH/RH)
- Seat striker finisher (LH/RH)
- Seatback pull strap (LH/RH)
- Seatback frame (LH)
- Headrest (LH/RH)
- Third row seat cross member
- Third row seat cross member finisher (LH)
- Third row seat cross member finisher (center)
- Third row seat cross member finisher (RH)
- Third row luggage floor
- Seatback board (LH)
- Seatback trim (LH)
- Seatback pad (LH)
- Seat cushion trim (LH)
- Seat cushion pad (LH)
- Seat frame finisher (center)
- Seat cushion frame (LH)
- Seat cushion frame (RH))
- Headrest holder (locked)
- Headrest holder (free)
- Seatback frame (RH)
 Clip
Clip
 Pawl
Pawl
Removal and Installation
CAUTION: During removal and installation, an assistant is required to protect against injury or damage.
REMOVAL
- Using a suitable tool release pawls and remove front bolt covers RH (2) and LH (1).
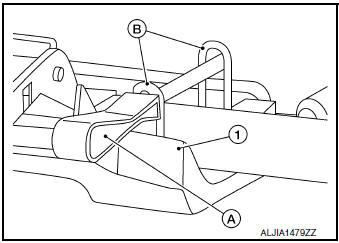
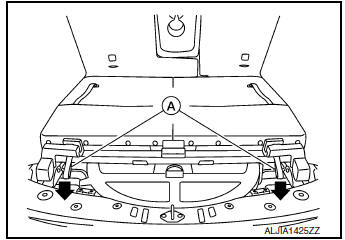
- Insert a suitable tool (A) through both U wires (B) of third row seat legs (1) (LH/RH).
WARNING: Do not remove seat front bolts without inserting a suitable tool through both U wires to protect against personal injury.
- Remove the seat front bolts (A).
- Fold the seatback to the flat position and open back door.
- Release seat latches by pulling straps (A) rearward, then lift seat from seat strikers (LH/RH) and remove.
INSTALLATION
Installation is in the reverse order of removal.
WARNING: Do not remove suitable tool from U wires before installing seat front bolts or personal injury may occur.
NOTE:
- Two people are required to position the seat so the seat latches are over the seat striker locations.
- Place rear seat legs on strikers, make sure to latch.
- Check that the rear seat latch and striker do not interfere, then tighten bolts to specification. Refer to SE- 42, "Exploded View".
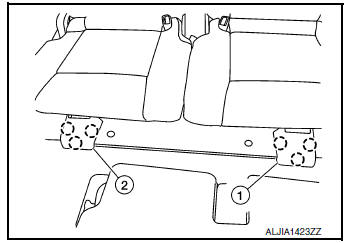
Third Row Seat Cross Member
REMOVAL
- Remove the third row seat. Refer to SE-43, "Removal and Installation".
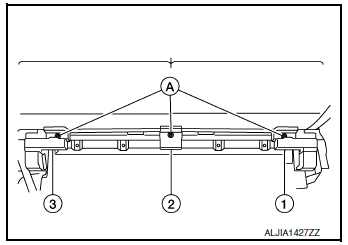
- Remove screws (A) and third row seat cross member finishers (1, 2, 3).
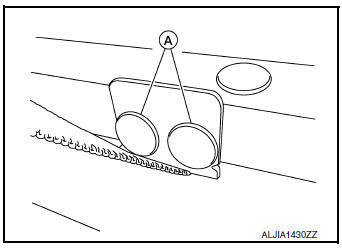
- Release third row luggage board outer clips (A) and inner clips (B) using a suitable tool.
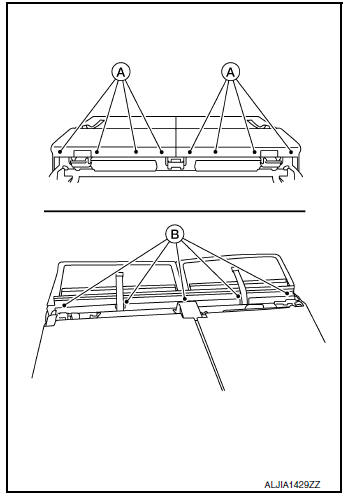
- Release third row luggage board retainer strap clips (A) (LH/RH) using a suitable tool and remove third row luggage board.
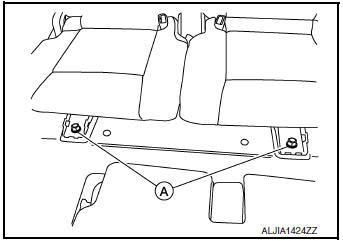
- Remove bolts and remove third row seat cross member.
INSTALLATION
Installation is in the reverse order of removal.
NOTE:
- Tighten the third row seat cross member to specification. Refer to SE-80, "Exploded View".
 Second row seats
Exploded View
RH SEAT
Headrest
Seatback upper luggage
board
Seatback luggage board
Seatback trim
Seatback pad
Recline release cable
Seat cushion trim
Fol ...
 Power seat switch
Exploded View
Seat cushion outer finisher
Power seat switch
Removal and Installation
REMOVAL
NOTE:
LH shown, RH similar.
Using a suitable tool release clips and remove seat ...
Other materials:
Voice commands
You can use voice commands to operate various
Bluetooth® Hands-Free Phone System features
using the NISSAN Voice Recognition system. For
additional information, refer to “NISSAN Voice
Recognition System” in this section.
Voice Prompt Interrupt
While using the Voice Recognition system, the ...
Run-flat tires (if so equipped)
Run-flat tires are those tires that can be used
temporarily if they are punctured. For additional
information, refer to “Run-flat tires” in “Maintenance
and do-it-yourself.”
For additional information, refer to the tire safety
information in the Warranty Information Booklet.
WAR ...
Precaution
Precaution for Supplemental Restraint System (SRS) "AIR BAG" and "SEAT
BELT
PRE-TENSIONER"
The Supplemental Restraint System such as “AIR BAG” and “SEAT BELT PRE-TENSIONER”,
used along
with a front seat belt, helps to reduce the risk or severity of injury to the
...
