Nissan Rogue Service Manual: Unit disassembly and assembly
FRONT COMBINATION LAMP
Exploded View
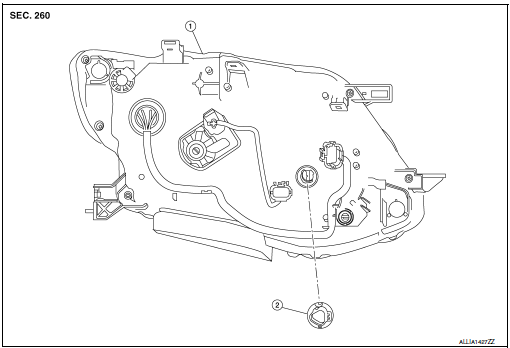
- Front combination lamp
- Turn signal lamp bulb socket
Disassembly and Assembly
DISASSEMBLY
- Remove front combination lamp. Refer to EXL-268, "Removal and Installation".
- Rotate the turn signal lamp bulb socket counterclockwise and remove.
- Remove the turn signal lamp bulb from the bulb socket.
ASSEMBLY
Assembly is in the reverse order of disassembly.
REAR COMBINATION LAMP
Exploded View
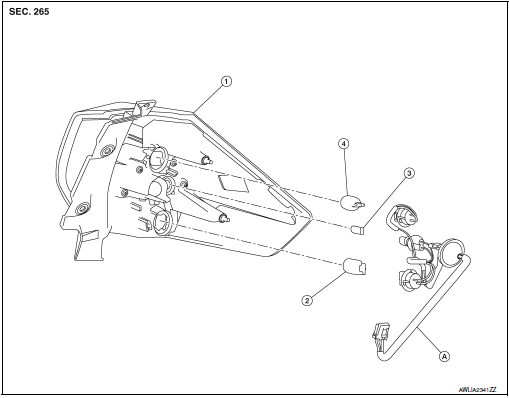
- Rear combination lamp
- Turn signal lamp bulb
- Tail lamp bulb
- Stop lamp bulb
- Rear combination lamp harness
Disassembly and Assembly
DISASSEMBLY
- Remove rear combination lamp. Refer to EXL-278, "Removal and Installation".
- Rotate the stop lamp bulb socket counterclockwise and remove.
- Remove the stop lamp bulb from the bulb socket.
- Rotate the tail lamp bulb socket counterclockwise and remove.
- Remove the tail lamp bulb from the bulb socket.
- Rotate the turn signal lamp bulb socket counterclockwise and remove.
- Remove the turn signal lamp bulb from bulb socket.
ASSEMBLY
Assembly is in the reverse order of disassembly.
CAUTION: After installing, be sure to install the bulb sockets securely to ensure watertightness.
 Removal and installation
FRONT COMBINATION LAMP
Exploded View
Front fender
Front combination lamp
Clip
Removal and Installation
REMOVAL
Remove front bumper fascia. Refer to EXT-17, "Removal a ...
 Service data and specifications (SDS)
Bulb Specifications
*: Always check with the Parts Department for the latest parts info. ...
Other materials:
Headlight control switch
Type A (if so equipped)
When turning the switch to the
position,
the front parking, tail, license plate and
instrument panel lights come on.
When turning the switch to the
position,
the headlights come on and all the other
lights remain on.
Type B (if so equipped)
...
Satellite radio reception (if so equipped)
When the satellite radio is used for the first time
or the battery has been replaced, the satellite
radio may not work properly. This is not a malfunction.
Wait more than 10 minutes with satellite
radio ON and the vehicle outside of any metal or
large building for satellite radio to receive a ...
Precaution
Precaution for Supplemental Restraint System (SRS) "AIR BAG" and "SEAT
BELT
PRE-TENSIONER"
The Supplemental Restraint System such as ŌĆ£AIR BAGŌĆØ and ŌĆ£SEAT BELT PRE-TENSIONERŌĆØ,
used along
with a front seat belt, helps to reduce the risk or severity of injury to the
...
