Nissan Rogue Service Manual: Removal and installation
AWD CONTROL UNIT
Exploded View
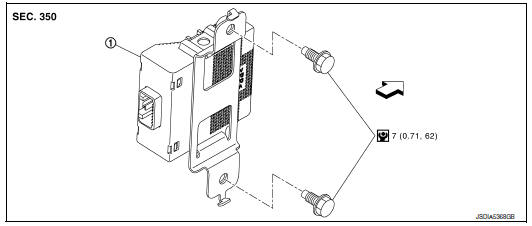
1 AWD control unit
 : Vehicle front
 : N·m (kg-m, in-lb)
Removal and Installation
REMOVAL
- Remove luggage side lower finisher (LH). Refer to INT-33, "Exploded View".
- Disconnect AWD control unit harness connector.
- Remove AWD control unit bolts (
 ).
).
NOTE: AWD control unit is located on the back side of body panel.
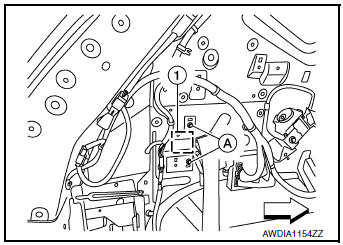
: Front
- Remove AWD control unit.
INSTALLATION
Installation is in the reverse order of removal.
CAUTION:
- Do not drop or shock AWD control unit.
- When replacing AWD control unit, perform writing unit characteristic. Refer to DLN-35, "Work Procedure".
AWD LOCK SWITCH
Exploded View
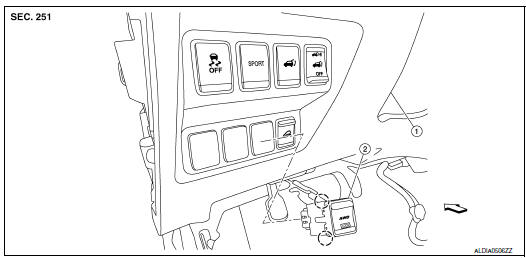
- Instrument lower panel LH
- AWD lock switch
Front
 Pawl
Pawl
Removal and Installation
REMOVAL
- Remove instrument lower panel LH. Refer to IP-22, "Removal and Installation".
- Disconnect AWD lock switch harness connector (A).
- Remove AWD lock switch from lower switch bracket (2).
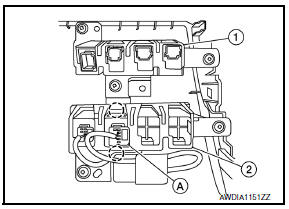
: Pawls
INSTALLATION
Install in the reverse order of removal.
TRANSFER COVER OIL SEAL
Removal and Installation
NOTE:
- Replacement on vehicle may cause damage to transfer cover, and may cause a transfer oil leak.
- If transfer cover oil seal requires replacement, remove the transfer assembly from the vehicle before replacing transfer cover oil seal. Refer to DLN-73, "Disassembly".
 Periodic maintenance
TRANSFER OIL
Inspection
TRANSFER OIL LEAKS
Check that transfer oil is not leaking from transfer assembly or around it.
TRANSFER OIL LEVEL
CAUTION:
Do not start engine while checking transfer oil ...
 Unit removal and installation
TRANSFER ASSEMBLY
Exploded View
1 Transfer assembly
: N·m (kg-m, ft-lb)
*: Apply anti-corrosion oil.
Removal and Installation
NOTE:
When removing components such as hoses, tubes/lines, etc ...
Other materials:
Fuse inspection
How To Check
If fuse is blown, be sure to eliminate cause of malfunction before
installing new fuse.
Use fuse of specified rating. Never use fuse of more than
specified
rating.
Do not partially install fuse; always insert it into fuse holder
properly.
Remove fus ...
Active trace control
This system senses driving based on the driver’s
steering and acceleration/braking patterns, and
controls brake pressure at individual wheels to
aid tracing at corners and help smooth vehicle
response.
The Active Trace Control can be set to ON (enabled)
or OFF (disabled) through the Vehicl ...
Power supply routing circuit
Wiring Diagram —Battery Power Supply —
Wiring Diagram —Accessory Power Supply —
Wiring Diagram —Ignition Power Supply —
Fuse
If fuse is blown, be sure to eliminate cause of malfunction before
ins ...
