Nissan Rogue Owners Manual: Headlight control switch
Type A (if so equipped)
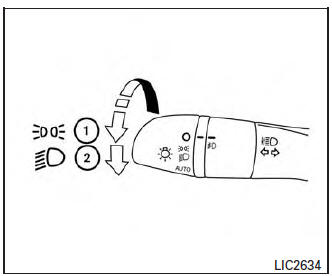
- When turning the switch to the
 position,
the front parking, tail, license plate and
instrument panel lights come on.
position,
the front parking, tail, license plate and
instrument panel lights come on. - When turning the switch to the
 position,
the headlights come on and all the other
lights remain on.
position,
the headlights come on and all the other
lights remain on.
Type B (if so equipped)
| CAUTION Use the headlights with the engine running to avoid discharging the vehicle battery. |
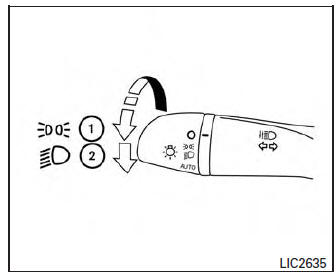
Autolight system (if so equipped)
The autolight system allows the headlights to turn on and off automatically. The autolight system can:
- Turn on the headlights, front parking, tail, license plate and instrument panel lights automatically when it is dark.
- Turn off all the lights when it is light.
- Keep all the lights on for a period of time after you place the ignition switch in the OFF position and all doors are closed.
NOTE: Autolight activation sensitivity and the time delay for autolight shutoff can be adjusted.
For additional information, refer to ÔÇťVehicle information displayÔÇŁ in this section.
To turn on the autolight system:
- Turn the headlight switch to the AUTO position 1 .
- Turn the ignition switch to ON.
- The autolight system automatically turns the headlights on and off.
Initially, if the ignition switch is turned OFF and a door is opened and left open, the headlights remain ON for a period of time. If another door is opened while the headlights are on, then the timer is reset.
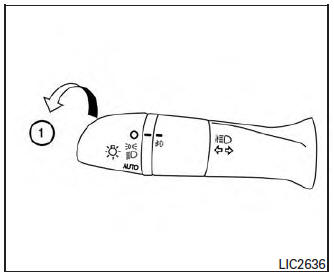
To turn the autolight system off, turn the switch to
the OFF,  ,
,
 or position.
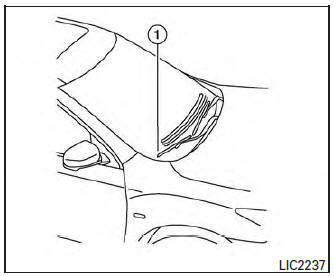
Autolight system (if so equipped)
Be sure you do not put anything on top of the autolight sensor located in the top side 1 of the instrument panel. The autolight sensor controls the autolight; if it is covered, the autolight sensor reacts as if it is dark out and the headlights will illuminate.
If this occurs while parked with the engine off and the ignition switch placed in the ON position, your vehicleÔÇÖs battery could become discharged.
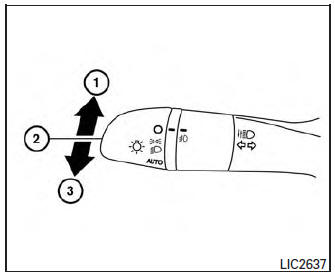
Headlight beam select
- To select the high beam function, push the
lever forward. The high beam lights come on
and the
 light illuminates.
 - Pull the lever back to select the low beam.
- Pulling and releasing the lever flashes the headlight high beams on and off.
Battery saver system
The battery saver automatically turns off the ignition after a period of time when the ignition switch is left in the ACC (if so equipped) or ON position.
Automatic headlight aiming control (if so equipped)
Vehicles with xenon headlights are equipped with an automatic levelling system. The headlight axis is controlled automatically.
NISSAN recommends that you should consult the local regulations on the use of lights.
Refer to ÔÇťXenon headlightsÔÇŁ earlier in this section for additional information.

 Daytime running light system
The daytime running lights automatically illuminate
when the engine is started with the parking
brake released. The daytime running lights operate
with the headlight switch in the OFF position
or ...
Other materials:
Rear wiper and washer system
Wiring Diagram
...
Precaution
Precaution for Supplemental Restraint System (SRS) "AIR BAG" and "SEAT
BELT
PRE-TENSIONER"
The Supplemental Restraint System such as ÔÇťAIR BAGÔÇŁ and ÔÇťSEAT BELT PRE-TENSIONERÔÇŁ,
used along
with a front seat belt, helps to reduce the risk or severity of injury to the
...
Low tire pressure warning lamp blinks
Description
The low tire pressure warning lamp blinks when the power switch is turned ON.
NOTE:
The position of an inactive tire pressure sensor can be identified by checking
the blinking timing of the low tire
pressure warning lamp.
Diagnosis Procedure
1.TIRE PRESSURE SENSOR ID REGISTRA ...
